
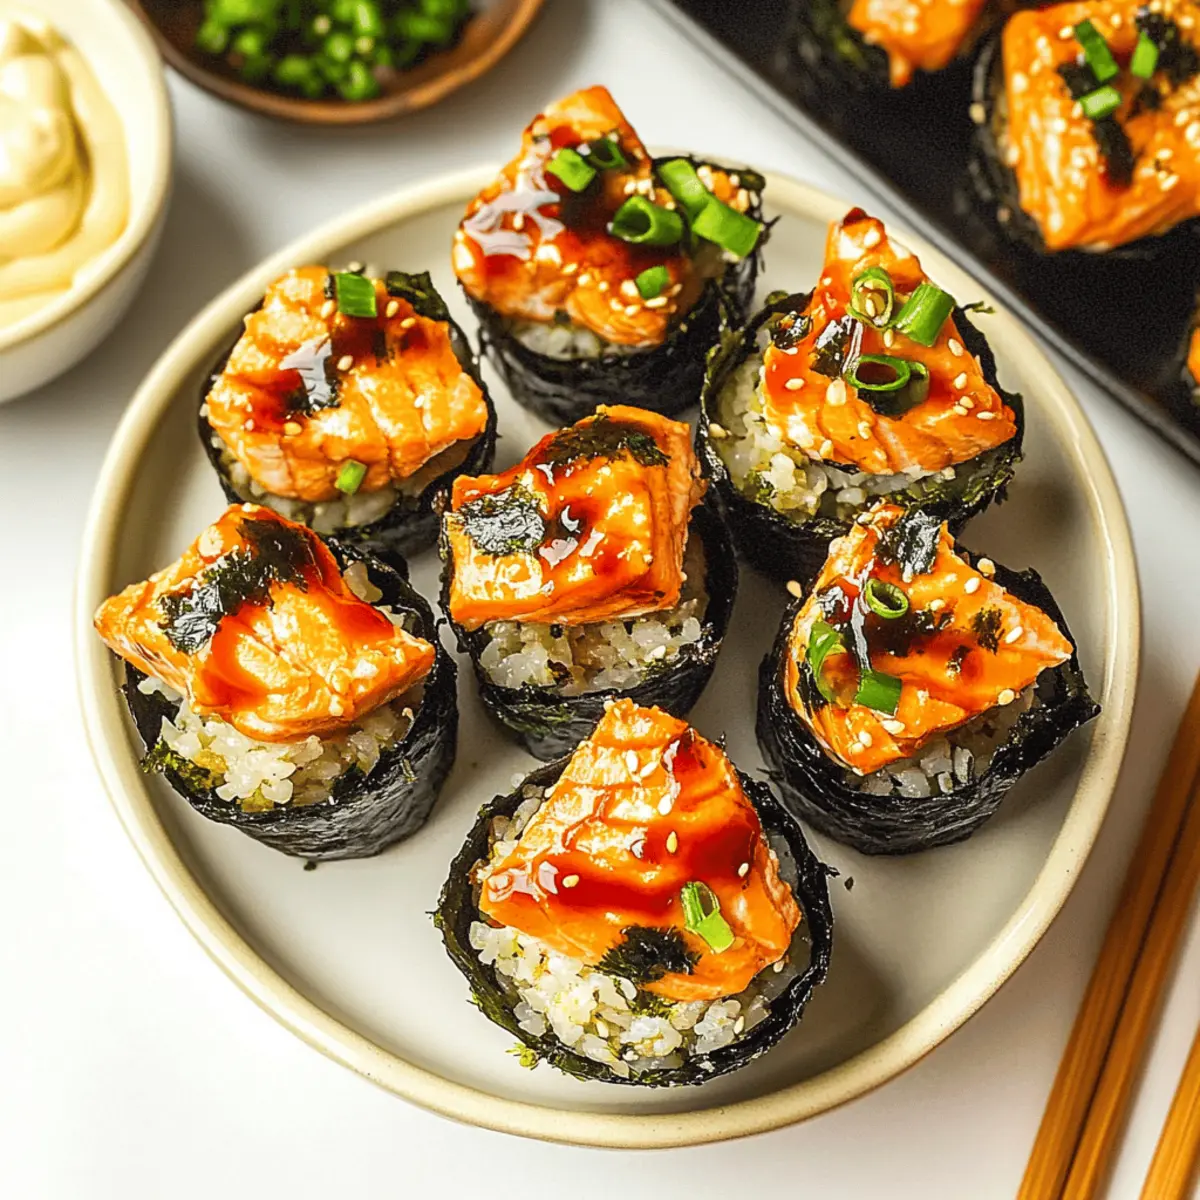
As I opened my fridge, I was met with an avalanche of ingredients calling for a culinary experiment. That’s when I stumbled upon the idea of Easy Baked Salmon Sushi Cups—a delightful fusion that takes traditional sushi to a whole new level! Imagine tender salmon perfectly nestled atop warm sushi rice, all cradled in crispy nori sheets. This dish is perfect for entertaining or a quick family dinner, making it a versatile crowd-pleaser. Plus, these baked sushi cups come together in a snap, so you can effortlessly impress your guests or satisfy your sushi cravings on a busy weeknight. Ready to discover how to make your very own sushi masterpiece at home? Let’s dive in!
Why You’ll Crave Baked Salmon Cups?
Unique and Flavorful: These baked sushi cups combine tender salmon and fluffy sushi rice, creating a taste you won’t forget.
Quick Preparation: Ideal for busy nights, this recipe can be whipped up in just 30 minutes, giving you more time to enjoy your meal!
Versatile Options: Feel free to play with ingredients—switch out salmon for shrimp or tofu for a delightful twist.
Crowd-Pleasing Appeal: Perfect as an appetizer or snack, everyone from sushi lovers to those new to sushi will be singing their praises!
Fresh Ingredients: Made with wholesome components and garnished with furikake, these cups offer both nutrition and satisfaction.
Don’t forget to serve with a side of pickled ginger or soy sauce for an extra flavor kick!
Baked Salmon Sushi Cups Ingredients
• For the Sushi Rice
- Uncooked Sushi Rice (1½ cups) – Provides the base and structure; short-grain white rice is ideal for sticky texture.
- Rice Vinegar (1 tbsp) – Enhances the rice with a touch of acidity; apple cider vinegar can be a great substitute.
- White Sugar (2 tsp) – Balances the acidity of the rice vinegar; honey or agave syrup may work as alternatives.
• For the Salmon Mixture
- Salmon (1 lb, cubed) – The star of the dish, providing rich flavor; fresh or frozen salmon works best.
- Light Soy Sauce (1 tbsp) – Adds savory umami flavor; can be substituted with tamari for a gluten-free option.
- Kewpie Mayo (1 tbsp) – Brings creaminess and a hint of sweetness; regular mayo can be used but results in a different flavor.
- Sriracha (1 tbsp) – Introduces heat and flavor complexity; adjust to taste for your preferred level of spice.
- Sesame Oil (1 tsp) – Infuses a nutty aroma and enhances the flavor; a few drops of olive oil can be used if necessary.
• For Assembling the Cups
- Nori Sheets (3 large, cut into quarters) – Forms the cup base; soy wrappers or lettuce can be used for a low-carb option.
- Furikake (for garnish) – Adds a crunchy, umami topping; sesame seeds can also be a lovely alternative.
- Green Onion (1, chopped, for garnish) – Provides fresh flavor and a pop of color; substitute with chives for a similar effect.
These baked salmon sushi cups are sure to become a favorite! Enjoy the delightful fusion of flavors and textures that will wow your taste buds!
Step‑by‑Step Instructions for Baked Salmon Sushi Cups
Step 1: Prepare Sushi Rice
Start by cooking the sushi rice according to the package instructions, typically needing about 15-20 minutes. Once cooked, transfer the warm rice to a large bowl and gently mix in rice vinegar and sugar until fully combined. The rice should be slightly sticky and warm, perfect for forming the base of your Baked Salmon Sushi Cups.
Step 2: Preheat Oven
Preheat your oven to 400°F (200°C), allowing it to reach the desired temperature while you prepare the rest of your ingredients. This step ensures that your Baked Salmon Sushi Cups will cook evenly and crisp up nicely as you pop them in the oven, resulting in a delectable finish.
Step 3: Make Salmon Mixture
In a medium bowl, combine the cubed salmon with light soy sauce, Kewpie mayo, sriracha, and sesame oil. Stir gently until all the ingredients are well incorporated, allowing the flavors to meld together. The mixture should be glossy and vibrant, reflecting the tasty creation of your Baked Salmon Sushi Cups.
Step 4: Assemble Cups
Lightly grease a muffin tin with non-stick spray for easy removal. Place the nori sheets into each cup holder, forming a little bowl shape. Then, spoon in the prepared sushi rice, pressing it down gently to create a solid base, followed by layering with the salmon mixture on top. The cups should overflow slightly for a generous portion.
Step 5: Bake
Slide the muffin tin into the preheated oven and bake for 15 minutes. Keep an eye out for the salmon to turn fully opaque and the tops to attain a beautiful golden hue. The nori should crisp up as well, giving your Baked Salmon Sushi Cups that delightful texture everyone loves.
Step 6: Garnish and Serve
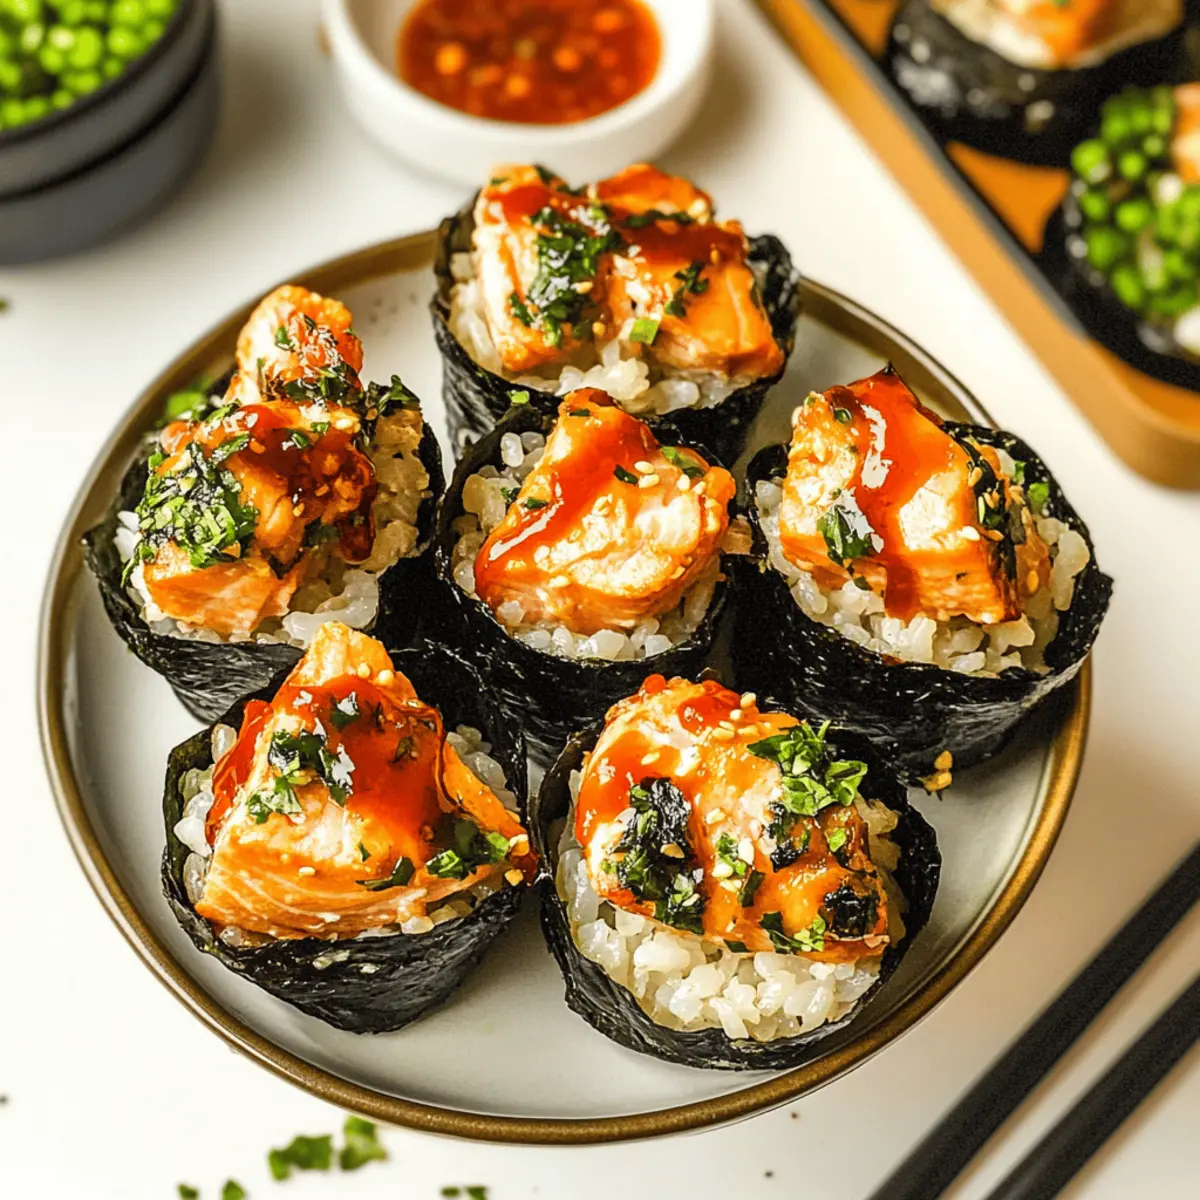
After baking, carefully remove the sushi cups from the oven and let them cool for a minute. Drizzle extra spicy mayo or sriracha over the top, then sprinkle with furikake and chopped green onions for a burst of color and flavor. Serve warm, and watch how quickly these Baked Salmon Sushi Cups disappear!

Make Ahead Options
These Easy Baked Salmon Sushi Cups are perfect for meal prep enthusiasts! You can make the sushi rice and salmon mixture up to 24 hours in advance. Simply cook the sushi rice and mix in the vinegar and sugar, then store it in an airtight container in the fridge. For the salmon mixture, combine cubed salmon with soy sauce, Kewpie mayo, sriracha, and sesame oil, and refrigerate it as well. Just before baking, assemble the sushi cups by placing the nori sheets in a muffin tin, layering in the sushi rice, and topping with the salmon mixture. Bake as directed for delicious results that are just as tasty as if made fresh!
How to Store and Freeze Baked Salmon Sushi Cups
Fridge: Keep leftovers in an airtight container for up to 2-3 days. This will ensure your Baked Salmon Sushi Cups remain tasty and fresh.
Freezer: If you want to save them for later, freeze the sushi cups before baking. Wrap each one tightly in plastic wrap and store in a freezer-safe bag for up to 1 month.
Reheating: To reheat, bake thawed sushi cups in a preheated oven at 350°F (175°C) for about 10 minutes, or until warmed through. This will help restore the crispy nori texture.
Avoid Room Temperature: For best quality, avoid leaving the sushi cups out at room temperature for more than 2 hours to prevent spoilage.
Expert Tips for Baked Salmon Sushi Cups
Don’t Overcrowd: Ensure you leave enough space in the muffin tin for even cooking; overcrowding can lead to soggy bottoms.
Cool Before Serving: Allow the sushi cups to cool slightly after baking so they hold their shape when removed and enhance the flavor.
Non-Stick Spray: Use a generous amount of non-stick spray to prevent the nori from sticking to the muffin tin; this makes for easier serving!
Flavorful Salmon: For extra depth, consider marinating the salmon mixture for at least 15 minutes before filling the cups, enhancing the deliciousness of your baked salmon sushi cups.
Watch the Time: Keep an eye on the baking time to ensure the salmon is perfectly cooked; overbaking can dry it out.
What to Serve with Easy Baked Salmon Sushi Cups
There’s nothing quite like a delightful spread to complement these savory sushi cups, bringing your meal to life!
-
Cucumber Salad: A light and refreshing side that offers a crunchy texture, cooling down the richness of the salmon. Toss in a light vinaigrette for a zesty kick.
-
Miso Soup: A warm bowl of miso soup pairs perfectly to elevate the umami flavor profile and adds a comforting element to the meal. Each sip complements the sushi cups beautifully.
-
Pickled Ginger: This classic sushi accompaniment enhances your palate between bites, providing a sweet-spicy contrast that balances the savory flavors of the salmon.
-
Edamame: Steamed edamame brings a delightful pop of freshness and is an easy snack to enjoy while the sushi cups are baking. Sprinkled with sea salt, it’s nutritious and satisfying.
-
Wasabi Peas: For a crunchy, flavorful snack, these spiced peas add a delightful heat and can contrast wonderfully with the cakes’ creamy mayo.
-
Sake or Green Tea: Pairing your meal with a chilled glass of sake or a warm cup of green tea can beautifully enhance the flavors while keeping the vibe relaxed and enjoyable.
Elevate your dining experience with these harmonious side dishes that will not only impress but also create a memorable meal alongside your Easy Baked Salmon Sushi Cups!
Baked Salmon Sushi Cups Variations
Invite your creativity to shine as you customize these scrumptious baked sushi cups with unique twists and substitutions!
-
Seafood Swap: Replace salmon with cooked shrimp or crab for a deliciously different flavor profile. Each option brings its own unique taste, perfect for seafood lovers!
-
Vegetarian Delight: Use cubed tofu or tempeh instead of salmon to create a satisfying, protein-packed option. Marinate them to infuse flavor, making your cups irresistible to both plant-based eaters and meat lovers alike!
-
Creamy Addition: Add avocado slices or a dollop of cream cheese for a rich, creamy layer inside the cups. This subtle change elevates the flavor and adds a delightful texture, giving you a sushi experience like no other!
-
Extra Crunch: Top your cups with sliced jalapeños or crunchy breadcrumbs for added texture and heat. This unexpected twist can offer a surprising kick that may delight adventurous eaters!
-
Sushi Roll Style: Use my easy homemade sushi mayo recipe to give your cups a creamy drizzle that elevates the overall experience. The extra richness pairs beautifully with the sushi rice and toppings.
-
Low-Carb Option: For a lighter version, swap nori sheets for blanched zucchini or lettuce wraps. This brilliant alternative keeps the fresh taste, while also catering to low-carb diets.
-
Funk It Up: Experiment with toppings like pickled vegetables or spicy kimchi to add an extra layer of flavor. These colorful additions not only enhance taste but also make your sushi cups a visual feast!
-
Fusion Flare: Consider incorporating ingredients like buffalo sauce or BBQ sauce in your salmon mixture for a unique twist. These bold flavors not only awaken your taste buds but also offer a fun fusion experience!
With these variations, your baked sushi cups are sure to be a hit! Feel free to mix and match ingredients to make your dish cater to everyone’s preferences while keeping it fun and delicious.
Baked Salmon Sushi Cups Recipe FAQs
What type of salmon should I use for the sushi cups?
Absolutely! You can use fresh or frozen salmon for these Baked Salmon Sushi Cups. If you’re in a pinch, canned salmon will work too, though it will alter the texture significantly. Look for salmon that’s bright in color and free from any dark spots – fresh is always best!
How should I store leftovers?
Very! Leftovers can be kept in an airtight container in the refrigerator for up to 2-3 days. To ensure the best flavor and texture, I recommend reheating them in the oven at 350°F (175°C) for about 10 minutes, so they regain that delightful crunch.
Can I freeze Baked Salmon Sushi Cups?
Absolutely! To freeze, I suggest wrapping each uncooked sushi cup tightly in plastic wrap and placing them in a freezer-safe bag or container. They can be frozen for up to 1 month. When you’re ready to enjoy, simply bake them directly from the freezer at the preheated oven temperature until cooked through.
What if the sushi cups stick to the muffin tin?
Oh no! To prevent sticking, it’s crucial to generously spray the muffin tin with non-stick spray before adding the nori sheets. If you do run into this issue, let them cool for a few minutes; this can help loosen them before using a small spatula or knife to gently lift them out.
Are there any dietary considerations I should keep in mind?
Very! If your guests have allergies or dietary restrictions, you can easily adapt this recipe. For gluten-free options, substitute regular soy sauce with tamari. Additionally, for those avoiding fish, swapping salmon with cooked shrimp or tofu. Always check the brand of Kewpie mayo and sriracha to ensure they align with dietary needs.
How can I tell if the sushi cups are done baking?
Great question! The sushi cups should bake for about 15 minutes, but keep an eye on them. You’ll know they’re ready when the salmon turns opaque and the tops of the cups are golden brown. The nori should be crisp, giving them that delightful texture we all love!

Baked Salmon Sushi Cups That Will Wow Your Taste Buds
Ingredients
Equipment
Method
- Start by cooking the sushi rice according to the package instructions, typically needing about 15-20 minutes. Once cooked, transfer the warm rice to a large bowl and gently mix in rice vinegar and sugar until fully combined.
- Preheat your oven to 400°F (200°C) while you prepare the rest of your ingredients.
- In a medium bowl, combine the cubed salmon with light soy sauce, Kewpie mayo, sriracha, and sesame oil. Stir gently until all the ingredients are well incorporated.
- Lightly grease a muffin tin with non-stick spray. Place the nori sheets into each cup holder, forming a bowl shape, then spoon in the sushi rice, pressing it down gently, and layer with the salmon mixture.
- Slide the muffin tin into the preheated oven and bake for 15 minutes until the salmon is opaque and the nori is crisp.
- After baking, let the sushi cups cool for a minute, drizzle with spicy mayo, sprinkle with furikake and green onions, then serve warm.
Leave a Reply