
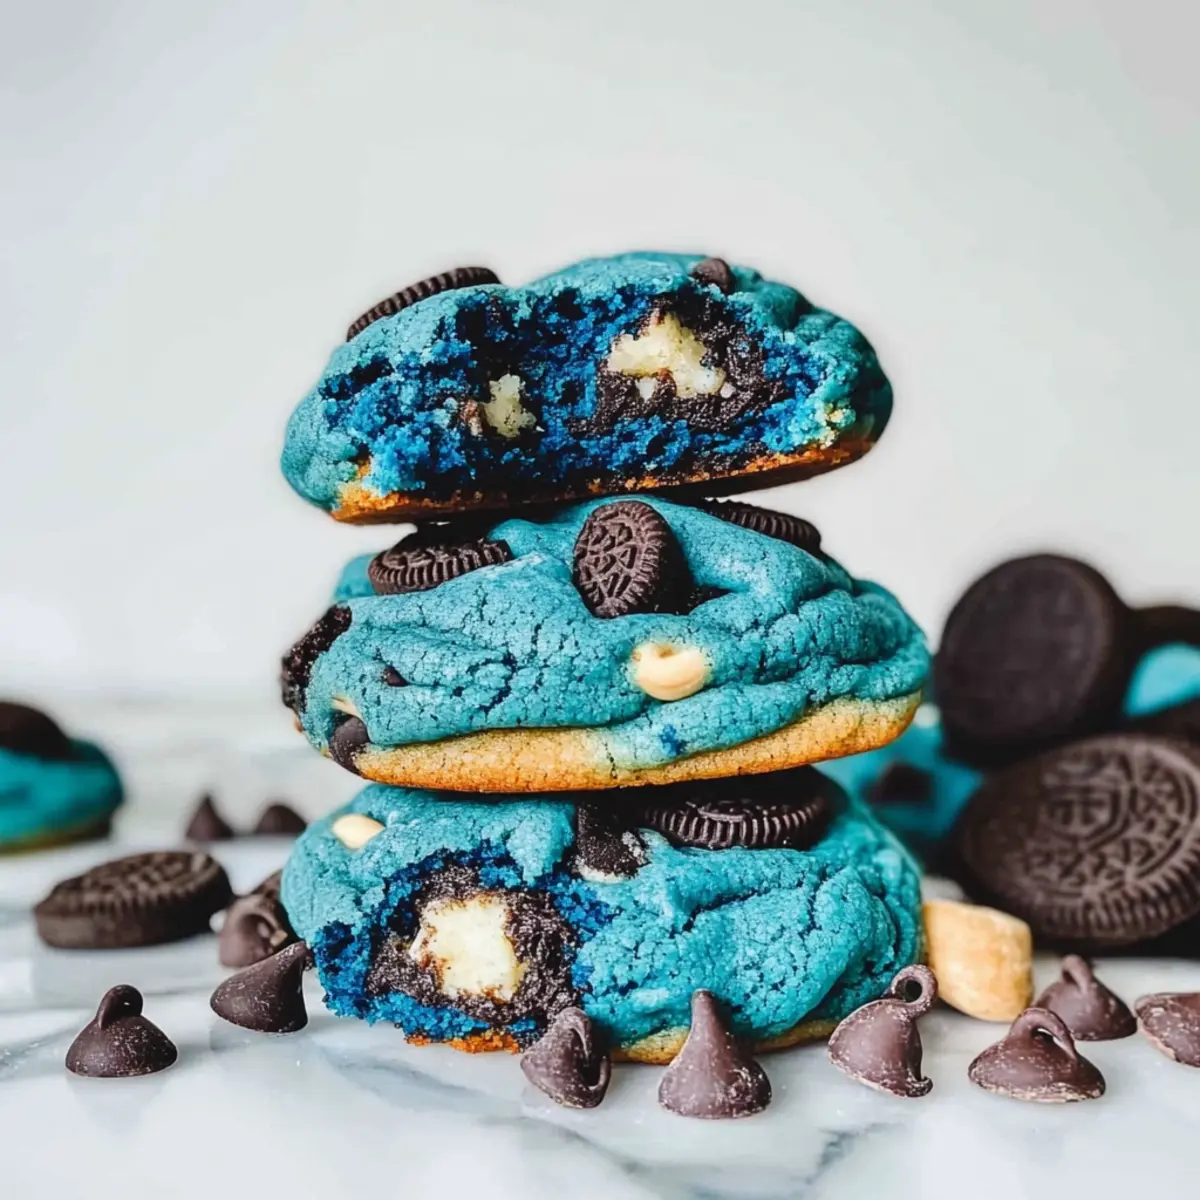
In a world filled with homemade delights, there’s nothing quite like the whimsical charm of Cookie Monster Cookies. These vibrant, blue beauties, generously stuffed with Oreos and chocolate chips, are not only a feast for the eyes but also a joy to bake. With just a quick prep time, you can whip up these chewy treats that are as fun to make as they are to eat, perfect for parties or simply the sweet satisfaction of indulging a playful side. The blend of soft cookie and crunchy Oreo creates a delightful contrast that promises to brighten your day. Ready to take your baking game to the next level? Let’s dive into the colorful world of Cookie Monster Cookies and discover how easy it is to make these show-stopping goodies!
Why Are Cookie Monster Cookies So Special?
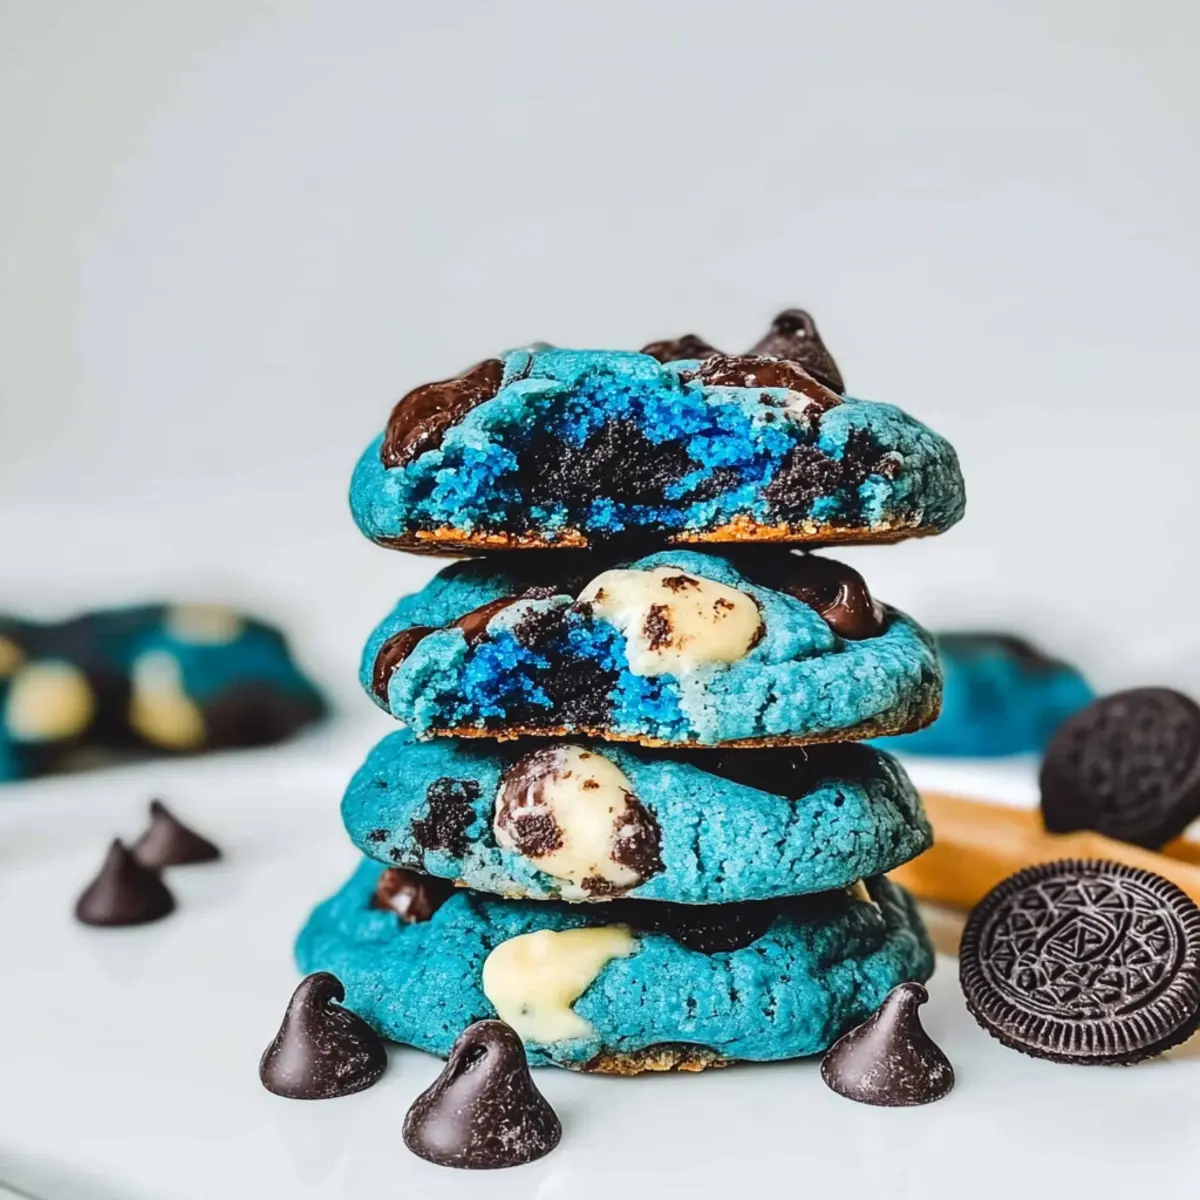
Colorful and Fun: These cookies are a visual delight, featuring a stunning blue hue that instantly elevates your baking game.
Chewy Texture: With a soft, thick consistency and a gooey center filled with chocolate chips, each bite is pure bliss.
Oreo Surprise: The hidden Oreo in each cookie adds an exciting crunch and a burst of nostalgic flavor that will charm eaters of all ages.
Quick and Easy: You don’t need advanced baking skills to impress your friends or family; with simple ingredients and a straightforward process, you’re set for success!
Versatile Treat: Customize by experimenting with different mix-ins or colors to match parties, holidays, or just for your own whimsy; everyone will want to come back for more!
These Cookie Monster Cookies are perfect for any occasion, whether it’s a delightful treat for kids or a fun way to spice up snack time.
Cookie Monster Cookies Ingredients
For the Dough
- Butter – Provides richness and moisture; substitute with margarine for a dairy-free version.
- Brown Sugar – Adds sweetness and chewiness; can be replaced with coconut sugar for a healthier option.
- Granulated Sugar – Sweetens the dough; no direct substitution necessary outside of dietary preferences.
- Egg – Binds ingredients and helps cookies rise; aquafaba (3 tbsp) can be used as a vegan substitute.
- Vanilla Extract – Enhances flavor; no substitutions needed, but artificial vanilla can work in a pinch.
- Blue Gel Food Coloring – Gives the dough its vibrant color; substitute with other food coloring or skip for traditional cookies.
- All-Purpose Flour – Provides structure; whole wheat flour can be used for a denser texture.
- Baking Powder & Baking Soda – Leavening agents for a soft texture; no substitutions recommended.
- Salt – Balances sweetness; keep as is for flavor enhancement.
For the Mix-Ins
- Chocolate Chips – Adds sweetness and chocolate flavor; swap with white or dark chocolate chips based on preference.
- Oreos – The signature stuffing for the cookies; alternative cookies can be used for different flavor profiles for these Cookie Monster Cookies.
Step‑by‑Step Instructions for Cookie Monster Cookies
Step 1: Prepare the Dough
In a large mixing bowl, cream together softened butter, brown sugar, and granulated sugar until the mixture is smooth and fluffy, about 2–3 minutes. Add in the egg, vanilla extract, and blue gel food coloring, mixing until the color is uniform and well combined. This vibrant dough will be the foundation for your delightful Cookie Monster cookies.
Step 2: Combine Dry Ingredients
In a separate bowl, whisk together all-purpose flour, baking powder, baking soda, and salt to ensure even distribution of the leavening agents. Gradually fold this dry mixture into the wet ingredients using a spatula, mixing just until no streaks of flour remain. The dough will start to come together, creating a thick and colorful base for your cookies.
Step 3: Add Mix-Ins
Gently fold in the chocolate chips and chopped Oreos into the dough, ensuring they are evenly distributed throughout. This is where the fun begins as the cookies become filled with delightful surprises! The mixture should remain bright blue, dotted with dark Oreo pieces and chocolaty morsels that will create a tasty treat in every bite.
Step 4: Shape Cookies
Using your hands, take a generous portion of dough and flatten it slightly in your palm. Place one Oreo in the center, wrapping the dough around it to form a ball. Make sure the Oreo is completely encased to retain its crunch during baking, creating the perfect hidden surprise in your Cookie Monster cookies.
Step 5: Chill Dough
Once shaped, place the cookie dough balls on a baking sheet. Refrigerate the dough for at least 30 minutes or freeze for 15-20 minutes. Chilling is essential for achieving that thick, chewy texture, ensuring the cookies won’t spread too much when baked.
Step 6: Bake
Preheat your oven to 180°C (350°F). Line a baking sheet with parchment paper, then transfer the chilled cookie dough balls onto the sheet, spacing them about 2 inches apart. Bake for 12-15 minutes, until the edges are golden and the centers are still soft and slightly puffy. Keep an eye for that perfect doneness!
Step 7: Cool
Once baked, remove the cookies from the oven and let them cool on the tray for 5 minutes. This allows them to set properly. Then, transfer them to a wire rack to cool completely. The end result will be vibrant, chewy Cookie Monster cookies with a delightful Oreo surprise inside each bite!

Expert Tips for Cookie Monster Cookies
-
Chill Dough: Ensure the cookie dough is properly chilled for at least 30 minutes; this keeps your Cookie Monster cookies thick and prevents them from spreading too much during baking.
-
Measuring Flour: Weighing your flour instead of using a measuring cup will provide more accurate results, helping you achieve the perfect chewy texture.
-
Mixing Technique: Use a stand mixer or hand mixer when creaming butter and sugars; this creates a light and fluffy base, setting the right foundation for your cookies.
-
Oreo Placement: Make sure to wrap the dough tightly around the Oreo to keep it intact during baking. If it’s not fully encased, the Oreo can leak out and lose its crunch.
-
Baking Time: Keep a close eye on baking time; every oven is different. Look for soft, puffy centers and slightly golden edges for the best result.
-
Freezing Dough: If you want to save some for later, freeze the shaped cookie dough balls and bake them straight from the freezer, adding a couple of extra minutes to the baking time for these Cookie Monster cookies.
Make Ahead Options
These Cookie Monster Cookies are ideal for busy home cooks looking to save time! You can prepare the cookie dough up to 24 hours in advance by following the first four steps and chilling the formed dough balls in the refrigerator. This helps maintain their thick, chewy texture when baked. If you need even more time, you can freeze the shaped dough for up to 3 months; just make sure to place them in a single layer on a baking sheet until frozen, then transfer to a freezer bag. When you’re ready to bake, simply add a couple of minutes to the baking time if baking from frozen. This means you can enjoy freshly baked, fun-filled Cookie Monster Cookies with minimal effort during your busy week!
Cookie Monster Cookies Variations & Substitutions
Embrace the creativity in your kitchen by customizing your Cookie Monster Cookies to suit your tastes!
- Dairy-Free: Substitute butter with margarine or coconut oil to make these cookies completely dairy-free without sacrificing flavor.
- Coconut Sugar: Swap out brown sugar for coconut sugar for a slightly caramel flavor and a healthier twist on sweetness.
- Vegan: Replace the egg with 3 tablespoons of aquafaba for a perfectly fluffy texture while keeping it plant-based.
- Alternative Fillings: Experiment by using different cookie treats like Biscoff or peanut butter cups instead of Oreos for a unique flavor explosion.
- Whole Wheat Twist: Use whole wheat flour instead of all-purpose for a heartier cookie with added fiber; you’ll enjoy a nutty flavor while keeping the chewy texture.
- Color Variations: Use your favorite food coloring to decorate for different occasions; think pastel colors for spring or bold holiday shades!
- Nutty Crunch: Toss in chopped nuts like pecans or walnuts to add texture and a delightful crunch to your chewy cookie base.
- Spicy Kick: Add a pinch of cinnamon or even some cayenne pepper for a surprising zing that will complement the sweetness and elevate the cookie experience.
No matter your selection, your homemade Cookie Monster Cookies are sure to impress! Don’t forget to check out our article on Cookie Decorating Ideas for inspiration on how to make these cookies even more festive. From birthday bashes to cozy movie nights, no special occasion is complete without these delightful treats!
How to Store and Freeze Cookie Monster Cookies
Room Temperature: Store baked cookies in an airtight container for up to 1 week to maintain their chewy texture and vibrant color.
Fridge: For longer freshness, keep them in the fridge for up to 2 weeks. Just ensure they’re well-wrapped to prevent drying out.
Freezer: Freeze cookie dough balls for up to 3 months; just make sure they’re in an airtight container. You can bake them directly from frozen, adding a few extra minutes to the baking time.
Reheating: If you have leftover cookies, warm them in the microwave for 10-15 seconds for that fresh-baked taste that complements these delightful Cookie Monster cookies!
What to Serve with Cookie Monster Cookies
Elevate your cookie experience as you create a full festival of flavors and textures to accompany these delightful treats.
-
Milkshake Delight: A classic pairing, smooth and creamy milkshakes enhance the sweetness of the cookies while offering a cold, refreshing contrast.
-
Vanilla Ice Cream: Top a warm Cookie Monster cookie with a scoop of vanilla ice cream for a heavenly sundae that melts in your mouth! The rich creaminess will balance the cookie’s vibrant flavor perfectly.
-
Chocolate-Dipped Strawberries: Sweet, succulent strawberries dipped in chocolate bring a fruity, fresh element that brightens up the dessert table. Their juiciness beautifully contrasts with the cookie’s chewy texture.
-
Fruit Punch: A refreshing fruit punch, bursting with citrusy goodness and bright colors, complements the whimsical nature of these cookies, making it a fun addition to any gathering.
-
Nutty Trail Mix: An easy-to-make side, mix nuts and dried fruits for a crunchy, salty nibble that balances the sweet Cookie Monster cookies beautifully. This adds a delightful texture to your treat spread.
-
Coffee or Espresso: The rich, bold flavors of coffee or espresso offer a delightful contrast to the sweetness of the cookies, making for a comforting and indulgent pairing.
-
Whipped Cream Topping: Light and airy whipped cream drizzled on top adds a touch of elegance and creaminess that transforms your cookie into a sophisticated dessert experience.
-
Mini Cupcakes: Fun-sized cupcakes in various flavors provide a playful aesthetic and a variety of tastes, creating an exciting dessert spread that keeps guests coming back for more.
Each pairing not only enhances the enjoyment of your Cookie Monster cookies but also brings a delightful blend of flavors and experiences to your gathering!
Cookie Monster Cookies Recipe FAQs
How do I select the best ingredients for Cookie Monster Cookies?
Absolutely! When choosing ingredients, look for unsalted butter for the best flavor and standard granulated sugar for sweetness. For the most vibrant color, opt for gel food coloring rather than liquid, as it will not alter the cookie’s texture. Freshness is key—check that your baking powder and soda are still active by testing them in water. Dark chocolate chips give an extra richness that complements the Oreos, so grab your favorites!
What’s the best way to store Cookie Monster Cookies?
Very! Store your baked Cookie Monster Cookies in an airtight container at room temperature for up to 1 week. To keep them even fresher, consider placing a slice of bread in the container; it helps maintain moisture. If you have leftovers, you can refrigerate them for up to 2 weeks, but I recommend consuming them sooner for the best flavor and texture!
Can I freeze the dough for Cookie Monster Cookies?
Absolutely! Freezing is a great way to enjoy fresh Cookies later. Shape the cookie dough into balls and place them on a baking sheet. Freeze for 2 hours until solid, then transfer the dough balls to an airtight container. They can last up to 3 months in the freezer. When you’re ready to bake, pop them straight from the freezer into the preheated oven, just adding 2-3 minutes to your baking time.
What should I do if my Cookie Monster Cookies spread too much while baking?
No worries! If your cookies spread too much, it could be due to warm dough. Always chill your dough for at least 30 minutes before baking to help maintain their shape. Additionally, make sure you’re using the correct measurements—too much butter or too little flour can cause excess spreading. For extra thickness, try adding a bit more flour or chilling the baked cookies for a few minutes post-baking to firm them up.
Are there any dietary considerations I need to be aware of for Cookie Monster Cookies?
Certainly! If you’re serving these cookies to friends with dietary restrictions, be mindful of allergens like wheat and dairy. You can use a dairy-free margarine and substitute the egg with 3 tablespoons of aquafaba to make a vegan version. When choosing Oreos or alternative filled cookies, ensure they meet the needs of your guests (e.g., gluten-free options are available!). Always check food labels for allergens before serving.
Can I make variations of Cookie Monster Cookies?
Very! The base recipe is flexible; feel free to swap in different mix-ins like white chocolate chips or nuts. You can also use other types of cookies instead of Oreos, such as Biscoff or filled chocolate bars, to create a fun twist. Coloring doesn’t have to stop at blue—try red or green hues for themed occasions! This versatility makes the Cookie Monster Cookies a hit in any gathering.

Cookie Monster Cookies: Fun and Chewy Treats for All Ages
Ingredients
Equipment
Method
- Step 1: Prepare the Dough - Cream together softened butter, brown sugar, and granulated sugar until smooth and fluffy for about 2-3 minutes. Add in the egg, vanilla extract, and blue gel food coloring, mixing until well combined.
- Step 2: Combine Dry Ingredients - In a separate bowl, whisk together flour, baking powder, baking soda, and salt. Gradually fold this dry mix into the wet ingredients until no flour streaks remain.
- Step 3: Add Mix-Ins - Gently fold in chocolate chips and chopped Oreos into the dough, ensuring they are evenly distributed.
- Step 4: Shape Cookies - Take a portion of dough, flatten it, and wrap it around an Oreo to form a ball.
- Step 5: Chill Dough - Place cookie dough balls on a baking sheet and refrigerate for at least 30 minutes or freeze for 15-20 minutes.
- Step 6: Bake - Preheat the oven to 180°C (350°F), line a baking sheet with parchment paper, and bake the cookies for 12-15 minutes until edges are golden.
- Step 7: Cool - Let cooled cookies rest on the tray for 5 minutes before transferring to a wire rack.
Leave a Reply