
The warmth of an Italian kitchen always calls to me, filled with the enticing aroma of freshly baked bread. In this world of quick takeout and fast food, there’s something pure and fulfilling about creating your own Crusty Italian Bread at home. This simple recipe lets you embrace your inner baker while producing a loaf that’s not only perfect for slathering in butter or dipping into your favorite soup but also impressively light on the prep. Just imagine the satisfaction of pulling a golden-brown crust from your oven. Whether you choose to add a sprinkle of herbs or some cheesy goodness, this homemade bread becomes an instant family favorite. Ready to dive in and elevate your homemade meals? Let’s get started!
Why is Homemade Bread Irresistible?
Homemade bread transforms your kitchen into a cozy haven, filling the air with delightful aromas. Versatile and customizable, you can experiment with flavors like herb-infused or cheesy crusts to match your taste. Texture is key, offering a crunchy crust that gives way to a soft, chewy inside. Simplicity reigns here—perfect for both novice bakers and seasoned chefs. Plus, it’s a surefire way to impress family and friends at dinner! Embrace the art of baking and treat yourself to this warm, comforting loaf that elevates any meal. Want more inspiration? Check out our tips on serving suggestions to make it even more delicious!
Crusty Italian Bread Ingredients
For the Dough
• All-Purpose Flour – Provides structure and texture; substitute with bread flour for a chewier texture.
• Salt – Enhances flavor and balances the dough’s taste; never skip this vital ingredient!
• Instant Yeast – Leavens the bread for a light and airy loaf; active dry yeast can be used with prior activation in warm water.
• Warm Water (110°F) – Hydrates the flour and activates the yeast, crucial for perfect rising.
Optional Variations
• Dried Rosemary or Thyme – Add 1 teaspoon for a fragrant herb-infused Crusty Italian Bread.
• Shredded Parmesan Cheese – Sprinkle on top before baking for a cheesy crust that elevates flavor.
• Whole Wheat Flour – Swap half of the all-purpose flour with whole wheat for a heartier loaf.
Step‑by‑Step Instructions for Crusty Italian Bread
Step 1: Prepare the Dough
In a large mixing bowl, combine 4 cups of all-purpose flour, 2 teaspoons of instant yeast, and 2 teaspoons of salt. Slowly pour in 1 and 3/4 cups of warm water (about 110°F), stirring with a wooden spoon until a sticky dough forms. This mixture should be messy but cohesive, with no dry flour visible.
Step 2: First Rise
Cover the bowl with plastic wrap or a damp towel and place it in a warm environment, such as near a sunny window. Allow the dough to rise for 1 to 2 hours, or until it has doubled in size. You’ll know it’s ready when it feels light and puffy, indicating that the yeast is active.
Step 3: Shape the Dough
Once risen, gently transfer the dough onto a floured surface. With floured hands, shape it into a round loaf by folding the edges towards the center and smoothing the top. Transfer the formed loaf onto a piece of parchment paper, which will make for easier handling later on.
Step 4: Second Rise
Cover the shaped loaf with a kitchen towel and let it rise again for about 30 minutes. Meanwhile, preheat your oven to 450°F with a Dutch oven inside to ensure it’s hot when the dough is ready. This second rise allows the dough to expand further before it meets the heat.
Step 5: Bake the Bread
Carefully remove the preheated Dutch oven from the oven, lifting the lid. Grasp the edges of the parchment paper to transfer the dough into the hot pot. Cover it with the lid and bake for 30 minutes. You’ll hear a gentle bubbling sound as it begins to rise and form that beautiful crust.
Step 6: Finish Baking
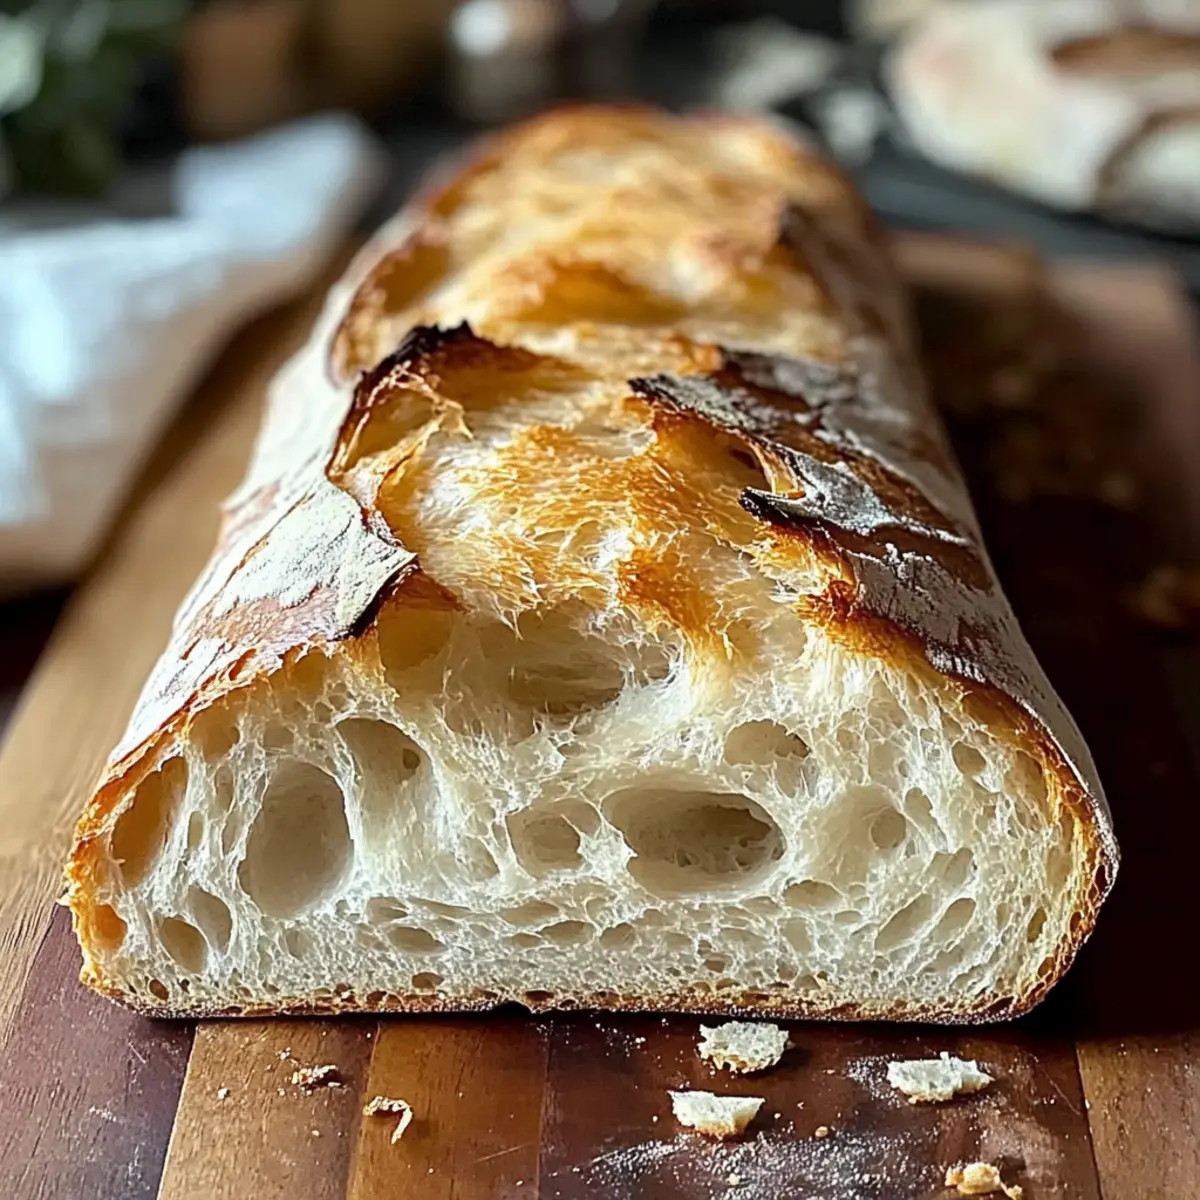
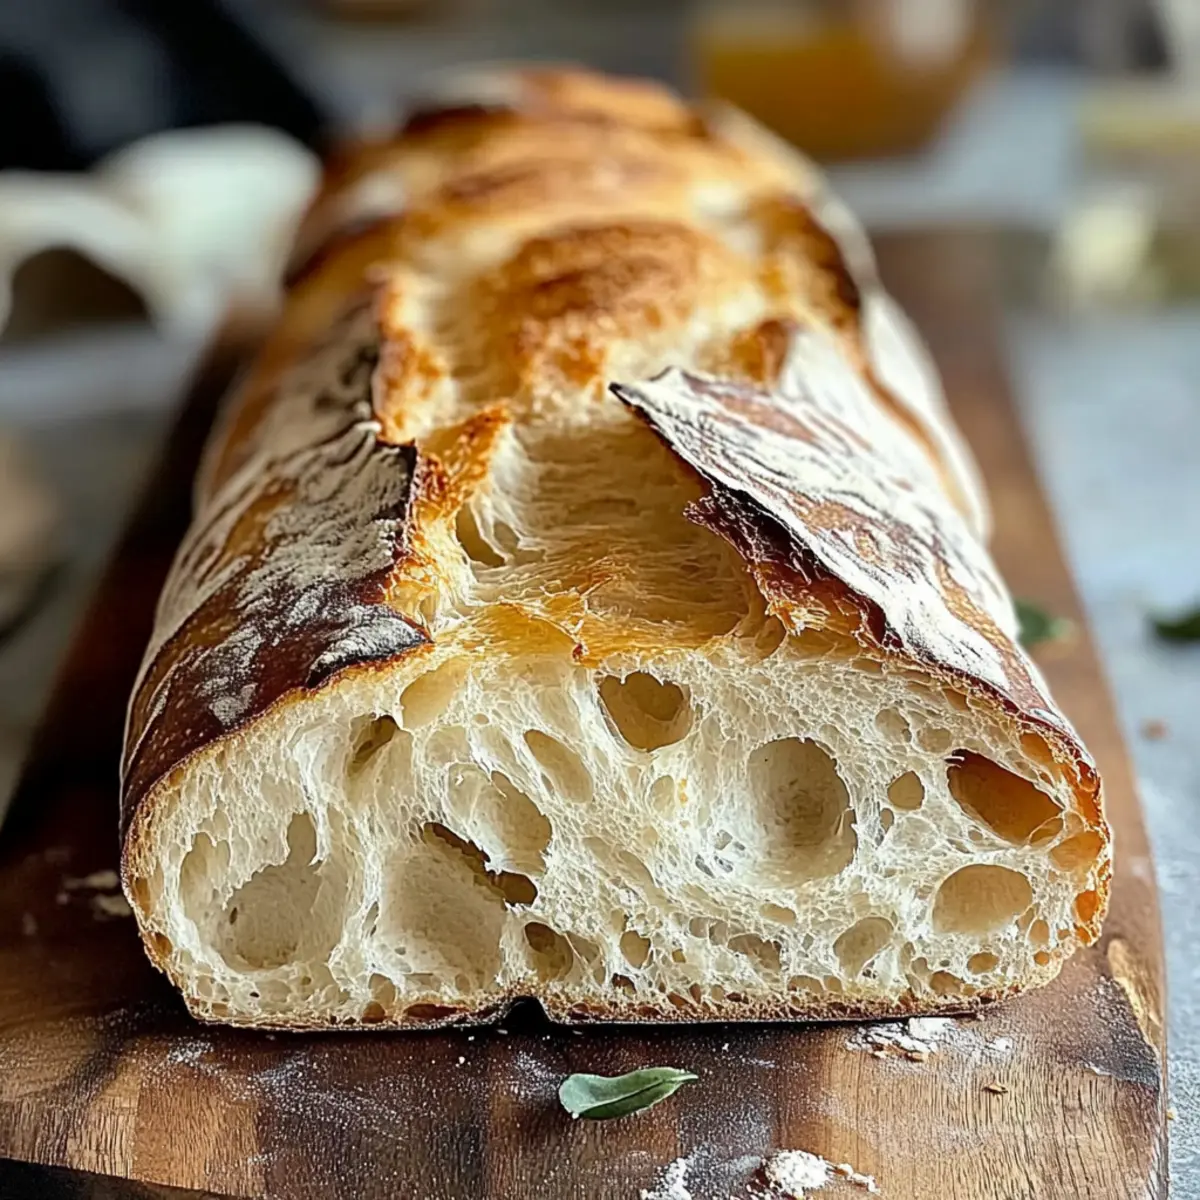
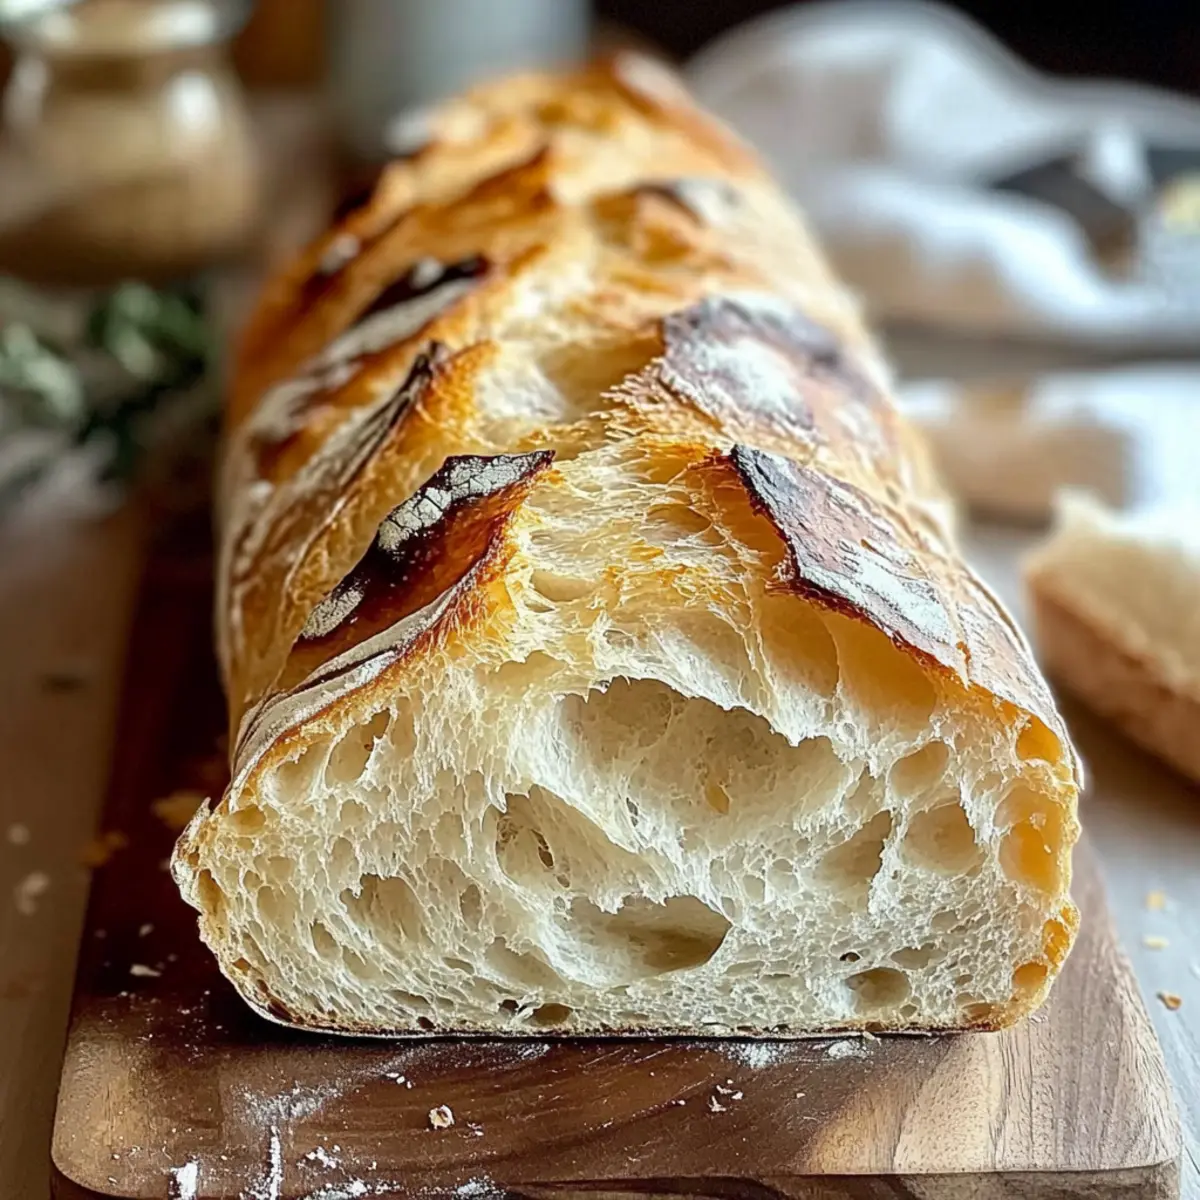
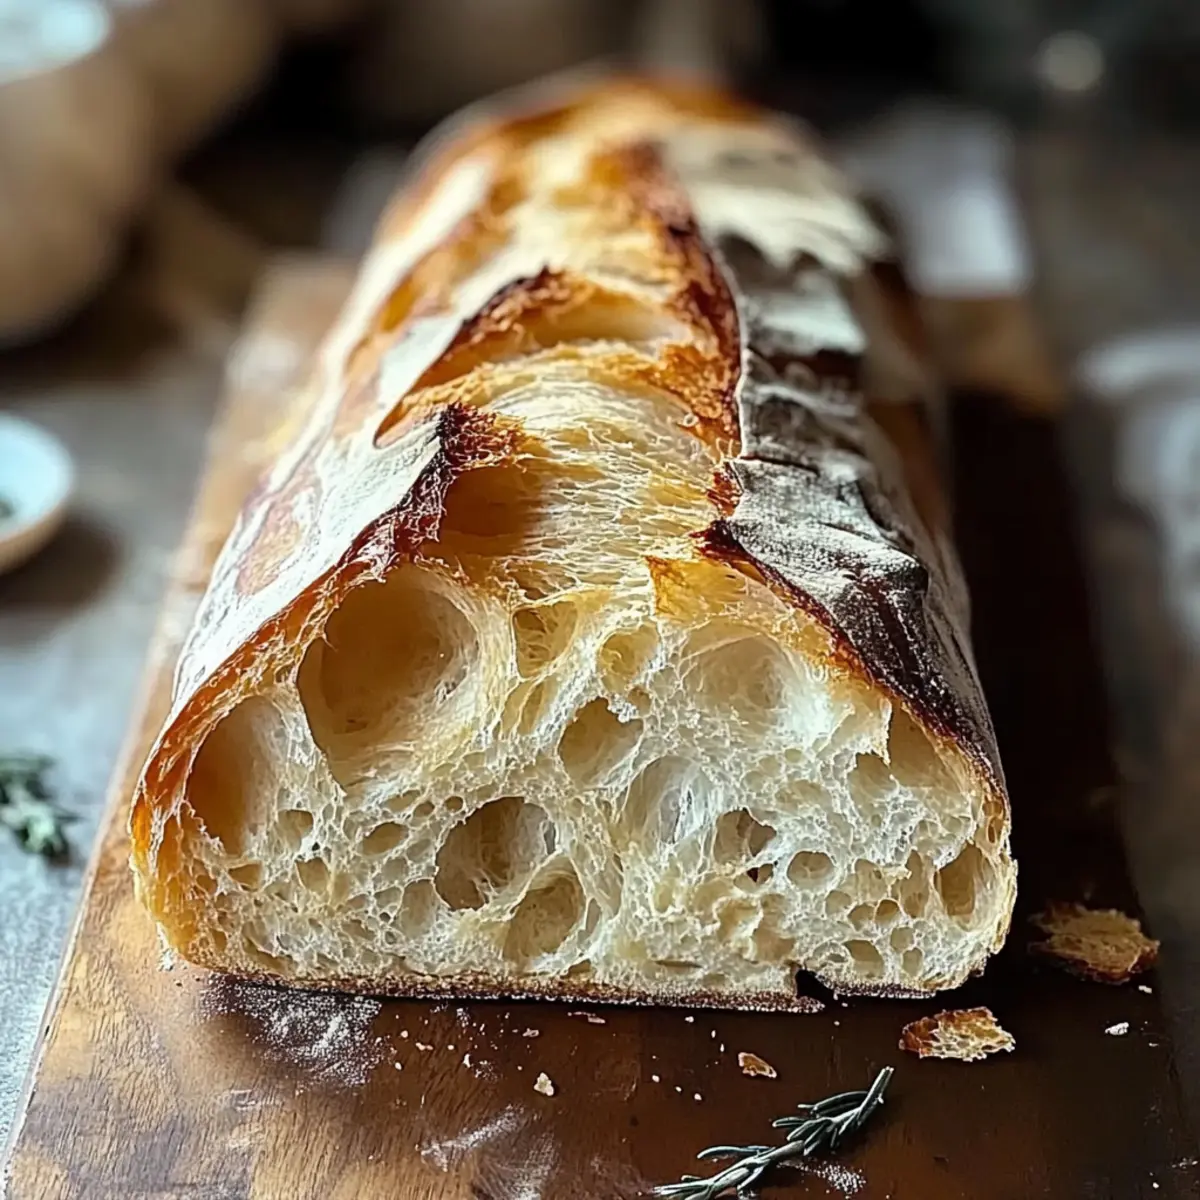
After 30 minutes, remove the lid from the Dutch oven and continue to bake for an additional 10 to 15 minutes. Keep an eye on the bread as it turns golden brown; you’re looking for a lovely crust that’s hard and crunchy. The internal temperature should reach 200°F for the perfect bake.
Step 7: Cool and Serve
Once baked, carefully take the Dutch oven out of the oven and transfer the bread onto a wire rack to cool. Allow it to rest for at least 30 minutes before slicing. This cooling period helps the bread settle and enhances that inviting texture of the Crusty Italian Bread you’ve worked hard to create.
Make Ahead Options
These Crusty Italian Bread loaves are perfect for meal prep enthusiasts! You can prepare the dough up to 24 hours in advance by following the first two steps of the recipe, then cover the bowl with plastic wrap and refrigerate it. This slows down the yeast activity, allowing for deeper flavor development while keeping the dough fresh. When you’re ready to bake, simply take the dough out of the fridge and let it come to room temperature for about 30 minutes before shaping and allowing the second rise. This method ensures your homemade bread is just as delicious and perfect for busy weeknights or occasions when you want to impress family and friends with minimal effort.
How to Store and Freeze Crusty Italian Bread
Room Temperature: Store the bread in an airtight bag or container at room temperature for up to 3 days to maintain its crunchy crust.
Freezer: For longer storage, wrap the cooled loaf in plastic wrap and aluminum foil, freezing it for up to 3 months.
Reheating: When ready to enjoy, reheat the Crusty Italian Bread in a preheated oven at 350°F for about 10 minutes to revitalize its crusty exterior.
Crusty Italian Bread Variations
Feel free to explore these delightful variations to make your Crusty Italian Bread uniquely yours!
- Herb-Infused: Add 1 teaspoon of dried rosemary or thyme for an aromatic twist that enhances the flavor. Your kitchen will smell heavenly as it bakes!
- Cheesy Crust: Sprinkle shredded Parmesan cheese on top before baking to create a delightful, flavor-packed crust. It’s a crunchy surprise with each slice!
- Whole Wheat Option: Swap half of the all-purpose flour with whole wheat flour for a heartier loaf that adds a nutty taste and boosts nutritional value.
- Garlic Bread Twist: Mix in 2 teaspoons of minced garlic or garlic powder into the dough for a savory twist that complements pasta dishes wonderfully. Imagine the aroma filling your kitchen!
- Olive Oil Enrichment: Add 2 tablespoons of high-quality olive oil into the dough for richness and a subtly luxurious texture in every bite. It’s a simple yet effective enhancement!
- Spicy Kick: For those who enjoy some heat, incorporate crushed red pepper flakes into the dough for a flavorful punch. This variation pairs well with hearty soups!
- Seed Topping: Before baking, sprinkle sesame seeds or poppy seeds on top for an added crunch and visual appeal. Such a simple touch makes it look artisanal!
- Focaccia Style: Flatten the shaped dough on a baking sheet and dimple it with your fingers, then drizzle with olive oil and sprinkle sea salt for a delicious focaccia-inspired loaf. Enjoy it with a dip of olive oil for an authentic Italian experience!
These variations ensure you can customize your Crusty Italian Bread to suit your taste, making every batch a new culinary adventure. Don’t forget to check out our tips on serving suggestions for your next meal!
What to Serve with Crusty Italian Bread
There’s nothing quite like the warmth of a home-cooked meal, especially when it’s complemented by a rustic loaf of fresh bread.
- Rich Tomato Soup: This classic pairing transforms each slice into the ultimate dipping experience, enhancing the bread’s flavor with hearty, tangy goodness.
- Creamy Garlic Butter: Slathering this on warm bread creates a divine contrast of textures, melting indulgently into the crust, perfect for an appetizer or side.
- Savory Olive Tapenade: A blend of briny olives elevates your bread with bold Mediterranean flavors, making it an irresistible addition to any charcuterie board.
- Fresh Caprese Salad: With vibrant tomatoes, basil, and mozzarella, this salad adds refreshing notes and contrasts beautifully against the rustic bread.
- Hearty Minestrone Soup: A thick, veggie-packed soup that pairs perfectly with crusty bread, making every bite satisfying and filling.
- Prosecco: For a bubbly touch, enjoy a glass of this sparkling wine; its acidity will cut through the richness of the bread and any accompanying dishes.
- Chocolate Lava Cake: For dessert, this gooey, rich cake surprises the palate and creates a decadent finish to your meal with a slice of bread for a unique twist.
Embark on a culinary adventure by pairing these delightful dishes with your homemade Crusty Italian Bread, and watch how they transform your dining experience.
Expert Tips for Crusty Italian Bread
- Temperature Matters: Ensure your warm water is around 110°F. Too hot can kill the yeast, resulting in dense bread.
- Rising Times: Don’t rush the rises! Allowing the dough to double in size properly develops flavor and texture in your Crusty Italian Bread.
- Steam Creation: To achieve a crispy crust, introduce steam in your oven by placing a pan of water on a lower rack during the bake.
- Rest Before Storing: Always let your bread cool completely on a wire rack before wrapping to maintain that perfect crust and prevent sogginess.
- Over-Kneed Caution: Be gentle when shaping the dough; over-kneading can toughen the bread instead of yielding the desired chewy texture.
Crusty Italian Bread Recipe FAQs
What type of flour is best for making Crusty Italian Bread?
I recommend using all-purpose flour for a balanced texture, but if you’re looking for a chewier bite, swapping in bread flour works wonders. The gluten content in bread flour contributes to that airy, soft interior we all love.
How should I store my Crusty Italian Bread to keep it fresh?
To maintain the magic of your Crusty Italian Bread, store it in an airtight bag or container at room temperature for up to 3 days. If it’s not consumed within that time, freeze it for longer enjoyment. Just remember to wrap it well—both in plastic wrap and aluminum foil—to guard against freezer burn.
Can I freeze Crusty Italian Bread? If so, how?
Absolutely! For freezing, allow your bread to cool completely first. Then wrap it tightly in plastic wrap and aluminum foil to keep it safe from the cold. You can freeze it for up to 3 months. When you’re ready to indulge, just reheat it in a preheated oven at 350°F for about 10 minutes; it will regain that lovely crust!
What if my dough doesn’t rise?
If your dough isn’t rising properly, check the yeast—make sure it’s fresh! The water temperature is crucial too; it should be around 110°F when mixed. If the water is too hot or too cold, it can kill the yeast. If your dough still seems lethargic, you can try moving it to a warmer spot, like near a sunny window, to encourage that double-in-size magic.
Can pets eat Crusty Italian Bread?
While it may be tempting to share your delicious bread with furry friends, it’s best to avoid giving them bread. Many pets, especially dogs and cats, can have difficulty digesting yeast and carbohydrates, which could lead to tummy troubles. Stick to pet-friendly treats for your furry loved ones!
Are there gluten-free options for Crusty Italian Bread?
If you’re aiming for a gluten-free version, you can experiment with gluten-free all-purpose flour blends that include xanthan gum to help replicate that stretchy, bread-like texture. Follow the package instructions closely since gluten-free baking can differ significantly from traditional methods. Don’t forget to let me know how it turns out!
Crusty Italian Bread Recipe for Your Cozy Home Baking
Ingredients
Equipment
Method
- In a large mixing bowl, combine 4 cups of all-purpose flour, 2 teaspoons of instant yeast, and 2 teaspoons of salt.
- Slowly pour in 1 and 3/4 cups of warm water, stirring until a sticky dough forms.
- Cover the bowl and let the dough rise for 1 to 2 hours.
- Transfer dough onto a floured surface and shape into a round loaf.
- Let the shaped loaf rise for 30 minutes, covered with a kitchen towel.
- Preheat your oven to 450°F with a Dutch oven inside.
- Transfer the dough into the hot Dutch oven and cover it, baking for 30 minutes.
- Remove the lid and bake for another 10 to 15 minutes until golden brown.
- Transfer the bread to a wire rack and cool for at least 30 minutes before slicing.
Leave a Reply