
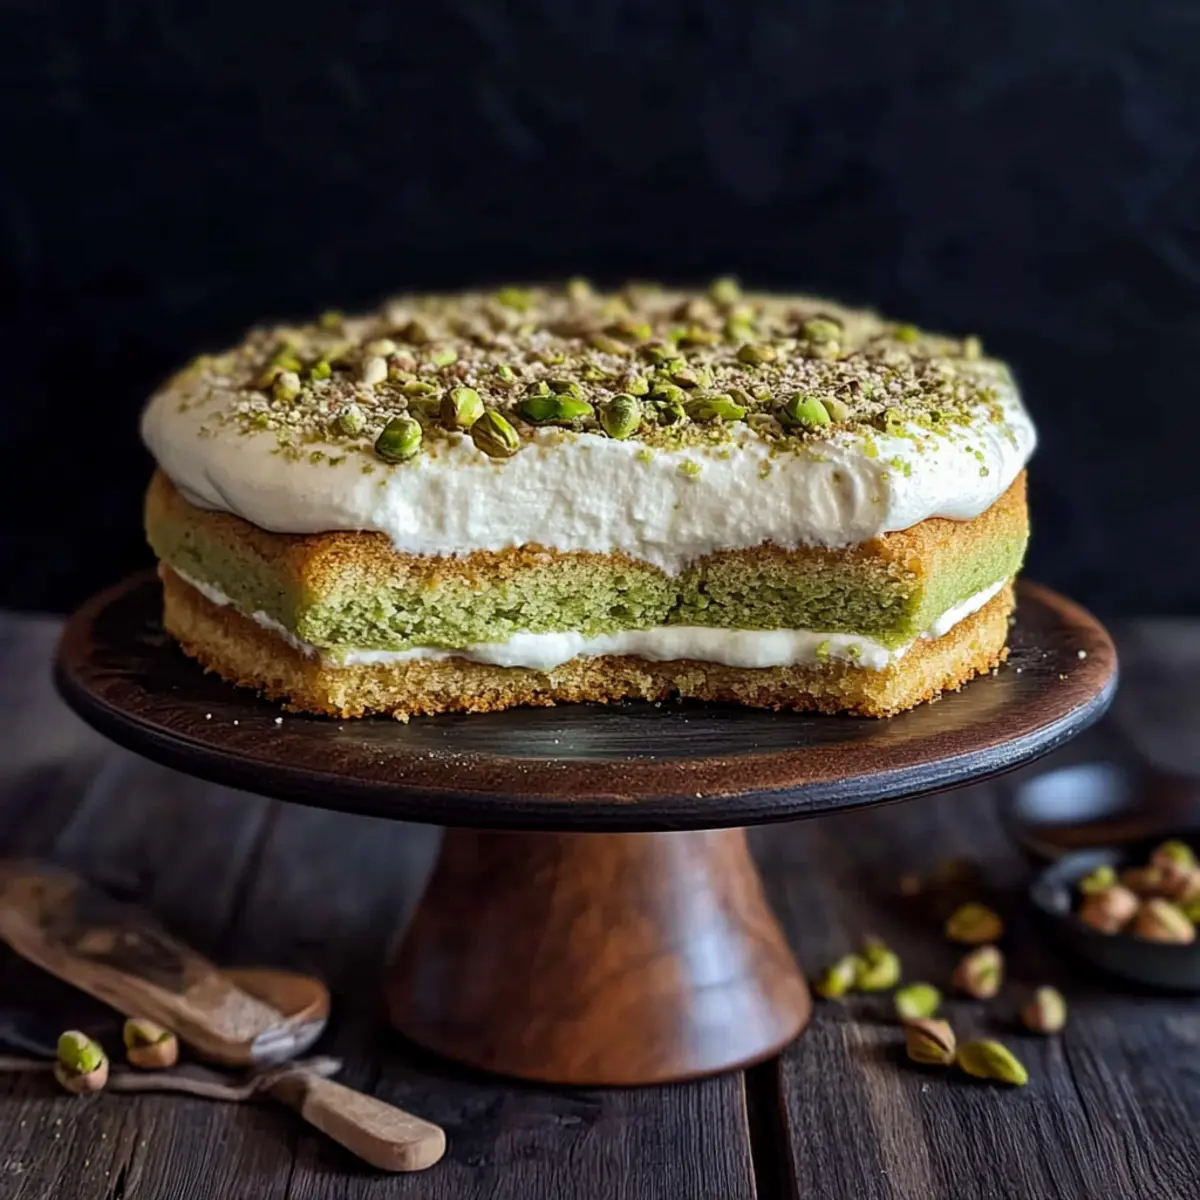
There’s something truly enchanting about an Italian dessert that feels like a little slice of heaven on a plate. Enter the Pistachio Tiramisu, a creamy delight that marries rich mascarpone with a dreamy pistachio filling, layered gracefully between light Sponge Cake or those classic Lady Fingers. This decadent yet simple no-bake option is not just perfect for special occasions; it’s also customizable to match your cravings. Whether you’re looking to impress at dinner parties or simply want to elevate your weeknight dessert game, this Pistachio Tiramisu blends convenience and indulgence effortlessly. Plus, you can whip it up without raw eggs for a worry-free treat! Ready to dive into the world of divine layers and nutty flavors? Let’s create a dessert that’s every bit as stunning as it is delicious!
Why is Pistachio Tiramisu a Must-Try?
Exquisite Flavor: The rich mascarpone paired with pistachio creates a creamy indulgence that tantalizes your taste buds.
Customizable: Swap in espresso or a splash of liqueur to make it uniquely yours!
No-Bake Convenience: This dessert requires minimal cooking; just layer and chill for a hassle-free delight.
Perfect for Any Occasion: Whether it’s a family gathering or an intimate dinner, this tiramisu is sure to impress.
Crowd-Pleaser: Everyone loves a good tiramisu, and this pistachio twist offers a fresh take on a beloved classic.
Make your dessert game strong with this showstopper, ideal for satisfying sweet cravings without the fuss!
Pistachio Tiramisu Ingredients
For the Cake Layers
• Sponge Cake or Lady Fingers – Use either homemade or store-bought for easy preparation.
For the Pistachio Filling
• Pistachio Cream – Rich and nutty, creates the dessert’s signature flavor; adjust thickness with milk as needed.
• Milk – Enhances moisture; use 2% or whole milk, or swap for espresso for a delicious coffee kick.
For the Mascarpone Mixture
• Large Egg (optional) – Adds richness; can be omitted and substituted with powdered sugar for a safe egg-free option.
• Granulated Sugar – Balances the dessert’s sweetness; consider powdered sugar if skipping the egg.
• Heavy Cream – Use cream with at least 30% fat for the best whipping results and texture.
• Mascarpone Cheese – Essential for that creamy, Italian flavor; this traditional cheese is a must for authentic tiramisu.
For Garnishing
• Chopped Pistachios – Add a crunchy finish and visual appeal; sprinkle on top just before serving.
Dive into the world of Pistachio Tiramisu with these simple yet essential ingredients for a truly unforgettable dessert!
Step‑by‑Step Instructions for Pistachio Tiramisu
Step 1: Prepare the Cake Layers
Begin by baking your Sponge Cake or arranging your store-bought Lady Fingers on a serving platter. If using a homemade cake, cool it completely before slicing it into two equal layers. This ensures that your Pistachio Tiramisu has a sturdy base and prevents sogginess later on.
Step 2: Blend the Pistachio Cream
In a mixing bowl, combine your pistachio cream with milk, blending until smooth and creamy. Adjust the consistency by adding more milk if necessary, ensuring it can be easily spread without dripping. This delectable pistachio mixture will be the heart of your dessert layers, so take your time to achieve the perfect blend.
Step 3: Assemble the First Layer
Place one of the cake layers on a serving plate. Drizzle it generously with milk to add moisture and enhance flavor. Next, spread half of the pistachio cream evenly over this layer, smoothing it out to create a uniform surface. After this step, refrigerate the layer to allow the flavors to meld beautifully.
Step 4: Prepare the Mascarpone Filling
In a separate bowl, beat together a large egg with granulated sugar until the mixture becomes frothy and pale. Gradually fold in the heavy cream and mascarpone cheese, continuing to mix until the filling thickens and becomes creamy. For an egg-free alternative, substitute the egg with powdered sugar while mixing.
Step 5: Add the Mascarpone Layer
Once your mascarpone filling is ready, take the chilled cake layer from the refrigerator and spread half of the mascarpone mixture evenly over the pistachio cream. Smooth it out carefully to create a nice layer, providing rich creaminess to your Pistachio Tiramisu.
Step 6: Repeat Layering Process
Take the remaining cake layer and place it on top of the mascarpone filling. Repeat the layering process by drizzling this layer with milk, followed by the remaining half of the pistachio cream, and finally topping it off with the rest of the mascarpone filling. Smooth everything out nicely, ensuring a beautiful presentation.
Step 7: Chill the Tiramisu
Cover your fully assembled Pistachio Tiramisu with plastic wrap or a lid and refrigerate for at least 3 to 4 hours, or preferably overnight. This chilling time allows the flavors to develop and the dessert to set properly, giving you that delightful, creamy texture.
Step 8: Garnish and Serve
When ready to serve, remove the Tiramisu from the refrigerator and carefully uncover it. Sprinkle the top with chopped pistachios for a crunchy finish and an appealing look. Slice into portions and serve chilled, enjoying the decadent layers and rich flavor of this Pistachio Tiramisu.
Pistachio Tiramisu Variations & Substitutions
Feel free to get creative with your Pistachio Tiramisu and make it uniquely yours with these fun ideas!
- Gluten-Free: Use gluten-free Lady Fingers or try an almond-based sponge cake for a delightful twist.
- Dairy-Free: Substitute heavy cream and mascarpone with coconut cream for a tropical, dairy-free version.
- Coffee Lovers: Replace milk with strong espresso for that classic tiramisu flavor that coffee enthusiasts adore.
- Extra Nutty: Fold in crushed pistachios into the mascarpone mixture for an additional crunchy surprise in every bite.
- Liqueur Boost: Add a splash of Amaretto or any flavored liqueur to the mascarpone filling to elevate the richness.
- Fruit Infusion: Layer fresh raspberries or strawberries between the cream layers for a refreshing fruitiness that balances the richness.
- Less Sweet: Reduce the sugar used in the mascarpone filling, adjusting to your taste to create a less indulgent dessert.
- Flavor Infusion: Consider swapping in flavored extracts like vanilla or almond for a personalized touch that brings new dimensions.
Exploring these variations can add unexpected delights to your Pistachio Tiramisu, transforming it into a dessert that rivals any restaurant’s best! Remember, the possibilities are as endless as your imagination. Happy cooking!
How to Store and Freeze Pistachio Tiramisu
Fridge: Store your Pistachio Tiramisu in an airtight container for up to 2-3 days. This keeps it fresh and prevents it from absorbing any unwanted flavors.
Freezer: For longer storage, you can freeze the tiramisu for up to 2 weeks. Wrap it tightly in plastic wrap and place it in a freezer-safe container.
Thawing: When ready to enjoy, thaw the frozen Pistachio Tiramisu overnight in the fridge before serving. This helps retain its creamy texture.
Reheating: No need for reheating; simply serve chilled for the best flavor and experience!
What to Serve with Creamy Pistachio Tiramisu?
Transform your delightful dessert experience into a full meal with these perfect pairings that balance flavors and textures beautifully.
- Espresso or Coffee: Bold and aromatic, a strong coffee perfectly complements the nutty richness of the tiramisu while providing a delightful contrast.
- Traditional Italian Biscotti: Crunchy and slightly sweet, biscotti gives a delightful texture to your dessert table, ideal for dipping into coffee or enjoying on their own.
- Fresh Berries: A medley of strawberries, raspberries, or blueberries adds a burst of freshness and vibrant color to balance the creaminess of the tiramisu.
- Whipped Cream: Light, airy whipped cream enhances the dessert’s smooth texture while providing an extra layer of indulgence with every bite.
- Zesty Lemon Sorbet: Refreshing and light, lemon sorbet acts as a palate cleanser to cut through the richness, making it an invigorating end to your meal.
- Chocolate Shavings: These delicate curls of chocolate not only elevate the aesthetic of the tiramisu but also add a touch of richness and subtle sweetness.
- Nutty Ice Cream: A scoop of pistachio or hazelnut ice cream reinforces the dessert’s nutty profile, enhancing the evening’s theme of indulgence.
- Fruit Salad: A vibrant mix of seasonal fruits adds a fresh, juicy contrast to the creamy layers of your tiramisu, presenting a harmony of taste and texture.
- Moscato Wine: This light, sweet wine complements the dessert’s flavors beautifully, bringing an elegant touch to your tiramisu experience.
- Pistachio Cookies: These crunchy bites mirror the dessert’s flavors, offering a delightful crunch that makes for a well-rounded dessert spread.
Make Ahead Options
Preparing your Pistachio Tiramisu ahead of time is a fantastic way to save on stress and time, especially during busy weekends or special occasions! You can assemble the entire dessert up to 24 hours in advance by layering the cake, pistachio cream, and mascarpone mixture, then simply refrigerate it. To maintain the tiramisu’s rich texture and flavors, be sure to cover it tightly with plastic wrap or a lid to prevent drying out. When you’re ready to serve, just garnish with chopped pistachios before delighting your guests. The waiting period actually enhances the flavors, making this make-ahead option truly irresistible!
Expert Tips for the Best Pistachio Tiramisu
-
Cream Consistency: Ensure the pistachio cream is thick enough to spread without running off. This avoids a soupy layer in your dessert.
-
Egg Safety: If using raw eggs, always choose pasteurized varieties for safety. Alternatively, opt for the egg-free method using powdered sugar.
-
Chill Time: Allow your Pistachio Tiramisu to chill for at least 4 hours or overnight. This is crucial for flavor melding and achieving the perfect texture.
-
Layer Moisture: Wet your Lady Fingers or cake layers gently—avoid soaking them excessively to maintain a light, airy dessert.
-
Flavor Variations: Personalize your Tiramisu by incorporating espresso or flavored liqueurs like Amaretto into your mascarpone mixture for added depth.
Remember, these simple tips will help you create a stunning Pistachio Tiramisu that impresses at any gathering!
Pistachio Tiramisu Recipe FAQs
What type of pistachio cream should I use?
Absolutely! You can either buy pre-made pistachio cream or make your own by blending roasted pistachios with a little sugar and cream. If you’re short on time, store-bought versions are perfectly delicious and will save you some effort!
How should I store leftover Pistachio Tiramisu?
Very important! To keep your Tiramisu fresh, simply place it in an airtight container in the fridge. It will stay good for up to 2-3 days. This way, you can enjoy the creamy delight without worrying about spoilage!
Can I freeze Pistachio Tiramisu?
Yes, you can! Wrap the Tiramisu tightly in plastic wrap and place it in a freezer-safe container. It will be good for up to 2 weeks. When you’re ready to eat, just thaw it overnight in the fridge for that luscious creamy texture!
What if the layers are too soggy?
Oh no! If you find your layers are too soggy, it may be due to over-soaking the cake layers in milk. To prevent this next time, gently drizzle the milk instead of soaking. Also, ensure your pistachio cream is thick enough to spread without running off.
Are there any dietary considerations for make-ahead recipes?
Absolutely! If you’re making Pistachio Tiramisu for guests with dietary restrictions, note that it can be made egg-free by using powdered sugar in place of raw eggs. Just mix the sugar with the cream and mascarpone filling for a safe alternative that everyone can enjoy.
How long should I let it chill before serving?
Definitely! Chilling your Pistachio Tiramisu for at least 3-4 hours, or preferably overnight, is crucial. This allows the flavors to meld beautifully, resulting in the perfect creamy texture that balances deliciousness with ease. Enjoy!
Irresistibly Creamy Pistachio Tiramisu for Every Occasion
Ingredients
Equipment
Method
- Begin by baking your Sponge Cake or arranging your store-bought Lady Fingers on a serving platter. Cool homemade cake before slicing it into two layers.
- In a mixing bowl, combine pistachio cream with milk, blending until smooth. Adjust consistency as needed.
- Place one cake layer on a serving plate. Drizzle generously with milk and spread half of the pistachio cream across it. Refrigerate to meld flavors.
- In a bowl, beat together egg and granulated sugar until frothy. Fold in heavy cream and mascarpone until creamy.
- Spread half of the mascarpone mixture over the pistachio cream on the chilled cake layer.
- Add the second cake layer on top. Repeat layering process with milk, pistachio cream, and remaining mascarpone filling.
- Cover with plastic wrap and refrigerate for at least 3-4 hours or overnight.
- Before serving, sprinkle the top with chopped pistachios. Slice into portions and serve chilled.
Leave a Reply