
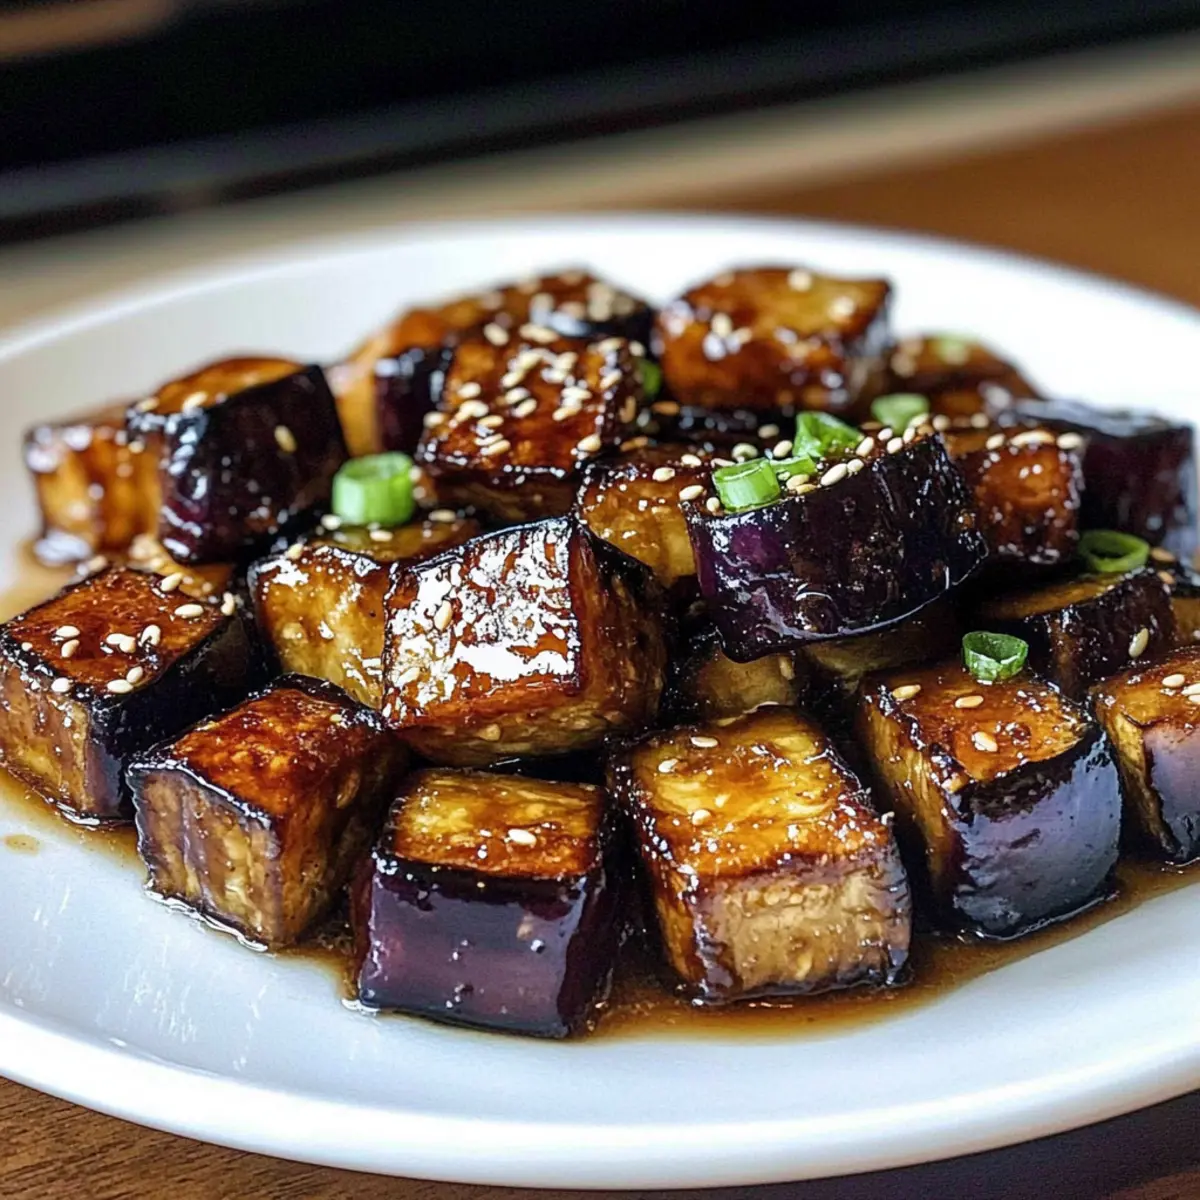
As I stood in my kitchen, the warm scent of miso wafting through the air, I realized just how comforting cooking can be—especially when it comes to creating delights like Miso Glazed Eggplant. This Japanese-inspired side dish is a true gem, perfect for those busy weeknights or casual get-togethers. Not only is it easy to whip up, but it also elevates any meal with its unique savory-sweet flavor profile. Picture tender roasted eggplant coated in a glossy, caramelized glaze that practically begs to be savored! Best of all, it’s vegetarian and can be adapted for any palate. Ready to transform your dinner routine? Let’s get cooking!

What makes Miso Glazed Eggplant unforgettable?
Melt-in-your-mouth tenderness: The roasted eggplant becomes beautifully soft, while the miso glaze adds a sticky, glossy finish that’s utterly irresistible.
Savory-sweet balance: Each bite offers a delightful dance of flavors, combining umami-rich miso with the sweetness of honey and mirin.
Quick and easy: You’ll spend just under 30 minutes in the kitchen, making it an ideal option for busy weeknights.
Versatile dish: Serve as a side with your favorite grilled protein or on its own with a steaming bowl of rice for a light meal.
Crowd-pleaser: Whether hosting a dinner or enjoying a quiet night in, this dish is sure to impress—perfect for anyone tired of fast food and craving wholesome flavors. Want to dive deeper into Japanese flavors? Check out my Japanese-inspired recipes for more delicious inspirations!
Miso Glazed Eggplant Ingredients
• Elevate your side dish game with these delicious ingredients!
For the Eggplant
- Eggplant – The star of the dish, cut into one-inch cubes for even roasting.
- Olive Oil – Essential for roasting, ensuring tenderness and a richer flavor.
- Salt & Pepper – Basic seasonings that elevate the overall taste of the Miso Glazed Eggplant.
For the Miso Glaze
- White Miso Paste – The key ingredient that provides a mild, sweet flavor; red miso can be used as a substitute for a stronger taste.
- Mirin – Adds sweetness and depth to the glaze; if unavailable, mix a tablespoon of rice vinegar with a teaspoon of sugar.
- Soy Sauce – Enhances the glaze with savory depth, perfectly balancing the sweetness.
- Honey – Aids in caramelization for that irresistible glaze; feel free to use maple syrup or agave nectar as a substitute.
- Fresh Ginger – Adds a refreshing kick; use finely grated ginger for the best flavor. If you’re in a pinch, ground ginger (1/2 teaspoon) is a suitable alternative.
- Garlic – Finely minced to enhance the richness of the glaze.
Optional Garnishes
- Sesame Seeds – For a delightful crunch and nutty flavor.
- Chopped Green Onions – Adds freshness and color to your Miso Glazed Eggplant.
Step‑by‑Step Instructions for Miso Glazed Eggplant
Step 1: Preheat the Oven
Begin by preheating your oven to 400°F (200°C). This is the perfect temperature to achieve that irresistible caramelization on the eggplant. Make sure your oven is fully heated before you place the vegetables inside, so you can get a nice brown finish on your Miso Glazed Eggplant.
Step 2: Prepare the Eggplant
While the oven is heating, take your eggplant and cut it into one-inch cubes. In a large mixing bowl, toss these cubes with olive oil, ensuring they are well-coated. Sprinkle with salt and pepper for seasoning. This step is essential for enhancing the eggplant’s flavor before roasting.
Step 3: Roast the Eggplant
Spread the seasoned eggplant cubes evenly on a baking sheet. Place them in the preheated oven and roast for 20-25 minutes. Make sure to flip the cubes halfway through to promote even cooking, aiming for a tender texture and a slight, golden-brown color that will complement the Miso Glazed Eggplant beautifully.
Step 4: Make the Miso Glaze
While your eggplant is roasting, it’s the perfect time to prepare the glaze. In a bowl, whisk together the white miso paste, mirin, soy sauce, honey, freshly grated ginger, and minced garlic until the mixture is smooth and well-combined. This sweet-savory glaze will bring a delightful burst of flavor to your dish.
Step 5: Apply the Glaze
Once the eggplant is perfectly roasted and tender, remove it from the oven. Brush a generous amount of the miso glaze over the eggplant cubes. Make sure each piece is well-coated to maximize flavor penetration, then return the eggplant to the oven for another 5-7 minutes.
Step 6: Final Roasting
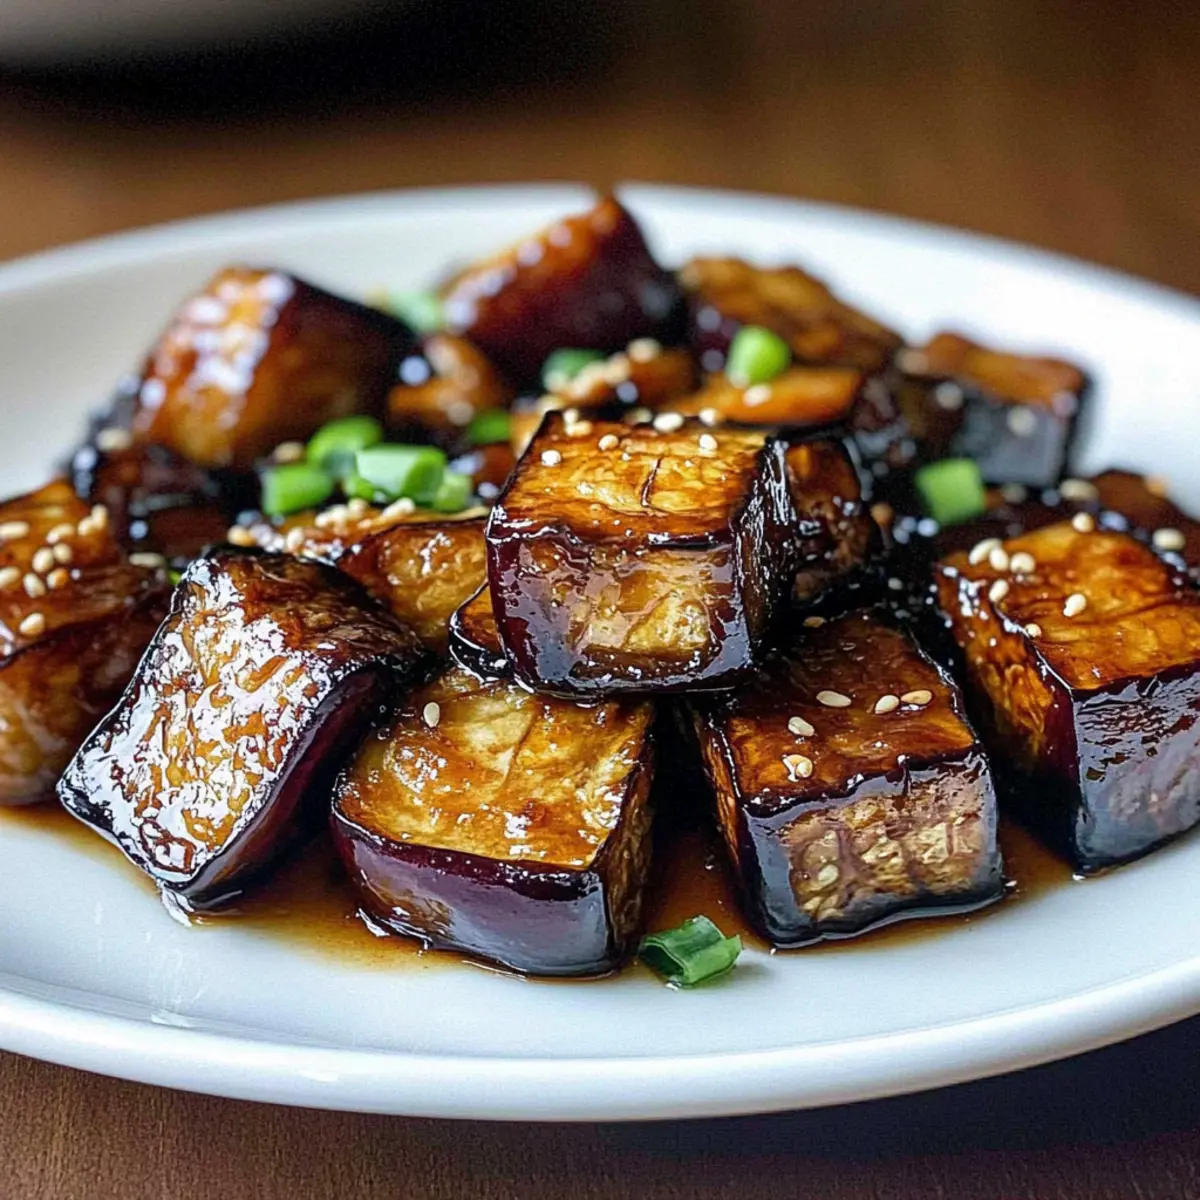
During this final roasting stage, keep a close eye on the Miso Glazed Eggplant. You want the glaze to bubble and caramelize, which creates a glossy finish. This step helps to intensify the flavors, so remove the dish when you see a lovely, golden-brown sheen on the eggplant.
Step 7: Garnish and Serve
Once roasted to perfection, take the Miso Glazed Eggplant out of the oven. For an extra touch, garnishing with sesame seeds and chopped green onions elevates both the visual appeal and the taste. Serve warm, and delight in this savory-sweet side dish that’s sure to impress!
What to Serve with Miso Glazed Eggplant
Transform your dining experience with these complementary dishes that enhance the flavors of your savory-sweet creation.
-
Steamed Jasmine Rice: The fluffy grains soak up the miso glaze beautifully, providing a comforting and neutral base that balances the eggplant’s richness.
-
Grilled Teriyaki Chicken: The smoky, salty-sweet notes of teriyaki chicken harmonize effortlessly with the umami of the miso, creating a delightful flavor fusion.
-
Crispy Tofu Stir-Fry: For a vegetarian twist, pair with pan-fried tofu tossed in seasonal vegetables. The tofu absorbs flavors well and adds a satisfying crunch.
-
Chili-Infused Edamame: These tender soybeans tossed in a chili-garlic mix offer a pop of heat that refreshes the palate between bites of the eggplant.
-
Sesame Noodle Salad: The cold noodles, tossed in a sesame-soy dressing, contrast with the warm eggplant while echoing its Asian-inspired flavors for a perfect duet.
-
Light Cucumber Salad: Crisp cucumbers with a sprinkle of rice vinegar and sesame seeds create a refreshing side that balances the richness of the miso glaze.
-
Sushi Rolls: A few nigiri or maki rolls complete your meal with their delicate textures, allowing the bold flavors of miso-glazed eggplant to shine even more.
-
Green Tea or Sake: Finish your meal with a soothing cup of green tea or a chilled glass of sake to cleanse the palate and enhance your Japanese-inspired dining experience.
Miso Glazed Eggplant Variations & Substitutions
Feel free to get creative with this delightful dish and tailor it to your tastes!
- Vegan: Replace honey with maple syrup or agave nectar for a fully plant-based version without sacrificing sweetness.
- Spicy Twist: Add a teaspoon of sriracha or chili garlic sauce to the glaze for a spicy kick that elevates the dish beautifully.
- Ginger-Free: If you’re avoiding ginger, omit it and consider adding a splash of sesame oil for added depth instead.
- Different Vegetable: Try using zucchini or bell peppers instead of eggplant for a fresh take that still offers delicious caramelization.
- Toasted Nuts: For an extra crunch, sprinkle toasted cashews or peanuts on top before serving, bringing a delightful texture contrast.
- Citrus Zest: Brighten the glaze with a touch of lime or lemon zest, adding a refreshing zing to each bite.
- Miso Variety: While white miso lends a mild sweetness, don’t hesitate to experiment with yellow or even red miso for a different flavor profile.
Whether you make subtle tweaks or go for bold changes, you’re sure to create a Miso Glazed Eggplant that is uniquely yours! Want to explore more exciting flavor options? Check out my Japanese-inspired recipes for a culinary adventure!
Expert Tips for Miso Glazed Eggplant
- Perfect Consistency: Ensure your miso glaze is smooth; if it’s too thick, simply add a splash of water or more mirin to achieve the right texture.
- Watch the Roasting: Keep a close eye during the final roasting to prevent the glaze from burning. A minute can make all the difference!
- Avoid Overcrowding: Give your eggplant room on the baking sheet; overcrowding can lead to steaming instead of roasting, affecting the texture of your Miso Glazed Eggplant.
- Flavor Variations: For extra depth, consider adding a sprinkle of chili flakes to the glaze or garnishes; it adds a lovely kick!
- Fresh Ingredients: Always use fresh ginger and garlic for the glaze; they enhance the flavor profile significantly, making your dish even more delightful.
Make Ahead Options
These Miso Glazed Eggplant are perfect for busy home cooks looking to save time! You can prepare the eggplant cubes and toss them with olive oil, salt, and pepper up to 24 hours in advance. Simply store them in an airtight container in the refrigerator to maintain their quality. Additionally, the miso glaze can be whisked together and refrigerated for up to 3 days; just give it a quick stir before using. When you’re ready to serve, roast the eggplant as instructed, apply the glaze, and finish with a final roast for 5-7 minutes to achieve that delicious caramelization. This prep-ahead method ensures you have a flavorful dish with minimal effort during your busy weeknights!
How to Store and Freeze Miso Glazed Eggplant
Fridge: Store any leftover Miso Glazed Eggplant in an airtight container for up to 3 days. This way, the flavors stay fresh and vibrant for future meals.
Freezer: If you want to keep it longer, freeze the glazed eggplant in a freezer-safe container for up to 2 months. Make sure to label it with the date for reference.
Reheating: To enjoy the deliciousness again, thaw it overnight in the fridge before reheating. Warm it gently in the oven at 350°F (175°C) covered with foil for about 15-20 minutes, ensuring the glaze doesn’t burn.
Tips: When storing, keep the glaze separate if possible to maintain the eggplant’s texture and flavor.
Miso Glazed Eggplant Recipe FAQs
How do I choose the best eggplant for Miso Glazed Eggplant?
Absolutely! When selecting eggplant, look for those that are firm, with smooth, glossy skin. Avoid any that have dark spots or are soft to the touch as these are signs of overripeness. A vibrant purple hue typically indicates freshness and quality.
What’s the best way to store leftover Miso Glazed Eggplant?
For sure! Store any leftovers in an airtight container in the refrigerator for up to 3 days. This helps maintain the tasty flavors. When ready to enjoy again, simply reheat gently to keep the glaze nice and sticky.
Can I freeze Miso Glazed Eggplant?
Absolutely! To freeze your Miso Glazed Eggplant, first let it cool completely. Then, place it in a freezer-safe container, making sure to label it with the date. It will keep well for up to 2 months. When ready to eat, thaw in the fridge overnight and reheat gently in the oven at 350°F (175°C) covered with foil for about 15-20 minutes.
What should I do if the Miso glaze is too thick?
No worries! If your glaze turns out too thick, simply whisk in a splash of water or more mirin until you reach your desired consistency. This will not only make it easier to brush onto the eggplant but will also help in achieving that luscious, glossy finish you’re after.
Is Miso Glazed Eggplant safe for those with allergies?
Very! Miso does contain soy, so it might not be suitable for those with soy allergies. However, it’s vegetarian and gluten-free options are available with gluten-free soy sauce. Always check labels and, if needed, use appropriate substitutes to enjoy this delicious dish comfortably!
Miso Glazed Eggplant: Your New Favorite Sweet-Savory Side
Ingredients
Equipment
Method
- Preheat your oven to 400°F (200°C).
- Cut the eggplant into one-inch cubes and toss with olive oil, salt, and pepper in a large mixing bowl.
- Spread the eggplant cubes evenly on a baking sheet and roast for 20-25 minutes, flipping halfway through.
- While the eggplant is roasting, whisk together the white miso paste, mirin, soy sauce, honey, grated ginger, and minced garlic until smooth.
- Once the eggplant is roasted, brush with the miso glaze and return to the oven for 5-7 minutes.
- Keep an eye on the eggplant during the final roasting to avoid burning the glaze and achieve a glossy finish.
- Garnish with sesame seeds and chopped green onions before serving warm.
Leave a Reply