
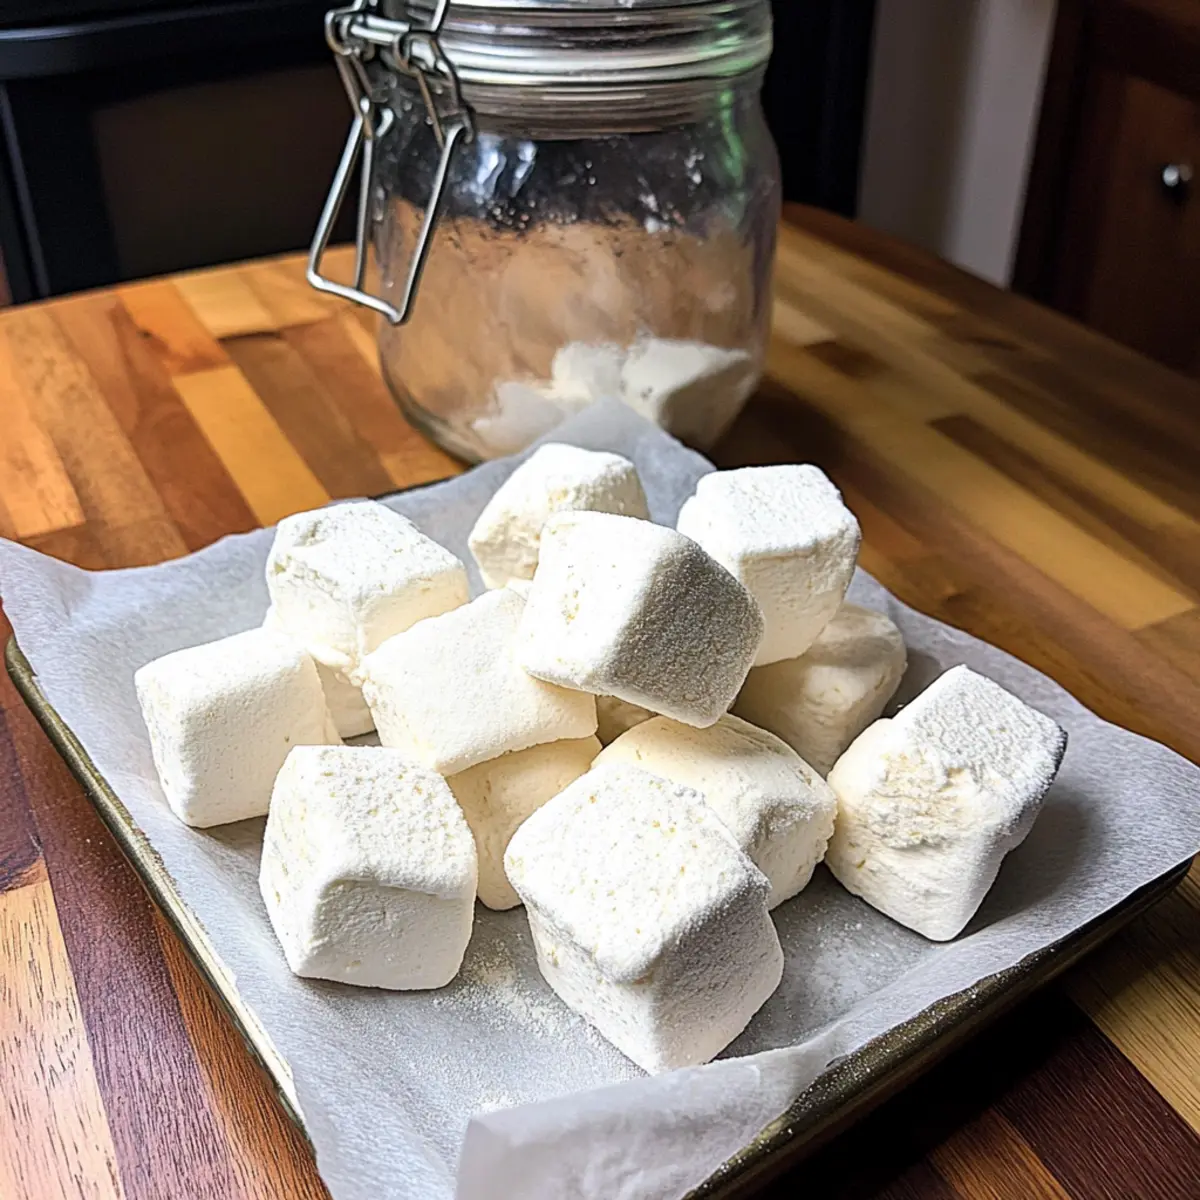
As I whisked my electric mixer into a frothy cloud, the magical transformation began—gelatin, water, and pure maple syrup danced together into fluffy, airy marshmallows, fresh from my kitchen. This Homemade Marshmallow recipe is not only gluten-free but also a delightful throwback to simpler times when treats were crafted from wholesome ingredients. With just four simple components, you can create these light and airy marvels that are free from artificial additives, perfect for cozy winter evenings spent sipping hot cocoa. The best part? You have the freedom to adjust sweetness levels, tailoring them to your taste buds with a quick swap of maple syrup or honey. Are you ready to elevate your dessert game and indulge in the sweet nostalgia of marshmallow magic? Let’s dive in!
Why Make Homemade Marshmallows?
Irresistible Flavor: These homemade marshmallows are bursting with natural sweetness, thanks to maple syrup or honey, elevating any dessert.
Customizable Delights: Adjust the sweetness to perfection by easily modifying the water and syrup ratio, making them a versatile treat for everyone.
Quick and Simple: This recipe is perfect for those short on time but eager to impress—whip them up with just four ingredients in under an hour!
Nostalgic Fun: Relive childhood memories as you roast these puffs over a cozy fire or add them to your favorite hot beverages.
Guilt-Free Indulgence: With no gluten and no artificial additives, you can enjoy these sweet delights without compromise. Kitchen satisfaction awaits!
Homemade Marshmallow Ingredients
For the Base
- Water – Essential for blooming the gelatin and ensuring the marshmallows set perfectly; use cold water for best results.
- Unflavored Gelatin – This provides the structure and delightful fluffiness; opt for grass-fed for an added nutrient boost.
For Sweetness
- Maple Syrup or Honey – This natural sweetener adds flavor and moisture; honey can replace maple syrup for a delightful twist.
- Sea Salt – Just a pinch elevates the overall flavor, enhancing the sweetness in these homemade marshmallows.
Get ready to experience the joy of crafting your very own homemade marshmallows!
Step‑by‑Step Instructions for Homemade Marshmallow
Step 1: Bloom Gelatin
Start by pouring ½ cup of cold water into a mixing bowl and whisking in 3 tablespoons of unflavored gelatin. Allow this mixture to sit undisturbed for about 3 to 5 minutes, letting the gelatin fully hydrate. You’ll see it thicken and become a gel-like consistency, which is crucial for achieving the light and fluffy texture in your homemade marshmallows.
Step 2: Prepare Syrup Mixture
In a saucepan, combine 1 cup of maple syrup with a pinch of sea salt and the remaining 1½ cups of water. Heat the mixture over medium-high heat, bringing it to a soft boil while stirring frequently. Allow it to simmer for about 8 minutes until it reaches a temperature of approximately 240°F (115°C), which is known as the soft ball stage, and ensure it thickens slightly.
Step 3: Combine Mixtures
As your syrup mixture reaches the boiling point, carefully pour it over the bloomed gelatin. Use a spatula to mix them together thoroughly until the gelatin has completely dissolved. At this stage, you should notice a glossy and somewhat sticky mixture forming, which will be the base for your fluffy homemade marshmallows.
Step 4: Whip Mixture
Using an electric mixer, whip the combined mixture on high speed for about 5 to 10 minutes. Watch as it transforms into a frothy cloud, and look for soft peaks to form—this is the signature texture of your homemade marshmallows. Once the mixture becomes fluffy and tripled in volume, you know you’re ready for the next step.
Step 5: Set Marshmallows
Line a 9×13 inch pan with parchment paper, ensuring it covers the bottom and sides. Gently pour the marshmallow fluff into the prepared pan, using a spatula to smooth the top. Refrigerate the marshmallow mixture for 2 to 3 hours, letting it set until firm. This cooling period is essential for achieving that pillowy texture.
Step 6: Cut Marshmallows
Once chilled and firm, remove the marshmallow slab from the pan by lifting the parchment paper. Dust your cutting surface with a light coating of cornstarch to prevent sticking, and use a sharp knife or pizza cutter to slice it into desired shapes—whether squares or fun shapes. Your homemade marshmallows are now ready to be served or stored!
Expert Tips for Homemade Marshmallows
Whip Wisely: Avoid over-whipping the mixture; stop as soon as it becomes fluffy. Too much mixing can lead to a grainy texture.
Bloom Right: Always use cold water for blooming gelatin, as this is vital for the marshmallow’s structure and fluffiness in your homemade marshmallows.
Temperature Matters: Use a candy thermometer to ensure your syrup reaches the soft ball stage (240°F/115°C), ensuring the marshmallows set properly.
Perfect Portions: Dust your cutting surface with cornstarch to prevent sticky marshmallows when you cut them; it’s a simple trick for easy handling.
Storage Savvy: Keep homemade marshmallows in an airtight container in the fridge; they stay fresh for up to two weeks and make delightful gifts!
Homemade Marshmallow Variations & Substitutions
Feel free to get creative and tailor your homemade marshmallows to suit your taste preferences or dietary needs!
-
Sweeter Twist: Increase the maple syrup to 1 cup while reducing water to 1 cup for extra sweetness.
-
Sugar-Free: Substitute maple syrup with a granulated erythritol sweetener, perfect for those watching their sugar intake.
-
Flavored Marshmallows: Add a few drops of vanilla extract or peppermint extract to the syrup mixture for an extra flavor kick.
-
Chocolate Delight: Stir in cocoa powder after the gelatin mixture is formed for a chocolatey treat that will satisfy any sweet tooth.
-
Fruit Flavors: Blend in fresh fruit puree—raspberry or strawberry—after whipping for a fruity twist that looks and tastes fabulous. Imagine the delightful pink hue of strawberry marshmallows, perfect for kids!
-
Toasted Marshmallow: For a unique twist, sprinkle some crushed graham crackers on top before it sets to mimic the flavor of s’mores.
-
Spicy Kick: If you enjoy a little heat, mix in a pinch of cayenne pepper for a surprising and delightful spicy marshmallow!
-
Dairy Free: Use a plant-based sweetener like agave instead of maple syrup or honey to keep these marshmallows dairy-free.
Embrace the joy of experimentation—who knows what delightful concoctions you might invent! For some delicious ideas to incorporate your fluffy marshmallows, check out our S’mores Recipe or learn how to make Homemade Hot Chocolate. Enjoy the sweet journey!
How to Store and Freeze Homemade Marshmallows
Fridge: Keep homemade marshmallows in an airtight container in the refrigerator for up to two weeks. This helps maintain their fluffy texture and freshness.
Freezer: For longer storage, freeze marshmallows in a single layer, separated by parchment paper, for up to three months. Thaw them in the fridge before use.
Reheating: If they become hard or too sticky, reheat briefly in the microwave for 5-10 seconds to restore their soft texture and enjoy in hot beverages.
Gift-Worthy: Wrap marshmallows in decorative bags or boxes for thoughtful homemade gifts, perfect for sharing some sweet nostalgia!
What to Serve with Light and Fluffy Homemade Marshmallows?
Indulging in a sweet treat is even better when paired with complementary flavors and textures that elevate your dessert experience.
-
Hot Chocolate: A classic pairing, rich and creamy hot chocolate beautifully melds with the airy texture of marshmallows, creating a cozy hug in a cup. The sweetness of the marshmallows balances the cocoa’s richness perfectly.
-
Roasted Coffee: The robust notes of freshly brewed coffee contrast wonderfully with the fluffy marshmallows. Dip them in your cup for an explosion of sweetness that brightens your morning routine.
-
Graham Crackers: Crunchy and slightly sweet, graham crackers are perfect for making s’mores! Layer these with your homemade marshmallows and chocolate for a nostalgic treat that will delight family and friends.
-
Chai Tea: The spiced warmth of chai tea offers a harmonious blend with the sweetness of marshmallows. Stir them in for an extra indulgent sip that warms the soul.
-
Ice Cream: Who can resist the charm of fluffy balls of goodness on top of cold and creamy ice cream? Toss them on a scoop of vanilla or chocolate for a delightful contrast in temperature and texture.
-
Fruit Salad: Fresh fruits like strawberries or banana slices add a refreshing twist. The natural sweetness of the fruit complements the marshmallows for a light and satisfying dessert.
-
Chocolate Fondue: Dip your marshmallows into silky chocolate for a decadent dessert experience! The contrast of rich chocolate and fluffy marshmallows is simply irresistible.
-
Moscow Mule: This zesty cocktail made with ginger beer and lime offers a crisp contrast to the sweet whimsy of your marshmallows, making for an adventurous pairing.
-
Homemade Cake: Elevate your favorite cake by adding a few marshmallows on top or within layers. They melt slightly, creating a delicious surprise that enhances every bite.
-
Milkshakes: Blend your marshmallows into a milkshake for an extra creamy, dreamy treat. The lightness of the marshmallows makes your shakes irresistibly thick and sweet.
Make Ahead Options
These homemade marshmallows are perfect for busy home cooks looking to save time in the kitchen! You can prepare the marshmallow base up to 24 hours in advance by blooming the gelatin and making the syrup mixture. Simply follow the first three steps and refrigerate the combined mixture in a covered bowl, ensuring it stays fresh. When you’re ready to serve, whip the mixture as directed in Step 4, then continue with Steps 5 and 6 to set and cut the marshmallows. They will turn out just as fluffy and delicious, ready to elevate your cozy winter drinks or desserts while fitting seamlessly into your meal prep routine. Enjoy that homemade goodness with minimal last-minute effort!
Homemade Marshmallows Recipe FAQs
What type of water should I use for blooming the gelatin?
Absolutely! You should use cold water for blooming the gelatin. This step is crucial, as it ensures that the gelatin hydrates properly, resulting in those lovely fluffy marshmallows. Just pour ½ cup of cold water into a bowl and stir in the 3 tablespoons of gelatin, letting it sit for around 3-5 minutes.
How should I store homemade marshmallows?
To preserve their freshness and delightful texture, store your homemade marshmallows in an airtight container in the fridge for up to two weeks. This keeps them fluffy and ready to elevate your hot cocoa or desserts!
Can I freeze homemade marshmallows?
Yes! For longer storage, you can freeze homemade marshmallows. To do this, layer them in a single layer on a baking sheet separated by parchment paper. Freeze them for up to three months, and when you’re ready to use, simply thaw them in the refrigerator before indulging.
What if my marshmallow mixture didn’t whip up properly?
Very! If your mixture doesn’t whip properly, it could be due to under-whipping or perhaps not reaching the correct syrup temperature. Make sure you whip the mixture on high speed for 5-10 minutes until it reaches fluffy soft peaks. If it hardens too much while whipping, you may need to start over. For future attempts, use a candy thermometer to check that your syrup reaches the soft ball stage at 240°F (115°C).
Are these marshmallows safe for people with dietary restrictions?
Definitely! These homemade marshmallows are gluten-free, provided you choose the right gelatin. Always check the labels to ensure they meet your specific dietary needs, especially if allergies are a concern. For added customization, feel free to swap maple syrup with honey based on your preferences.
Can I adjust the sweetness of my homemade marshmallows?
Absolutely! You can customize the sweetness by modifying the ratio of the water to maple syrup. For sweeter marshmallows, use equal parts (1 cup each) of water and maple syrup. If you’re looking for a less sweet version, adjust to 1.5 cups of water and ½ cup of maple syrup for a balanced taste. Happy marshmallow crafting!
Fluffy Homemade Marshmallow Magic You Can Make Today
Ingredients
Equipment
Method
- Pour ½ cup of cold water into a mixing bowl and whisk in 3 tablespoons of unflavored gelatin. Let sit for 3 to 5 minutes.
- In a saucepan, combine 1 cup of maple syrup, a pinch of sea salt, and 1½ cups of water. Heat until it simmers for about 8 minutes until it reaches 240°F (115°C).
- Carefully pour the syrup mixture over the bloomed gelatin and mix until dissolved.
- Using an electric mixer, whip the combined mixture on high speed for 5 to 10 minutes until fluffy.
- Line a 9x13 inch pan with parchment paper, pour in the marshmallow fluff, and refrigerate for 2 to 3 hours to set.
- Once set, dust your cutting surface with cornstarch and cut the marshmallows into desired shapes.
Leave a Reply