
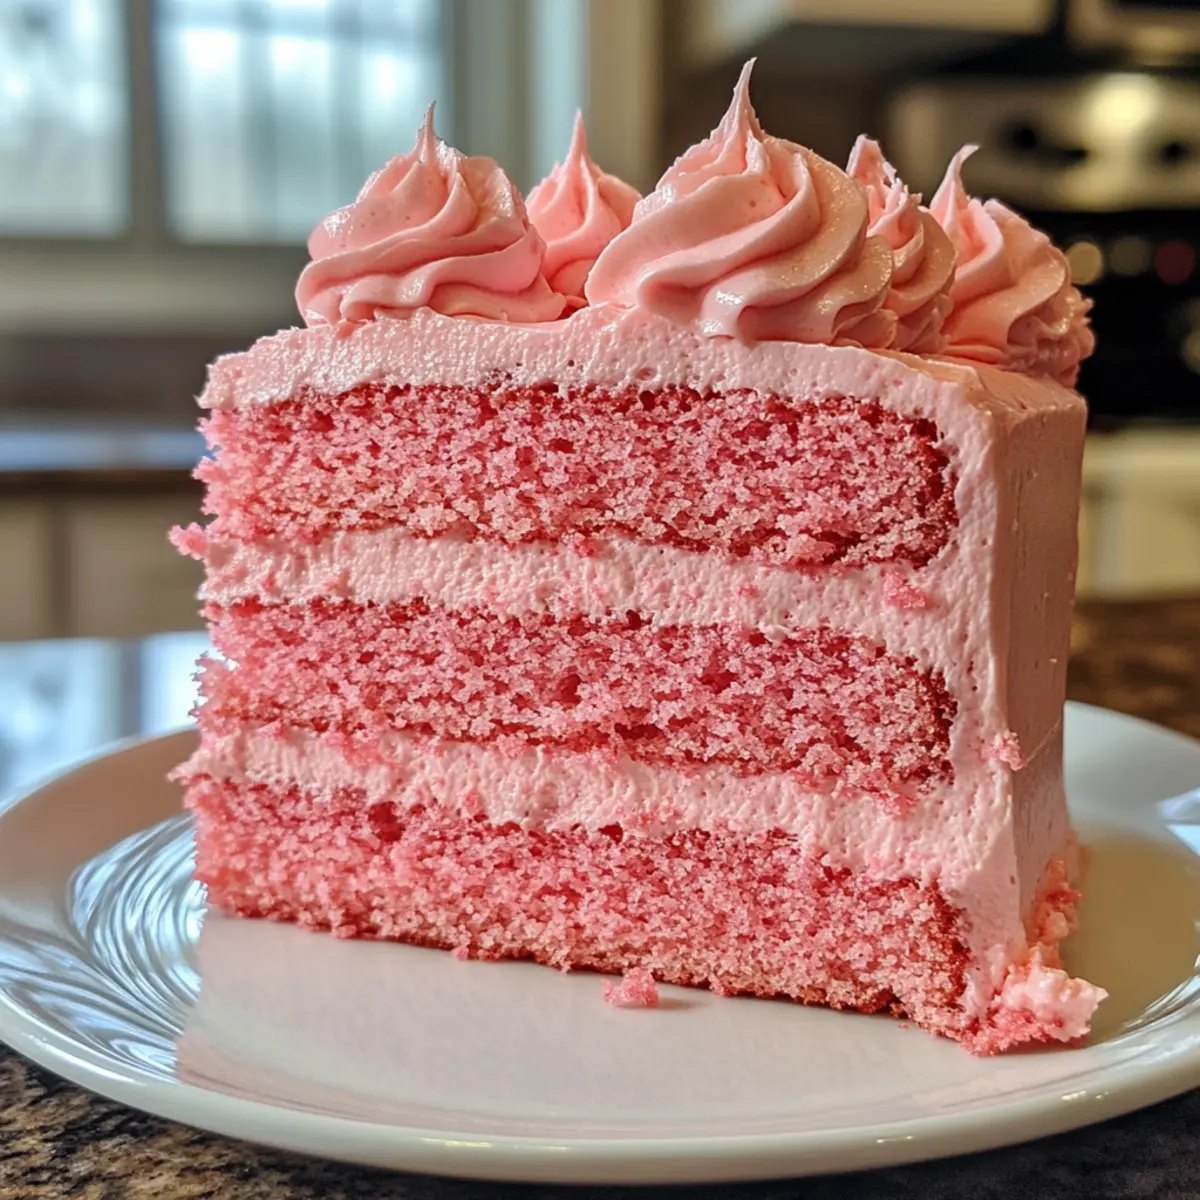
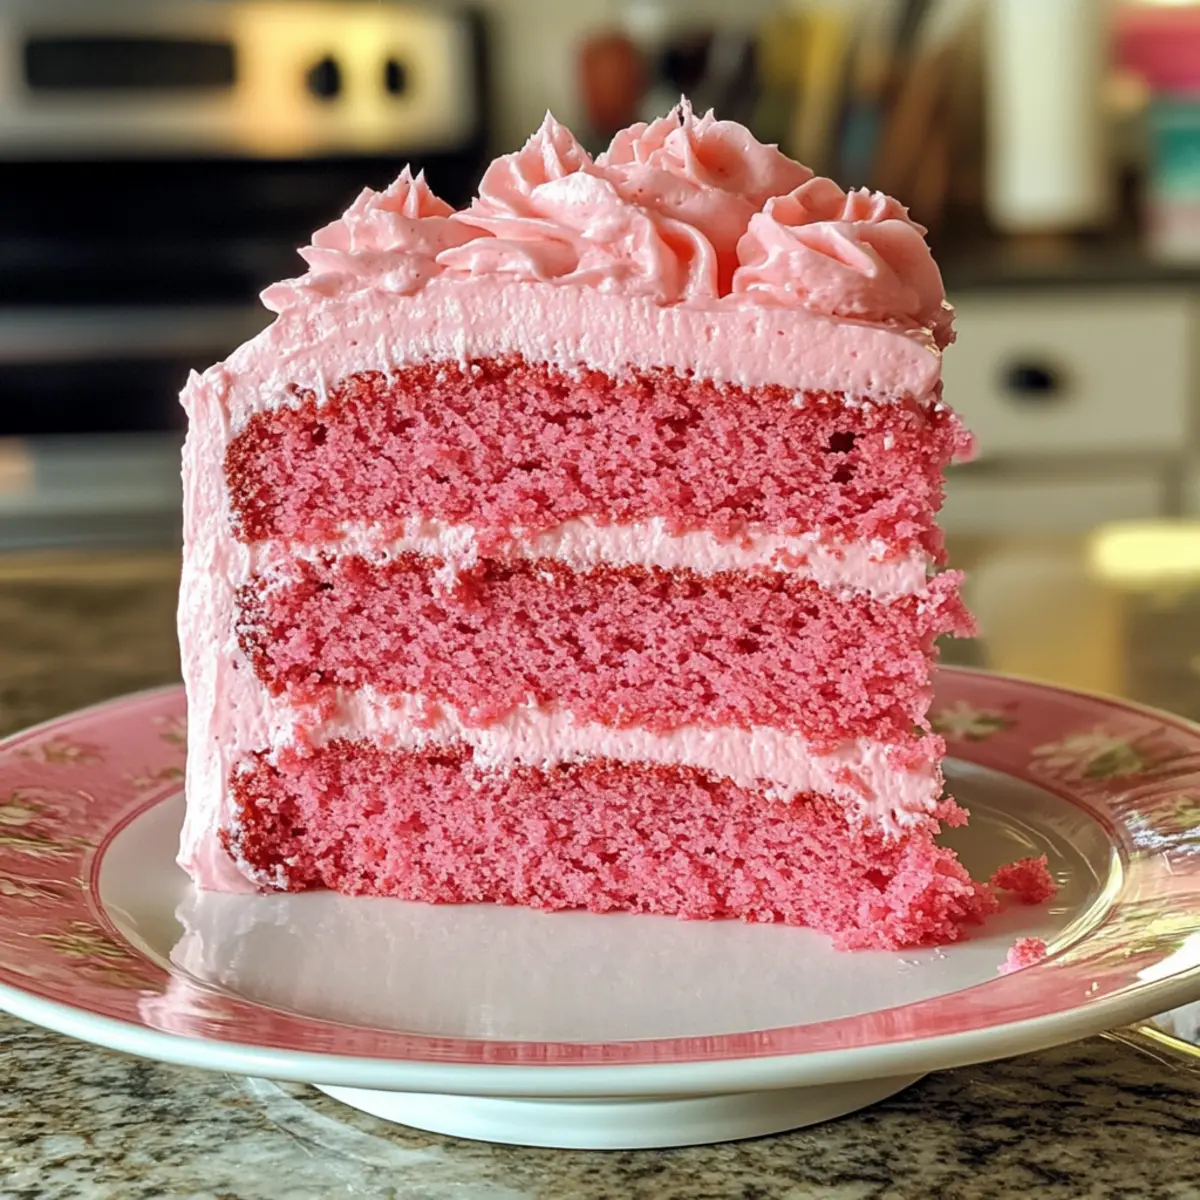
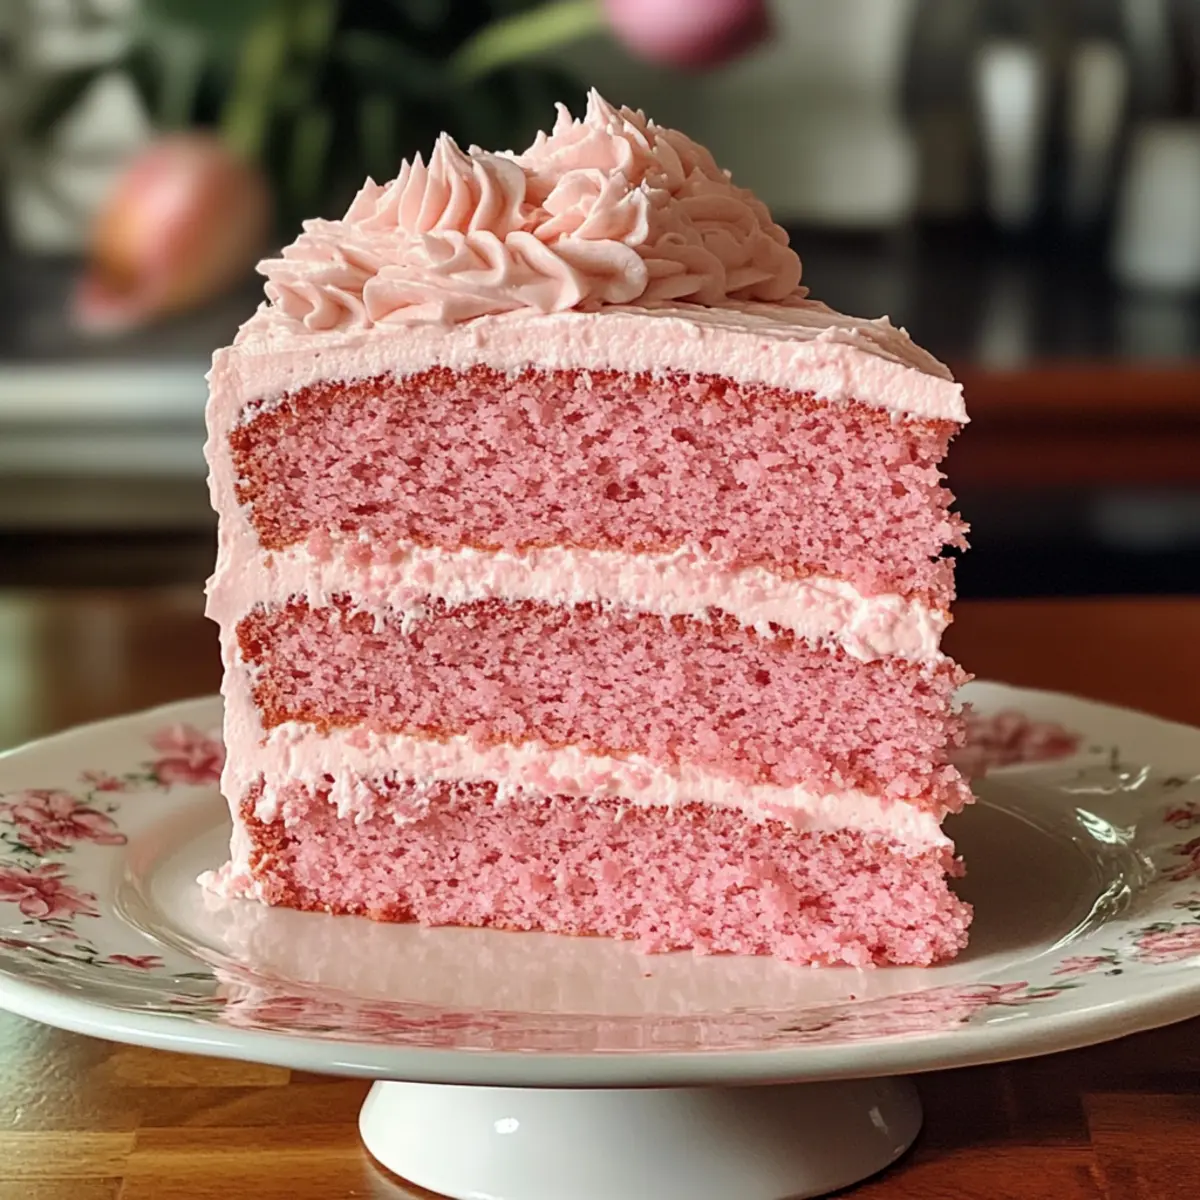
As I sift through memories of joyous family gatherings, the delightful aroma of baking offers a sweet reminder of love and togetherness. Today, I’m excited to share my favorite Mother’s Day Pink Velvet Cake recipe, a stunning dessert that’s sure to be the highlight of your celebration. This cake strikes the perfect balance between rich cocoa and a charming pink hue, beautifully topped with velvety cream cheese frosting. The best part? It’s easy enough for novice bakers to whip up, and it’s a guaranteed crowd-pleaser, making it a wonderful excuse to gather everyone around the table. So, are you ready to learn how to create a masterpiece that will leave everyone asking for seconds? Let’s bake some magic!
Why is Pink Velvet Cake So Special?
Delightful Taste: This cake combines rich cocoa and vanilla, offering a flavor profile that’s both indulgent and familiar. It’s a twist on classic cakes that brightens any gathering!
Visually Stunning: The charming pink hue makes this dessert a showstopper for celebrations, such as Mother’s Day, birthdays, or even intimate dinners.
Easy to Make: Even novice bakers can pull this off with our straightforward instructions, ensuring you’ll impress family and friends without feeling overwhelmed.
Perfect for Sharing: Everyone loves a slice, making it an ideal centerpiece that encourages togetherness. Plus, who doesn’t want to bring a little love to the table?
Customizable Options: Feel free to experiment! Swap in buttercream frosting or add fresh fruits for a personal touch that matches your taste!
Get ready to create sweet memories with this delightful Pink Velvet Cake!
Pink Velvet Cake Ingredients
-
For the Cake
• Cake Flour – Provides the structure and lightness of the cake. Note: Cake flour offers a fine texture; all-purpose flour can be a substitute with adjustments.
• Cocoa Powder – Adds richness and depth to the flavor. Note: Unsweetened cocoa is recommended; Dutch-processed can be used for a darker flavor.
• Baking Powder – Acts as a leavening agent, ensuring the cake rises properly. Note: Check for freshness to ensure effectiveness.
• Salt – Enhances overall flavor balance. Note: Just a pinch improves sweetness perception.
• Unsalted Butter – Provides moisture and creaminess. Note: Allow butter to reach room temperature for optimal creaming.
• Granulated Sugar – Contributes to sweetness and texture. Note: Can be reduced slightly if desired.
• Eggs – Bind the ingredients together and add richness. Note: Use at room temperature for better emulsification.
• Buttermilk – Adds moisture and a slight tanginess to the cake. Note: Milk mixed with vinegar can be a substitute.
• Vanilla Extract – Enhances flavor complexity. Note: Use pure vanilla for best results.
• Red Food Coloring – Imparts the signature pink color. Note: Add gradually until desired hue is achieved. -
For the Frosting
• Cream Cheese – Delivers a tangy richness that pairs well with the cake. Note: Make sure it’s softened for easy spreading.
• Powdered Sugar – Creates a sweet and smooth frosting texture. Note: Sift for a lump-free result.
• Butter – Adds creaminess and helps create a fluffy frosting. Note: Room temperature butter whips up better!
• Vanilla Extract – Enhances the frosting’s flavor. Note: Again, pure vanilla yields the best taste!
Get ready to impress everyone with your Pink Velvet Cake!
Step‑by‑Step Instructions for Pink Velvet Cake
Step 1: Preheat the Oven
Start by preheating your oven to 350°F (175°C). While the oven heats up, prepare two 9-inch round cake pans by greasing them with butter or oil and dusting them with flour. This ensures that your Pink Velvet Cake will release easily after baking, allowing you to achieve smooth, beautiful layers.
Step 2: Combine Dry Ingredients
In a medium-sized mixing bowl, whisk together 2 ½ cups of cake flour, ½ cup of cocoa powder, 1 tablespoon of baking powder, and ½ teaspoon of salt. This step is crucial as it helps to evenly distribute the leavening agents and cocoa throughout the flour. A well-mixed dry mixture means a more consistent texture in your Pink Velvet Cake!
Step 3: Cream Butter and Sugar
In a large mixing bowl, cream together ¾ cup of softened unsalted butter and 1 ¾ cups of granulated sugar using an electric mixer on medium speed. Beat for about 3 minutes until the mixture is light and fluffy. This crucial step incorporates air into the butter, resulting in a tender and moist cake.
Step 4: Add Eggs
Next, add four large eggs to the butter and sugar mixture, one at a time. Mix well after each addition to ensure that each egg is fully incorporated before adding the next. This process helps bind all the ingredients together, contributing to the rich flavor and fluffy texture of your Pink Velvet Cake.
Step 5: Mix in Buttermilk and Flavors
Pour in 1 cup of buttermilk, 2 teaspoons of vanilla extract, and a few drops of red food coloring into the batter. Mix on low speed until combined, allowing the liquid ingredients to enhance the moistness and flavor of your cake. The red food coloring will gradually create that signature pink hue—feel free to adjust to your desired shade!
Step 6: Combine Dry and Wet Mixtures
Gradually fold the dry ingredients into the wet mixture using a spatula. Mix gently until everything is just combined and the batter is smooth. Be careful not to overmix; this will help maintain the lightness and fluffiness of your Pink Velvet Cake.
Step 7: Bake the Cakes
Divide the batter evenly between the prepared cake pans and smooth the tops with a spatula. Bake in your preheated oven for 25-30 minutes, or until a toothpick inserted into the center comes out clean. This is the moment you’ll experience a delightful chocolatey aroma wafting through your kitchen!
Step 8: Cool the Cakes
Once baked, remove the cakes from the oven and let them cool in the pans for about 10 minutes. Then, carefully transfer them to wire racks to cool completely. This cooling step is important for ensuring that the cakes set properly and retain their moisture, making your Pink Velvet Cake irresistibly soft.
Step 9: Frost the Cake
After the cakes have cooled, generously frost the top of one layer with cream cheese frosting before carefully placing the second layer on top. Spread more frosting over the top and gently down the sides for a beautiful finish. This luscious frosting pairs perfectly with the rich flavor of your Pink Velvet Cake!
Tips for the Best Pink Velvet Cake
-
Room Temperature Ingredients: Ensure all your ingredients, especially butter and eggs, are at room temperature for a smooth batter and perfect texture.
-
Mixing Caution: Avoid overmixing when combining the dry and wet ingredients; this prevents a dense cake and keeps the Pink Velvet Cake light and fluffy.
-
Check for Doneness: Test your cakes with a toothpick inserted into the center—if it comes out clean, your Pink Velvet Cake is done baking!
-
Cool Completely: Allow the cakes to cool fully before frosting; this helps the frosting stay intact and prevents melting.
-
Customization Options: Feel free to get creative! Try adding almond extract instead of vanilla or fresh berries on top for a personal touch that enhances flavor.
Make Ahead Options
These Mother’s Day Pink Velvet Cakes are perfect for busy cooks looking to save time during celebrations! You can prepare the cake layers up to 24 hours in advance. Simply bake the cakes, let them cool completely, wrap tightly in plastic wrap, and refrigerate to keep them fresh. The frosting can also be made ahead of time and stored in an airtight container in the refrigerator for up to 3 days. When you’re ready to serve, simply frost the cake and let it come to room temperature for the best flavor. This way, you can enjoy a stunning, homemade dessert without the last-minute rush!
What to Serve with Mother’s Day Pink Velvet Cake
As you plan the perfect celebration around a delightful pink dessert, consider adding complementary flavors and textures to elevate your meal.
-
Fresh Berries: Juicy strawberries or raspberries add a tart contrast to the sweetness of the cake, enhancing each bite. Their vibrant colors bring a festive touch, perfect for special occasions.
-
Vanilla Ice Cream: The creamy richness of vanilla ice cream creates a delightful pairing, balancing the cake’s sweet frosting with its cool creaminess. A scoop alongside each slice will remind you of childhood desserts!
-
Sparkling Lemonade: A refreshing glass of sparkling lemonade cuts through the cake’s sweetness, offering a zesty, light beverage choice that keeps the atmosphere bright and cheerful.
-
Chocolate-Dipped Strawberries: This indulgent treat pairs beautifully, echoing the cocoa notes in the cake while presenting a visually stunning contrast on the plate. They’re a romantic touch, perfect for Mother’s Day!
-
Creamy Mashed Potatoes: They might seem unconventional, but a fluffy side of creamy mashed potatoes can ground a meal celebrating love, balancing sweetness with comforting texture for a memorable feast.
-
Coconut Macarons: These light and chewy cookies provide delightful texture and flavor, making for an elegant dessert pairing that continues the celebration without overwhelming sweetness.
-
Herbal Tea: A soothing cup of herbal tea resonates with the warm, family-focused ambiance of your gathering, offering a calming contrast to the cake’s sweetness.
By thoughtfully curating these pairings, you can create a delightful dining experience that complements your stunning Pink Velvet Cake and fosters lasting memories!
Pink Velvet Cake Customization Ideas
Feel free to let your creativity shine as you make this Pink Velvet Cake your own!
-
Frosting Swap: Replace the creamy cream cheese frosting with light buttercream or airy whipped cream for a different sweet experience. Each option offers a unique texture and sweetness, allowing you to find the perfect match.
-
Almond Extract: Instead of vanilla extract, use almond extract to add a delightful nutty flavor. This twist elevates the cake’s profile and adds an unexpected layer of complexity to each bite.
-
Fresh Berries: Top your cake with a medley of fresh berries to add a burst of freshness. Strawberries, raspberries, or blueberries not only enhance the visual appeal but also bring delightful flavors that beautifully complement the cake’s sweetness.
-
Ice Cream Delight: Serve slices of your cake with a scoop of vanilla ice cream for a decadent dessert. The combination of warm cake with cold ice cream creates a harmonious balance that will delight your taste buds.
-
Spicy Kick: Add a pinch of cayenne or cinnamon to the batter for an exciting kick of warmth. This subtle heat can create a surprising flavor that elevates the classic sweetness of the cake.
-
Lower Sugar Option: Reduce the sugar content a bit for a lighter version while ensuring the cake remains moist and delicious. Adjusting sweetness might also make it enjoyable for those who prefer a less sugary treat!
-
Colorful Sprinkles: For a festive touch, add sprinkles to the top of the frosting. This not only enhances the celebratory spirit but also makes your Pink Velvet Cake visually irresistible.
Experimenting with these variations can transform your Pink Velvet Cake into a unique masterpiece that resonates with your personal taste and style. For more delightful ideas, consider incorporating elements from my other cherished recipes like Strawberry Shortcake or my luscious Chocolate Ganache desserts!
How to Store and Freeze Pink Velvet Cake
Room Temperature: Store unfrosted Pink Velvet Cake at room temperature in an airtight container for up to 3 days to maintain its moisture and flavor.
Fridge: If you have leftovers that are already frosted, keep the cake in the fridge, where it will stay fresh for about 5 days. Make sure it’s covered well to prevent drying out.
Freezer: For longer storage, freeze individual slices of Pink Velvet Cake wrapped tightly in plastic wrap and then aluminum foil for up to 2 months. This way, you can enjoy a piece whenever you crave it!
Reheating: Thaw frozen slices in the fridge overnight, then let them sit at room temperature for about 30 minutes before serving to restore their delightful texture.
Mother’s Day Pink Velvet Cake Recipe FAQs
What type of flour should I use for Pink Velvet Cake?
Using cake flour is ideal for a soft and fluffy texture, but you can substitute with all-purpose flour if needed. Just remember to reduce the liquid slightly since all-purpose flour is denser.
How do I know if my cocoa powder is fresh enough for baking?
Check the expiration date on your cocoa powder. If it’s past its date or you notice any off smells, it’s best to replace it. For baking, fresh cocoa will ensure rich flavor and color in your Pink Velvet Cake!
How long can I store Pink Velvet Cake?
Unfrosted Pink Velvet Cake can be stored at room temperature in an airtight container for up to 3 days. If it’s frosted, keep it in the refrigerator, and it will stay fresh for about 5 days when covered properly to prevent it from drying out.
Can I freeze Pink Velvet Cake, and if so, how?
Absolutely! To freeze your Pink Velvet Cake, slice it first, then wrap each slice tightly in plastic wrap and aluminum foil. It can be stored in the freezer for up to 2 months. When you’re ready to enjoy it, simply thaw in the fridge overnight and let it sit at room temperature for 30 minutes before serving for that fresh-baked taste!
Is there a way to make this cake allergy-friendly?
Yes! To make the Pink Velvet Cake suitable for various dietary needs, you can use gluten-free all-purpose flour as a substitute for regular flour. For dairy-free options, consider using almond milk mixed with vinegar instead of buttermilk and a dairy-free butter substitute for frosting. Just be sure to check the specifics of any ingredients used to ensure they fit your dietary requirements.
What can I do if my cake layers are uneven?
If your Pink Velvet Cake layers are uneven after baking, it’s easiest to trim the tops with a serrated knife to create a level surface for frosting. You can also bake the layers for a couple more minutes if they’re slightly undercooked; just be cautious not to overdo it!

Fluffy Pink Velvet Cake That Celebrates Every Occasion
Ingredients
Equipment
Method
- Preheat your oven to 350°F (175°C) and prepare two 9-inch round cake pans by greasing them and dusting with flour.
- In a medium bowl, whisk together the cake flour, cocoa powder, baking powder, and salt.
- In a large mixing bowl, cream together the softened butter and granulated sugar for about 3 minutes until light and fluffy.
- Add the eggs one at a time, mixing well after each addition.
- Mix in the buttermilk, vanilla extract, and food coloring until combined.
- Gradually fold the dry ingredients into the wet mixture until just combined.
- Divide the batter evenly between the prepared cake pans and bake for 25-30 minutes or until a toothpick comes out clean.
- Let the cakes cool in the pans for about 10 minutes, then transfer to wire racks to cool completely.
- Once cooled, frost the top of one layer with cream cheese frosting, top with the second layer, and frost the top and sides.
Leave a Reply