
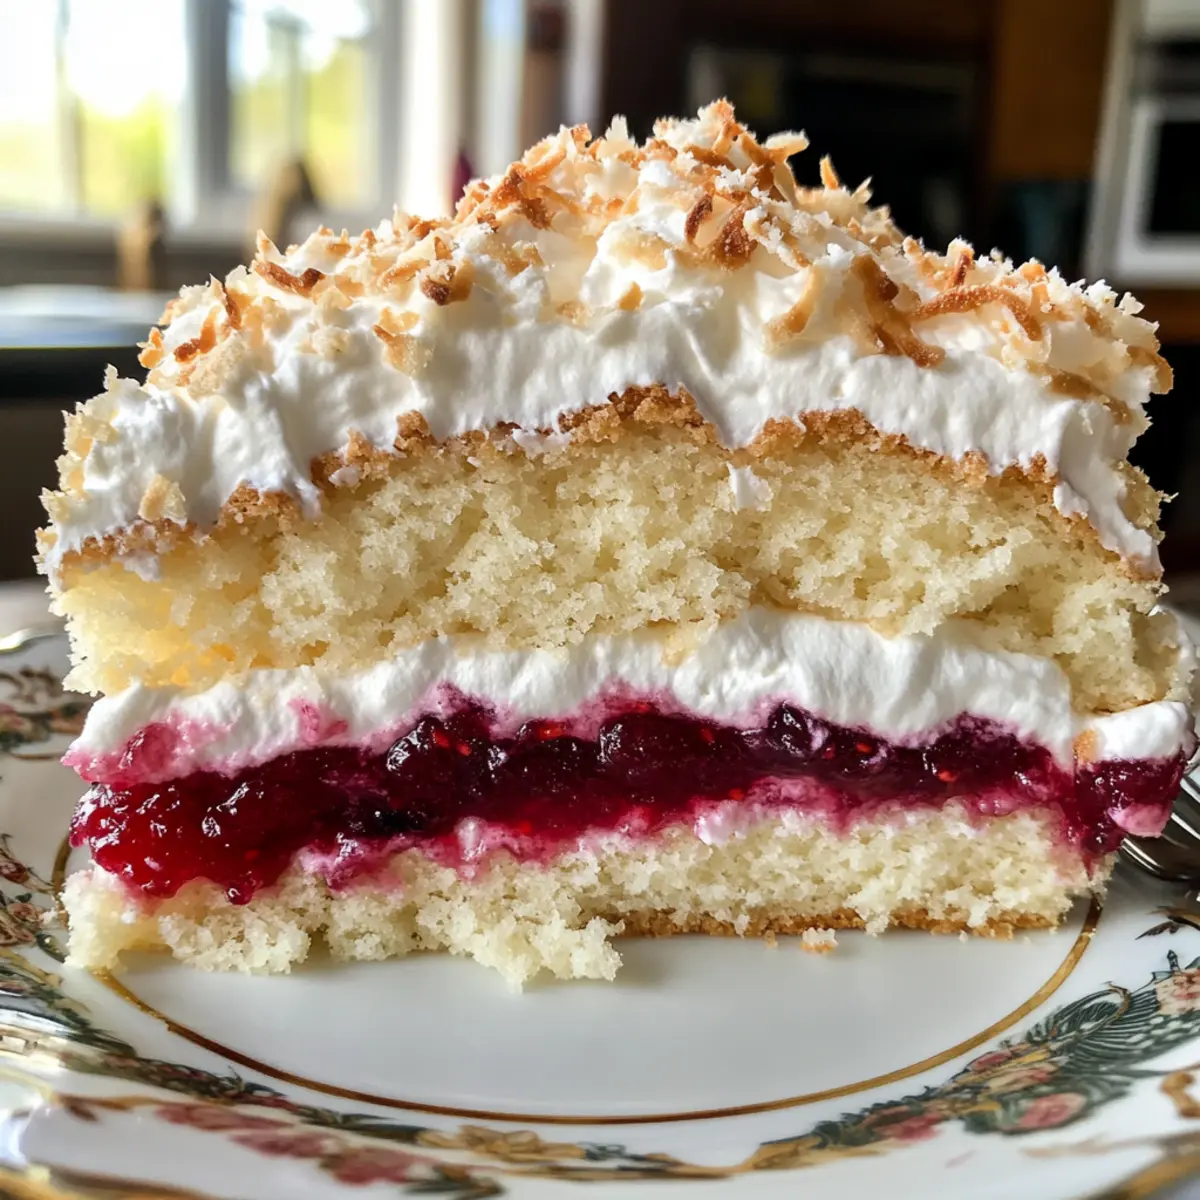
As I took my first bite of the Classic New Zealand Louise Cake, a rush of memories flooded in—a cozy afternoon with family and friends, laughter filling the air. This beloved dessert features a buttery shortbread base, layered with tangy raspberry jam, and topped with a cloud-like coconut meringue that adds an irresistible sweetness. What I adore most about this indulgence is how easy it is to whip up; perfect for those days when you crave something homemade but are short on time! Not to mention, it’s an absolute crowd-pleaser, sure to impress anyone who has the pleasure of sharing a slice. Are you ready to create a moment of nostalgia along with me? Let’s dive into the delightful world of Louise Cake!
Why is Louise Cake a Must-Try?
Nostalgic Comfort: Each bite transports you back to cherished family gatherings, making it a perfect way to relive those sweet memories.
Effortless Preparation: With straightforward steps, even novice bakers can create this stunning dessert, injecting homemade joy into any occasion.
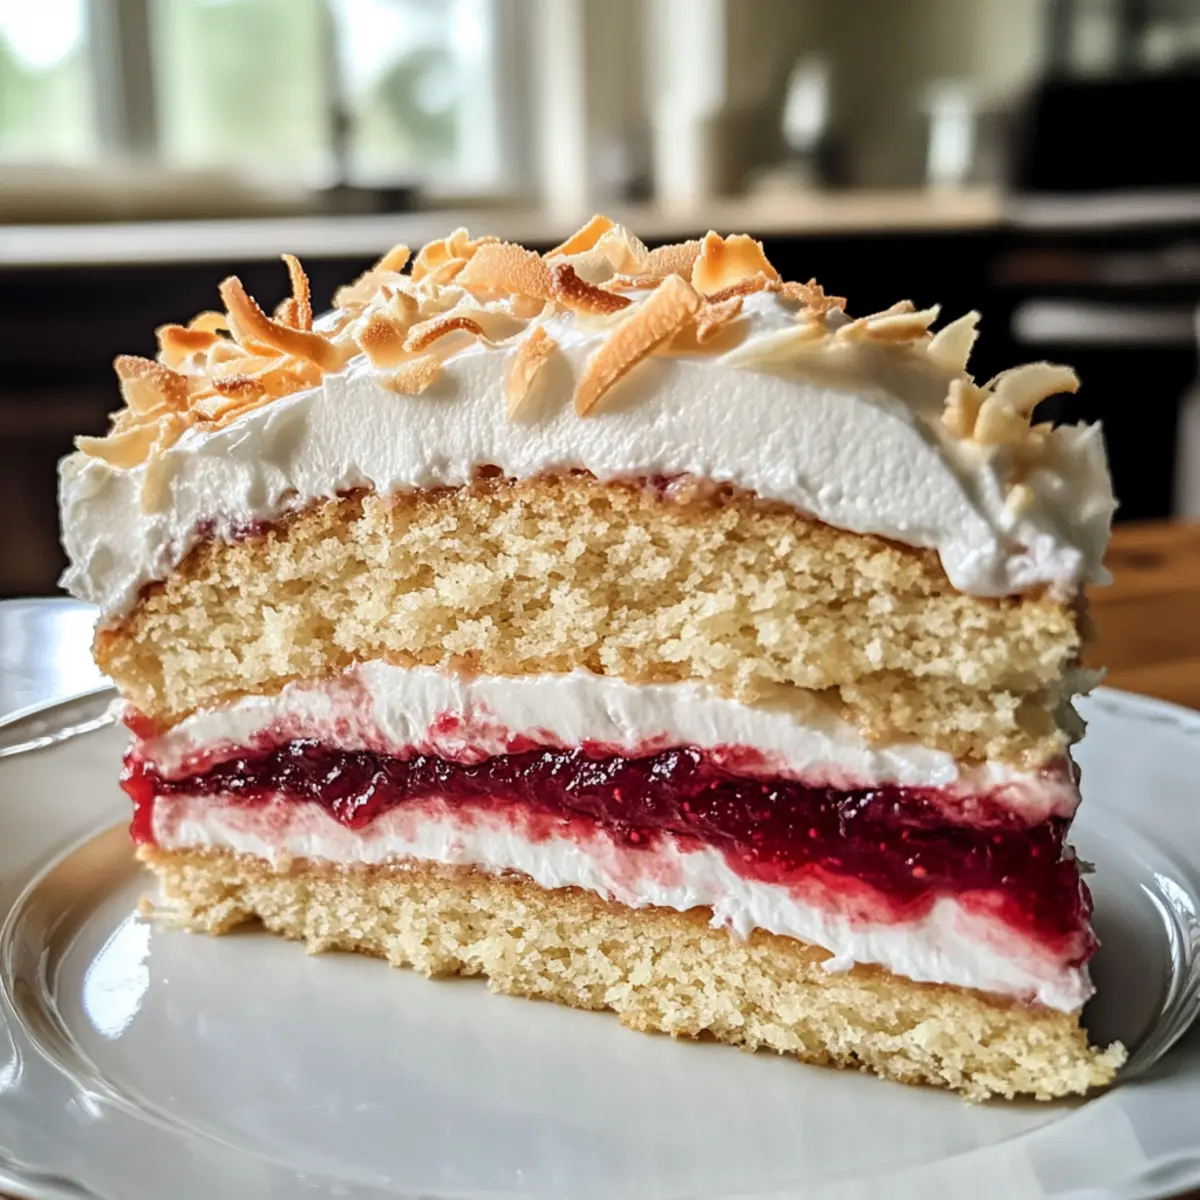
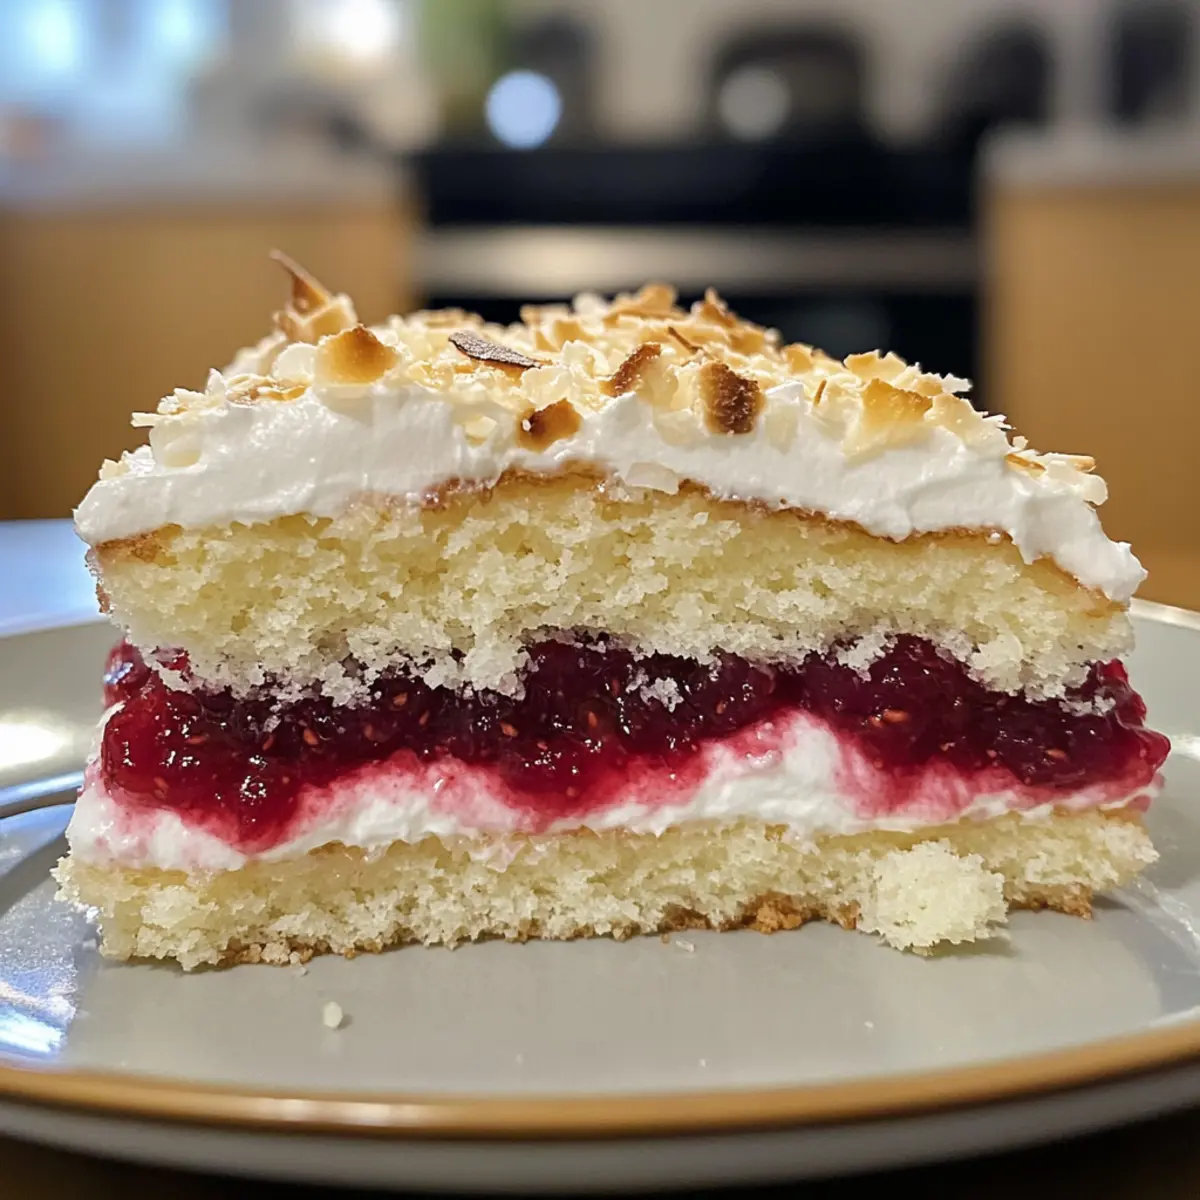
Flavor Fusion: The delightful combination of buttery shortbread, tangy raspberry jam, and fluffy coconut meringue ensures a taste sensation that’s both unique and satisfying.
Impressive Presentation: This cake not only tastes great but looks stunning, making it an instant star at tea parties or potlucks.
Versatile Variations: Feel free to try different jam flavors or meringue thickness, allowing personal touches that cater to your taste preferences.
Indulge in this Classic New Zealand treat and check out our Serving Suggestions for pairing ideas that elevate your dessert experience!
Louise Cake Ingredients
For the Shortbread Base
- All-purpose Flour – Provides structure; substitute with gluten-free flour for a gluten-free version.
- Unsalted Butter – Adds richness and flavor; can use salted butter, but reduce added salt by 1/4 tsp.
- Caster Sugar (or Granulated Sugar) – Sweetness and helps with meringue stability; you can replace it with granulated sugar since it dissolves well in the Swiss meringue method.
- Egg Yolks (2) – Adds moisture and richness to the shortbread; don’t skip this element for the perfect base!
- Salt – Enhances flavors; the quantity may vary based on the type of salt used.
For the Raspberry Layer
- Raspberry Jam – Adds fruity sweetness and moisture; using fresh or homemade jam can enhance the flavor of your Louise Cake.
For the Meringue Topping
- Egg Whites (5) – Essential for making the fluffy meringue; can scale back to 3 whites for a thinner meringue, adjusting sugar to 170g.
- Caster Sugar – Stabilizes the meringue; ensure you use caster sugar for the best texture in your meringue.
- Shredded Coconut – Provides texture and flavor to the meringue; desiccated coconut can be used as a substitute, maintaining the same weight.
Dive into your baking journey with these ingredients and create a mouthwatering Louise Cake that will delight and inspire!
Step‑by‑Step Instructions for Louise Cake
Step 1: Preheat and Prepare
Begin by preheating your oven to 350°F (175°C). While it heats, line a 9-inch square pan with parchment paper, securing it with binder clips to prevent slippage. Ensuring your pan is ready will make transferring the Louise Cake smoother once baked.
Step 2: Create the Shortbread Base
In a large mixing bowl, cream together 1 cup of softened unsalted butter and 1 cup of caster sugar until the mixture becomes light and fluffy, around 3-5 minutes. Gradually add in 2 egg yolks, mixing thoroughly. Gently fold in 2 cups of sifted all-purpose flour and a pinch of salt, kneading until you form a smooth dough. Press this mixture evenly into your lined pan.
Step 3: Add the Raspberry Layer
Spread a generous layer of raspberry jam over the smooth shortbread base. Aim for an even distribution, covering the entire surface, around 1/2 inch thick. The tangy raspberry jam adds moisture and flavor to your classic Louise Cake, so don’t be shy with this delightful topping.
Step 4: Prepare the Meringue
Set up a double boiler with simmering water. In a heatproof bowl, combine 5 egg whites and 1 cup of caster sugar, whisking gently until the sugar dissolves completely, about 5 minutes. Once dissolved, transfer the bowl to your mixer and whip the mixture until stiff peaks form, which should take another 3-5 minutes. The meringue will be glossy and stable.
Step 5: Fold in Coconut
Carefully fold 1 cup of shredded coconut into the whipped meringue using a spatula. This will add texture and flavor to your Louise Cake topping. Be gentle to maintain the airiness of the meringue, ensuring a lovely, fluffy finish.
Step 6: Assemble and Bake
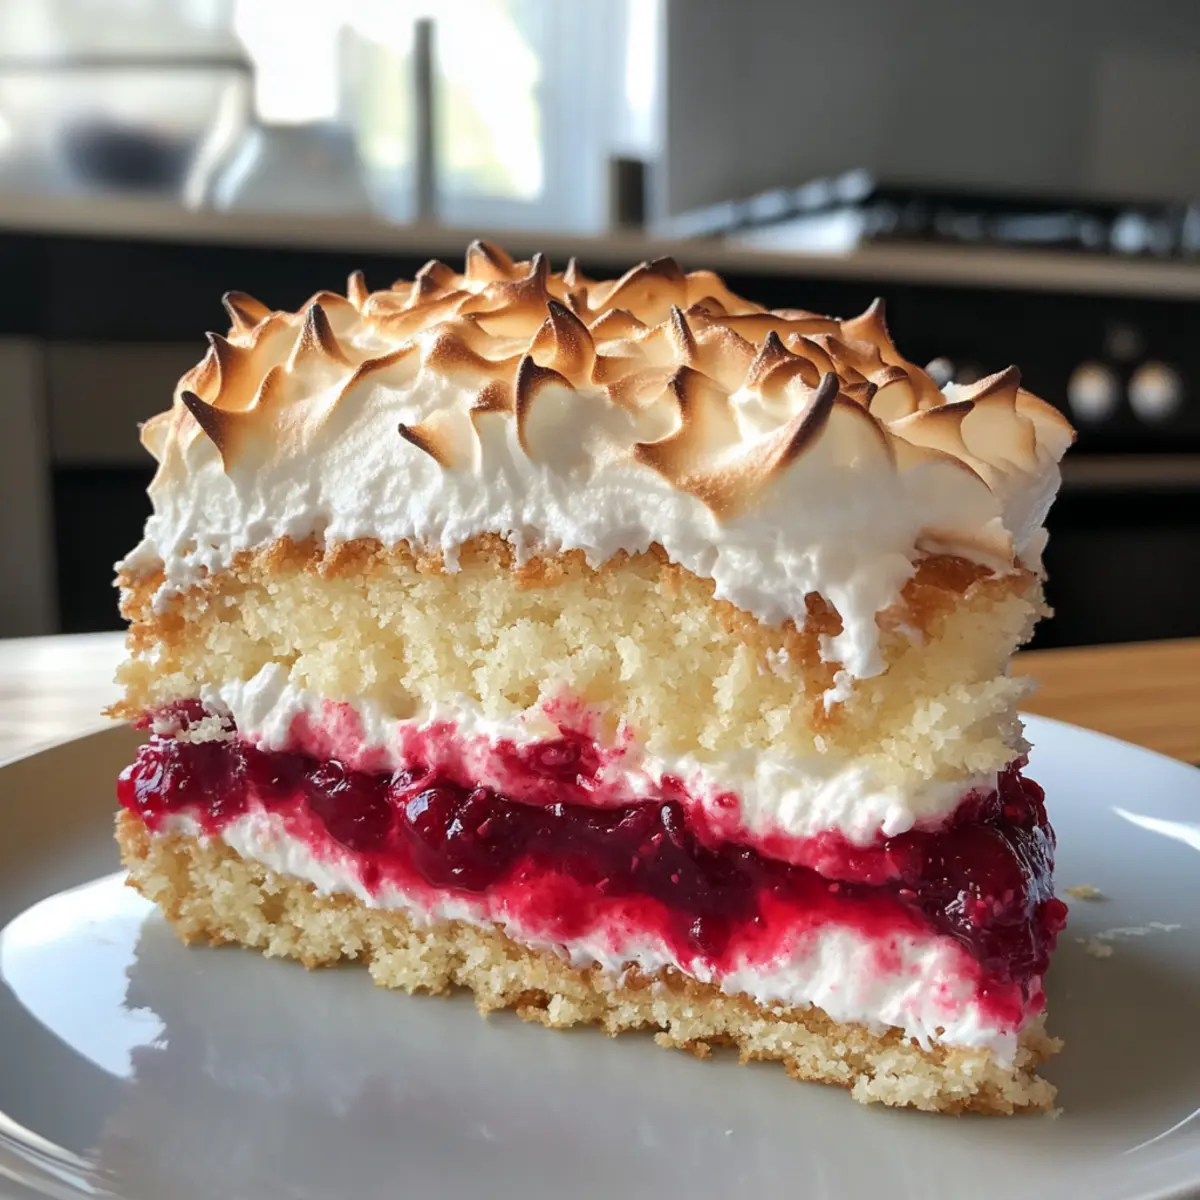
Spoon the meringue over the jam layer, spreading it evenly to cover the surface while creating soft peaks for visual appeal. Place the assembled Louise Cake in the preheated oven and bake for 30 minutes, or until the meringue is golden brown on top, achieving that perfect toasty finish.
Step 7: Cool and Slice
Once baked, remove the cake from the oven, and let it cool in the pan for at least 20 minutes. This cooling step ensures the meringue sets properly. Once cooled, gently lift the Louise Cake out of the pan using the parchment paper, slice into squares, and serve to enjoy this classic treat!
How to Store and Freeze Louise Cake
Room Temperature: Keep the cake wrapped in plastic wrap or in an airtight container at room temperature for up to 3 days. This maintains the meringue’s fluffiness and the shortbread’s tenderness.
Fridge: If you need to store it longer, place the cake in the fridge for up to a week. Just be sure to cover it well to prevent it from drying out.
Freezer: For longer storage, freeze the Louise Cake for up to 3 months. Wrap tightly in foil or place in an airtight container to prevent freezer burn. When ready to enjoy, thaw in the refrigerator overnight.
Reheating: Avoid reheating the meringue, as it may lose its texture. Instead, serve cold or at room temperature for the best experience of your delightful Louise Cake.
Louise Cake: Customization Ideas
Feel free to get creative with your Louise Cake! Explore these delightful variations to suit your tastes and dietary needs.
-
Gluten-Free: Swap all-purpose flour with a gluten-free flour blend to enjoy this treat without gluten. It’s a delicious way to cater to dietary preferences while keeping the flavors intact.
-
Jam Flavor Swap: Use apricot, strawberry, or mixed berry jam to change up the flavor profile of your cake. Each fruit brings its unique twist, adding a personal touch that surprises the palate.
-
Dairy-Free Option: Substitute the unsalted butter with coconut oil for a dairy-free version, and enjoy the same rich texture without sacrificing taste. Baking becomes more inclusive!
-
Thicker Meringue: Increase the egg whites to 6 and maintain the same sugar ratio for a thicker, fluffier meringue layer that really steals the show. This adds an impressive height and a cloud-like texture to your Louise Cake.
-
Coconut Variations: Use sweetened shredded coconut for added sweetness or try toasted coconut for a delightful crunch and deeper flavor. The options here elevate the meringue experience!
-
Chocolate Drizzle: Melt dark chocolate and drizzle it over the cooled cake for an extra layer of indulgence. The rich chocolate pairs beautifully with the fruity tartness of the raspberry jam.
-
Nutty Twist: Fold in chopped pecans or walnuts into the meringue for added crunch and a nutty flavor. This creates a delightful texture contrast alongside the creamy meringue.
-
Spicy Kick: Add a pinch of cayenne pepper to the meringue for those who enjoy a surprising twist! It’s a fun way to elevate the flavors and excite the taste buds.
Tailor your Louise Cake experience to your heart’s content, and don’t forget to pair it with a warm cup of tea. Check out these helpful Serving Suggestions for delightful pairings that complement this lovely dessert!
Expert Tips for Louise Cake
-
Double Boiler Benefits: Using a double boiler for the meringue ensures even heat distribution, preventing the egg whites from cooking too fast and resulting in a smoother texture.
-
Cool Completely: Allowing the Louise Cake to cool entirely before slicing helps prevent the meringue from cracking and ensures clean cuts for beautiful presentation.
-
Binder Clip Caution: While binder clips are useful for securing parchment paper, make sure they’re placed in a way that they don’t affect the rising of the meringue during baking.
-
Adjusting Coconut: If using different types of coconut, monitor the sugar in the meringue. This will keep the sweetness balanced and your Louise Cake deliciously delightful!
-
Jam Thickness Matters: Spread the raspberry jam evenly, aiming for about a half-inch layer. This enhances the moisture and flavor, making each bite of your Louise Cake truly memorable.
What to Serve with Classic New Zealand Louise Cake?
Elevate your dessert experience with delightful pairings that perfectly complement this nostalgic treat.
-
Fresh Berries: A medley of raspberries, strawberries, and blueberries brightens the flavors of the cake while adding a refreshing touch. Their natural sweetness and tartness enhance the raspberry jam layer beautifully.
-
Whipped Cream: Lightly sweetened whipped cream adds a creamy texture that balances the airy coconut meringue, making each bite more indulgent. It’s a classic pairing that never disappoints.
-
Vanilla Ice Cream: The rich creaminess of vanilla ice cream offers a warm contrast to the chilled cake. The ice cream melts slightly into the shortbread, creating a heavenly flavor fusion.
-
Herbal Tea: A soothing cup of chamomile or mint tea brings an aromatic lift as you savor the layers of your Louise Cake. The warmth of the tea pairs wonderfully with the fluffy meringue and fruity filling.
-
Lemonade: A bubbly, homemade lemonade adds a zingy twist, cutting through the sweetness of the cake. Its refreshing quality provides a delightful contrast that invigorates the palate.
-
Chocolate Drizzle: A drizzle of rich chocolate sauce across the meringue topping adds a decadent touch. The bittersweet notes of chocolate enhance the overall sweetness, making for a luscious dessert experience.
Your Classic New Zealand Louise Cake deserves these delightful companions to take it from simply delicious to an unforgettable feast!
Make Ahead Options
These Classic New Zealand Louise Cakes are perfect for busy home cooks looking to save time! You can prepare the shortbread base up to 24 hours in advance; simply press it into the pan, cover it tightly with plastic wrap, and refrigerate. Additionally, the raspberry jam layer can be spread on the base before serving, allowing you to enjoy flavors that meld overnight. To maintain the meringue’s fluffy texture, whip it just before baking, as it’s best fresh. When ready to impress, simply top with the prepared meringue and bake for 30 minutes for delicious results that taste just made!
Louise Cake Recipe FAQs
What is the best type of raspberry jam to use?
Absolutely, using the best raspberry jam is crucial! Fresh or homemade jam tends to enhance the flavor dramatically, giving your Classic New Zealand Louise Cake that extra touch of authenticity and sweetness. If store-bought is your choice, opt for brands that use real fruit and low sugar for a more natural taste.
How should I store leftover Louise Cake?
To keep your Louise Cake fresh, store it at room temperature wrapped in plastic wrap or in an airtight container for up to 3 days. If you want to enjoy it longer, you can refrigerate it for up to a week—just ensure it’s well covered to prevent drying out.
Can I freeze Louise Cake?
Yes, you can freeze your Louise Cake! Wrap it tightly in foil or place it in an airtight container to avoid freezer burn. It can be stored for up to 3 months. When you’re ready to enjoy it, simply thaw it in the refrigerator overnight, and it will still taste wonderfully fresh!
What if the meringue doesn’t whip to stiff peaks?
Very common! If your meringue doesn’t reach stiff peaks, it could be due to residual grease in your mixing bowl, so make sure it’s completely clean and dry before using. You can also ensure that no yolk gets into the egg whites, as even a small amount can affect whipping. If you’re still having trouble, try adding a pinch of cream of tartar to stabilize the egg whites.
Is there a gluten-free option for Louise Cake?
Of course! You can substitute the all-purpose flour with a gluten-free flour blend that measures cup-for-cup. This keeps the integrity of the cake while accommodating those with gluten sensitivities. Just confirm that your other ingredients, like baking powder and butter, are also gluten-free.
How do I get the meringue perfectly golden?
To achieve that beautiful golden meringue on your Louise Cake, make sure to bake it at 350°F (175°C) for the full 30 minutes without opening the oven door. Keep an eye on it toward the end—once it turns a lovely golden brown, it indicates it’s ready and perfectly set without falling flat!
Delightful Louise Cake: A Cozy Twist on a Kiwi Classic
Ingredients
Equipment
Method
- Preheat your oven to 350°F (175°C) and line a 9-inch square pan with parchment paper.
- Cream together 1 cup of softened unsalted butter and 1 cup of caster sugar until light and fluffy. Add 2 egg yolks and mix thoroughly. Fold in 2 cups of all-purpose flour and a pinch of salt to form a dough.
- Spread a generous layer of raspberry jam over the shortbread base.
- Combine 5 egg whites and 1 cup of caster sugar in a heatproof bowl set over a double boiler, whisk until sugar dissolves, then whip until stiff peaks form.
- Fold 1 cup of shredded coconut into the meringue carefully to maintain airiness.
- Spoon the meringue over the jam layer and spread evenly. Bake for 30 minutes until golden brown.
- Let the cake cool in the pan for at least 20 minutes before lifting out, slicing and serving.
Leave a Reply