
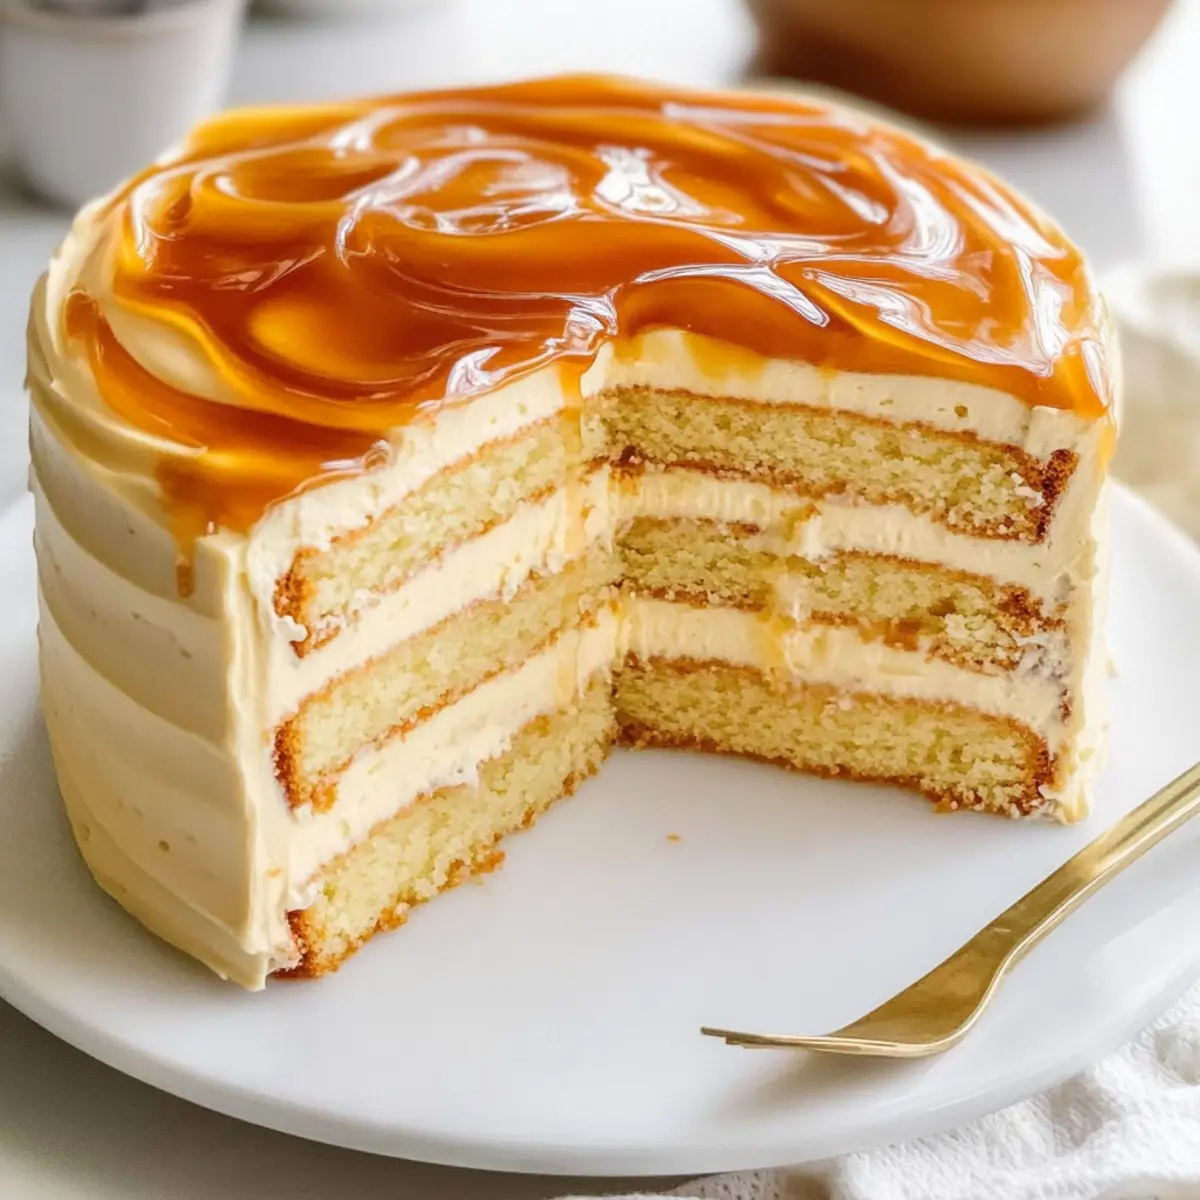
As I unwrapped the warm, sweet aroma of vanilla cake mingling with the inviting scent of caramel, I knew I was in for a treat. This Moist Salted Caramel Cake is a true masterpiece for anyone who appreciates the balance of rich and sweet flavors. It features delicate layers of fluffy vanilla cake perfectly paired with a velvety homemade salted caramel and a buttery buttercream that will leave you craving more. One of the best parts? It’s a crowd-pleaser that will shine at any celebration—whether you’re celebrating a birthday, an anniversary, or just a Tuesday. Plus, the quick prep time means you can whip this beauty up without spending an entire day in the kitchen. Are you ready to embark on this sweet baking adventure with me?
Why is This Cake So Irresistible?
Unforgettable Flavor: Each bite of this Salted Caramel Cake bursts with rich, buttery caramel and soft vanilla, creating a perfect balance of sweet and savory.
Simple Technique: You don’t need to be a professional baker! This recipe features straightforward steps, making it easy for anyone to achieve that gourmet cake experience at home.
Impressive Presentation: With glistening layers drizzled in caramel, this cake is a show-stopper that will wow your guests at any gathering.
Versatile Pairing: Ideal for celebrations, it pairs flawlessly with coffee or tea, making it just as suitable for a casual get-together as for a lavish dinner party.
In just an afternoon, you can create this masterpiece that your friends and family will rave about—truly a treat that keeps on giving! If you’re looking for another delicious creation, check out my recipe for Creamy Buttercream Frosting.
Salted Caramel Cake Ingredients
For the Cake
• Granulated Sugar – The primary sweetener that helps balance the flavors in your Salted Caramel Cake.
• All-Purpose Flour – Provides structure, ensuring your cake layers rise beautifully.
• Cornstarch – Aids in achieving a tender, moist crumb for that melt-in-the-mouth experience.
• Baking Powder/Baking Soda – Leavening agents that will give your cake the perfect lift.
• Sour Cream – Adds a delightful tang and moisture to keep the cake tender.
• Butter – Enriches the cake with a luscious richness, contributing to its melt-in-your-mouth quality.
• Vegetable Oil – Ensures extra moisture and softness for an incredibly tender cake.
• Vanilla Extract – Enhances the flavor of the cake, infusing it with a lovely aroma.
• Eggs – Binds the ingredients together while adding structure and moisture.
For the Salted Caramel
• Granulated Sugar – The base for your caramel, bringing that delicious sweetness.
• Water – Helps dissolve sugar evenly and promotes even caramelization.
• Butter – Adds richness to your caramel, helping it achieve a smooth texture.
• Heavy Cream – Makes the caramel rich and creamy, perfect for drizzling and folding into buttercream.
• Salt – The key ingredient that elevates the flavors and gives you that sought-after salted taste.
For the Buttercream Frosting
• Unsalted Butter – Whipped until light and fluffy, this forms the base of your creamy frosting.
• Powdered Sugar – Adds sweetness and creates that signature silky texture in your buttercream.
• Vanilla Extract – Enhances the overall flavor profile, making each bite a delight.
• Salted Caramel Sauce – Swirled into the frosting for an extra layer of flavor that ties everything together.
Step‑by‑Step Instructions for Salted Caramel Cake
Step 1: Prepare the Salted Caramel
In a medium saucepan, combine granulated sugar and water over medium heat, stirring until the sugar dissolves. Allow it to boil without stirring until it turns a rich amber color, about 8-10 minutes. Once golden, carefully add butter and heavy cream in stages, stirring continuously until smooth. Mix in salt, then transfer the caramel to a bowl and let it cool to room temperature.
Step 2: Make the Cake Batter
Preheat your oven to 340°F (170°C) and grease two 9-inch round cake pans. In a large mixing bowl, cream together the butter and granulated sugar until fluffy, about 3-4 minutes. Then, add eggs one at a time, fully incorporating each before adding the next. Gradually mix in the sour cream and vanilla extract, then gently fold the dry ingredients into the wet in two parts, ensuring a smooth batter.
Step 3: Bake Cake Layers
Pour equal amounts of the batter into the prepared cake pans, smoothing the tops with a spatula. Place them in the preheated oven and bake for 20-23 minutes, or until a toothpick inserted in the center comes out clean. The cakes should be slightly golden and spring back to the touch. Once done, remove from the oven and allow them to cool in the pans for 10 minutes before transferring them to a wire rack.
Step 4: Cool the Cake
Let the cake layers cool completely on the wire rack to ensure they hold their structure during frosting. This usually takes about 30-45 minutes. Once cool, level the tops of the cakes with a serrated knife if necessary, ensuring they are even for stacking. It’s important that the layers are completely cool to prevent the buttercream from melting when applied.
Step 5: Prepare the Buttercream Frosting
In a large mixing bowl, beat the unsalted butter with an electric mixer on medium speed until light and fluffy, about 4-5 minutes. Gradually add powdered sugar, mixing on low until incorporated. Then, add in vanilla extract and 1/4 cup of the cooled salted caramel, beating until the frosting is smooth and creamy. If too thick, add a little more cream to reach your desired consistency.
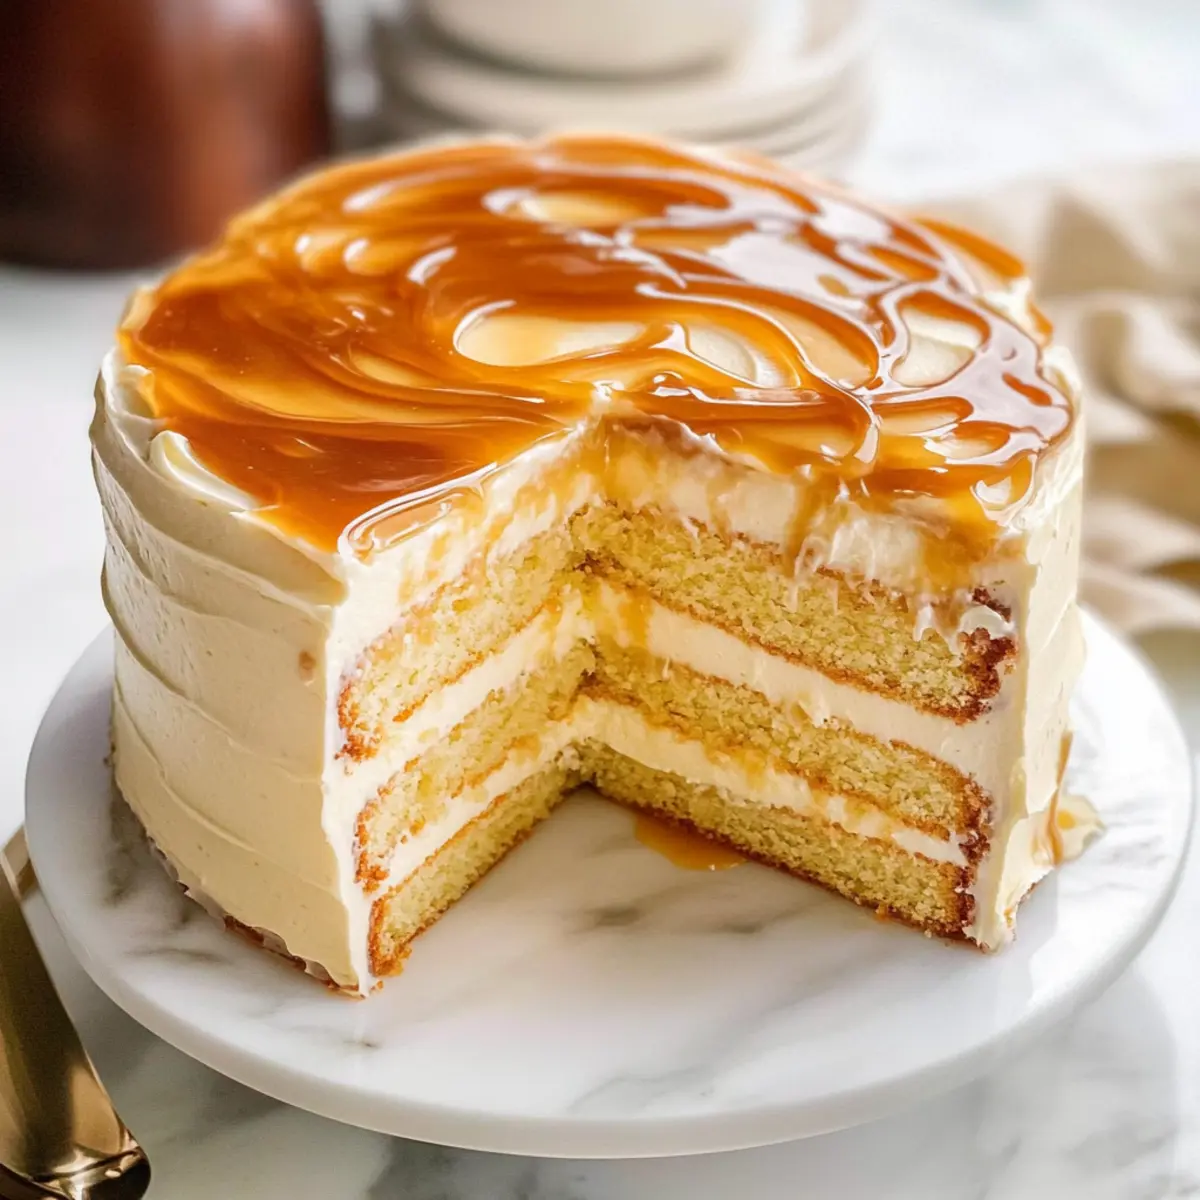
Step 6: Assemble the Cake
Begin by placing one cake layer on a serving platter. Generously spread a layer of buttercream on top, followed by a drizzle of salted caramel. Place the second cake layer on top and gently press down to secure it. Apply a thin crumb coat of buttercream around the entire cake, then chill for about 20 minutes to set it before applying the final layer of frosting.
Step 7: Decorate and Serve
Once chilled, generously frost the top and sides of the cake with the remaining buttercream until bold and smooth. Drizzle the top with more salted caramel for added flair, letting it cascade down the sides for a beautiful finish. For an extra touch, sprinkle sea salt over the top. Slice and serve your delightful Salted Caramel Cake, and watch as everyone enjoys this luxurious dessert!

Salted Caramel Cake Variations
Feel free to let your creativity shine as you customize this delightful cake to suit your taste!
-
Dairy-Free: Swap butter and heavy cream for coconut oil and full-fat coconut milk. The result is a rich, luscious ‘caramel’ flavor that’s perfect for dairy-sensitive friends.
-
Gluten-Free: Substitute all-purpose flour with a gluten-free blend or almond flour. It will lend a slightly nutty taste while keeping the cake moist and tender.
-
Nutty Twist: Stir in 1/2 cup of finely chopped nuts like pecans or walnuts into the batter. This adds a lovely crunch and hints of flavor that elevate each bite.
-
Chocolate Infusion: Replace a quarter of the flour with cocoa powder for a chocolate-flavored base. Pair with chocolate buttercream for a luxurious twist.
-
Hazelnut Flavor: Instead of vanilla extract, use hazelnut extract for a beautiful nutty depth that beautifully complements the salted caramel.
-
Spicy Heat: Add a pinch of cayenne pepper or ground ginger to the cake batter for a subtle spicy kick. This unexpected heat dances on your palate, balancing perfectly with the sweetness.
-
Fruit Layer: Incorporate layers of fresh fruit, like raspberries or bananas, between the cake and frosting. The fruity tartness cuts the sweetness, making it wonderfully refreshing.
-
Layered Delight: For a stunning presentation, make a three-tiered version of this cake. This eye-catching display will surely be the highlight of any celebration!
No matter how you choose to personalize this Salted Caramel Cake, consider pairing it with a delicious cup of coffee or checking out my Creamy Buttercream Frosting recipe for the ultimate dessert experience!
How to Store and Freeze Salted Caramel Cake
Room Temperature: Preserve your cake at room temperature for up to 2 days, covered with a cake dome or wrapped in plastic to keep it moist.
Fridge: Store leftovers in an airtight container for up to 5 days. Allow to come to room temperature before serving for the best flavor experience.
Freezer: For longer storage, wrap the cake tightly in plastic wrap and then in aluminum foil; it can be frozen for up to 2 months.
Reheating: If desired, thaw the Frozen Salted Caramel Cake in the fridge overnight, then warm individual slices briefly in the microwave (10-15 seconds) or enjoy chilled!
Expert Tips for the Best Salted Caramel Cake
-
Room Temperature Ingredients: Ensure all ingredients, especially eggs and sour cream, are at room temperature for better mixing and a fluffier cake.
-
Caramel Watch: Monitor the caramel carefully while it cooks; burning can happen quickly, so stay nearby until it reaches that perfect amber color.
-
Cooling Matters: Allow the cakes to cool completely before frosting. Frosting a warm cake can lead to melting buttercream, resulting in a messy finish.
-
Leveling Layers: Level the tops of your cake layers with a serrated knife for even stacking. Uneven layers can lead to a lopsided cake.
-
Decorative Drizzle: When decorating, let the salted caramel drip down the sides for a beautiful presentation. It’s not just tasty, it adds visual allure!
-
Serving Temperature: Allow the Salted Caramel Cake to come to room temperature before serving for the best flavor and texture experience.
What to Serve with Moist Salted Caramel Cake?
Picture the perfect dessert spread that captivates the senses while celebrating the rich and sweet flavors of this delightful cake.
- Fresh Berries: The tartness of strawberries, raspberries, or blueberries adds a bright contrast, balancing the sweetness of the cake.
- Vanilla Ice Cream: A scoop of creamy vanilla enhances the decadent flavors, melting harmoniously against the richness of the cake.
- Chocolate Ganache: Drizzling a velvety chocolate ganache creates an indulgent twist, enriching every bite and appealing to chocolate lovers.
- Coffee or Espresso: The bold, warm notes of coffee will elevate the flavors of the salted caramel, making it a perfect pairing for your dessert.
- Mint Infused Whipped Cream: Light and refreshing, this cream adds a lovely minty finish that cleanses the palate after each rich bite.
- Caramel Sauce: Serve with extra caramel drizzled on top for those who simply can’t get enough of that sweet, salty flavor fusion!
Choose a pairing or two, and watch how your guests’ faces light up with delight as they experience the joy of this irresistible treat!
Make Ahead Options
These Salted Caramel Cake preparations are perfect for busy home cooks looking to save time without sacrificing flavor! You can make the salted caramel and buttercream up to 3 days in advance; simply refrigerate them in airtight containers. The cake layers can also be baked up to 24 hours ahead—allow them to cool completely, then wrap tightly in plastic wrap to keep them moist. When you’re ready to serve, just assemble the cake by layering the buttercream and caramel between the cooled cake layers. For the best results, let it sit at room temperature for about 30 minutes before slicing to ensure the buttercream is perfectly spreadable—enjoy the delicious rewards of your thoughtful prep!
Salted Caramel Cake Recipe FAQs
How do I select the best ingredients for the Salted Caramel Cake?
Absolutely! For the best results, choose ripe, fresh ingredients. Look for eggs that are firm but not cracked, and cream that’s fresh and cold. When selecting butter, opt for unsalted for better control over salt levels in your buttercream. Ensure your flour is fresh and hasn’t been sitting in the pantry too long as it can affect the texture of your cake.
How should I store leftovers of the Salted Caramel Cake?
Very! You can store the cake in an airtight container at room temperature for about 2 days. If you prefer, you can also keep it in the fridge, which will help it last up to 5 days. Make sure to allow it to come to room temperature before serving to experience the flavors fully.
Can I freeze my Salted Caramel Cake, and how?
Absolutely! To freeze your Salted Caramel Cake, first, let it cool completely. Wrap each layer tightly in plastic wrap, followed by aluminum foil, to protect it from freezer burn. You can freeze it for up to 2 months. When you’re ready to enjoy, simply thaw it overnight in the refrigerator and bring it to room temperature before serving.
I had trouble with my caramel—how do I avoid burning it?
Great question! To prevent burning your caramel, keep your heat at medium and don’t stray too far—caramel can burn quickly! Stir the sugar and water until dissolved, but once it starts boiling, don’t stir. Instead, gently swirl the pan occasionally. Watch the color closely until it reaches a rich amber hue, which usually takes about 8-10 minutes. Remove it from heat immediately to avoid overcooking!
Is this Salted Caramel Cake safe for everyone, including those with allergies?
It’s always good to be cautious! This cake contains gluten (flour) and is high in sugar and fat, so those with celiac disease or gluten intolerance should avoid it unless using a gluten-free flour substitute. Moreover, it contains dairy and eggs; hence, it’s not suitable for vegans or individuals with lactose intolerance or egg allergies. Always double-check your ingredients to ensure they meet the dietary needs of your loved ones.
How long can I keep the Salted Caramel Cake in the fridge?
The more the merrier! You can keep your delicious cake in the fridge for about 5 days. Just make sure it’s stored in an airtight container to maintain its moisture. If you want to keep it fresher longer, consider freezing as mentioned above!

Irresistible Salted Caramel Cake That Everyone Will Love
Ingredients
Equipment
Method
- In a medium saucepan, combine granulated sugar and water over medium heat, stirring until sugar dissolves. Allow to boil until a rich amber color, about 8-10 minutes. Add butter and heavy cream in stages, stirring until smooth. Mix in salt and let cool.
- Preheat oven to 340°F (170°C) and grease two 9-inch round cake pans. In a large mixing bowl, cream butter and granulated sugar until fluffy. Add eggs one at a time, incorporating each fully. Gradually mix in sour cream and vanilla. Fold dry ingredients into wet in two parts to ensure a smooth batter.
- Pour batter into prepared pans, smoothing tops. Bake for 20-23 minutes until a toothpick inserted comes out clean. Allow cakes to cool in pans for 10 minutes before transferring to wire rack.
- Let cake layers cool completely for about 30-45 minutes. Level tops of cakes if necessary.
- In a large mixing bowl, beat unsalted butter until light and fluffy. Gradually add powdered sugar, mix on low until incorporated, then add vanilla and salted caramel, beating until smooth. Adjust consistency with more cream if needed.
- Begin by placing one cake layer on a serving platter. Spread a layer of buttercream, followed by a drizzle of salted caramel. Place the second cake layer on top and gently press down. Apply a thin crumb coat of buttercream around the cake, chill for about 20 minutes.
- Once chilled, frost the top and sides of the cake with remaining buttercream. Drizzle more salted caramel on top and sprinkle sea salt if desired. Serve the Salted Caramel Cake and enjoy!
Leave a Reply