
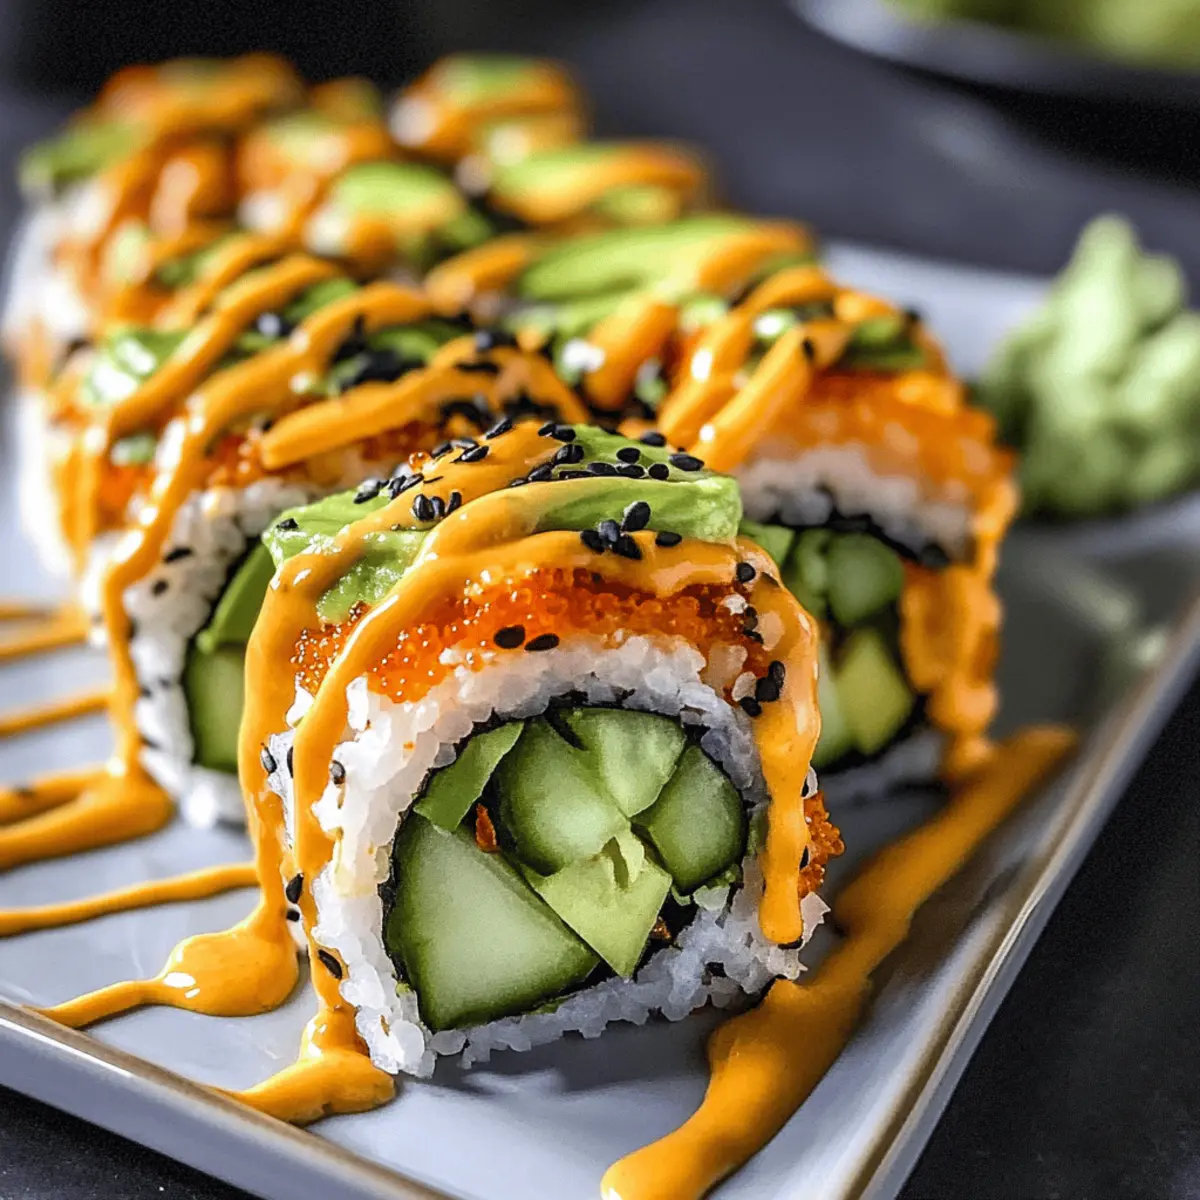
As I stood in my kitchen, the scent of seasoned sushi rice filled the air, sparking memories of lively sushi bars. Creating homemade dragon rolls—an artful fusion of fresh vegetables and tender seafood—has become my favorite culinary adventure. This recipe for Homemade Dragon Rolls: A Sushi Sensation brings the delightful experience of dining out right to your home. Not only are these rolls customizable to fit everyone’s taste, but they also deliver a fresh, wholesome meal that’s a quick escape from the usual takeout routine. Every vibrant bite combines textures and flavors that leave you craving more. Ready to impress your friends or simply treat yourself to a sushi night? Let’s roll up those sleeves and get started!

Why Make Homemade Dragon Rolls?
Homemade dragon rolls are a delight for the senses! Fresh ingredients like creamy avocado and crunchy cucumber create an irresistible bite. Customizable to please even the pickiest eaters, feel free to substitute with your favorite seafood or veggies. Quick preparation means you can whip up these rolls for a last-minute dinner or fun gathering. Plus, you’ll show off your sushi-making skills, impressing family and friends alike! Dive into a homemade culinary adventure that’s both exciting and satisfying—your taste buds will thank you!
Homemade Dragon Rolls Ingredients
Gather your essentials for crafting these delightful homemade dragon rolls that promise vibrant flavors and an unforgettable sushi experience!
For the Sushi Rice
- Sushi Rice – Use short-grain rice for the optimal sticky texture necessary to hold your rolls together.
- Rice Vinegar – Adds a delicious tang; it’s key to seasoning your rice perfectly.
- Sugar – Just a pinch enhances the flavor profile of the sushi rice.
- Salt – Balances the sweetness; a must for well-seasoned rice.
For the Fillings
- Nori Sheets – Essential for wrapping; high-quality sheets contribute to better flavor and roll integrity.
- Cucumber – Provides a refreshing crunch; opt for English cucumbers to minimize seeds.
- Avocado – Adds creaminess; choose ripe avocados for the best texture.
- Cooked Shrimp or Crab Meat – This seafood brings a protein punch; pre-cooked varieties save time.
For the Sauce & Toppings
- Sriracha Sauce – Introduces a delightful spicy kick; adjust to your preferred heat level.
- Toasted Sesame Seeds – Sprinkle on top for added nuttiness and beautiful presentation.
With these homemade dragon rolls ingredients, you’re just a few steps away from rolling up a sushi sensation that everyone will love!
Step‑by‑Step Instructions for Homemade Dragon Rolls: A Sushi Sensation
Step 1: Prepare Sushi Rice
Begin by rinsing 2 cups of sushi rice under cold water until the water runs clear, removing excess starch. Cook the rice following the package instructions, usually about 20 minutes. Once cooked, transfer to a bowl and fold in 3 tablespoons of rice vinegar, 1 tablespoon of sugar, and a pinch of salt while the rice is still warm. Allow it to cool to room temperature.
Step 2: Cut Your Fillings
While the sushi rice cools, slice one cucumber and one ripe avocado into thin, uniform strips. This ensures easy rolling and balances the flavors in your homemade dragon rolls. Aim for the cucumber to mimic the length of the nori sheets for perfect presentation. Set aside your beautiful vegetable strips as you prepare to assemble the roll.
Step 3: Set Up Your Rolling Station
Lay a bamboo sushi mat on a clean, flat surface, covering it with plastic wrap for easy cleanup. Place one sheet of nori, shiny side down, on the mat, leaving a bit of space at the top edge to secure the roll later. This setup is crucial for rolling your homemade dragon rolls effectively and neatly.
Step 4: Spread the Rice
With your hands lightly moistened to prevent sticking, take about 1 cup of cooled sushi rice and spread it evenly over the nori, covering approximately two-thirds of the sheet. Ensure the rice is pressed down gently to create an even layer, leaving the top third clear for sealing. This rice layer is the base for your delicious fillings.
Step 5: Add Fillings
In the center of the rice-covered nori, layer your prepared shrimp or crab, cucumber, and avocado strips. If you enjoy a little heat, drizzle some sriracha sauce over your fillings now. These ingredients will provide both texture and flavor to your dragon rolls, making each bite a delightful experience.
Step 6: Roll It Up
Starting from the edge of the bamboo mat closest to you, lift and begin to roll the nori away from yourself, tucking the filling tightly as you go. Use gentle but firm pressure to shape the rolls into a cylindrical form. Roll until you reach the edge of the nori, and then seal the edge with a dab of water to secure it in place.
Step 7: Slice and Serve
Using a sharp knife dipped in water to prevent sticking, slice your rolled dragon roll into eight even pieces. Aim for smooth and clean cuts, showcasing the colorful ingredients inside. Arrange the sliced rolls on a plate, serving them with soy sauce and additional sriracha alongside for dipping. Enjoy your homemade dragon rolls!

What to Serve with Homemade Dragon Rolls: A Sushi Sensation
When you’ve rolled up a platter of homemade dragon rolls, it’s time to pair them with scrumptious sides and beverages to elevate your meal experience!
-
Miso Soup: A warm, savory start to your dinner, miso soup offers a soothing contrast to the cool, fresh rolls, making it a classic pairing.
-
Seaweed Salad: This light and tangy salad adds a crunchy texture and brings additional flavors of the ocean that complement the seafood in your rolls.
-
Edamame: Lightly salted green soybeans provide a satisfying bite; their crispness creates a delightful contrast to the creamy avocado and seafood.
-
Sushi Ginger: Sweet and tangy, pickled ginger acts as a palate cleanser between rolls, enhancing your tasting journey and ensuring each bite feels fresh.
-
Tempura Vegetables: Crispy and delicious, tempura adds a delightful crunch alongside the soft textures of the dragon rolls. The light batter doesn’t overshadow the sushi’s flavors.
-
Green Tea: This warm beverage brings earthy notes that perfectly balance the dish, offering a calming finish to the vibrant flavors unfolding on your plate.
-
Sake: Elevate your sushi night with a glass of sake, whose smooth and subtle sweetness pairs wonderfully with the umami of the seafood-rich rolls.
-
Chocolate Mochi: For dessert, enjoy the chewy sweetness of chocolate mochi. A perfect way to end your meal on a light, refreshing note—plus, they’re bite-sized!
Each of these accompaniments harmonizes beautifully with homemade dragon rolls, creating a memorable dining experience that delights all the senses!
Make Ahead Options
These Homemade Dragon Rolls are perfect for meal prep, allowing you to enjoy fresh sushi any night! You can prepare the sushi rice and filling components—such as sliced cucumber and avocado—up to 24 hours in advance. Simply cook the sushi rice, season it, and allow it to cool before storing it in an airtight container in the refrigerator. Keep the sliced avocado in a separate container, ideally with a bit of lemon juice to prevent browning. When you’re ready to roll, assemble your ingredients on the nori sheets and complete the rolling process. This way, every bite of your homemade dragon rolls will be just as delicious and satisfying!
Storage Tips for Homemade Dragon Rolls
-
Fridge: Store leftover homemade dragon rolls in an airtight container for up to 24 hours. This helps maintain freshness and prevents the nori from getting soggy.
-
Freezer: If you want to keep your rolls longer, wrap each one tightly in plastic wrap and store in a freezer bag for up to 2 months. Thaw in the fridge overnight before serving.
-
Reheating: For best results, enjoy your dragon rolls cold straight from the fridge. If you prefer them warm, briefly microwave them for about 10-15 seconds, but be cautious not to overheat.
-
Serving: If the rolls have been refrigerated, let them sit at room temperature for about 10 minutes before serving for optimal texture and flavor.
Expert Tips for Homemade Dragon Rolls
-
Rice Consistency Matters: Ensure your sushi rice is moist but not too wet; this balance keeps your homemade dragon rolls intact and looking great.
-
Don’t Overfill: Avoid the temptation to stuff each roll with too much filling to prevent tearing when rolling. A few well-placed ingredients create a balanced flavor.
-
Use Fresh Ingredients: Fresh vegetables and seafood make a noticeable difference in taste. Opt for ripe avocados and high-quality nori to enhance your homemade dragon rolls.
-
Roll with Care: Use gentle pressure when rolling your sushi to achieve that perfect cylindrical shape. Too much force can result in a squished roll.
-
Experiment Boldly: Feel free to switch up your fillings! Try tempura flakes, spicy mayo, or different seafood varieties for unique spins on your homemade dragon rolls.
Homemade Dragon Rolls Variations
Feel free to unleash your culinary creativity with these delightful twists to your homemade dragon rolls for an even more sensational experience!
-
Dairy-Free: Substitute avocado with mashed edamame for a unique twist on creaminess while keeping it plant-based.
-
Spicy Kick: Mix mayonnaise with sriracha to create a creamy spicy mayo, drizzled on top for extra heat and flavor.
-
Veggie-Packed: Add julienned bell peppers or shredded carrots to the filling for a vibrant burst of color and crunch. Each bite turns into a colorful medley.
-
Gluten-Free: Use gluten-free soy sauce for dipping to keep the entire meal gluten-free, making it accessible for all guests.
-
Tempura Style: Include tempura-fried vegetables or shrimp for a crunchy texture that elevates your rolls to restaurant-quality.
-
Fruity Surprise: Try adding mango slices or thinly sliced strawberries for a sweet and fruity contrast to the savory flavors.
-
Smoked Flavor: Incorporate smoked salmon instead of shrimp or crab for a rich smoky taste that adds depth to your rolls.
For additional ideas, you might want to consider testing out spicy mayo or some fantastic sushi platter options! Don’t be afraid to experiment and create a personalized version of these dragon rolls that speaks to your own flavor preferences.
Homemade Dragon Rolls Recipe FAQs
What kind of nori should I use for homemade dragon rolls?
Absolutely! High-quality nori sheets are crucial for a delicious sushi experience. Look for nori that is dark green and shiny—this indicates freshness. Avoid any sheets with dark spots or that feel overly brittle, as these can affect both taste and roll integrity.
How should I store leftover homemade dragon rolls?
Very important! If you have leftover rolls, store them in an airtight container in the refrigerator, where they will stay fresh for up to 24 hours. Keeping them sealed prevents the nori from getting soggy while also preserving the flavors. If you’d like to enjoy them slightly warmed, let them sit out for about 10 minutes before serving, or briefly microwave for 10-15 seconds.
Can I freeze my homemade dragon rolls?
Of course you can! To freeze your rolls, wrap each piece tightly in plastic wrap to avoid freezer burn and store them in a freezer bag. They can be kept for up to 2 months. When you’re ready to enjoy them, thaw in the refrigerator overnight. For the best texture, enjoy them cold, or heat them briefly in the microwave.
What are some common mistakes when making sushi rolls?
The most frequent issue is overfilling the rolls, leading to tearing when you try to roll them up. It’s essential to strike a balance with the amount of filling; I recommend a single layer of each ingredient. Also, ensure that your sushi rice isn’t too wet, as this can make it difficult to achieve a proper roll. Lastly, use gentle pressure when rolling and cutting to maintain a beautiful presentation!
Are there any dietary considerations for homemade dragon rolls?
Definitely! If you’re making these rolls for a group, keep an eye out for allergens. For gluten-free options, ensure you use gluten-free soy sauce and check the ingredients in your nori. Additionally, if you’re serving pets, remember that avocado can be toxic to them, so it’s best to keep those parts separate. Only use fresh, pre-cooked seafood to avoid any health risks associated with raw fish.
How ripe should my avocado be for making dragon rolls?
Great question! You want your avocado to be perfectly ripe—when you press it gently, it should give slightly but not feel mushy. If it’s too hard, it won’t mix well with your other ingredients; if it’s too soft, it may spoil. Look for avocados with a dark skin and a slightly soft touch, indicating they’re ready to bring the creamy goodness to your homemade dragon rolls!

Elevate Dinner with Homemade Dragon Rolls: A Sushi Sensation
Ingredients
Equipment
Method
- Begin by rinsing 2 cups of sushi rice under cold water until the water runs clear, then cook according to package instructions for about 20 minutes. Fold in 3 tablespoons of rice vinegar, 1 tablespoon of sugar, and a pinch of salt while warm. Allow to cool.
- Slice one cucumber and one ripe avocado into thin, uniform strips.
- Lay a bamboo sushi mat covered with plastic wrap on a clean surface, place one sheet of nori shiny side down on the mat.
- With moistened hands, take about 1 cup of cooled sushi rice and spread it evenly over two-thirds of the nori, leaving the top third clear.
- In the center of the rice-covered nori, layer shrimp or crab, cucumber, and avocado strips, drizzling sriracha sauce if you like.
- Starting from the edge closest to you, lift the bamboo mat and roll the nori away, tucking the filling tightly. Seal the edge with a dab of water.
- Using a sharp knife dipped in water, slice the roll into eight even pieces and serve with soy sauce and additional sriracha.
Leave a Reply