
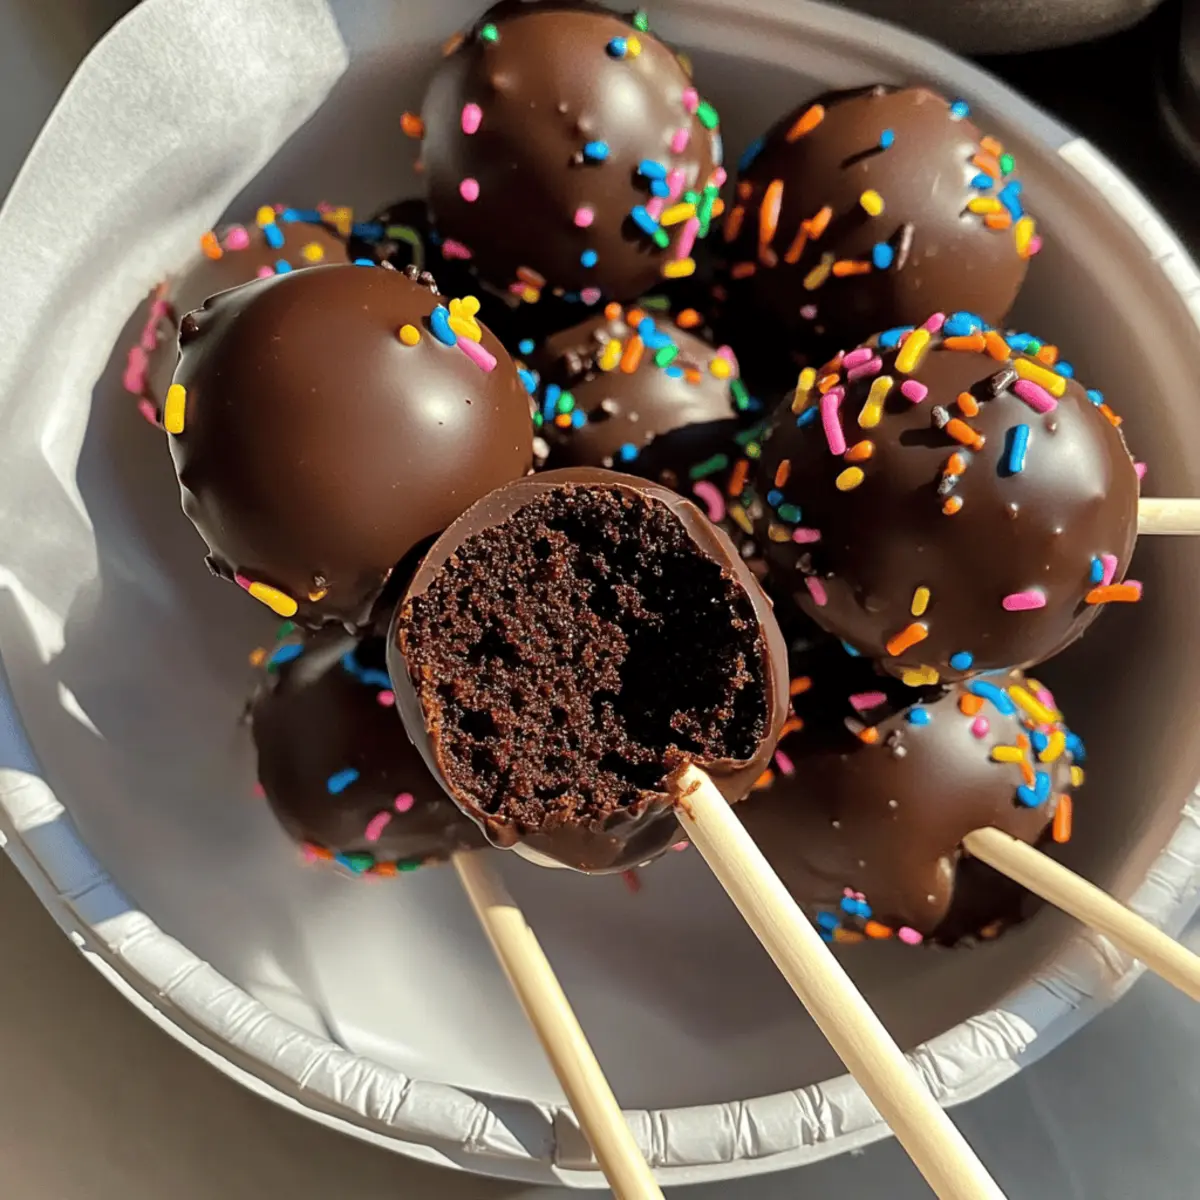
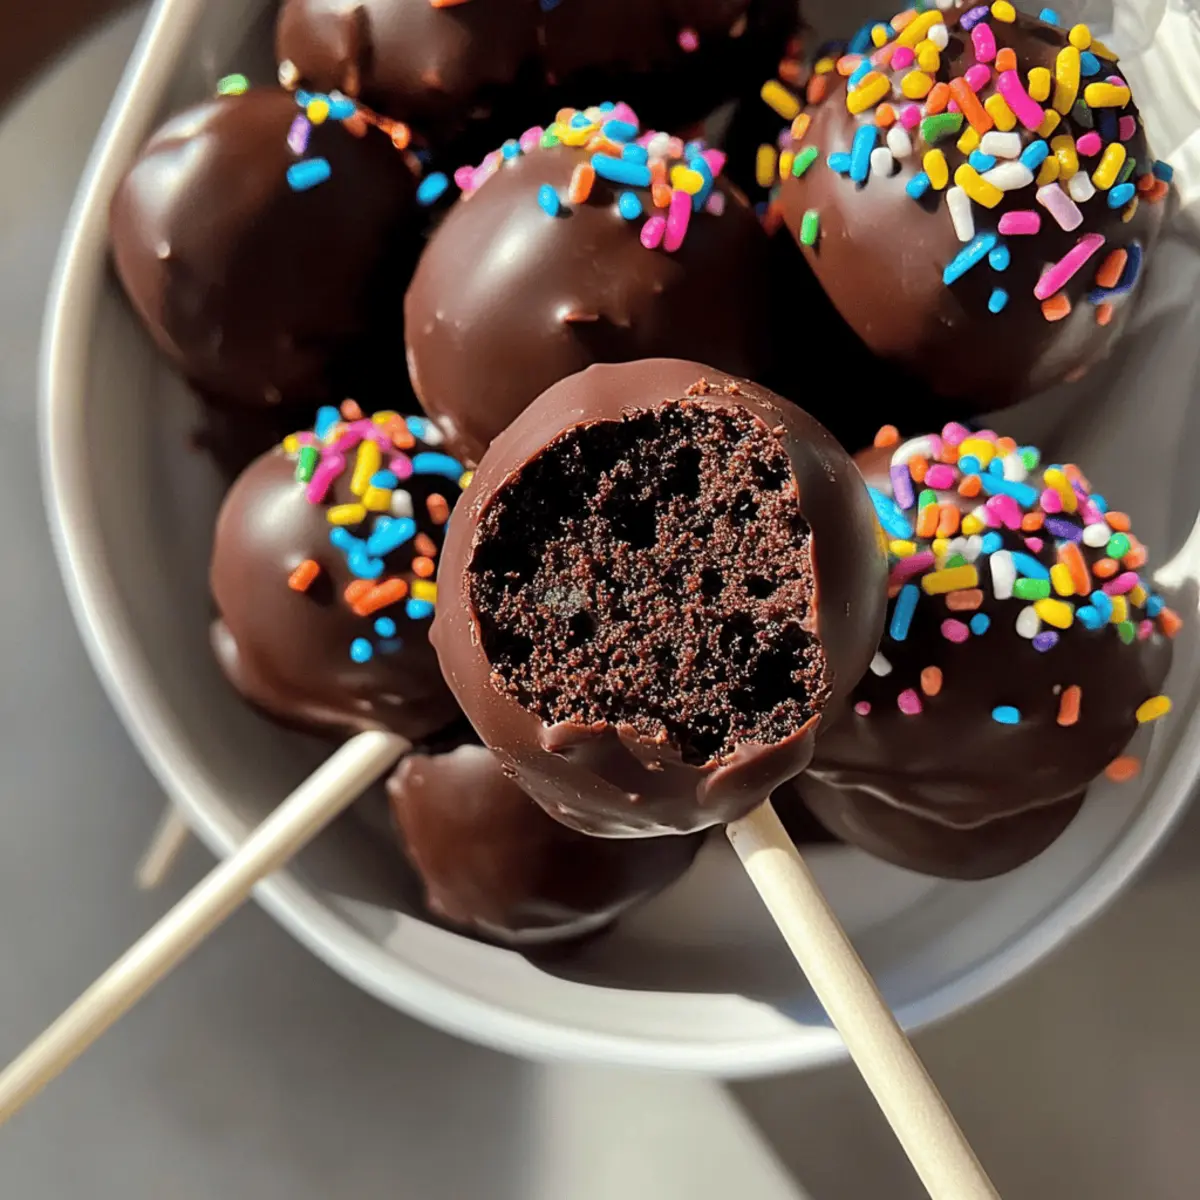
As I took a moment to marvel at the colorful display in front of me, I realized these delightful Chocolate Cake Pops were not just any dessert; they were little bites of joy! Perfectly moist and fudgy on the inside, each pop is encased in a luscious chocolate shell that’s both satisfying and oh-so-tempting. What makes them truly irresistible is their simplicity—using a chocolate cake mix makes for an incredibly easy dessert that anyone can whip up. Whether you’re celebrating a birthday, hosting a casual gathering, or simply indulging on a cozy evening, these cake pops are guaranteed to bring a smile to your face and sweetness to your day. Curious how to make them at home? Let’s dive in!

Why Are These Cake Pops So Irresistible?
Simplicity, you won’t believe how easy these Chocolate Cake Pops are to make with just a box cake mix! Delightful flavors shine through, with a rich, fudgy center encased in a smooth chocolate shell that satisfies every chocolate lover. Versatile options are at your fingertips — feel free to switch up the toppings or use different chocolate varieties. Perfect for any occasion, they’re crowd-pleasers at birthday parties or bake sales. Plus, they save you time while impressing guests with their gourmet look! Treat yourself to these delicious treats and elevate your dessert game!
Chocolate Cake Pops Ingredients
For the Cake
• Chocolate Cake Mix – Base of the cake pop; any 15 oz chocolate cake mix will do.
• Eggs – Necessary for binding; follow box instructions for quantity.
• Water or Milk – Replace water with milk for extra richness.
• Vegetable Oil – Keeps the cake moist; use as directed on the box.
For the Frosting
• Salted Butter – Adds richness; unsalted butter can also be substituted.
• Plain Cream Cheese – Provides moisture and flavor; ensure it’s softened for easy mixing.
• Vanilla Extract – Enhances the flavor profile; no substitutes are needed.
• Powdered Sugar – Sweetens the frosting; sift for a smooth consistency.
For the Coating
• Chocolate Melting Wafers – The delicious outer layer; opt for quality wafers for best results.
• Sprinkles – Decorative touch that adds crunch and fun.
These ingredients come together to make scrumptious Chocolate Cake Pops that will delight friends and family. Happy baking!
Step‑by‑Step Instructions for Easy and Delicious Chocolate Cake Pops
Step 1: Bake Cake
Begin by preparing the chocolate cake mix according to the package instructions, substituting water with milk to enhance richness. Preheat the oven to 350°F (175°C) and pour the batter into a greased cake pan. Bake for 25–30 minutes, or until a toothpick inserted in the center comes out clean. Allow the cake to cool in the pan for 10 minutes, then transfer it to a cooling rack to cool completely.
Step 2: Cool Cake
After the cake has cooled in the pan, place it on a cooling rack and let it sit for about 30 minutes. Ensure it is completely cooled, as warm cake will make the subsequent steps messy. Keep an eye on it; the cake should feel completely cool to the touch before you proceed to the frosting stage.
Step 3: Make Frosting
In a mixing bowl, beat ½ cup of softened salted butter with 8 oz of plain cream cheese and 1 teaspoon of vanilla extract until the mixture is smooth and creamy. Gradually add 2 cups of sifted powdered sugar, mixing until fully combined. The frosting should be thick but spreadable, allowing it to easily blend with the cake crumbles in the next step.
Step 4: Combine Frosting and Cake
Crumble the cooled chocolate cake into a large mixing bowl, ensuring there are no large chunks remaining. Add about 1 cup of the prepared cream cheese frosting to the crumbled cake and mix with an electric mixer. Incorporate until everything is moist and well-combined; adjust the frosting amount for your desired rolling consistency.
Step 5: Chill Mixture
Cover the bowl with plastic wrap and refrigerate the cake mixture for 30-45 minutes. This chilling step is crucial; it firms up the cake batter, making it easier to roll into balls. Check the mixture occasionally and ensure it retains a slightly tacky texture for rolling.
Step 6: Shape Balls
Once chilled, use your hands to scoop out about 1.5 tablespoons of the cake mixture and roll it into smooth balls. Place each ball on a parchment-lined baking sheet. Aim for uniform size; this ensures even coating and a tidy presentation for your delicious chocolate cake pops.
Step 7: Prepare Coating
In a microwave-safe bowl, melt the chocolate melting wafers in 30-second intervals, stirring after each session, until smooth and glossy. Keep an eye on the chocolate; over-melting can lead to clumping. Ensure the melted chocolate remains fluid for easy dipping when coating the cake pops.
Step 8: Insert Sticks
Dip the ends of the cake pop sticks in the melted chocolate, coating about half an inch. Stick a coated end into each cake ball, ensuring it goes in deep enough for stability. Place the baking sheet back in the fridge for about 10-15 minutes to allow the chocolate to set slightly.
Step 9: Coat Cake Pops
Once the cake pop sticks are secure, dip each cake pop into the melted chocolate, ensuring they are fully coated. Allow the excess chocolate to drip off, giving a smooth finish. Immediately sprinkle with your choice of toppings before the chocolate sets, creating a fun and vibrant outer layer.
Step 10: Set
Arrange your coated chocolate cake pops upright in a styrofoam block or place them on a parchment-lined tray. Allow them to set at room temperature for about 30 minutes or place them in the fridge for quicker hardening. Once firm, your delightful chocolate cake pops are ready to enjoy or serve at your next celebration!
What to Serve with Easy and Delicious Chocolate Cake Pops
Imagine a delightful spread of treats and flavors that perfectly complement your decadently wrapped cake pops, enticing every sweet tooth in the room.
-
Decadent Hot Chocolate: A rich and creamy beverage that pairs beautifully with the fudge-like texture of cake pops. Add a dash of cinnamon for an extra warmth!
-
Berry Medley Salad: Fresh strawberries, raspberries, and blueberries provide a burst of fruity freshness that cuts the sweetness and adds color to your dessert table.
-
Classic Vanilla Ice Cream: Creamy vanilla ice cream balances the chocolate richness. Top with a drizzle of chocolate sauce for the ultimate indulgence!
-
Creamy Whipped Cream: Light and airy, a dollop of whipped cream brings a cloud-like texture to each bite, making the cake pops feel extra special.
-
Chocolate-Dipped Marshmallows: For a fun twist, add more chocolatey goodness with these sticky treats. Pair them for a double dose of sweetness that’s sure to please!
-
Sparkling Fruit Punch: A refreshing drink with a hint of citrus can cleanse the palate while adding a festive touch to your gathering. It’s perfect for kids and adults alike!
-
Gourmet Coffee: A cup of rich coffee offers a sophisticated contrast to the sweetness of the cake pops, making for a delightful after-dinner combination.
-
Salted Caramel Sauce: Drizzle this sauce over the cake pops for an irresistible salty-sweet flavor explosion! Just the right touch to elevate those chocolate delights.
Expert Tips for Chocolate Cake Pops
-
Chill Thoroughly: Make sure to chill the cake pop mixture for at least 30-45 minutes; warm batter can make it difficult to roll and maintain shape.
-
Smooth Melting: Melt chocolate wafers in intervals and stir well; this keeps the chocolate smooth for an even coating on your chocolate cake pops.
-
Avoid Overmixing: When combining frosting and cake, mix just until incorporated; overmixing can lead to a dense texture in the cake pops.
-
Stick Stability: Dip the cake pop sticks in chocolate before inserting them; this helps secure them firmly in place, preventing any topple during coating.
-
Creative Toppings: Experiment with different sprinkles or crushed candies for fun variations; it adds a delightful touch and visual appeal to your chocolate cake pops.
Storage Tips for Chocolate Cake Pops
-
Room Temperature: Chocolate cake pops can stay at room temperature for up to 2 days, but be sure to keep them covered to maintain freshness.
-
Fridge: Store cake pops in an airtight container in the refrigerator for up to 7 days, ensuring they remain moist and delicious.
-
Freezer: Freeze chocolate cake pops for up to 3 months; wrap them tightly in plastic wrap, then place in a freezer-safe container to prevent freezer burn.
-
Reheating: When ready to enjoy frozen cake pops, let them thaw in the fridge overnight for best texture before serving.
Make Ahead Options
These Chocolate Cake Pops are perfect for meal prep enthusiasts, saving time on busy weeknights or special occasions! You can prepare the cake and frosting up to 24 hours in advance. Simply bake and cool the cake, then store it in an airtight container at room temperature. Make the frosting and refrigerate it in a separate container. When you’re ready to assemble, crumble the cake, mix it with the frosting, and chill the mixture for 30-45 minutes until firm. Finish by rolling into balls, inserting the sticks, and coating with melted chocolate! Your cake pops will be just as delicious, helping you enjoy quality treats with minimal last-minute effort.
Chocolate Cake Pops Variations
Feel free to let your creativity shine while customizing these delightful treats!
-
Red Velvet: Substitute chocolate cake mix with red velvet for a stunning color contrast. Perfect for themed parties!
-
Nutty Delight: Add chopped nuts or toffee bits to the cake mixture for a delightful crunch that complements the fudgy center.
-
Mini Pops: Roll smaller balls to create mini cake pops, perfect for bite-sized indulgence at gatherings or a sweet snack anytime.
-
Flavor Burst: Mix in a teaspoon of espresso powder or peppermint extract to elevate the flavor, introducing a gourmet twist that will impress your guests.
-
Different Chocolates: Use white chocolate melting wafers instead of dark for a sweeter profile. Chocolate lovers will enjoy the richness of this swap!
-
Geometric Shapes: Instead of balls, shape the cake pops into fun geometric forms using cookie cutters, making them a playful treat that’s visually engaging.
-
Spicy Kick: Infuse a hint of chili powder or cayenne pepper into the frosting for a surprising heat that brings a whole new flavor dimension to your cake pops.
-
Dipped in Caramel: Give them a decadent twist by dipping the pops in caramel sauce before coating in chocolate for an irresistible caramel-chocolate combo!
For even more ideas, consider exploring options like homemade cake pop stands or learning about variations in cake decorations to enhance your cake pops visually!
Chocolate Cake Pops Recipe FAQs
How do I choose the right chocolate cake mix?
Absolutely! When selecting a chocolate cake mix, look for one labeled as “moist” for the best results. A 15 oz box is typically the perfect size. Check the ingredients; a mix with cocoa powder provides a more intense chocolate flavor. Don’t shy away from trying different brands to find your favorite!
What is the best way to store chocolate cake pops?
For freshness, store your chocolate cake pops in an airtight container. They can hold well at room temperature for up to 2 days, but to prolong their life, I recommend refrigerating them, where they can last for up to 7 days. Make sure they are well-covered to prevent drying out and maintaining their delightful taste.
Can I freeze chocolate cake pops?
Absolutely! These delectable treats can be frozen for up to 3 months. To freeze, first, wrap each cake pop individually in plastic wrap and then place them in a freezer-safe container. This double protection ensures they remain tasty and free from freezer burn. When you’re ready to enjoy them, thaw them in the fridge overnight for optimal texture.
What should I do if my cake pop mixture is too crumbly?
If your cake pop mixture is crumbly, don’t worry! Simply add more frosting, a tablespoon at a time, until you reach the desired sticky consistency. This should allow the mixture to hold together better when you roll it into balls. Combining the ingredients thoroughly helps, so use an electric mixer for even distribution.
Are these chocolate cake pops safe for my dog to eat?
No, chocolate can be toxic to dogs, so please keep these delicious chocolate cake pops away from your furry friends. Instead, consider making a dog-friendly treat with carob instead of chocolate to treat your pup safely. Always check for ingredients that could pose a risk to their health.
What should I do if the chocolate coating is too thick or clumpy?
If your chocolate coating is too thick, reheat it in short 15-second intervals in the microwave, stirring in between to achieve a smooth consistency. If it remains clumpy, adding a small amount of vegetable oil can also help thin it out without compromising flavor. Keeping the chocolate warm while dipping is crucial for a smooth finish!

Irresistible Chocolate Cake Pops for Perfect Celebrations
Ingredients
Equipment
Method
- Bake the cake by preparing the chocolate cake mix as per package instructions. Replace water with milk for added richness. Preheat oven to 350°F (175°C) and pour batter into a greased cake pan. Bake for 25-30 minutes or until a toothpick comes out clean. Cool the cake in the pan for 10 minutes, then transfer to a cooling rack to cool completely.
- Place the cooled cake on a cooling rack and let sit for about 30 minutes, ensuring the cake is completely cool.
- In a mixing bowl, beat the softened salted butter with the cream cheese and vanilla extract until smooth. Gradually add sifted powdered sugar and mix until fully combined.
- Crumble the cooled chocolate cake into a large mixing bowl. Add 1 cup of prepared frosting and mix with an electric mixer until moist and combined.
- Cover the bowl with plastic wrap and refrigerate the mixture for 30-45 minutes to firm up.
- Scoop out about 1.5 tablespoons of the mixture and roll into smooth balls. Place each ball on a parchment-lined baking sheet.
- Melt chocolate melting wafers in a microwave-safe bowl in 30-second intervals, stirring until smooth and glossy.
- Dip the ends of cake pop sticks into the melted chocolate before inserting them into each cake ball for stability.
- Dip each cake pop into the melted chocolate, allow excess chocolate to drip off, and immediately sprinkle with toppings.
- Arrange the coated cake pops upright to set at room temperature for 30 minutes or refrigerate for quicker hardening.
Leave a Reply