
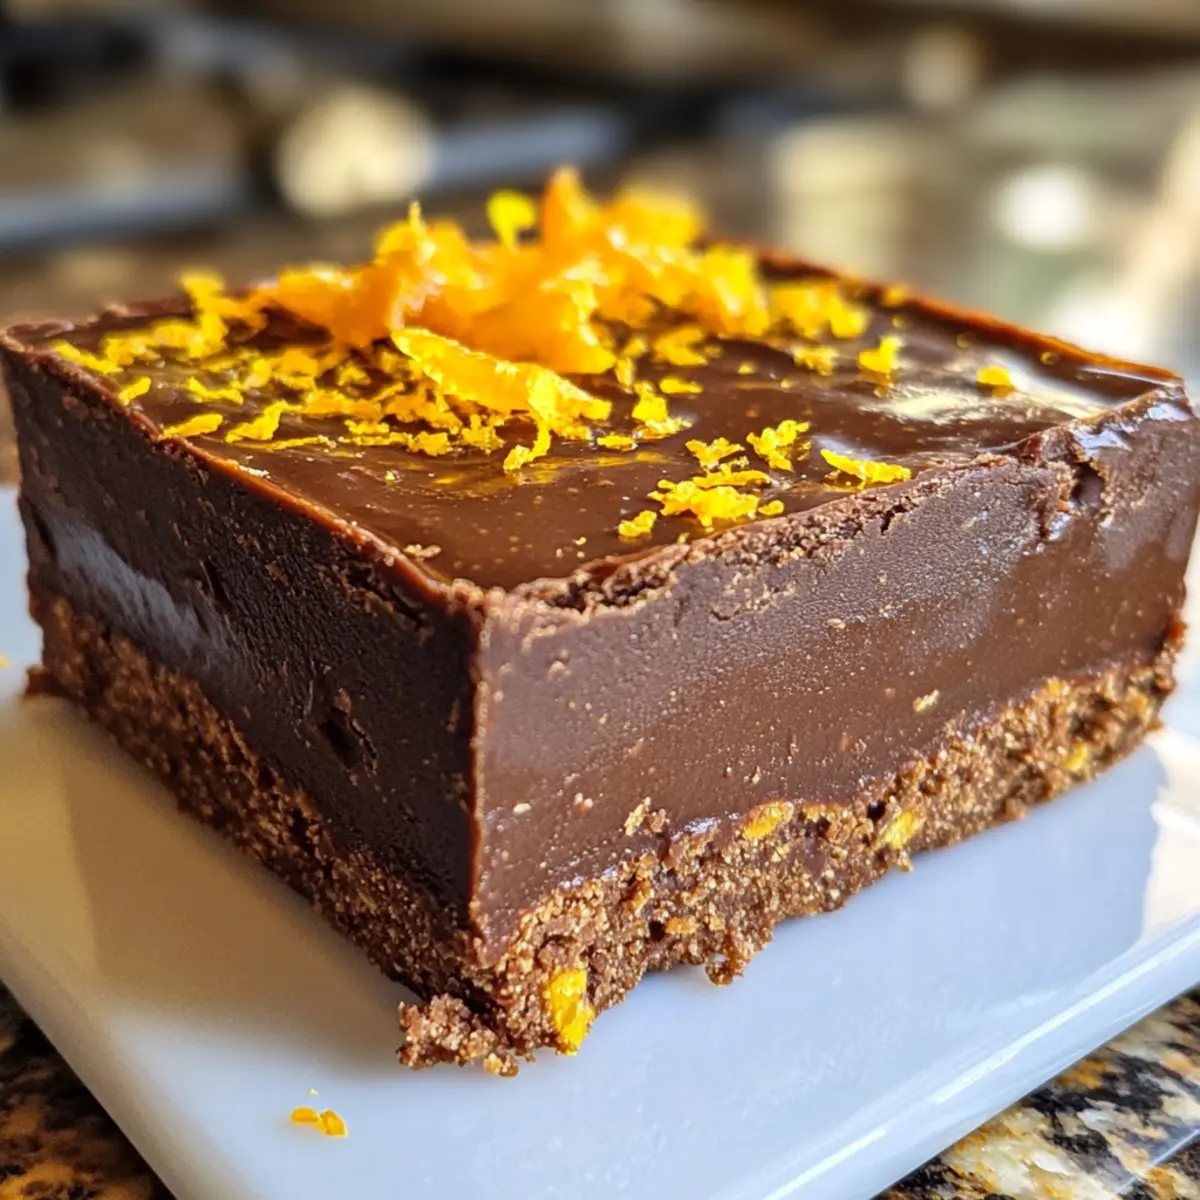
As I unwrapped the sweet scent of citrus and chocolate wafting through my kitchen, I couldn’t help but steal a nibble of my latest creation: Chocolate Orange Fudge. This delightful treat is a fusion of rich chocolate and zesty orange, creating a melt-in-your-mouth experience that’s both comforting and refreshing. What’s even better? It’s incredibly simple to whip up, making it the perfect indulgence for any occasion—be it a cozy night in or a special gift for loved ones. With just a handful of ingredients, this recipe promises to elevate your dessert game while being a crowd-pleaser. Are you ready to satisfy your sweet tooth and impress your friends? Let’s dive into this irresistible recipe!
Why Is Chocolate Orange Fudge Irresistible?
Rich Flavor: The amazing blend of dark chocolate and zesty orange creates a harmonious taste that’s both comforting and refreshing.
Simple Preparation: Whipping up this fudge is a breeze! With just a few ingredients, even beginner cooks can create a gourmet experience at home.
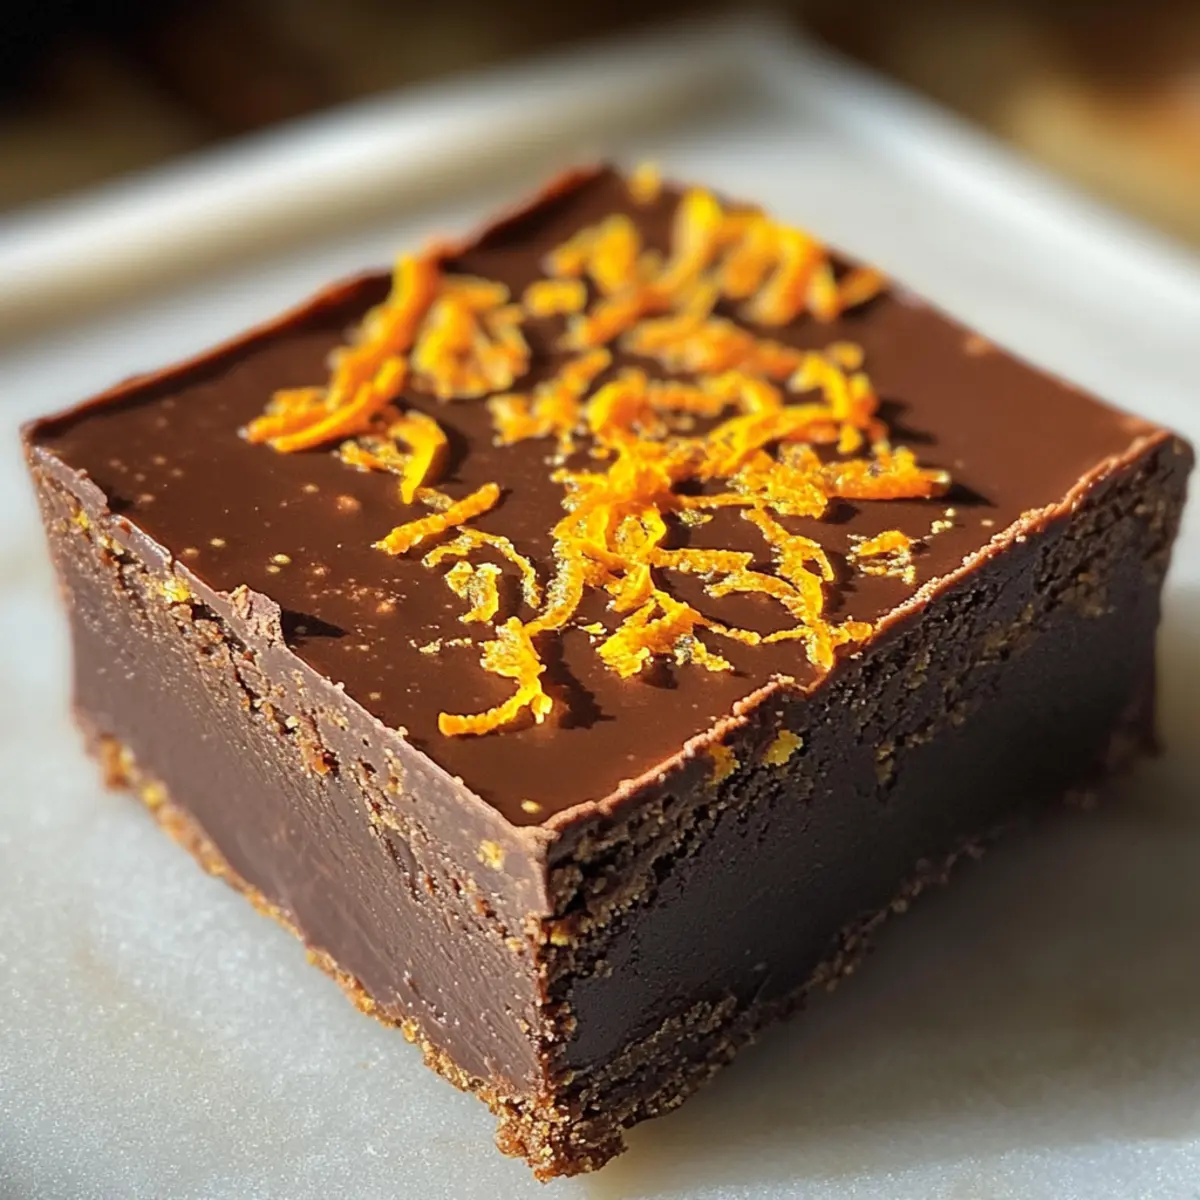
Melt-in-Your-Mouth Goodness: Experience a delectable combination of textures, as each bite melts effortlessly, leaving you wanting more.
Versatile Treat: Perfect as a sweet indulgence or a thoughtful gift, this fudge is ready for any occasion. Pair it with a cup of coffee or tea for an elevated experience!
Crowd-Pleaser: Whether serving at a gathering or sharing with family, this Chocolate Orange Fudge is sure to impress and leave everyone asking for seconds. If you’re looking for more fabulous dessert ideas, check out our fudge variations to elevate your treat game!
Chocolate Orange Fudge Ingredients
For the Fudge
- Dark Chocolate – Offers richness and depth; opt for high-quality chocolate for a more decadent treat.
- Sweetened Condensed Milk – Acts as a binder and sweetener; substitute with evaporated milk and sugar for a less sweet option.
- Unsalted Butter – Adds a creamy texture; can be swapped with coconut oil for a dairy-free experience.
- Orange Zest – Infuses the fudge with vibrant citrus flavor; lemon zest works well for a different twist.
- Vanilla Extract – Enhances the overall flavor; while optional, it adds a subtle depth.
Step‑by‑Step Instructions for Chocolate Orange Fudge
Step 1: Prepare Pan
Start by lining an 8-inch square baking dish with parchment paper, allowing some overhang for easy removal later. This step is crucial for achieving a clean, smooth finish on your Chocolate Orange Fudge. Make sure the parchment paper is well-fitted to the corners of the pan for the best results.
Step 2: Melt Ingredients
In a medium saucepan, combine dark chocolate, sweetened condensed milk, and unsalted butter over low heat. Stir the mixture consistently for about 5–7 minutes until everything is completely melted and has a smooth, glossy texture. Be patient and keep the heat low to prevent scorching the chocolate—it should appear deeply rich and velvety.
Step 3: Add Flavor
Remove the saucepan from heat once your ingredients are well combined and melted. Stir in the vibrant orange zest and vanilla extract, mixing thoroughly for about 1 minute until evenly incorporated. The bright aroma of orange will enhance your Chocolate Orange Fudge, giving it a refreshing lift that’s simply irresistible.
Step 4: Pour Mixture
Carefully pour the velvety fudge mixture into the prepared baking dish. Using a spatula, spread it evenly, smoothing the top to create a polished finish. The texture should look luscious and inviting, enticing everyone who sees it. Ensure there are no air bubbles trapped in the fudge for an even consistency throughout.
Step 5: Chill
Place the baking dish in the refrigerator and let the fudge chill for at least 2 hours to set. This important step allows the fudge to firm up, resulting in the perfect melt-in-your-mouth texture. After this time, check that the edges are firm, indicating it’s ready for slicing.
Step 6: Slice & Serve
Once set, gently lift the fudge out of the pan using the overhanging parchment. Place it on a cutting board and slice it into squares, reveling in the gorgeous layers of chocolatey-orange goodness. Serve immediately or store in an airtight container for later enjoyment, knowing this Chocolate Orange Fudge is a crowd-pleaser perfect for any occasion.
Chocolate Orange Fudge Customization Ideas
Feel free to experiment and customize your fudge to suit your taste and dietary preferences!
- Nutty Crunch: Add chopped nuts like walnuts or almonds for a delightful crunch and added nutrition. A mix of textures elevates the fudge experience!
- Coconut Flavor: Incorporate shredded coconut into the mixture for a tropical twist. The chewy coconut complements the chocolate so beautifully!
- Salted Caramel Drizzle: Drizzle with salted caramel sauce before cutting for a sweet and salty flavor explosion. This decadent addition makes your fudge truly gourmet!
- Spice Infusion: A dash of cayenne pepper or chili powder brings a spicy kick. It’s unexpected, exciting, and perfect for those who crave a little heat in their sweets.
- Dairy-Free Option: Use dairy-free chocolate and coconut milk instead of sweetened condensed milk for a vegan version that everyone can enjoy. Great taste adds a wonderful inclusivity to gatherings!
- Fruit Add-ins: Mix in dried fruits such as cranberries or apricots for bursts of tartness. The fruity components make every bite a delightful surprise.
- Flavor Variations: Swap orange zest for lemon or lime zest for a different citrus zing. This simple change can create a refreshing new profile!
- Chocolate Blend: For even deeper flavor, use a mix of dark and milk chocolate, balancing richness with creaminess for the ultimate treat.
While you’re on your fudge journey, consider pairing it with a warm cup of coffee or indulging in a sweet coffee cake on the side for an unforgettable dessert moment. Explore more exciting ideas in our fudge variations.
Expert Tips for Chocolate Orange Fudge
-
Measure Precisely: Use a kitchen scale for accurate measurements of dark chocolate, ensuring a perfect texture in your Chocolate Orange Fudge.
-
Avoid Scorching: Melt your chocolate mixture over low heat and stir constantly to avoid burning, which can ruin the flavor and texture.
-
Fresh Zest: Always use fresh orange zest rather than bottled options to achieve a more vibrant and zesty flavor in your fudge.
-
Let it Set: Allow the fudge to chill in the refrigerator for the full 2 hours; this helps achieve that delicious melt-in-your-mouth consistency.
-
Storage Tips: Keep your fudge in an airtight container to maintain freshness; it lasts up to two weeks in the fridge, or it can be frozen for longer storage.
How to Store and Freeze Chocolate Orange Fudge
Fridge: Keep your Chocolate Orange Fudge in an airtight container in the refrigerator for up to 2 weeks. This ensures it stays fresh and maintains its melt-in-your-mouth texture.
Freezer: For longer storage, freeze the fudge in an airtight container for up to 3 months. Wrap individual squares in plastic wrap before placing them in a container to prevent sticking.
Reheating: If you prefer a softer texture, let the fudge sit at room temperature for about 15 minutes before serving. Enjoy each piece chilled or slightly warmed for an extra comforting treat!
What to Serve with Chocolate Orange Fudge
As you delight in the creamy, citrus-infused goodness of this treat, consider pairing it with complementary flavors and textures for a complete experience.
- Velvety Ice Cream: A scoop of vanilla or chocolate ice cream adds a cool contrast that enhances the fudge’s richness.
- Fresh Berries: Raspberries or strawberries provide a burst of freshness, cutting through the sweetness and adding a vibrant color to your dessert platter.
- Coffee or Espresso: Enjoying a cup of coffee alongside your Chocolate Orange Fudge enhances the chocolate notes and invigorates your senses.
- Nutty Biscotti: The crunchy texture of almond or hazelnut biscotti pairs beautifully with fudge, offering a delightful contrast in each bite.
- Mint Tea: A soothing cup of mint tea not only refreshes the palate but also complements the citrusy notes of the fudge, creating a balanced dessert experience.
- Chocolate-Covered Almonds: For a chocolate lover’s paradise, serve these crunchy treats for an extra nutty flair that echoes the fudge’s flavors.
- Oranges Slices drizzled with Honey: Fresh orange slices drizzled with honey provide an elegant, fruity accent that enhances the zesty element of the fudge.
- Meringue Cookies: Light and airy meringues offer a sweet crunch that beautifully contrasts the dense, creamy fudge.
- Dark Chocolate Wine: A rich, dark chocolate wine brings a luxurious touch and heightens the fudge’s deep cocoa notes.
Make Ahead Options
These Chocolate Orange Fudge treats are perfect for busy home cooks looking to save time without sacrificing flavor! You can prepare the fudge mixture up to 24 hours in advance; simply follow the recipe up to the chilling step. After pouring it into the prepared baking dish, cover it tightly with plastic wrap and refrigerate. To maintain their creamy texture, be sure the fudge cools completely before sealing it. When you’re ready to serve, just slice it into squares straight from the fridge. With these make-ahead options, you can enjoy melt-in-your-mouth Chocolate Orange Fudge with minimal last-minute effort, making it an ideal choice for gatherings or sweet cravings!
Chocolate Orange Fudge Recipe FAQs
How do I select the best dark chocolate for my fudge?
Absolutely! When choosing dark chocolate, look for bars with a cocoa percentage of 60% or higher. This ensures a rich, deep flavor that will enhance your Chocolate Orange Fudge. It’s essential to opt for high-quality chocolate with minimal ingredients—ideally, just cocoa mass, sugar, and cocoa butter—to achieve that melt-in-your-mouth texture you desire.
What is the best way to store leftover fudge?
Very simple! Keep your Chocolate Orange Fudge in an airtight container in the refrigerator for up to 2 weeks. If placed in the fridge, it maintains its creamy texture and flavor. Plus, if you want to enjoy it longer, you can freeze it, which we’ll explain next!
Can I freeze Chocolate Orange Fudge?
Definitely! For freezing, wrap individual squares of fudge tightly in plastic wrap, making sure they’re well sealed to prevent freezer burn. Place the wrapped pieces in an airtight container and freeze for up to 3 months. When you’re ready to enjoy, let them sit at room temperature for about 15 minutes to regain their delightful texture.
What should I do if the fudge is too soft after chilling?
No worries at all! If your fudge seems too soft after chilling, it may simply need more time in the fridge to set properly. Try chilling it for an additional hour. To avoid this in the future, ensure the chocolate mixture is cooked as specified without any overheating, and let it cool slightly before pouring it into the pan.
Can I make this fudge dairy-free or vegan?
Absolutely! To make your Chocolate Orange Fudge dairy-free, simply replace the dark chocolate with vegan chocolate chips and substitute sweetened condensed milk with canned coconut milk. This will give you a delicious alternative that maintains the fudge’s creamy texture and rich flavor!
Is there a way to adjust the sweetness of the fudge?
Very much so! If you’d like to modify the sweetness, you can use less sweetened condensed milk or substitute it with evaporated milk mixed with a little sugar to your liking. Just be cautious not to change the ratio too much, as the consistency could be affected. Keeping the balance will lead to the perfect Chocolate Orange Fudge!
Melt-in-Your-Mouth Chocolate Orange Fudge Bliss
Ingredients
Equipment
Method
- Start by lining an 8-inch square baking dish with parchment paper, allowing some overhang for easy removal later.
- In a medium saucepan, combine dark chocolate, sweetened condensed milk, and unsalted butter over low heat, stirring consistently for about 5–7 minutes until everything is completely melted.
- Remove the saucepan from heat and stir in the orange zest and vanilla extract, mixing thoroughly for about 1 minute.
- Carefully pour the fudge mixture into the prepared baking dish, smoothing the top with a spatula.
- Place the baking dish in the refrigerator and let the fudge chill for at least 2 hours to set.
- Once set, gently lift the fudge out of the pan using the overhanging parchment and slice into squares.
Leave a Reply