
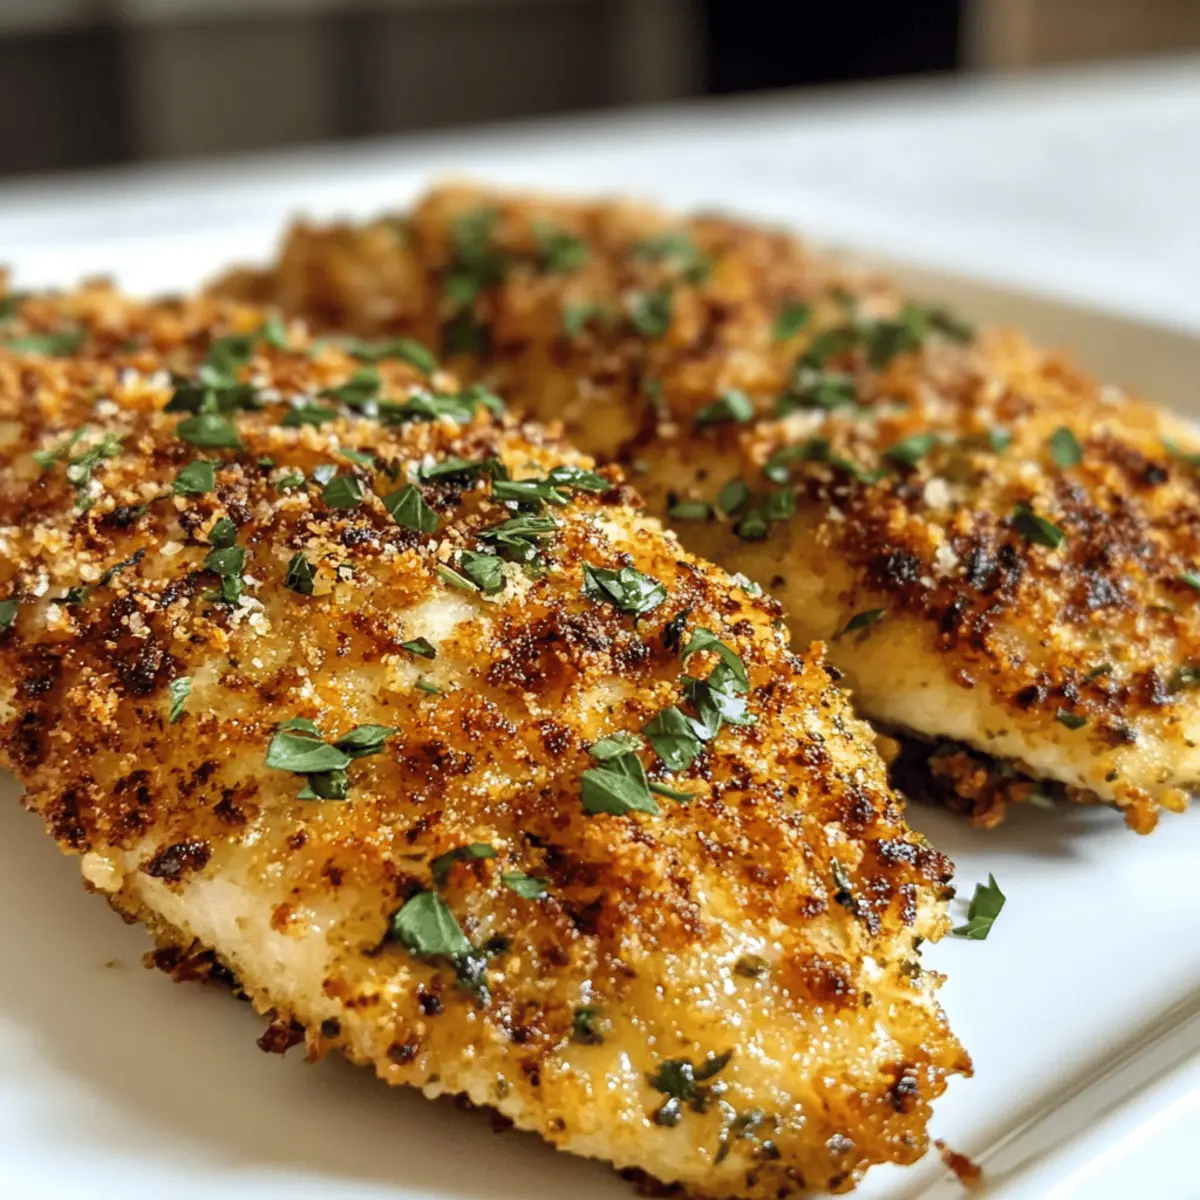
With the sizzle of chicken hitting the hot skillet, I can already feel my excitement bubbling over. There’s something incredibly satisfying about bringing homemade comfort food to the dinner table, especially when it’s Crispy Dill Pickle Parmesan Chicken. The unique combination of briny pickle juice and rich Parmesan creates a symphony of flavor that’s simply irresistible. Not only does this dish promise a delectable crunch, but it’s also a high-protein option that’s perfect for meal prepping busy weeknights. Whether you’re pairing it with a fresh salad or just enjoying a piece straight off the skillet, every bite is a reminder that home-cooked meals don’t have to be complicated to be extraordinary. Ready to discover how easy it is to make this delightful dish? Let’s dive in!
Why is this chicken recipe a must-try?
Crispiness on the outside, juiciness on the inside—this dish truly delivers comfort at its best! The tangy flavor from dill pickle juice mingles perfectly with the savory Parmesan, making every bite an explosion of taste. Plus, it’s quick and easy to prepare, ideal for anyone tired of fast food. Elevate your dinner game while enjoying a high-protein meal that even picky eaters will love. For an extra twist, try it with a side of your favorite fresh salad or coleslaw!
Crispy Dill Pickle Parmesan Chicken Ingredients
For the Chicken
- Chicken Breasts – Main protein source; boneless and skinless allows for quick cooking and easy eating.
- Dill Pickle Juice – Provides flavor and helps tenderize the chicken; can substitute with vinegar if needed.
For the Breading
- Breadcrumbs – Creates the crispy coating; seasoned breadcrumbs add extra flavor, but plain can be used with added spices.
- Parmesan Cheese – Enhances flavor and adds richness; can swap for another hard cheese if desired.
- Eggs – Acts as a binding agent to help the breadcrumbs adhere; may substitute with a flax egg for a plant-based option.
- All-Purpose Flour – Dredging base that helps create an initial layer for the breading; can use gluten-free flour as an alternative.
- Garlic Powder – Adds aromatic depth; fresh garlic can be used but adjust the amount.
- Onion Powder – Complements the chicken’s flavor profile; optional but recommended.
- Paprika – Contributes color and mild flavor; smoked paprika would add a different dimension if preferred.
- Salt and Pepper – Essential seasonings to enhance all flavors; adjust to taste.
For Cooking
- Cooking Oil – Used for frying to achieve a crispy texture; can substitute with a healthier option like avocado oil.
Tantalize your taste buds with this Crispy Dill Pickle Parmesan Chicken that’ll become a family favorite!
Step‑by‑Step Instructions for https://www.sublimecake.net/wp-content/uploads/2025/07/cjdzkbexzsi7azzbx0xq.webp
Step 1: Marinate the Chicken
In a large bowl, combine the boneless, skinless chicken breasts with dill pickle juice. Allow the chicken to marinate for at least 30 minutes in the refrigerator, letting the briny flavor penetrate and tenderize the meat. This step is crucial for infusing your Crispy Dill Pickle Parmesan Chicken with that tangy zing that will make every bite unforgettable.
Step 2: Prepare Breading Station
While the chicken marinates, set up your breading station with three shallow bowls. Fill the first bowl with all-purpose flour seasoned with garlic powder, onion powder, paprika, salt, and pepper. In the second bowl, whisk together eggs until frothy. Finally, combine seasoned breadcrumbs with grated Parmesan cheese in the third bowl. This organized setup will streamline the coating process.
Step 3: Preheat the Oil
In a large skillet, heat about 1/4 inch of cooking oil over medium heat. To check if the oil is hot enough, drop in a small piece of breadcrumb; it should sizzle immediately. This heat ensures your Crispy Dill Pickle Parmesan Chicken will achieve that golden brown, crunchy exterior while remaining juicy inside, making this cooking method essential.
Step 4: Coat the Chicken
Once the chicken has marinated, remove it from the pickle juice and gently shake off any excess. Start the breading by dredging each piece in the seasoned flour, ensuring it’s fully coated. Next, dip it into the whisked eggs, letting any excess drip off. Finally, press the chicken into the breadcrumb-Parmesan mixture, thoroughly coating each piece to achieve maximum crunch.
Step 5: Fry the Chicken
Carefully place the coated chicken into the hot oil in the skillet. Fry each piece for about 5-7 minutes per side, or until the chicken is golden brown, crispy, and fully cooked. Use a meat thermometer to ensure the internal temperature reaches 165°F (75°C). The oil should not be overcrowded, so fry in batches if necessary for the best results.
Step 6: Drain Excess Oil
Using tongs, transfer the fried chicken to a paper towel-lined plate. This step allows any excess oil to drain off, keeping your Crispy Dill Pickle Parmesan Chicken light and crisp. Let the chicken rest for a couple of minutes while you prepare to serve or store it.
Step 7: Rest the Chicken
Allow the cooked chicken to rest for 5-10 minutes. This resting period lets the juices redistribute, ensuring every bite remains juicy and tender. The crunchiness of the coating will hold up beautifully, creating the perfect textural contrast with the succulent chicken inside.
Step 8: Serve or Store
Once rested, serve the Crispy Dill Pickle Parmesan Chicken immediately alongside your favorite sides, or let it cool before transferring it to an airtight container for storage. This dish is perfect for quick weeknight dinners, and leftovers can easily be reheated, maintaining their deliciousness.
Variations & Substitutions for Crispy Dill Pickle Parmesan Chicken
Feel free to get creative and personalize your Crispy Dill Pickle Parmesan Chicken for a delightful twist!
-
Gluten-Free: Use gluten-free breadcrumbs and flour to keep this dish celiac-friendly without sacrificing crunch.
-
Dairy-Free: Swap the Parmesan cheese for a dairy-free alternative, or use nutritional yeast for a cheesy flavor boost. This makes the dish accessible for those avoiding dairy.
-
Spicy Kick: Add cayenne pepper or crushed red pepper flakes to the breading for a fiery twist. Feeling bold? Try a dash of hot sauce in the pickle marinade!
-
Herb Infusion: Mix dried herbs like dill or Italian seasoning into the breadcrumb coating for an extra layer of flavor. A hint of fresh herbs elevates the dish with fragrant complexity.
-
Chicken Thighs: Swap out chicken breasts for juicy thighs; they provide additional flavor and moisture. Thighs create a richer taste, making this dish even more satisfying.
-
Baked Option: For a healthier version, bake the breaded chicken on a parchment-lined baking sheet at 400°F (200°C) for 20-25 minutes, turning halfway. This method allows you to enjoy the crispiness without the frying.
-
Zingy Marinade: Consider adding lemon juice or hot sauce to the pickle juice marinade for a zesty punch! A dash of flavor can truly brighten up the dish.
-
Air Fryer Method: Use an air fryer to achieve that golden crisp with less oil. Cook at 375°F (190°C) for about 10-15 minutes, flipping halfway for even cooking.
With these variations, you can tailor the Crispy Dill Pickle Parmesan Chicken to match your cravings or dietary needs! Plus, don’t forget to explore complementary dishes such as a vibrant side salad or creamy coleslaw to enhance your meal experience. Happy cooking!
Expert Tips for Crispy Dill Pickle Parmesan Chicken
-
Marination Matters: Allow the chicken to marinate for at least 30 minutes. This ensures maximum flavor and tenderness from the dill pickle juice.
-
Breading Station Setup: Organize your coating station with separate bowls for flour, eggs, and breadcrumbs. This makes the dipping process smooth and helps avoid clumping.
-
Oil Temperature Check: Always test the oil temperature with a breadcrumb before frying. If it doesn’t sizzle, the chicken won’t get that desirable crispy texture.
-
Avoid Overcrowding: Fry the chicken in small batches to prevent steaming, which can lead to soggy breading. Proper spacing allows for even cooking.
-
Use a Meat Thermometer: Check the internal temperature to ensure doneness. The chicken must reach 165°F (75°C) for a safe and juicy result.
-
Resting Period Importance: Let the chicken rest for 5-10 minutes after frying. This step keeps the chicken juicy while preserving that delightful crispiness of the coating.
What to Serve with Crispy Dill Pickle Parmesan Chicken
There’s nothing quite like the comfort of a home-cooked meal, especially when you can pair it with delightful sides.
-
Creamy Coleslaw: This crunchy, tangy side adds a refreshing contrast to the crispy chicken while balancing the flavors superbly. The creamy dressing plays off the dill pickle undertones beautifully.
-
Garlic Mashed Potatoes: Soft and buttery, these mashed potatoes create a comforting base that complements the crunchy exterior of the chicken. The rich flavors meld together perfectly in every bite.
-
Green Salad: A fresh garden salad bursting with vibrant greens and your favorite veggies gives a fresh brightness that elevates the meal. Top with a tangy vinaigrette to enhance the dish’s savory profile.
-
Corn on the Cob: Sweet, juicy corn is the perfect side, offering a satisfying crunch and natural sweetness that pairs nicely with the dish’s savory notes. It brings a hint of summer to your dinner table throughout the year.
-
Sweet Potato Fries: These crispy, slightly sweet fries add a delightful contrast to the dish. Their vibrant color and flavor can brighten up your plate while providing a satisfying crunch.
-
Lemonade or Iced Tea: A cool glass of lemonade or refreshing iced tea makes the perfect drink to cleanse your palate and balance the savory richness of the chicken. The lightness of the drink complements the meal beautifully.
-
Chocolate Chip Cookies: End on a sweet note with warm, melty chocolate chip cookies. Their gooey sweetness will perfectly contrast the savory chicken, leaving everyone with a smile.
Enjoy crafting a meal that feels comforting, balanced, and absolutely irresistible!
Make Ahead Options
These Crispy Dill Pickle Parmesan Chicken are perfect for those busy weeknights when you need to save time without compromising flavor! You can marinate the chicken in dill pickle juice up to 24 hours in advance, allowing the flavors to deeply infuse. Additionally, you can prepare the breading station by combining the flour, eggs, breadcrumbs, and Parmesan ahead of time and refrigerating it. When you’re ready to cook, simply coat the marinated chicken and fry as instructed. For the best quality, store any cooked chicken in an airtight container in the refrigerator for up to 3 days; just reheat in the oven to keep that crispy texture intact. Enjoy your homemade comfort food with minimal effort!
How to Store and Freeze Crispy Dill Pickle Parmesan Chicken
Fridge: Store leftover Crispy Dill Pickle Parmesan Chicken in an airtight container for up to 3 days. This keeps the chicken fresh and prevents moisture loss.
Freezer: For longer storage, freeze the cooked chicken in a single layer on a baking sheet. Once frozen, transfer to a freezer bag or airtight container for up to 3 months.
Reheating: To reheat, place chicken in the oven at 375°F (190°C) for about 10-15 minutes, or until heated through, ensuring the coating remains crispy.
Room Temperature: Avoid leaving cooked chicken at room temperature for more than 2 hours to maintain food safety and quality.
Crispy Dill Pickle Parmesan Chicken Recipe FAQs
How do I choose the best chicken for this recipe?
Absolutely! When selecting chicken breasts, look for boneless and skinless pieces that are plump and have a pink hue with minimal dark spots. Fresh chicken should have a clean smell and no visible bruises or discoloration. For added juiciness, you might consider using chicken thighs instead, as they can stay tender even after cooking.
How should I store leftover Crispy Dill Pickle Parmesan Chicken?
To keep your chicken fresh, store any leftovers in an airtight container in the refrigerator for up to 3 days. If properly sealed, it should retain its flavors, but it’s best enjoyed within that timeframe. Reheat gently in the oven to maintain that beloved crispy exterior—no soggy chicken here!
Can I freeze Crispy Dill Pickle Parmesan Chicken?
Sure! To freeze your chicken, first let it cool completely. Then, arrange the chicken in a single layer on a baking sheet and place it in the freezer until frozen solid, about 2 hours. Once frozen, transfer the pieces to a freezer bag or airtight container. It can be stored for up to 3 months. When you’re ready to enjoy again, reheat in the oven at 375°F (190°C) until warm, about 10-15 minutes.
What should I do if the breading doesn’t stick to the chicken?
If the breading isn’t adhering well, try shaking off excess dill pickle juice more thoroughly before dredging in flour. Another tip is to ensure that you press the breadcrumbs firmly onto the chicken for a better hold. Next time, consider increasing the marination time, which can enhance the chicken’s texture and flavor, allowing a better seal.
Can I make this recipe gluten-free?
Very much so! Simply substitute the all-purpose flour with a gluten-free flour blend and use gluten-free breadcrumbs in your coating. This way, you can still enjoy the same delightful crunch and flavor without the gluten! Just be sure to double-check any added seasonings to ensure they are gluten-free as well.
Is this recipe safe for my pets?
While chicken is safe for dogs in moderation, the dill pickle juice and seasonings can be harmful. It’s best to avoid giving your pets this dish, especially the fried version. Instead, you can prepare a plain, unseasoned piece of cooked chicken just for them— they will love it!
Crispy Dill Pickle Parmesan Chicken You'll Crave Again
Ingredients
Equipment
Method
- In a large bowl, combine the boneless, skinless chicken breasts with dill pickle juice. Allow to marinate for at least 30 minutes.
- Set up your breading station with three shallow bowls: flour with seasoning, whisked eggs, and breadcrumb-Parmesan mixture.
- Heat about 1/4 inch of cooking oil in a skillet over medium heat. Test with a breadcrumb for readiness.
- Remove marinated chicken from pickle juice and coat in flour, dip in eggs, then press into the breadcrumb mixture.
- Fry each piece of chicken for 5-7 minutes per side until golden brown and cooked through, ensuring internal temp reaches 165°F.
- Drain fried chicken on a paper towel-lined plate to remove excess oil.
- Let the chicken rest for 5-10 minutes for juices to redistribute.
- Serve immediately with your favorite sides or cool for storage in an airtight container.
Leave a Reply