
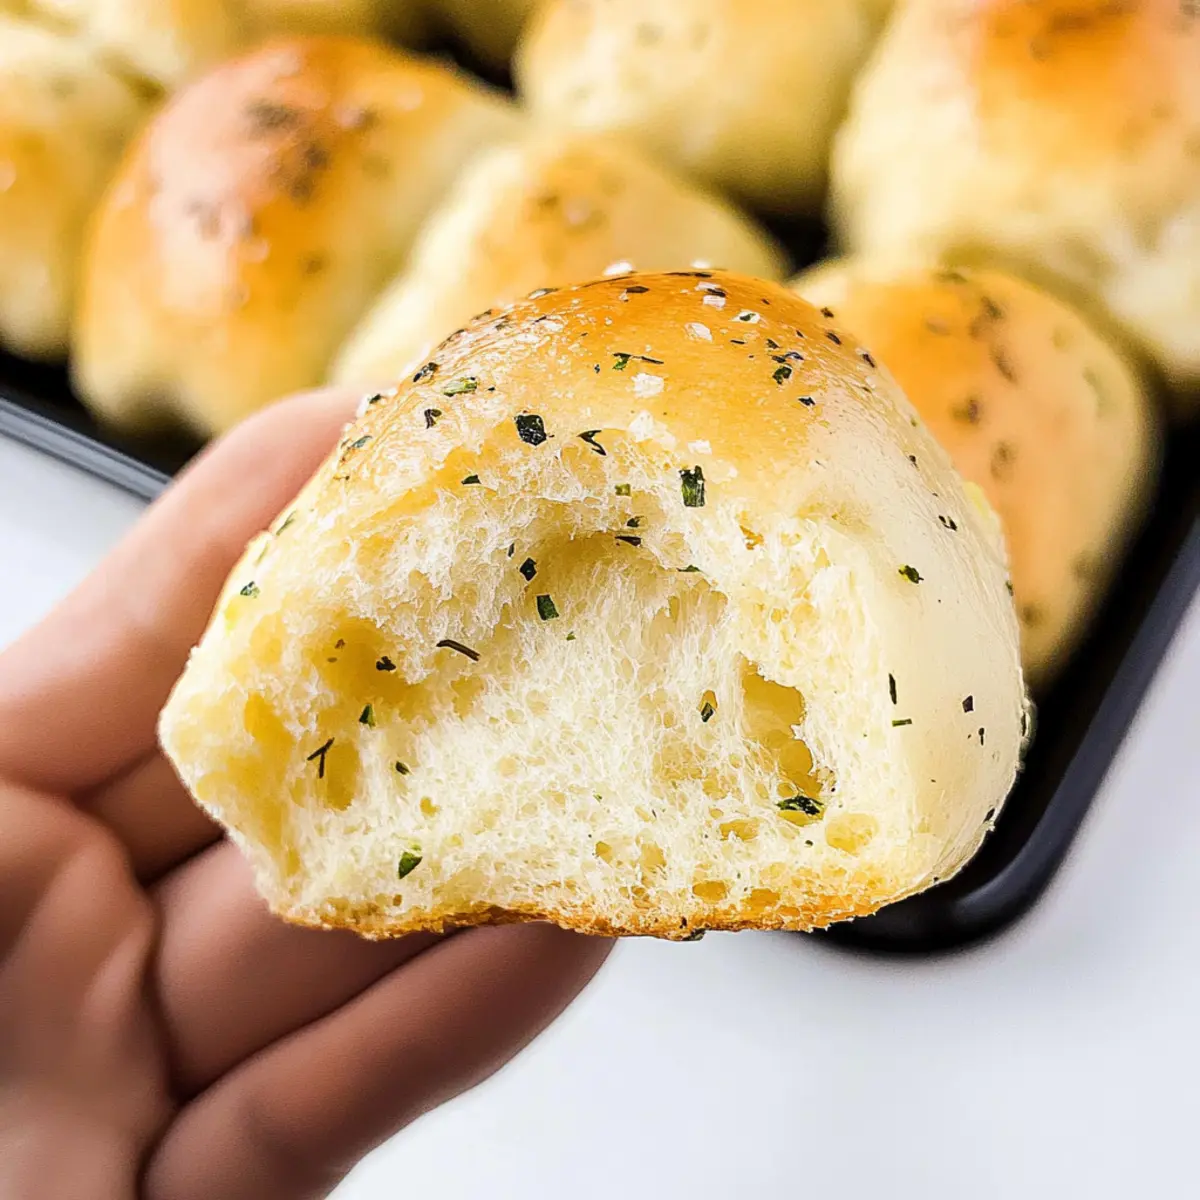
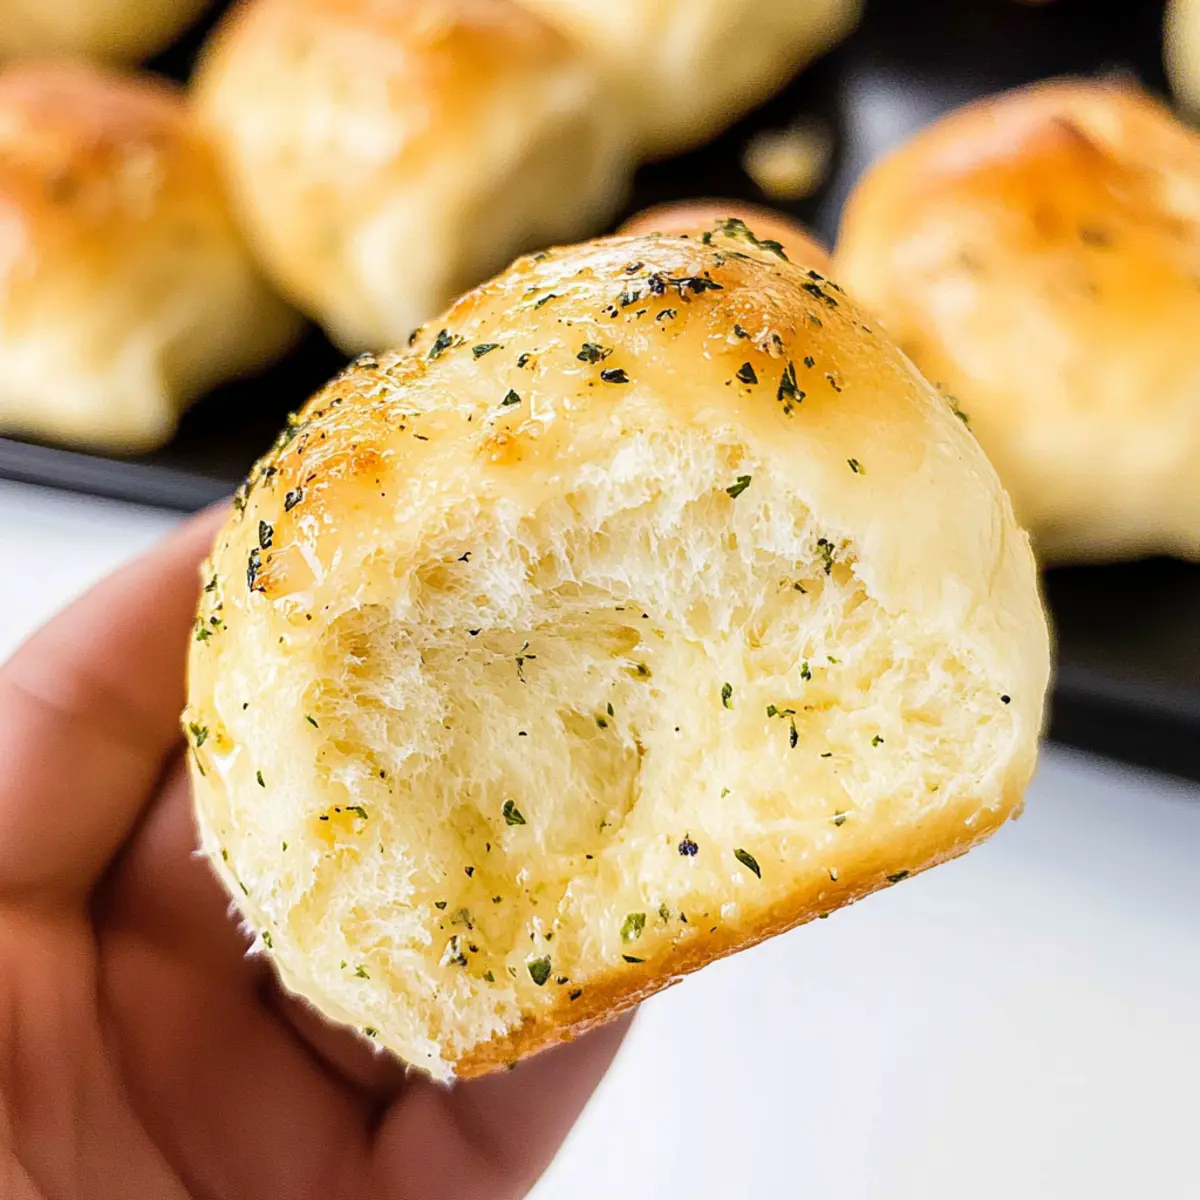
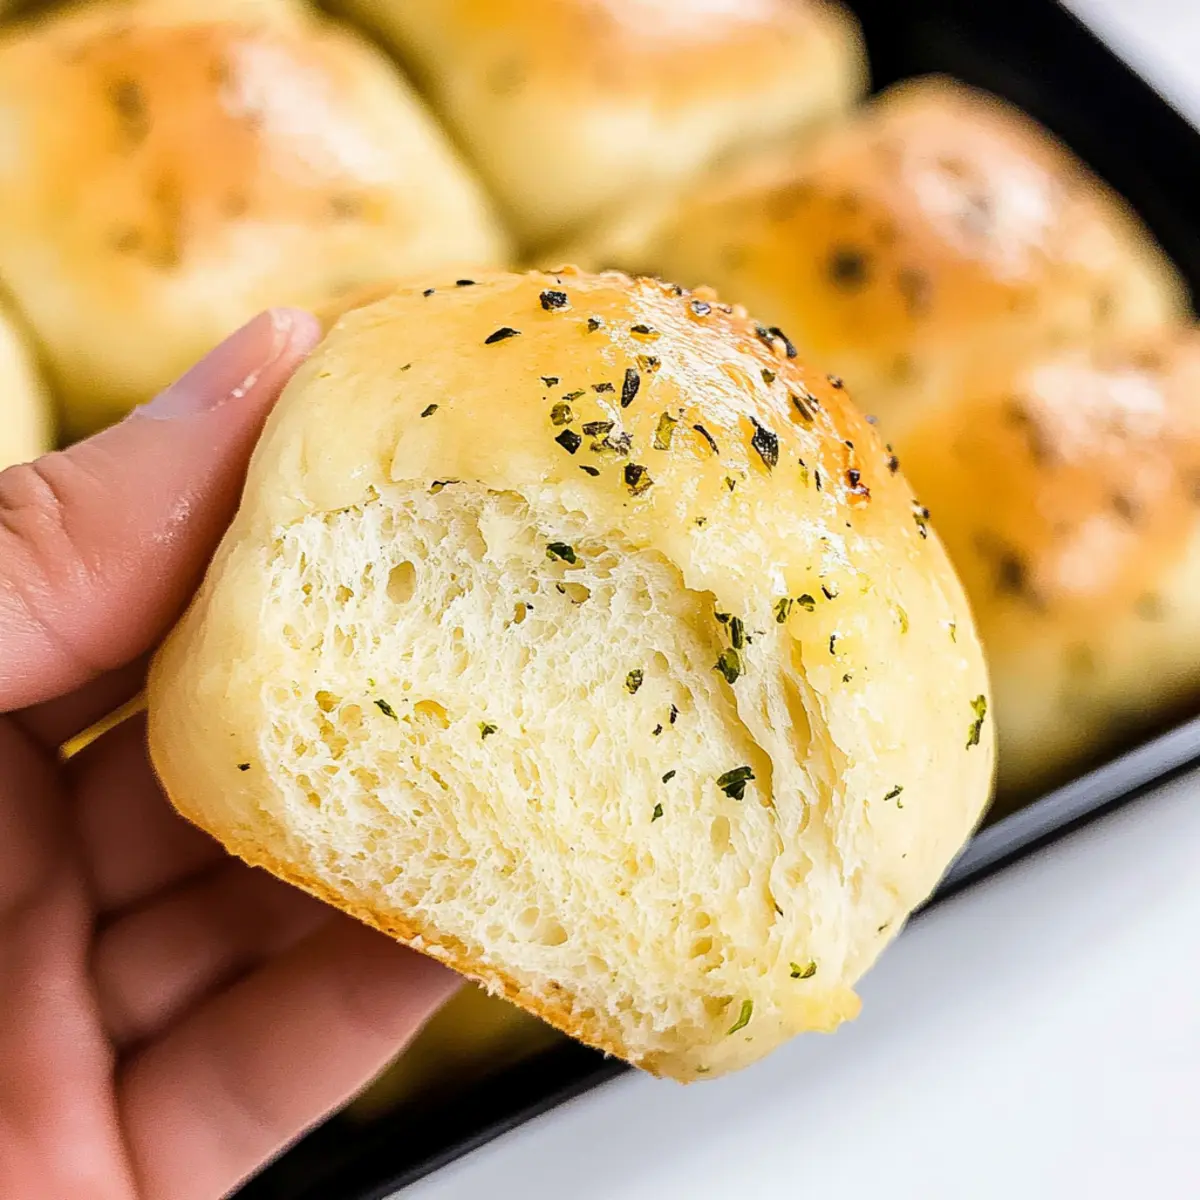
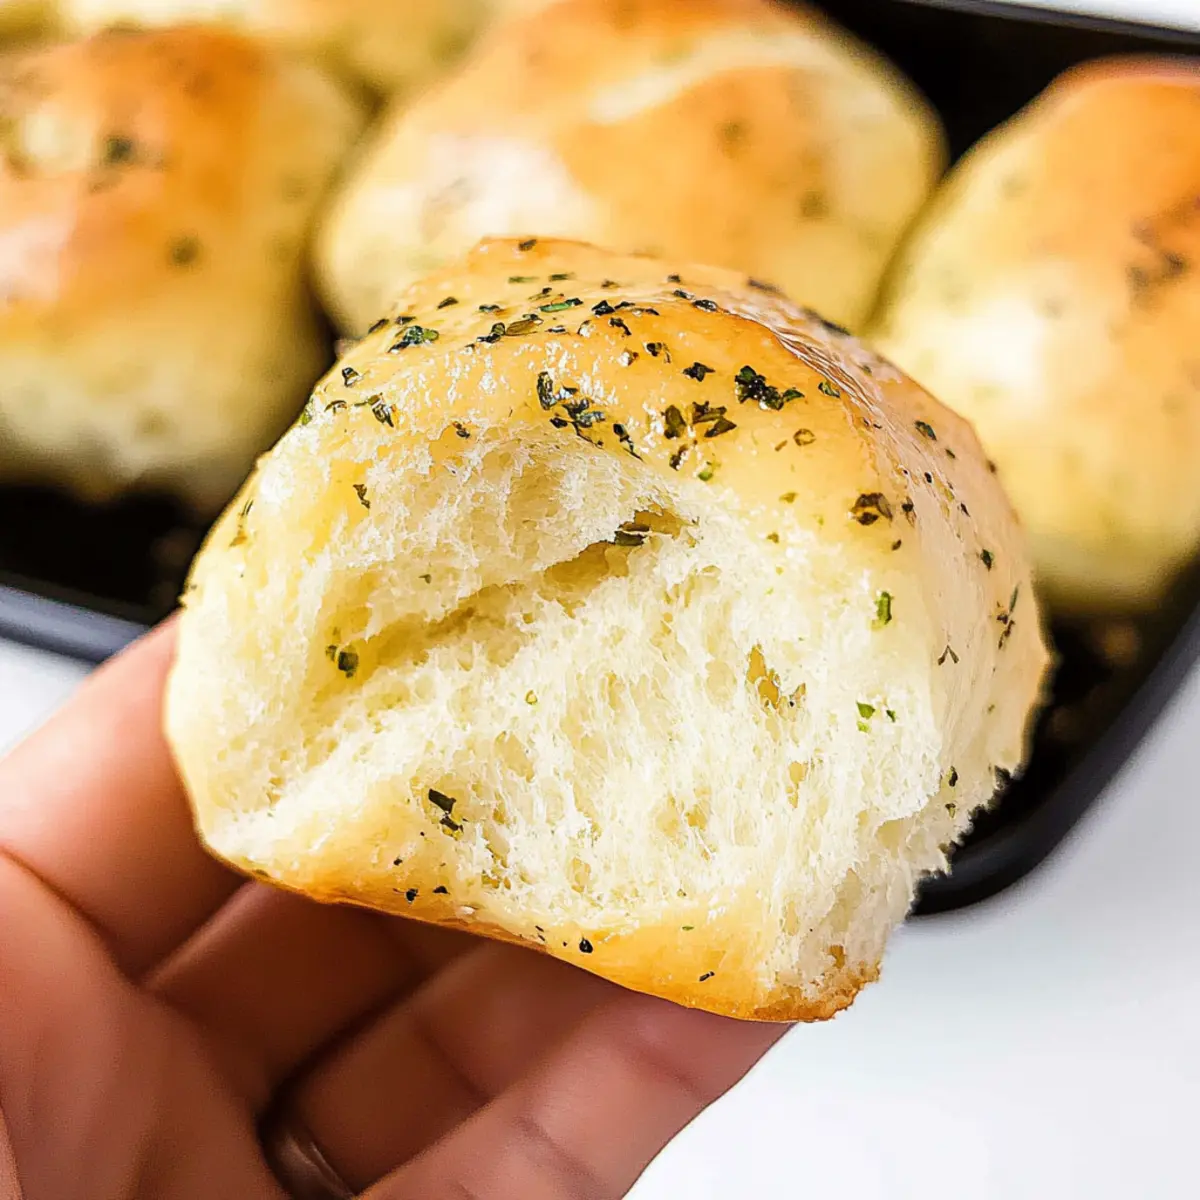
As I stood over my warm oven, the cozy aroma of garlic began weaving its way through my home, instantly igniting memories of family dinners and joyous gatherings. These Soft and Savory Garlic Dinner Rolls are the perfect addition to elevate any meal, transforming an ordinary night into something truly special. Using simple pantry ingredients, this recipe promises fluffy, melt-in-your-mouth rolls that are irresistibly flavorful and approachable for home cooks of all levels. Not only are they a fantastic crowd-pleaser—perfect for sharing during gatherings—but they also make for a delightful comfort food that’s sure to warm hearts. So, what do you say? Are you ready to fill your kitchen with that comforting garlicky goodness?
Why Make Garlic Dinner Rolls?
Irresistible Aroma: The scent of these dinner rolls filling your kitchen creates an inviting atmosphere, perfect for family gatherings.
Perfectly Soft: Achieve a fluffy, cloud-like texture that will have everyone reaching for seconds.
Versatile Delight: These rolls complement any meal—try them alongside soups, stews, or at holiday feasts!
Beginner-Friendly: Even if you’re new to baking, this simple recipe ensures a fuss-free experience and delicious results!
Make-Ahead Option: Busy schedule? Refrigerate shaped rolls overnight for a convenient, fresh-baked treat—easy to prep in advance!
Elevate your meal with these delightful garlic dinner rolls and experience why they are a must-have at your table!
Garlic Dinner Rolls Ingredients
For the Dough
• Whole Milk – Activates yeast and adds moisture; substitute with almond milk for a dairy-free option.
• Active Dry Yeast – Leavening agent essential for rising; ensure it’s fresh for optimal results.
• Granulated Sugar – Feeds the yeast for activation; can replace with honey (adjust liquid accordingly).
• Eggs – Provides structure and richness; for a vegan option, use flax eggs instead.
• Unsalted Butter – Adds flavor and richness; melted; can use olive oil as a healthier alternative.
• Garlic Powder – Delivers garlicky flavor; fresh minced garlic can be used for a stronger taste.
• Salt – Enhances flavor and controls yeast activity; important for overall taste.
• Bread Flour – Provides structure and softness; ideal for bread; all-purpose flour can be used but may result in denser rolls.
• Fresh Rosemary, Parsley, Oregano – Add depth and herbal flavor; dried herbs can substitute in smaller amounts.
For the Garlic Herb Butter (for brushing)
• Garlic Herb Butter – Adds a finishing touch; combine melted butter, Italian seasoning, and minced garlic for irresistible flavor.
Step‑by‑Step Instructions for Garlic Dinner Rolls
Step 1: Activate Yeast
In a stand mixer bowl, combine warm whole milk, granulated sugar, and active dry yeast. Stir gently and let the mixture sit for 10–15 minutes, until it becomes frothy and bubbly. This indicates that your yeast is active and ready to work its magic in creating soft garlic dinner rolls.
Step 2: Make Dough
Once the yeast mixture is frothy, add in the remaining sugar, eggs, melted unsalted butter, garlic powder, and salt. Mix everything until combined, then gradually add bread flour until a smooth, slightly sticky dough forms. The dough should pull away from the sides of the bowl without being too dry.
Step 3: Knead
Transfer the dough onto a lightly floured surface or keep it in the stand mixer. Knead the dough by hand for about 8–10 minutes or for 3–4 minutes using the mixer with a dough hook. The dough should be smooth and elastic, indicating it’s ready for its first rise to create those fluffy garlic dinner rolls.
Step 4: First Rise
Place the kneaded dough into a lightly oiled bowl, turning it to coat all sides. Cover the bowl with a clean kitchen towel or plastic wrap and let it rise in a warm area until it doubles in size, about 1 hour. This initial rising is crucial for achieving fluffy rolls full of savory flavor.
Step 5: Shape Rolls
After the dough has risen, punch it down gently to release the air. Divide the dough into 12 equal pieces and shape each piece into a ball. Place the shaped rolls into a greased baking pan, leaving some space in between for them to rise again. They’ll puff up beautifully!
Step 6: Second Rise
Cover the baking pan with a towel and let the rolls rise again in a warm spot until they double in size, approximately 1 to 1.5 hours. This second rise allows the garlic dinner rolls to become even fluffier and more delightful, ready to bake.
Step 7: Preheat Oven
While the rolls are rising, preheat your oven to 350°F (175°C). This ensures that the rolls will bake evenly and develop a golden brown color. Preheating is essential for achieving the perfect texture that makes these garlic dinner rolls irresistible.
Step 8: Prepare Butter Mix
In a small bowl, combine melted butter with minced garlic and Italian seasoning. Once the rolls have risen, brush the garlic herb butter generously over the top of the rolls. This step not only adds fantastic flavor but also helps create a beautiful golden crust.
Step 9: Bake
Bake the rolls in the preheated oven for 18–20 minutes, or until they turn golden brown on top and sound hollow when tapped. As they bake, the aroma of garlic will fill your kitchen—a sign of the delicious garlic dinner rolls that await you.
Step 10: Serve
Once baked, remove the rolls from the oven and brush with any remaining garlic herb butter for an extra burst of flavor. Allow them to cool slightly before serving warm, and enjoy the incredible softness and savory goodness of your homemade garlic dinner rolls!
Make Ahead Options
These Soft and Savory Garlic Dinner Rolls are perfect for busy home cooks looking to save time! You can prepare the dough and shape the rolls up to 24 hours in advance and refrigerate them overnight. Simply place the shaped rolls in a greased baking pan, cover them snugly with plastic wrap, and refrigerate. This slow rise enhances flavor while maintaining softness. When you’re ready to bake, allow the rolls to come to room temperature (around 30 minutes), then brush with garlic herb butter and bake as instructed. This method ensures that your garlic dinner rolls turn out just as fluffy and delicious, saving you valuable time for meal planning!
Storage Tips for Garlic Dinner Rolls
Room Temperature: Store baked garlic dinner rolls in an airtight container at room temperature for up to 3 days to maintain freshness.
Fridge: If you need them to last longer, keep them in the fridge for up to 1 week, wrapped in plastic wrap to prevent dryness.
Freezer: Freeze leftover rolls by wrapping each in plastic wrap and placing them in a freezer bag for up to 1 month; they’ll be perfect when thawed and reheated.
Reheating: To enjoy them warm, reheat frozen rolls directly from the freezer in the oven at 350°F (175°C) for about 10-12 minutes until heated through; your soft and savory garlic dinner rolls will be irresistible again!
Expert Tips for Garlic Dinner Rolls
-
Correct Yeast Temperature: Ensure your milk is between 110-115°F to activate the yeast properly; too cold won’t work, and too hot will kill it.
-
Humidity Matters: For a successful rise, create a humid environment by placing a mug of hot water in the microwave with the dough, encouraging fluffiness.
-
Knead Enough: Knead the dough until smooth and elastic, about 8-10 minutes by hand or 3-4 minutes in a mixer; under-kneading can result in denser rolls.
-
Don’t Rush the Rise: Allow both the first and second rises to fully double in size. This step is crucial for achieving those soft and fluffy garlic dinner rolls.
-
Make-Ahead Convenience: For busy days, shape the rolls, refrigerate them overnight, and just bring them to room temperature before baking to enjoy fresh rolls anytime.
What to Serve with Garlic Dinner Rolls
These fluffy, buttery rolls can infuse your meal with warmth and flavor, making every bite a cherished moment.
-
Savory Vegetable Soup: A warm bowl of hearty vegetable soup pairs perfectly, balancing the fluffy texture of the rolls with comforting flavors. The rolls are perfect for dipping!
-
Creamy Mashed Potatoes: Their creamy consistency complements the soft garlic dinner rolls beautifully, creating a delightful dish that no one can resist. It’s like a hug on your plate.
-
Crispy Roasted Chicken: The savory garlic from the rolls enhances the juicy flavors of roasted chicken, making every bite a burst of savory goodness. Whether it’s a family dinner or a special occasion, it’s a match made in heaven.
-
Herbed Salad: A light, herbed salad provides a refreshing contrast to the rich rolls, brightening your meal. The freshness of lettuce and herbs balances the buttery flavor beautifully.
-
Cheesy Garlic Bread: If you’re a garlic lover, serving these alongside cheesy garlic bread takes the flavor to new heights! It’s a double delight that will have everyone asking for more.
-
Red Wine: A glass of robust red wine brings out the hearty flavors in your meal, creating an exquisite dining experience. The richness of the wine melds harmoniously with the warmth of the rolls.
-
Homemade Apple Pie: For a sweet finale, the warm, cinnamon-infused apple pie offers a delightful contrast to the savory rolls. A scoop of vanilla ice cream on top makes it even better!
Garlic Dinner Rolls Variations & Substitutions
Feel free to get creative and make these garlic dinner rolls your own with these delightful twists!
-
Fresh Garlic: Replace garlic powder with freshly minced garlic for a bolder flavor and aroma. The vibrant taste of fresh garlic will elevate your rolls to a whole new level!
-
Herb Infusion: Swap in different herbs like thyme or chives based on your preference. A fragrant mix can personalize the flavor and complement your meal beautifully.
-
Cheesy Surprise: Create a cheese-stuffed version by placing a cube of your favorite cheese in the center of each roll before the second rise. As the rolls bake, gooey cheese will melt and create an irresistible filling.
-
Whole Wheat Flour: Substitute half of the bread flour with whole wheat flour for a healthier twist. This will add a nutty flavor and boost the nutritional value of your dinner rolls.
-
Spice It Up: Add red pepper flakes or a pinch of cayenne pepper to the garlic butter for a spicy kick. This subtle enhancement will provide warmth and a touch of heat every time you take a bite.
-
Olive Oil Option: Use olive oil instead of melted butter for a heart-healthy alternative. The rich taste of olive oil will still provide the moisture and flavor you desire in your rolls.
-
Sweet Garlic Rolls: For a unique flavor, incorporate a touch of honey or maple syrup into the dough. This sweet contrast to the garlic will make for an unexpectedly delicious treat.
-
Dairy-Free Delight: Substitute whole milk with almond milk and use a vegan butter alternative for a fully dairy-free version. Now, everyone can enjoy these fluffy rolls without compromising on taste!
Explore these variations to tailor your homemade garlic dinner rolls to your unique tastes, and enjoy the delicious possibilities!
Garlic Dinner Rolls Recipe FAQs
How do I know if my garlic dinner roll ingredients are fresh?
Absolutely! For the best results, check the yeast’s expiration date—if it’s fresh, it will foam when activated in warm milk. Whole milk should be fresh with no off smells, and herbs should be vibrant and aromatic. For butter, look for a creamy consistency without any signs of shelf-life issues.
What’s the best way to store garlic dinner rolls for freshness?
Very! Store your baked garlic dinner rolls in an airtight container at room temperature for up to 3 days. If you want them to last longer, you can refrigerate them for up to a week. Just make sure to wrap them in plastic wrap to prevent them from drying out.
Can I freeze garlic dinner rolls? How do I do it?
Yes, absolutely! To freeze your garlic dinner rolls, first ensure they are completely cool. Then, wrap each roll tightly in plastic wrap and place them in a freezer bag. They can be frozen for up to 1 month. When you’re ready to enjoy them, simply thaw at room temperature or reheat in an oven set to 350°F (175°C) for about 10-12 minutes.
What should I do if my dough doesn’t rise?
Great question! If your dough isn’t rising, it could be due to several factors. First, ensure your yeast is fresh and activated properly. The milk should be between 110-115°F. If it’s too cold, the yeast won’t activate, and if it’s too hot, it can kill the yeast. Also, try placing the dough in a warm, humid environment to encourage rising—this can be achieved by using a mug of hot water in your microwave along with the dough.
Are these garlic dinner rolls safe for people with allergies?
Definitely! However, this recipe contains common allergens such as wheat (in flour), dairy (in milk and butter), and eggs. If you or your guests have allergies, you can make some adjustments: substitute almond milk for whole milk for a dairy-free option, and use flax eggs to make it vegan. Be sure to check specific ingredient labels for additional allergens.
How can I enhance the garlic flavor in my rolls?
Absolutely! For a more intense garlic flavor, you can use fresh minced garlic in place of garlic powder—just remember that fresh garlic gives a bolder taste. You could also increase the amount of garlic herb butter brushed over the rolls before and after baking for an irresistible garlicky finish!
Fluffy Garlic Dinner Rolls You Can't Resist Making
Ingredients
Equipment
Method
- In a stand mixer bowl, combine warm whole milk, granulated sugar, and active dry yeast. Stir gently and let sit for 10-15 minutes until frothy.
- Once frothy, add in remaining sugar, eggs, melted butter, garlic powder, and salt. Mix until combined, then gradually add bread flour until a smooth dough forms.
- Transfer dough onto a lightly floured surface or keep in mixer. Knead by hand for 8-10 minutes or 3-4 minutes using a mixer with a dough hook.
- Place kneaded dough in a lightly oiled bowl, cover, and let rise in a warm area until it doubles in size, about 1 hour.
- After rising, punch down gently, divide dough into 12 pieces, and shape each into a ball. Place in a greased baking pan.
- Cover pan with a towel and let rolls rise again in a warm spot until doubled in size, approximately 1 to 1.5 hours.
- Preheat oven to 350°F (175°C).
- In a small bowl, combine melted butter with minced garlic and Italian seasoning. Brush over the top of the rolls.
- Bake rolls for 18-20 minutes, or until golden brown and sound hollow when tapped.
- Remove from oven and brush with remaining garlic herb butter. Allow to cool slightly before serving.
Leave a Reply