
The aroma of grilled cheese wafting through the kitchen brings back memories of cozy nights in, where comfort food reigns supreme. Today, I’m excited to share my take on the Grilled Cheese Burrito, a delightful Taco Bell copycat that wraps bold flavors in a crispy, cheesy shell. This recipe is a game changer: it’s not only quick to prepare—taking under 30 minutes—but also incredibly customizable. Whether you favor spicy seasoned beef, tender chicken, or a hearty vegetarian option, you can craft this comfort food to suit your cravings. Best of all, it’s a surefire crowd-pleaser that both kids and adults will love! Ready to dive into a delicious experience that elevates your homemade meals? Let’s get started!
Why Is This Grilled Cheese Burrito Irresistible?
Versatile Options: This recipe caters to everyone—choose beef, chicken, or a vegetarian filling for endless possibilities.
Quick and Easy: You can whip this up in under 30 minutes, making it perfect for busy weeknights.
Kid-Friendly: Packed with flavors and melty goodness, it’s sure to be a hit with the little ones!
Crispy Delight: The combination of grilled cheese on the outside and a hearty filling inside creates a mouthwatering texture blend.
Perfect for Meal Prep: Assemble burritos ahead of time for a hassle-free, satisfying meal whenever you need it.
Pair your burrito with a tasty side like Cheeseburger Pretzel Bombs for the ultimate dinner experience!
Ingredients for Grilled Cheese Burrito
• Get ready for cheesy bliss!
For the Filling
- Ground Beef – Provides a savory base; substitute with chicken, beans, or tofu for a different protein profile.
- Taco Seasoning – Adds spice and flavor; use a packet or a homemade blend for freshness.
- Cooked White Rice – Acts as a hearty filler; quinoa or cauliflower rice make great alternatives.
- Sour Cream – Adds creaminess and tang; substitute with Greek yogurt or dairy-free alternatives for a lighter option.
- Nacho Cheese Sauce – Provides gooeyness and richness; use homemade cheese sauce or a vegan version if desired.
- Chipotle Sauce – Delivers a smoky heat; sriracha or hot sauce can serve as substitutes for added spice.
For the Cheese
- Shredded Cheddar Cheese – Melts well and enhances flavor; try mozzarella or a Mexican cheese blend for variation.
- Shredded Mozzarella – Offers extra meltiness; substitute with a cheese of your choice.
For the Wrap
- Large Flour Tortillas – Serves as the wrap; corn tortillas can be used for a gluten-free option.
- Butter/Oil – Essential for grilling; use a non-stick cooking spray for fewer calories.
Each of these ingredients plays a crucial role in crafting your Grilled Cheese Burrito, ensuring a satisfying and flavorful experience that’s well worth the effort!
Step‑by‑Step Instructions for Grilled Cheese Burrito (Taco Bell Copycat)
Step 1: Cook the Beef
Start by browning 1 pound of ground beef in a skillet over medium heat for about 8–10 minutes, breaking it apart as it cooks until it’s no longer pink. Drain any excess grease, then sprinkle in 1 packet of taco seasoning and add ¼ cup of water. Stir well and let it simmer for another 5 minutes, until the beef absorbs the seasoning and thickens.
Step 2: Warm the Tortillas
Once the beef is ready, heat your large flour tortillas to make them pliable. You can do this by placing them in a dry skillet over medium heat for about 30 seconds on each side, or simply pop them in the microwave for 20-30 seconds. The tortillas should be warm and slightly soft to make wrapping easier.
Step 3: Assemble the Burrito
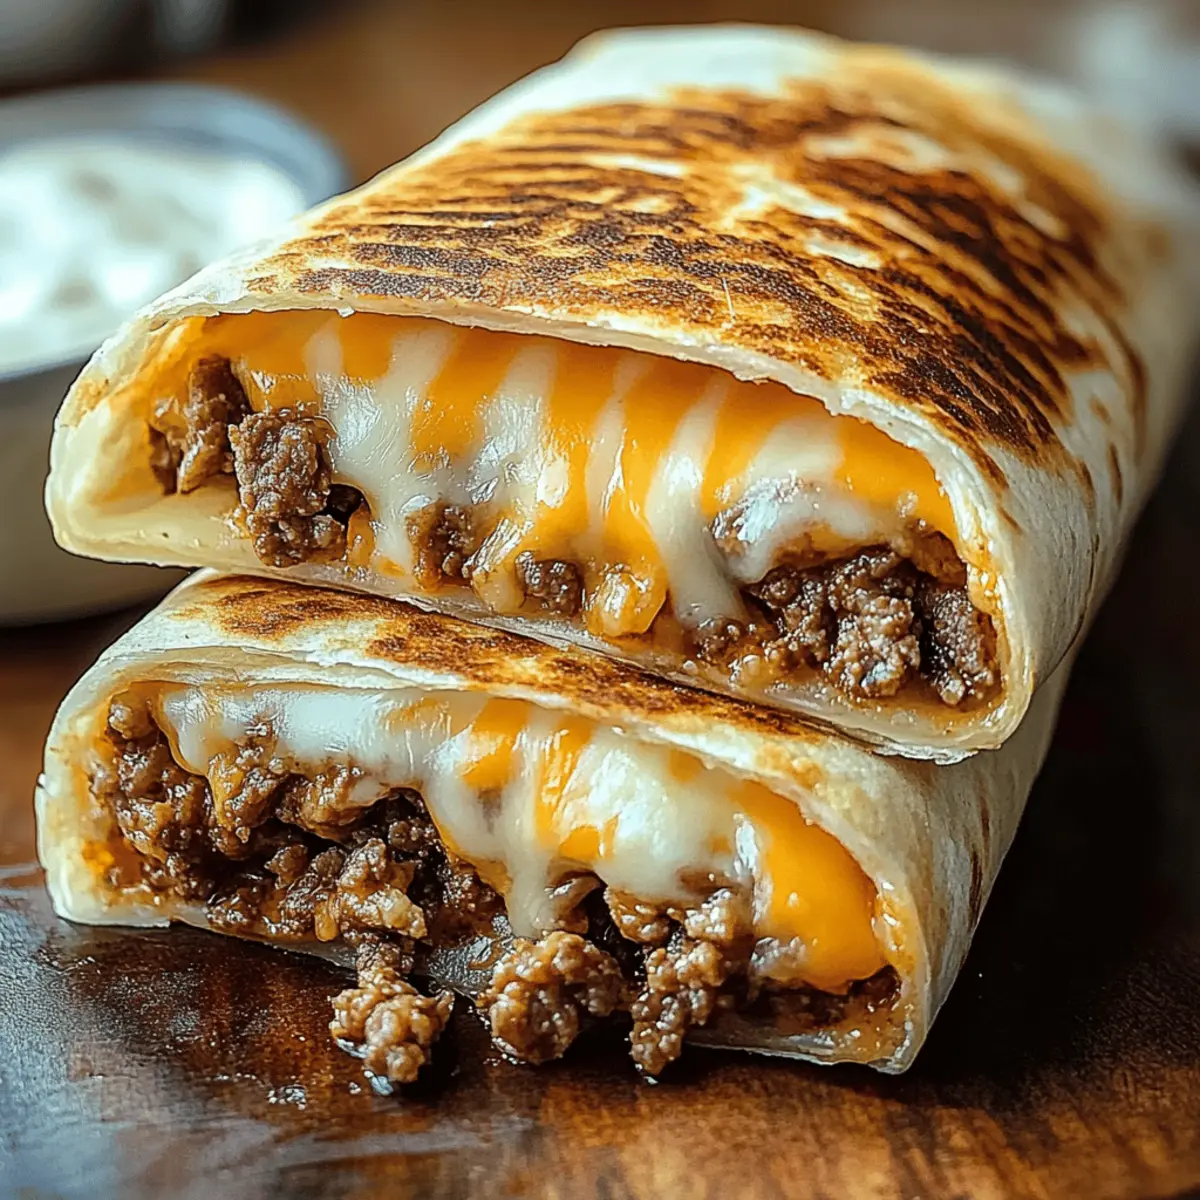
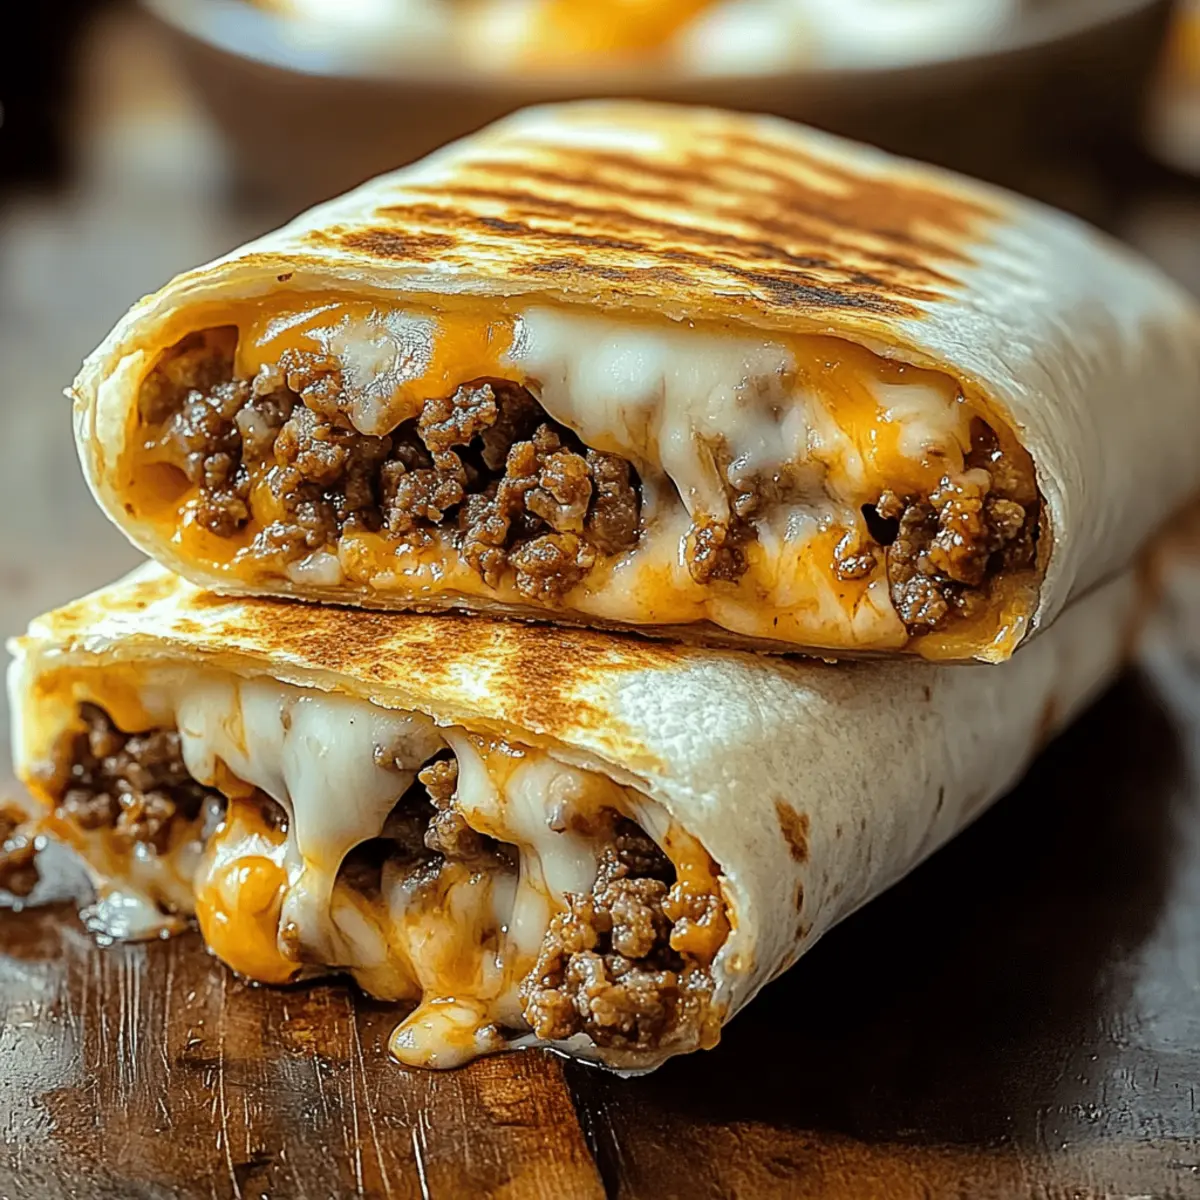
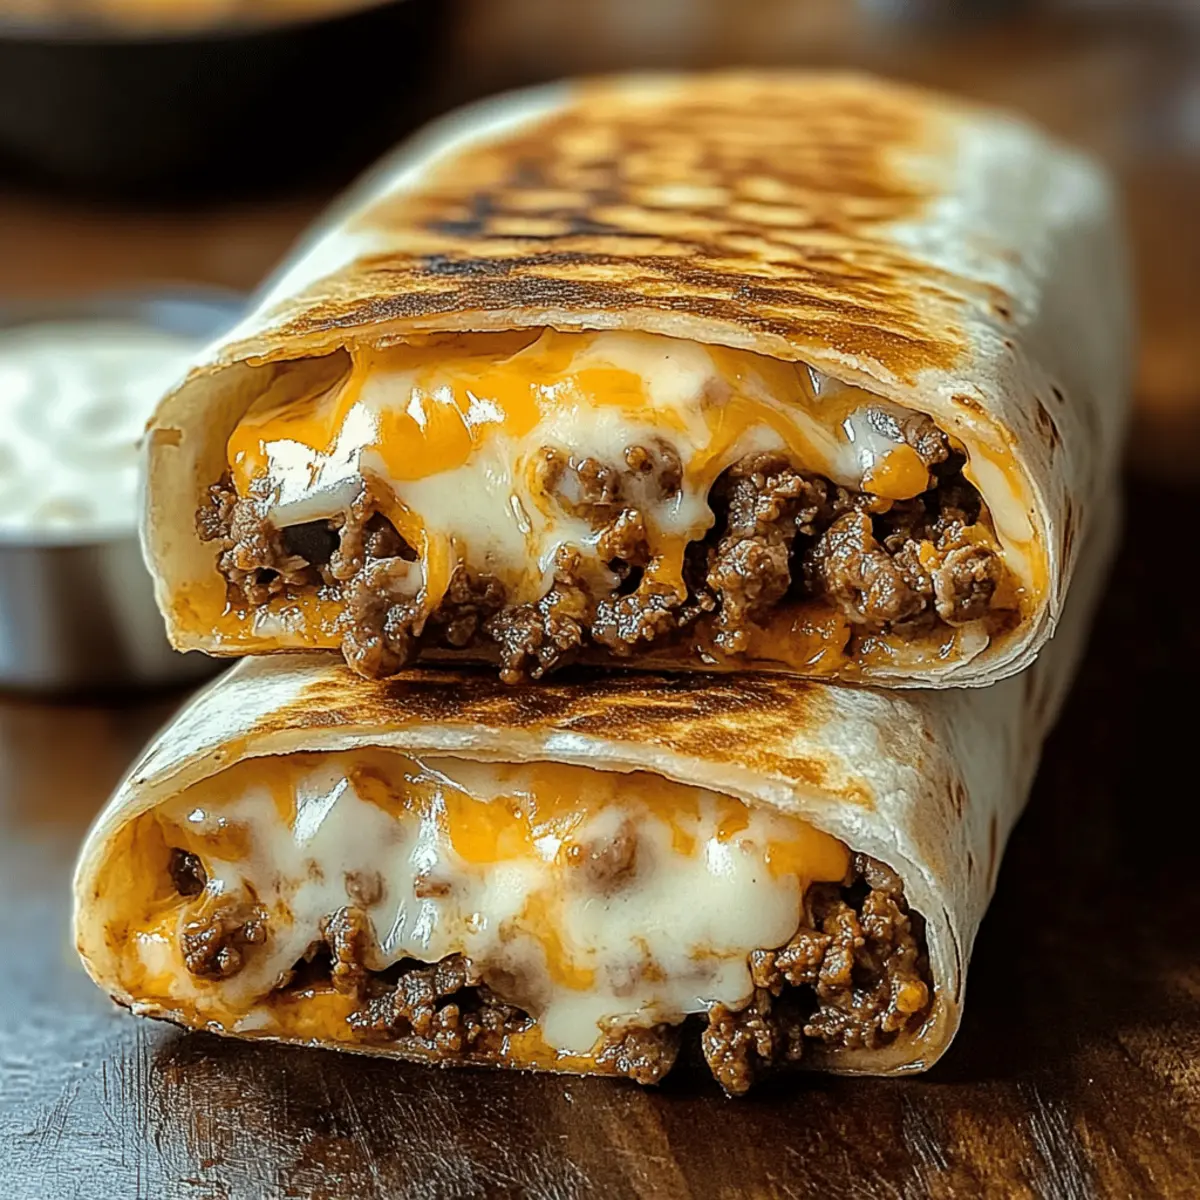
Lay a warmed tortilla flat on a clean surface. Begin layering by adding a generous scoop of cooked rice, followed by the seasoned beef, a drizzle of nacho cheese sauce, a spoonful of chipotle sauce, and a dollop of sour cream. Finally, sprinkle on shredded cheddar and mozzarella cheese for that irresistible creamy texture.
Step 4: Wrap It Up
To wrap your Grilled Cheese Burrito, fold in the sides of the tortilla and roll it tightly from the bottom to the top, sealing in all the delicious fillings. Ensure the seam is facing down to hold everything together, making it easier to grill and serve.
Step 5: Grill the Burrito
Preheat a skillet over medium heat and add a small amount of butter or oil. Once it’s hot, sprinkle about 2 tablespoons of shredded cheese in the skillet, then place the burrito seam-side down onto the melted cheese. Cook for 3–4 minutes until the bottom is golden and crispy, then carefully flip it to the other side and grill for another 3–4 minutes until the cheese forms a crust.
Step 6: Serve and Enjoy
Once grilled to a golden perfection on both sides, remove the burrito from the skillet and let it cool for a minute. Then slice it in half diagonally to reveal the gooey, cheesy filling inside. This Grilled Cheese Burrito is ready to be served warm, bursting with flavors that’ll remind you of Taco Bell while being completely homemade!

Tips for the Best Grilled Cheese Burrito
- Perfectly Cooked Beef: Ensure that the beef is cooked thoroughly before adding the taco seasoning to prevent a greasy filling. Drain excess fat for the best texture.
- Warm Tortillas: Heating the tortillas makes them more pliable, preventing them from cracking when folded. Don’t skip this step!
- Layer Strategically: Spread the fillings evenly to avoid messy burritos. Too much filling can make rolling difficult, leading to spills during grilling.
- Grill Time Matters: Keep an eye on the grilling process; if it’s too hot, the cheese may burn before the burrito crisps up. Adjust the heat as needed.
- Chill for Making Ahead: If prepping for later, assemble the burritos and refrigerate. Just grill them right before serving for optimal warmth and crispiness.
Using these tips will help you create the ultimate Grilled Cheese Burrito, full of flavor and comfort!
Storage Tips for Grilled Cheese Burrito
Fridge: Store leftover Grilled Cheese Burrito in an airtight container for up to 3 days. This helps retain the burrito’s flavor and prevents it from drying out.
Freezer: If you want to save some for later, wrap each burrito tightly in plastic wrap and place them in a freezer-safe bag. They can be frozen for up to 3 months.
Reheating: To reheat, thaw in the fridge overnight, then grill in a skillet over medium heat for about 5 minutes per side to restore crispiness.
Room Temperature: Avoid leaving the burrito out at room temperature for more than 2 hours to ensure food safety.
Grilled Cheese Burrito Variations
Feel free to explore these delicious twists that will make your Grilled Cheese Burrito even more exciting!
-
Beefless Delight: Substitute ground beef with shredded chicken, black beans, or tofu for a tasty vegetarian version. Bring new flavors to the table with your favorite protein choice!
-
Spicy Kick: Add sliced jalapeños or a dash of your favorite hot sauce to the filling for an extra punch of heat. A little spice can transform your meal, igniting a burst of flavor in every bite!
-
Fresh Veggie Crunch: Mix in diced bell peppers, corn, or spinach with your filling for added freshness and color. These vibrant veggies not only enhance flavor but also bring nutritional benefits into your burrito.
-
Creamy Alternatives: Swap sour cream for Greek yogurt or avocado for a creamy twist that’s just as satisfying. These creamy substitutes can elevate your burrito’s texture while still complementing the rich flavors.
-
Dairy-Free Option: Use dairy-free cheese and a vegan sour cream alternative for a delightful vegan version. Who says comfort food can’t be compassionate? This adaptation ensures everyone can join the feast.
-
Flavorful Fuels: Consider including a scoop of refried beans or guacamole inside your burrito for extra texture and flavor. These additions will make each bite even more satisfying and create a filling meal option.
-
Crunchy Topping: Add crushed tortilla chips inside the burrito for a delightful crunch. This unexpected twist introduces a fun texture that will keep your taste buds guessing!
-
Breakfast Burrito: Switch things up by adding scrambled eggs and breakfast sausage for a hearty breakfast option. Breakfast for dinner, anyone? This comforting combination is a great way to start or end the day!
For even more meal inspiration, consider pairing your burrito with a side of Cheeseburger Pretzel Bombs or treat yourself to a slice of Velvet Strawberry Cheesecake. Enjoy your culinary adventure!
Make Ahead Options
These Grilled Cheese Burritos are perfect for meal prep, allowing you to enjoy a delicious homemade meal on busy nights! You can assemble the burritos up to 24 hours in advance; simply wrap them tightly in plastic wrap or place them in an airtight container. To maintain quality, refrigerate them promptly and avoid adding fresh ingredients like sour cream or nacho cheese until just before grilling. When you’re ready to serve, heat your skillet, grill the assembled burritos for 3-4 minutes per side until golden and crispy, and enjoy the same comforting flavors that make these burritos a hit!
What to Serve with Grilled Cheese Burrito?
Elevate your dining experience with delightful sides that complement the rich flavors of this cheesy creation.
-
Fresh Salsa: A zesty salsa adds bright and tangy notes, enhancing the burrito’s savory goodness.
-
Guacamole: Creamy and smooth, guacamole provides a luscious contrast to the crunchy burrito, making each bite even more satisfying.
-
Mexican Rice: Fluffy, seasoned rice offers a heartwarming side that pairs perfectly with the bold flavors of the burrito while adding a comforting touch.
-
Charred Corn Salad: The sweetness of grilled corn with fresh herbs introduces delightful texture and summery notes that balance the richness of the cheese.
-
Crispy Tortilla Chips: Crunchy and fun, serve these with a side of nacho cheese or your favorite dip for a playful contrast to the soft burrito.
-
Margaritas: An ice-cold margarita makes for a refreshing beverage choice that pairs beautifully with the spiciness of the burrito, enhancing your meal’s overall enjoyment.
Incorporate these delicious options to create a memorable feast that delights the senses and adds a festive touch to your table!
Grilled Cheese Burrito Recipe FAQs
What is the best way to select ripe ingredients for my Grilled Cheese Burrito?
Absolutely! For the best flavor and texture, choose fresh ingredients. Look for ground beef that is bright red with minimal fat, or if opting for chicken, choose cutlets that are pink and without dark spots. Inspect your tortillas for any tears or dryness, ensuring they are soft and pliable. If you’re using fresh vegetables or toppings like jalapeños, select those that are firm and vibrant in color, ensuring maximum crunch and flavor.
How should I store leftover Grilled Cheese Burritos?
Store leftovers in an airtight container in the refrigerator for up to 3 days. This helps to keep the burritos moist and flavorful. You can also wrap them in foil or plastic wrap to maintain freshness, ensuring no air gets in.
Can I freeze Grilled Cheese Burritos? If so, how?
Yes, you can freeze the burritos for later enjoyment! Here’s how: Wrap each burrito tightly in plastic wrap, then place it in a freezer-safe bag. Be sure to label the bag with the date—this helps you keep track of freshness. They can be frozen for up to 3 months. When you’re ready to eat, thaw overnight in the fridge, and then grill them in a skillet for about 5 minutes per side to reheat, allowing the texture to crisp back up.
What should I do if my burrito comes out soggy?
Very! If your burrito ends up soggy, it could be due to too much filling or excess moisture in the ingredients. To avoid this, ensure the beef is well-drained and only add small amounts of sauces. When assembling, layer the ingredients strategically; consider placing rice first as a moisture barrier. If it happens again, simply toast each assembled burrito in a skillet until crispy, which enhances both flavor and texture.
Are there any dietary considerations for my Grilled Cheese Burrito?
The more the merrier! For those with dietary restrictions, you can easily make this recipe vegetarian by substituting beef with beans, tofu, or grilled veggies. For gluten-free options, use corn tortillas. If you’re using dairy-free products, try almond or cashew cheeses instead of the regular cheese. Always check for specific allergens in packaged ingredients, especially with the nacho and chipotle sauces, to ensure everyone’s safe and happy at the table.
Irresistible Grilled Cheese Burrito: Easy Taco Bell Copycat
Ingredients
Equipment
Method
- Start by browning the ground beef in a skillet over medium heat for about 8–10 minutes, breaking it apart as it cooks until it’s no longer pink. Drain excess grease, sprinkle in taco seasoning, and add water. Stir and simmer for another 5 minutes.
- Heat the large flour tortillas to make them pliable in a dry skillet over medium heat for about 30 seconds on each side or microwave for 20-30 seconds.
- Lay a warmed tortilla flat, adding a scoop of cooked rice, seasoned beef, nacho cheese sauce, chipotle sauce, sour cream, and sprinkle cheeses.
- Fold in the sides of the tortilla and roll tightly from the bottom to the top, sealing in the filling.
- Preheat a skillet and add butter or oil. Sprinkle shredded cheese in the skillet, place the burrito seam-side down into melted cheese, and cook for 3–4 minutes until golden, then flip and grill again for another 3–4 minutes.
- Remove the burrito and let it cool for a minute, then slice diagonally to reveal the filling.
Leave a Reply