
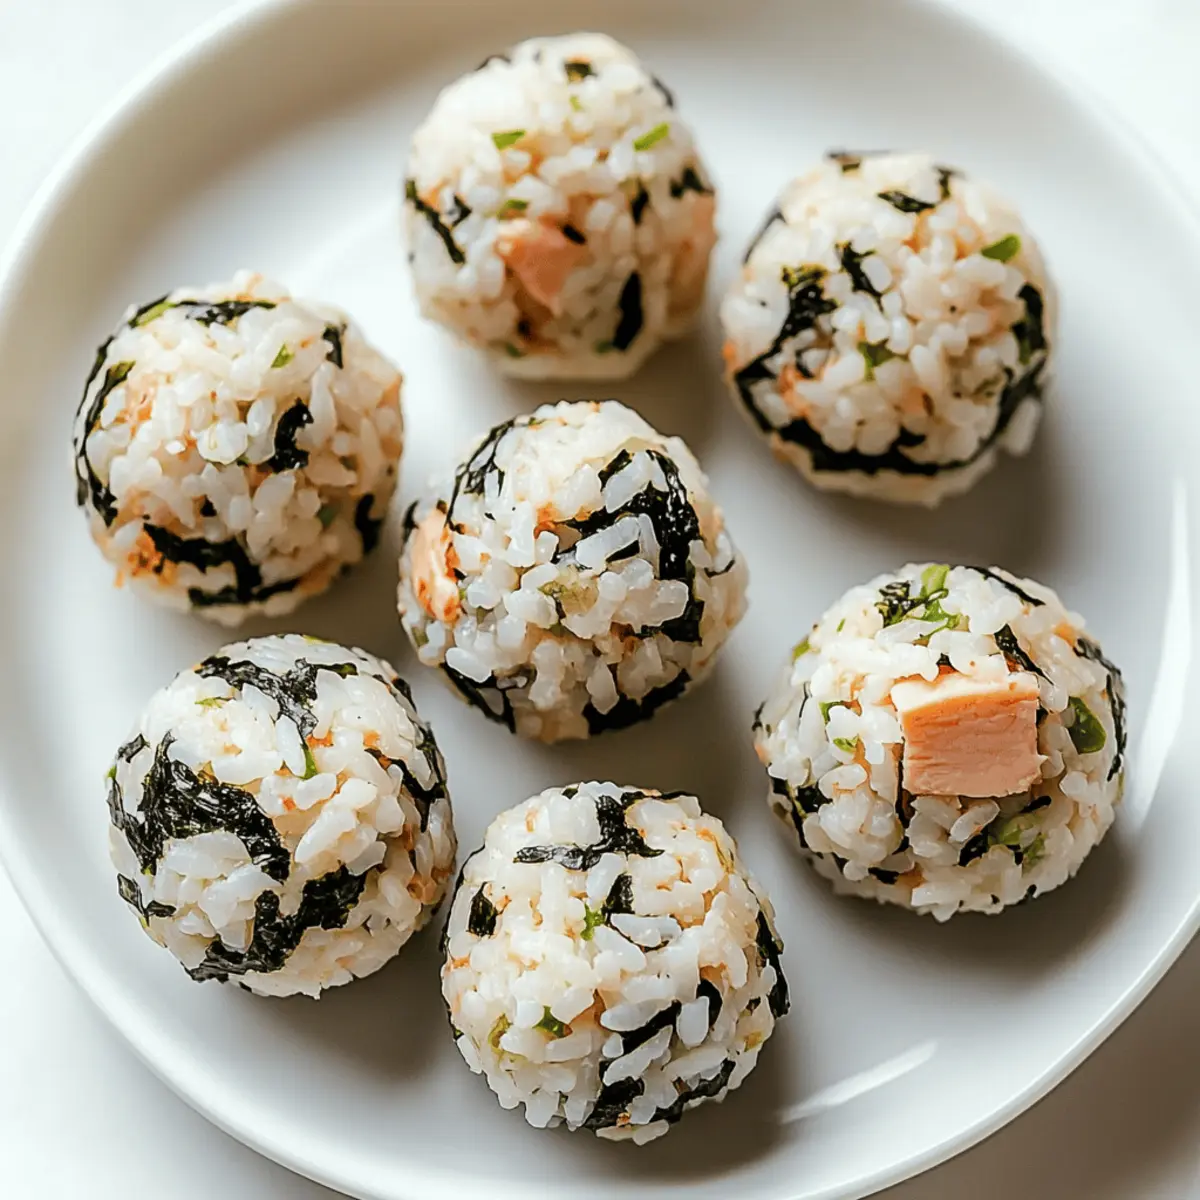
On a bustling weekday afternoon, I found myself in desperate need of a portable lunch solution that didn’t involve the same old sandwich routine. That’s when I stumbled upon the beauty of Easy Tuna Rice Balls. These delightful bites are not only a fulfilling fusion of comforting rice and savory tuna, but they also offer a canvas for your culinary creativity. Packed with energy and flavor, they’re a dream come true for those busy days or for anyone tired of fast food. Plus, they come with flexible options for vegetarians and vegans alike, making it easy to cater to everyone’s tastes. Ready to explore how to whip up these quick and budget-friendly tuna rice balls for your next meal? Let’s dive in!
Why Are Tuna Rice Balls So Special?
Versatile and Fun: These Easy Tuna Rice Balls are not just simple to make; they can be tailored to suit any dietary need. With options like mashed chickpeas for a vegetarian twist, everyone can dig in.
Budget-Friendly: You won’t break the bank with this recipe! Made from pantry staples, they’re perfect for budget-conscious cooks.
Portable Snack: These rice balls are the ideal grab-and-go lunch, perfect for busy days. Just pack them up, and you’re set!
Bursting with Flavor: The combination of sesame oil and mayonnaise ensures each bite is deliciously creamy and packed with umami.
Crowd-Pleasing: Whether you’re hosting a casual lunch or enjoying family time, these tuna rice balls are sure to impress.
For even more veggie-friendly options, consider exploring our vegetarian rice ball version.
Tuna Rice Balls Ingredients
For the Rice Mixture
- Cooked Rice – Use sushi rice, brown rice, or quinoa for varied textures.
- Canned Tuna – Packed with protein; substitute with mashed chickpeas or crumbled tofu for a vegetarian or vegan option.
- Mayonnaise – Adds creaminess; opt for regular or vegan mayo and consider mixing in rice vinegar and sugar for a tangy twist.
- Sesame Oil – A touch of flavor that enhances the overall taste of the tuna rice balls.
For the Final Touch
- Seaweed (Nori) – An optional ingredient that contributes authentic umami flavor to your rice balls, elevating the snack experience.
These tuna rice balls provide a delightful mix of texture and taste, making them an ideal addition to any meal plan!
Step‑by‑Step Instructions for Easy Tuna Rice Balls
Step 1: Prepare the Rice Mixture
In a large mixing bowl, combine 2 cups of cooled, cooked rice with 1 can of drained, flaked tuna. Add 2 tablespoons of mayonnaise and 1 tablespoon of sesame oil. If you’re using seaweed, finely chop about a sheet and stir it in for extra flavor. Mix well until everything is evenly coated and incorporated, ensuring a creamy texture for your easy tuna rice balls.
Step 2: Adjust Consistency
Once the mixture is combined, taste and adjust the creaminess by adding more mayonnaise if desired. If the mixture feels too wet, add a bit more rice to balance it out. The final blend should be moist but firm enough to hold its shape when rolled. Let it sit for about 5 minutes, allowing flavors to meld while maintaining a visual check on creaminess.
Step 3: Shape the Rice Balls
Using clean hands, divide the rice mixture into eight equal portions. Take one portion and gently flatten it in your palm, then roll it into a ball, ensuring it’s packed tightly. Repeat this process for all portions. This will give you uniform easy tuna rice balls, perfect for snacking or packing into your lunchbox.
Step 4: Chill or Serve Immediately
For optimal texture, serve your easy tuna rice balls immediately or refrigerate them for about 15-20 minutes for a firmer consistency. If serving later, store them in an airtight container in the fridge. Each ball should have a glossy finish and feel slightly firm to the touch but not dry, ideal for enjoying as a quick, portable snack.
Step 5: Pair and Enjoy
These delightful tuna rice balls can be served with dipping sauces like soy sauce or spicy mayo to elevate the flavor profile even further. They’re great on their own or as part of a refreshing meal, alongside fresh veggies or a fruit salad. Enjoy the burst of flavor each bite provides and share with family and friends!
Expert Tips for Easy Tuna Rice Balls
• Rice Consistency Matters: Ensure your cooked rice is cooled before mixing; warm rice can make it difficult to shape the tuna rice balls properly.
• Creamy Balance: Adjust the amount of mayonnaise based on your preference. If the mixture feels too dry, add a bit more mayo for creaminess.
• Uniform Portions: Use a measuring cup to divide the rice mixture into equal portions; this will help in shaping uniform tuna rice balls.
• Chill for Shape: If you’re having trouble rolling the balls, refrigerate the mixture for 15-20 minutes first, making it easier to handle.
• Flavor Infusions: Experiment with spices or flavors to customize these tuna rice balls—add sriracha for heat or fresh herbs for an aromatic touch.
Enjoy the fusion of flavors and textures with these delightful tuna rice balls!
What to Serve with Easy Tuna Rice Balls
These charming bites are just the beginning of a delightful meal experience that invites creativity and flavor.
- Soy Sauce: A classic dip that enhances the umami flavor of the tuna, making each bite more satisfying.
- Spicy Mayo: This creamy dip adds a delicious kick, creating a lovely contrast to the subtle flavors of the rice balls.
- Fresh Cucumber Slices: Crisp and refreshing, they bring a light crunch to the meal, balancing the richness of the tuna rice balls.
- Edamame: These vibrant green beans are not only nutritious but also provide a satisfying textural contrast, perfect for snacking alongside.
- Carrot Sticks: Naturally sweet and crunchy, their bright color adds vibrancy to your plate and complements the savory rice balls beautifully.
- Fruits like Apple Wedges or Grapes: Their sweet juiciness offers a refreshing bite, creating a lovely balance with savory flavors and energizing your lunch.
- Green Salad: A simple arugula or mixed greens salad with a light vinaigrette adds a nourishing freshness, making for a complete meal.
- Mango Chutney: Sweet and tangy, this condiment can elevate your tuna rice balls, adding an exotic twist to your lunch experience.
- Iced Green Tea: This refreshing drink not only complements the meal’s flavors but also enhances the Asian-inspired theme.
- Chocolate-Covered Almonds: These make for a delightful, sweet ending to your meal, providing a satisfying crunch with a touch of indulgence.
Make Ahead Options
These Easy Tuna Rice Balls are perfect for meal prep, allowing you to save precious time on busy weeknights. You can prepare the rice mixture (rice, tuna, mayo, and sesame oil) up to 24 hours in advance, storing it in an airtight container in the refrigerator to keep it fresh. For best results, form the rice balls the same day you plan to serve them, ensuring they maintain their ideal texture. When ready to enjoy, simply roll the portioned mixture into balls and chill them briefly (15-20 minutes) for a firmer consistency. This way, you’ll have flavorful, ready-to-eat tuna rice balls just waiting for your lunchbox or snack cravings!
How to Store and Freeze Tuna Rice Balls
Fridge: Store your tuna rice balls in an airtight container in the fridge for up to 3 days to maintain freshness and flavor.
Freezer: For longer storage, freeze the rice balls in a single layer on a baking sheet first. Once frozen, transfer them to a freezer bag for up to 2 months.
Reheating: Thaw frozen tuna rice balls in the fridge overnight, then reheat them in a microwave for about 30 seconds or until warm.
Serving Suggestion: Enjoy the rice balls cold or at room temperature; they’re perfect for snacking and ready to carry on your busy days!
Tuna Rice Balls – Customization Ideas
Feel free to let your culinary creativity shine while making these tuna rice balls! The options are endless, and each variation will add a unique twist you’ll love.
-
Vegetarian Swap: Substitute canned tuna with mashed chickpeas or crumbled tofu. Season with salt, pepper, and your favorite spices for a delightful flavor.
-
Whole Grain Boost: Experiment with quinoa or brown rice instead of sushi rice to add nutritional benefits and a hearty texture. The nutty flavor will be a pleasant surprise!
-
Spice it Up: Add sriracha or chili flakes to the rice mixture for a spicy kick. Heat lovers will appreciate the extra zest in every bite!
-
Herb Infusion: Incorporate fresh herbs like cilantro or green onions into the mix. This will brighten up the flavor and showcase a refreshing twist.
-
Tangy Touch: Mix in a splash of rice vinegar and a touch of sugar with the mayonnaise for a delightful tang that elevates the overall taste.
-
Texture Play: Roll in crushed nuts or seeds before serving for an added crunch. It brings a fun surprise and extra nutrition to your snack!
-
Vegan Creaminess: Use avocado in place of mayonnaise for a creamy, vegan alternative. This adds richness and a different flavor profile that’s oh-so-delicious!
To enhance these rice balls even further, consider pairing them with sauces like soy sauce or spicy mayo. You can also check out our vegetarian rice ball version for even more inspiration!
Easy Tuna Rice Balls Recipe FAQs
What type of rice works best for tuna rice balls?
You can use sushi rice, brown rice, or even quinoa for your tuna rice balls. Each type brings its unique texture and flavor—just ensure the rice is cooked and cooled beforehand to make shaping easier!
How should I store leftover tuna rice balls?
Absolutely! Store your tuna rice balls in an airtight container in the fridge for up to 3 days. This keeps them fresh and ready for snacking. If you find they’ve gone a bit dry, a dash of mayo before serving can help restore some creaminess.
Can I freeze tuna rice balls?
Yes, you can! To freeze, first place the rice balls on a baking sheet in a single layer and freeze them until solid (about 1-2 hours). Once frozen, transfer them to a freezer bag and store for up to 2 months. To enjoy, simply thaw overnight in the fridge, then microwave for about 30 seconds to warm them up.
What if my rice ball mixture is too dry?
No worries! If your tuna rice balls mixture turns out dry, add a little more mayonnaise to hydrate it. You can also mix in a splash of water or another tablespoon of sesame oil until you reach your desired consistency. The mixture should be moist yet firm enough to hold its shape.
Are there any allergen concerns with this recipe?
Definitely keep an eye on allergies! For those allergic to seafood, substituting the canned tuna with mashed chickpeas or crumbled tofu makes for a delicious vegetarian or vegan option. Ensure that your mayonnaise is made with allergen-free ingredients as well, especially for those with egg sensitivities.
Can I make tuna rice balls ahead of time?
Very much so! These rice balls can be prepared a day in advance. Just keep them in an airtight container in the fridge until you’re ready to serve. For best results, take them out about 15 minutes before serving to let them come to room temperature; that way, they retain their delightful texture!
Delicious Tuna Rice Balls – Your New Favorite Snack!
Ingredients
Equipment
Method
- In a large mixing bowl, combine cooked rice, canned tuna, mayonnaise, and sesame oil. If using, stir in the chopped seaweed.
- Taste and adjust the creaminess with more mayonnaise if desired, or add more rice if too wet. Let sit for about 5 minutes.
- Divide the mixture into eight equal portions, flatten each in your palm, and roll into balls.
- Serve immediately or refrigerate for 15-20 minutes for firmer consistency. Store in an airtight container if serving later.
- Enjoy with dipping sauces like soy sauce or spicy mayo, alongside fresh veggies or a fruit salad.
Leave a Reply