
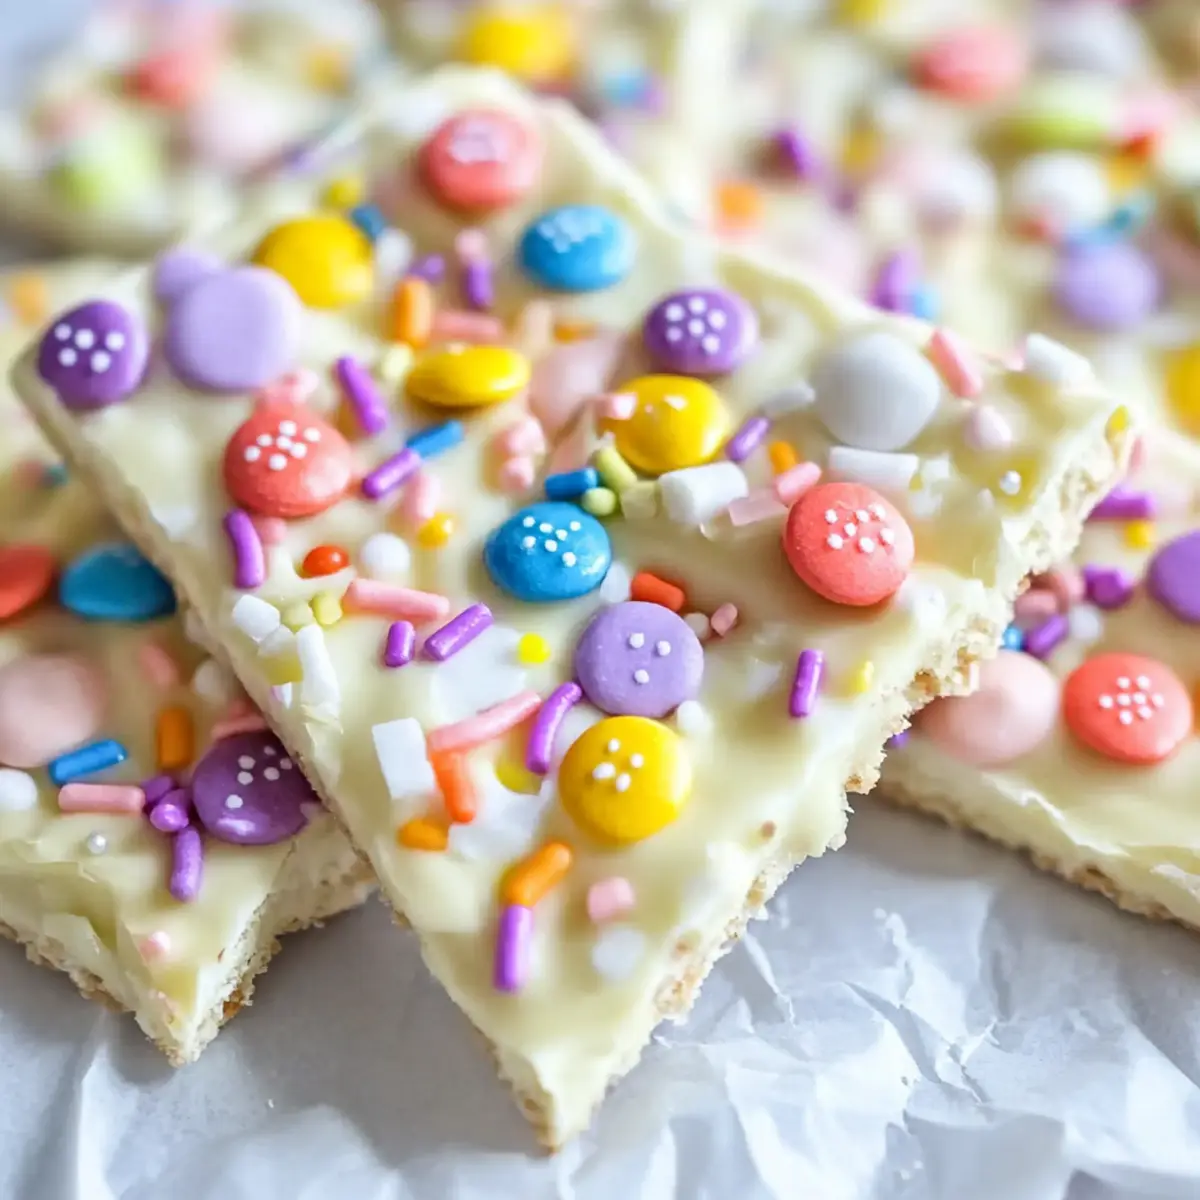
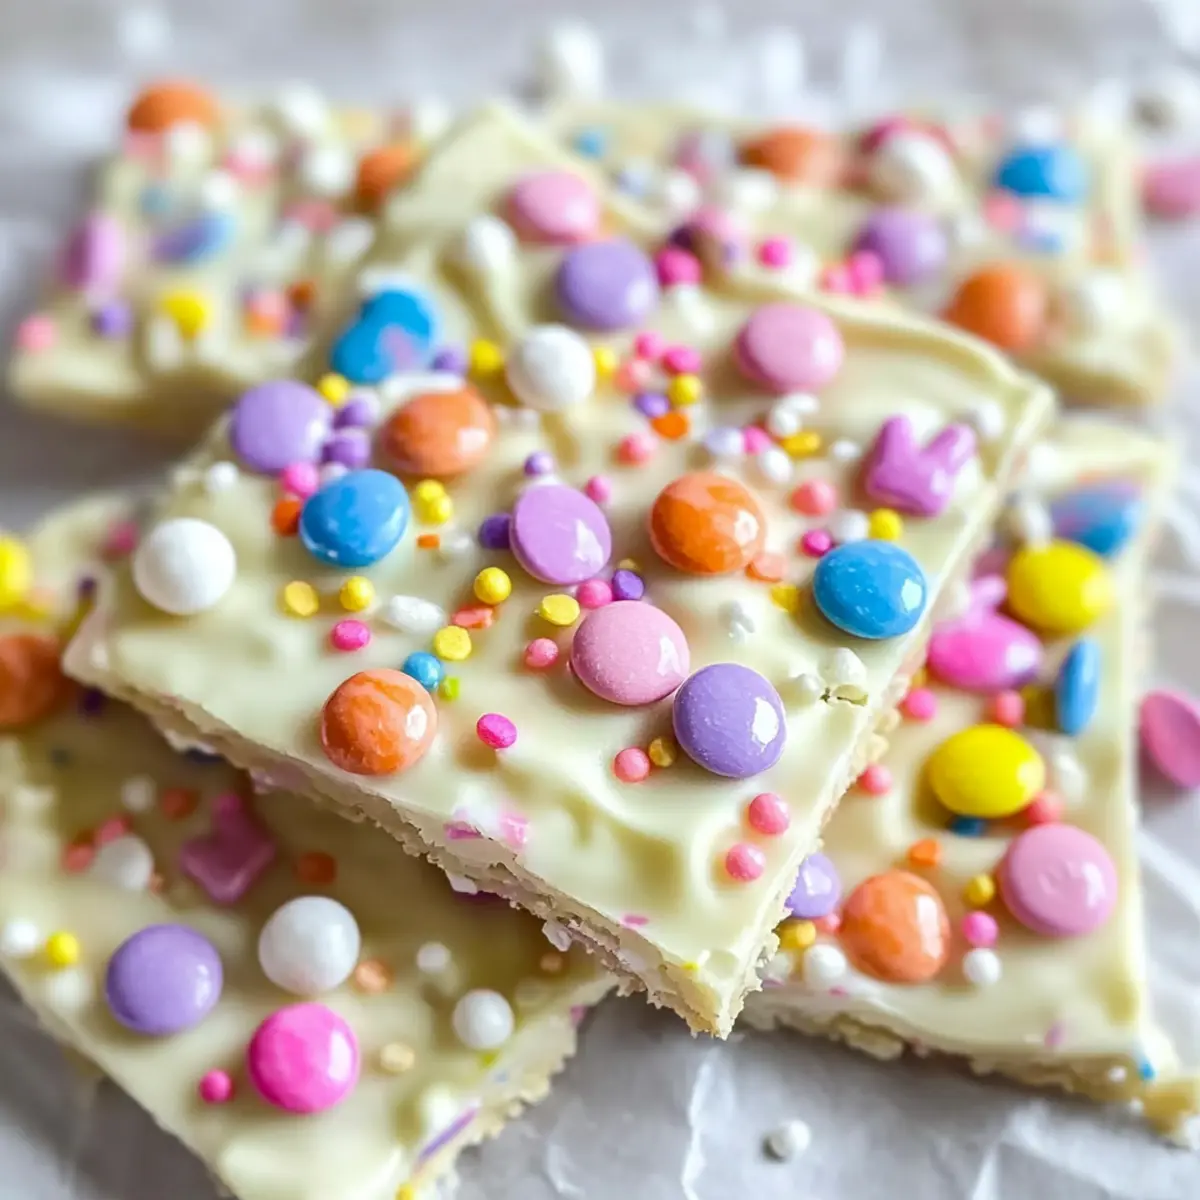
As I wandered through the bustling aisles of my favorite grocery store, the pastel colors of Easter treats caught my eye, instantly sparking a joyful nostalgia. This inspired me to create something special: my Easy Easter Bunny Bark. This delightful no-bake dessert requires no fancy techniques, making it a perfect project to tackle with little ones or to whip up last minute for holiday celebrations. The creamy white chocolate base, adorned with a rainbow of pastel candies, promises a delightful crunch in every bite and brings a playful spirit to your Easter festivities. Plus, it’s completely customizable, allowing you to add your favorite treats, making it a deliciously unique creation each time. Curious how to make this whimsical sweet treat? Let’s hop into the recipe!
Why is Easy Easter Bunny Bark a Must-Try?
Simplicity: This no-bake dessert requires minimal effort, making it accessible for chefs of all skill levels.
Customizable: You can easily swap ingredients, tailoring the bark to your taste with different candies and chocolate options.
Kid-Friendly: Perfect for family fun, get the kids involved in the creative process—it’s an exciting kitchen project!
Visually Appealing: The vibrant colors and festive toppings make it a stunning centerpiece for any Easter celebration.
Make-Ahead: Prepare this delightful treat in advance, saving you time and stress during the holiday festivities.
Gluten-Free Options: With careful ingredient selection, you can ensure this bark is suitable for everyone at your gathering, appealing to all dietary needs.
You’ll impress family and friends with this whimsical creation, so check out my tips for easy serving and storage!
Easy Easter Bunny Bark Ingredients
• For the Base
- White Chocolate or Candy Melts – Choose high-quality options for a creamy texture; milk or dark chocolate can be used for a different flavor.
• For the Toppings
- Pastel-colored M&M’s or Chocolate Eggs – These add sweetness and vibrant colors; just ensure candies are nut-free if allergies are a concern.
- Easter-themed Sprinkles – Use these for a fun, decorative touch; you could also substitute with edible glitter or nuts if allergies allow.
• For Optional Color
- Gel Food Coloring (optional) – Perfect for adding playful swirls; avoid liquid food coloring to prevent chocolate seizing when used.
Now that you have all the yummy components, let’s hop to the fun part—creating your very own Easy Easter Bunny Bark!
Step‑by‑Step Instructions for Easy Easter Bunny Bark
Step 1: Prepare Your Workspace
Begin by lining a baking sheet with parchment paper or a silicone mat, ensuring it’s ready to hold your delightful Easy Easter Bunny Bark. This will prevent sticking and make it easy to lift the finished product. Clear your countertop and gather necessary equipment such as a microwave-safe bowl, spatula, and toothpicks for swirling.
Step 2: Melt the Chocolate
In a microwave-safe bowl, microwave the white chocolate or candy melts in 30-second intervals, stirring between each until fully melted and smooth—this should take about 1 to 2 minutes total. Ensure there are no lumps, as a creamy base is crucial for your Easter Bunny Bark. Be careful not to overheat, as chocolate can seize quickly.
Step 3: Optional Color Mixing
If you choose to add a splash of color, divide a small portion of the melted chocolate into separate bowls. Mix in gel food coloring to achieve your desired hues, creating a fun rainbow palette for this festive treat. Remember to keep the colors vibrant without over-mixing to maintain clear swirls in your Easy Easter Bunny Bark.
Step 4: Spread the Base Chocolate
Pour the main batch of melted chocolate onto the prepared baking sheet. Using an offset spatula, gently spread it out into an even layer, about 1/4 inch thick. This creamy canvas will set the stage for your colorful toppings, providing a delicious base for all those festive candies.
Step 5: Create Colorful Swirls
Drop spoonfuls of your colored chocolate mixture onto the white base, evenly spaced across the surface. Use a toothpick to swirl through the drops, creating an eye-catching marbled effect. Be careful not to overwork the chocolate, which can muddy the colors, but aim for a fun, playful design that will charm everyone.
Step 6: Add Toppings
Generously sprinkle pastel-colored M&Ms and Easter-themed sprinkles across the top, pressing them in gently to help them adhere to the melted chocolate. This layer of vibrant colors and textures adds a delightful crunch and visual appeal to your Easy Easter Bunny Bark, making it irresistible to all who see it.
Step 7: Let It Set
Allow your Easy Easter Bunny Bark to set at room temperature for 1-2 hours, or for a quicker method, refrigerate for about 20 minutes until hardened. The bark should be firm to the touch and ready for breaking or cutting into fun, irregular pieces for serving. Keep an eye on it to prevent over-hardening.
Step 8: Break and Serve
Once your bark is fully set, use your hands or a knife to break it into irregular, bite-sized pieces. This whimsical sweet treat will surely bring a smile to everyone’s face. Serve the Easy Easter Bunny Bark on a festive platter or package them as delightful gifts in cellophane bags tied with pretty ribbons.
What to Serve with Easy Easter Bunny Bark
Treat your guests to a colorful and delightful spread that complements the whimsical charm of your no-bake Easter treat.
- Creamy Vanilla Ice Cream: The creamy texture balances the sweet crunch of the bark, creating a deliciously indulgent dessert duo.
- Fruit Salad: A medley of fresh fruits adds a refreshing contrast, helping to cleanse the palate between bites of candy-coated goodness.
- Mini Cupcakes: These sweet bites echo the festive spirit, offering fun flavors and a touch of whimsy to your dessert table.
- Sparkling Lemonade: A bubbly citrus drink enhances the festive atmosphere, providing a zesty refreshment that brightens every gathering.
- Chocolate Dipped Strawberries: These elegant treats introduce a chocolatey flavor alongside fresh fruit, making for a delightful pairing on your holiday spread.
- Decorative Easter Cookies: These colorful cookies will be a hit, complementing the luscious bark while keeping the festive theme intact.
- Nutty Trail Mix: A crunchy, salty option that balances sweetness with earthy flavors, bringing a delightful contrast to your dessert offerings.
- Mint Chocolate Milkshake: Creamy and refreshing, this shake adds a fun twist while enhancing the sweet flavors of the Easy Easter Bunny Bark.
Storage Tips for Easy Easter Bunny Bark
- Room Temperature: Store the Easy Easter Bunny Bark in an airtight container at room temperature for up to two weeks. This will keep it fresh and delicious, enhancing the crunchy texture.
- Fridge: If you’re worried about melting, you can refrigerate the bark for added stability. Just ensure it’s in an airtight container to prevent it from absorbing other odors.
- Freezer: For longer storage, freeze the bark in an airtight container for up to three months. When ready to enjoy, thaw at room temperature for a few minutes before serving.
- Reheating: It’s best to serve the bark at room temperature. Avoid reheating, as this can alter the chocolate’s texture and cause it to become too soft.
Make Ahead Options
These Easy Easter Bunny Bark treats are perfect for busy cooks looking to save time during the holiday rush! You can prepare the chocolate base up to 24 hours in advance by melting and spreading it onto the baking sheet, then covering it tightly with plastic wrap to keep it fresh. When you’re ready to finish, simply add your toppings—pastel M&Ms and sprinkles—then allow it to set at room temperature. If you need to prepare even further in advance, the completed bark can be stored in an airtight container at room temperature for up to two weeks or refrigerated for extra freshness. This way, you’ll have a delightful treat ready to serve, just as delicious as when it was first made!
Expert Tips for Easy Easter Bunny Bark
- Quality Matters: Use high-quality white chocolate or candy melts for a silky texture and richer flavor that enhances your Easy Easter Bunny Bark.
- Avoid Seizing: Keep water away from the melting chocolate; any moisture can cause it to seize and ruin the creamy consistency.
- Color Swirls: When mixing in gel food coloring, use small dollops on the melted base and gently swirl to create beautiful patterns without over-mixing.
- Setting Time: Allow the bark to set properly; if refrigerating, check after 15 minutes to ensure it doesn’t harden too much, which can make it difficult to break.
- Customization: Experiment with different toppings and additions, like crushed pretzels for extra crunch or seasonal candies for a unique twist on your Easy Easter Bunny Bark.
Easy Easter Bunny Bark Variations
Feel free to unleash your creativity and customize your Easy Easter Bunny Bark with these fun and flavorful variations!
-
Dairy-Free: Swap white chocolate for dairy-free chocolate or candy melts to cater to vegan diets without sacrificing taste.
With a combination of coconut oil and dairy-free chocolate, you’ll achieve that rich creaminess loved by all, making it suitable for everyone at your gathering. -
Nut-Free Toppings: Instead of M&Ms, utilize gummy bunnies or chocolate-covered raisins for a nut-free alternative that still delivers sweetness.
These chewy options not only add variety but also bring a playful touch to your bark, making it just as delightful as the original. -
Salted Crunch: Incorporate crushed pretzels or lightly salted nuts for a delicious contrast of sweet and salty flavors.
The combination of textures adds excitement and depth, transforming your bark into a snack that keeps everyone coming back for more! -
Colorful Twist: Create vibrant swirls by using multiple shades of gel food coloring mixed into your white chocolate base.
This playful presentation makes your Easter treat truly stand out on any table, inviting smiles from guests both young and old. -
Candy Swap: Consider using different seasonal candies, like pastel jelly beans or caramel-filled chocolates, for a unique taste each time.
It’s an opportunity to explore and adapt your bark to reflect your favorite spring sweets! -
Crunchy Add-ins: Mix in crushed graham crackers or crispy rice cereal for added texture and a nostalgic twist reminiscent of s’mores.
This delightful bonus creates a fun bite that’s full of surprises and connects cherished memories of family gatherings. -
Spicy Kick: Add a hint of cayenne pepper or chili powder to the melted chocolate for a surprising zing that balances the sweetness!
This unexpected twist may just become a new favorite, captivating adventurous taste buds looking for that unique flavor profile. -
Make it Meta: For a fun activity, create a topping bar with a variety of options so family and friends can customize their own pieces!
This adds an interactive component to your celebration, fostering fun and laughter while everyone indulges in their delicious creations.
As you explore these variations, don’t forget to check out my tips for storage to keep your bark fresh and tasty for all your celebratory gatherings!
Easy Easter Bunny Bark Recipe FAQs
What type of chocolate should I use for Easy Easter Bunny Bark?
Absolutely! I recommend using high-quality white chocolate or candy melts for the base. They provide a creamy texture that makes every bite delightful. If you’re looking for different flavors, milk or dark chocolate works beautifully as well, just be sure to adapt your toppings accordingly!
How should I store Easy Easter Bunny Bark?
Very simply! Store your Easy Easter Bunny Bark in an airtight container at room temperature for up to two weeks. This keeps it fresh and enjoyable. If you prefer, you can also refrigerate it to prevent melting, but make sure it’s sealed to avoid any unwanted odors.
Can I freeze Easy Easter Bunny Bark?
Of course! To freeze, wrap the Easy Easter Bunny Bark in plastic wrap or place it in an airtight container. It can be stored in the freezer for up to three months. When you’re ready to enjoy it, simply let it thaw at room temperature for a few minutes before serving.
What do I do if my chocolate seizes while melting?
Don’t worry; it happens to the best of us! If your chocolate seizes, simply add a teaspoon of coconut oil and stir until smooth. This should help restore the consistency. Always remember to keep moisture away from your chocolate to prevent seizing in the first place!
Can I make Easy Easter Bunny Bark gluten-free?
Absolutely! Just be sure to check the labels on your candies, as many options are gluten-free. Look for pastel-colored M&Ms or chocolate eggs that specify they are gluten-free to cater to dietary needs. It’s an easy, delicious treat suitable for everyone!
Easy Easter Bunny Bark with Colorful Candy Delight
Ingredients
Equipment
Method
- Prepare your workspace by lining a baking sheet with parchment paper or a silicone mat.
- Melt the white chocolate or candy melts in a microwave-safe bowl in 30-second intervals until smooth, about 1 to 2 minutes total.
- If using gel food coloring, mix small portions into the melted chocolate to create fun colors.
- Pour the melted chocolate onto the prepared baking sheet and spread it into an even layer.
- Drop spoonfuls of colored chocolate onto the white base and swirl with a toothpick.
- Sprinkle pastel-colored M&M's and Easter-themed sprinkles on top, pressing them gently to adhere.
- Let the bark set at room temperature for 1-2 hours or refrigerate for 20 minutes until hardened.
- Once set, break the bark into irregular pieces and serve.
Leave a Reply