
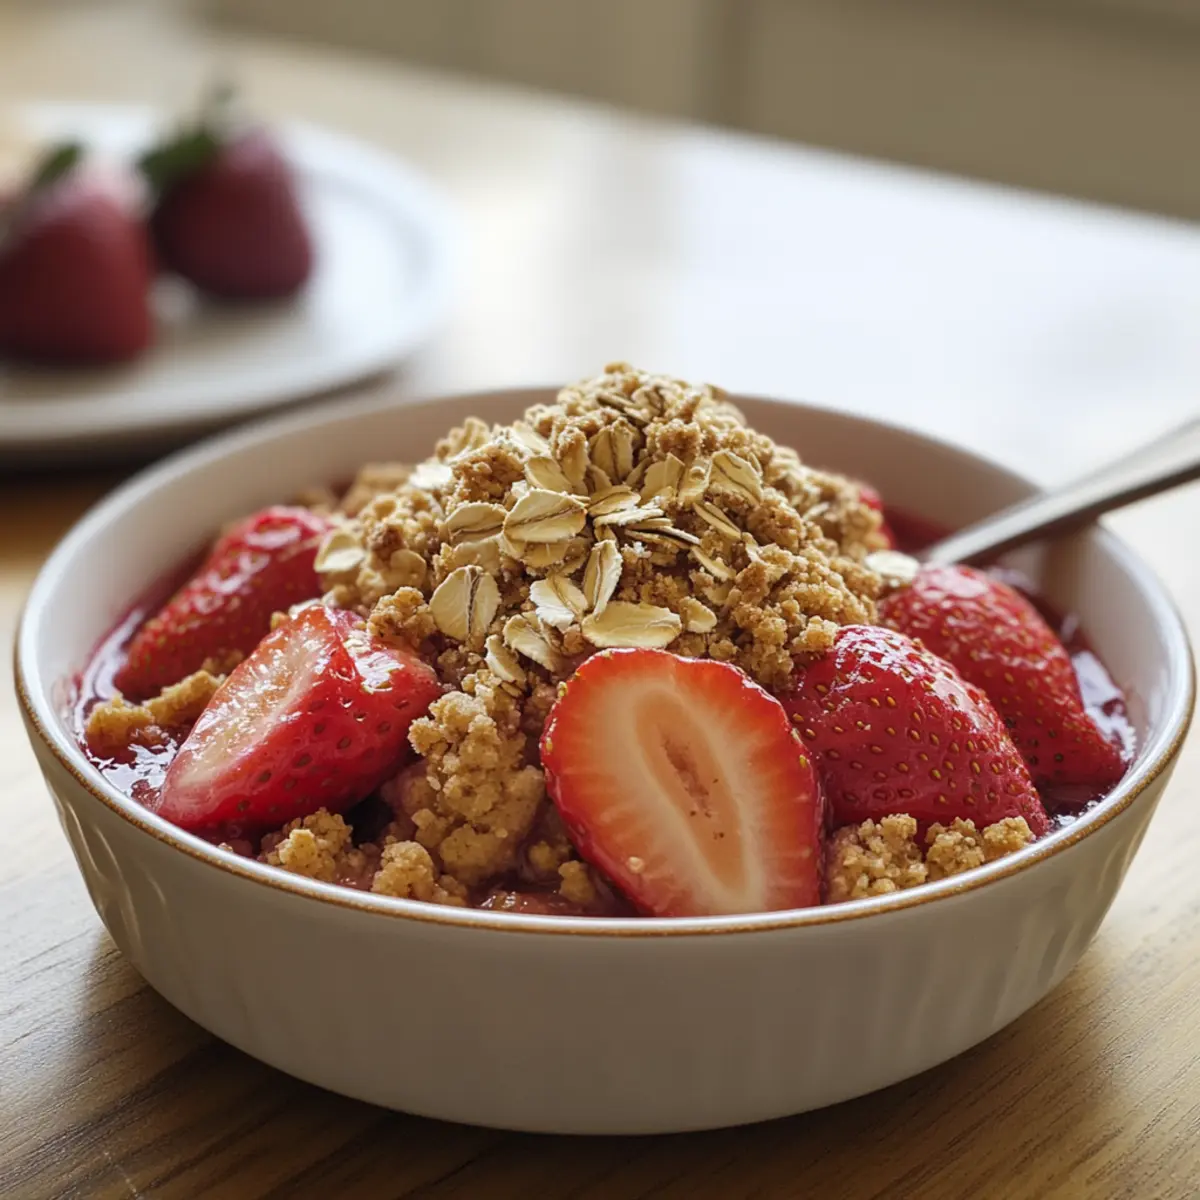
As I stood in the kitchen, the sweet aroma of ripe strawberries filled the air, whisking me back to lazy summer afternoons at my grandmother’s house. Her secret? The comforting warmth of a homemade Fresh Strawberry Crisp, a summer dessert that never failed to charm each guest at her table. With just the right balance of juicy strawberries and a buttery oat topping, this simple dessert is a true crowd-pleaser. What makes it even better is how quick it comes together, allowing you to savor the moment without fussing over complicated steps. Plus, it’s easily adaptable to a gluten-free option—perfect for all your loved ones. So, are you ready to bring a taste of nostalgia into your home with this delightful Strawberry Crisp recipe? Let’s dive in!
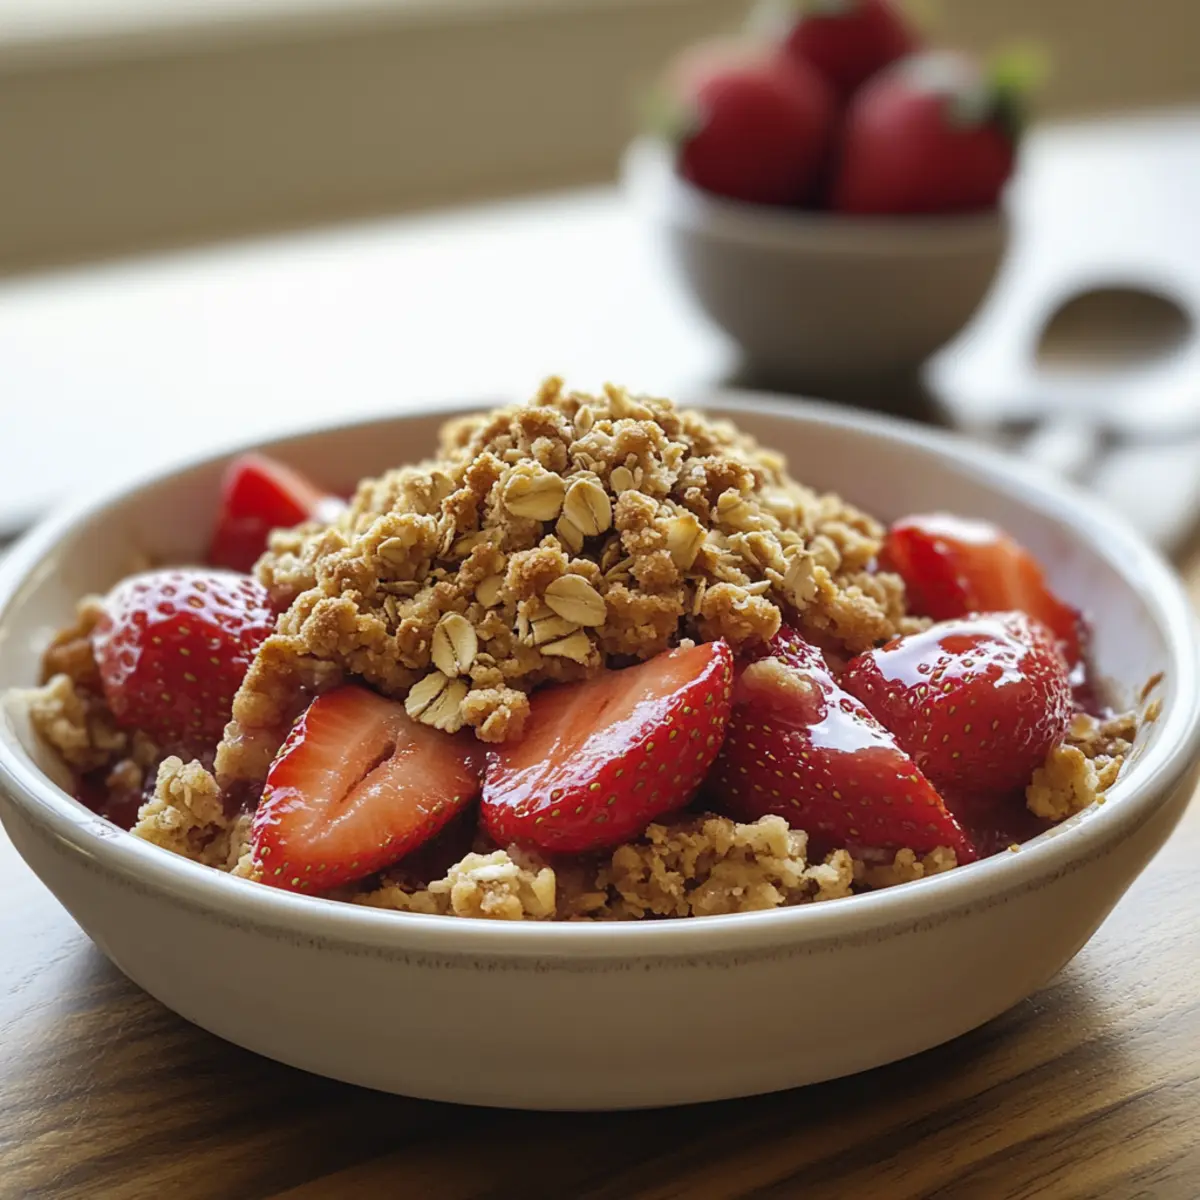
Why Is This Strawberry Crisp Irresistible?
Simplicity at Its Best: With minimal ingredients and straightforward instructions, this recipe is perfect for both novice and experienced home cooks.
Bursting with Fresh Flavor: The use of ripe, juicy strawberries creates a delightful sweetness that shines in every bite.
Quick and Easy: Assemble in just minutes, bake, and enjoy! It’s the ideal dessert for unexpected guests or family gatherings.
Versatile Template: Feel free to swap strawberries for your favorite seasonal fruits like peaches or mixed berries; you can even add nuts for extra crunch!
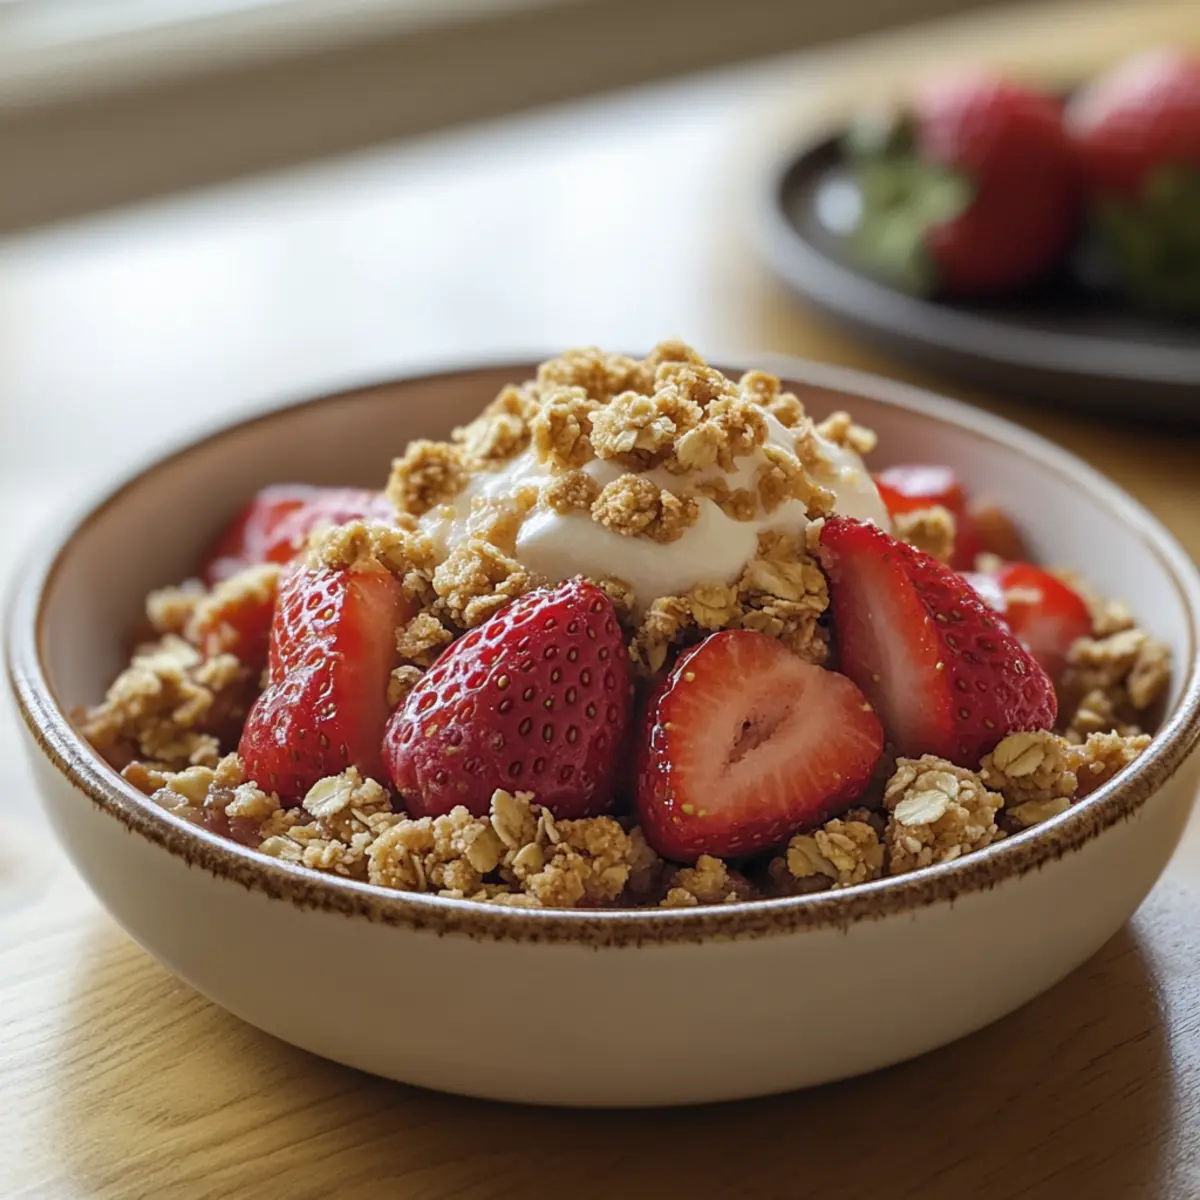
Crowd-Pleaser: This dish offers comfort and nostalgia, making it a perfect centerpiece for any summer celebration. Don’t forget to serve it warm with a scoop of vanilla ice cream for the ultimate experience!
Strawberry Crisp Ingredients
• Here’s everything you’ll need to make this delectable summer dessert!
For the Strawberry Filling
• Fresh Strawberries – Use ripe berries for the sweetest flavor in your Strawberry Crisp.
• Brown Sugar – Enhances sweetness and moisture; coconut sugar is a great, healthier alternative.
For the Topping
• Oats – Provides a lovely crunch; ensure they’re certified gluten-free if needed.
• All-Purpose Flour – Offers structure to the topping; almond flour works beautifully for a gluten-free option.
• Butter – Adds rich flavor; swap for coconut oil or vegan butter for a dairy-free treat.
• Cinnamon (optional) – Adds warmth and depth; feel free to leave it out if you prefer a simpler taste!
Step‑by‑Step Instructions for Strawberry Crisp
Step 1: Preheat the Oven
Begin by preheating your oven to 350°F (175°C). This ensures that your Strawberry Crisp will bake evenly. As the oven warms up, you can gather your ingredients and prepare the filling, making sure everything is ready to go for a seamless cooking experience.
Step 2: Prepare the Strawberry Filling
While the oven preheats, wash and slice about four cups of fresh strawberries. In a large mixing bowl, combine the sliced strawberries with brown sugar, gently tossing them together. Allow the mixture to sit for about 10 minutes, letting the strawberries release their juices and create a natural syrup that will enhance the flavor.
Step 3: Make the Oat Topping
In a separate mixing bowl, combine one cup of oats, half a cup of all-purpose flour, and a teaspoon of cinnamon if desired. Pour in a melted stick of butter and stir the mixture until it resembles a crumbly texture. This buttery oat topping will provide a delightful crunch that contrasts beautifully with the juicy strawberries below.
Step 4: Assemble the Crisp
In a greased 8×8 inch baking dish, spread the prepared strawberry filling evenly across the bottom. Next, generously sprinkle the oat topping over the strawberries, ensuring it’s distributed evenly to cover the fruit. This layering creates a tempting blend of flavors in the finished Strawberry Crisp.
Step 5: Bake the Crisp
Transfer the baking dish to the preheated oven and bake for 25-30 minutes. Keep an eye on it, and look for a golden brown topping and bubbling edges as signs of doneness. The aroma wafting through your kitchen will be irresistible, signaling the delicious treat coming together.
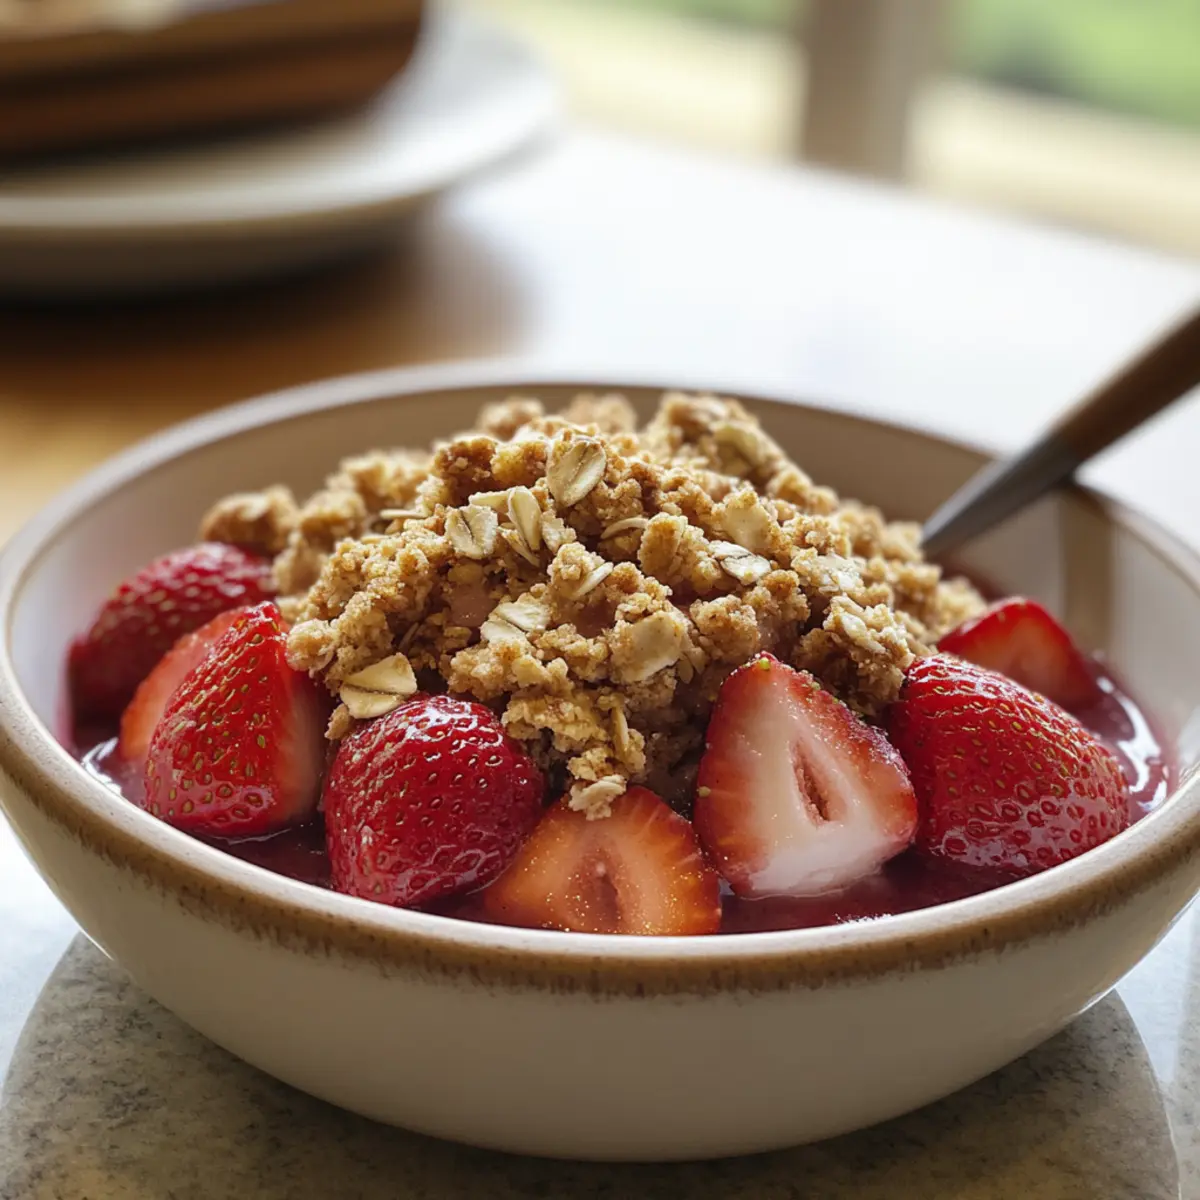
Step 6: Cool & Serve
Once baked to perfection, remove the Strawberry Crisp from the oven and let it cool for about 10 minutes. This cooling period allows the juices to settle while still keeping it warm. Serve your delectable Strawberry Crisp warm, ideally with a scoop of vanilla ice cream on top for a delightful dessert experience.
Make Ahead Options
This Fresh Strawberry Crisp is a fantastic option for meal prep, allowing you to enjoy a delicious dessert without the last-minute scramble! You can prepare the strawberry filling up to 24 hours in advance by slicing the strawberries and mixing them with brown sugar; simply refrigerate this mixture until you’re ready to bake. Additionally, the oat topping can be made ahead and stored in an airtight container for up to 3 days—just be sure to keep it in a cool, dry place to maintain its crumbly texture. When it’s time to serve, layer the filling and topping in your baking dish and bake as directed. This way, you can enjoy the comforting, warm flavors of the Strawberry Crisp with minimal fuss on busy weeknights!
Strawberry Crisp Variations & Substitutions
Feel free to get creative with this delightful recipe and tailor it to your taste buds!
-
Mixed Fruit: Swap strawberries for a mix of berries or sliced peaches for a twist; just keep the ratios similar.
Consider how the different fruits complement one another. The combo can create an exciting medley of flavors that celebrates the best of summer! -
Nutty Crunch: Add chopped nuts like pecans or walnuts to the topping for extra texture and flavor.
This is a wonderful way to enhance both the crunch and the nutrition of your Strawberry Crisp. The earthy flavor of the nuts pairs beautifully with ripe fruit! -
Alternative Sweeteners: Use maple syrup or honey instead of brown sugar for a different sweetness profile.
A drizzle of honey can offer a floral note, making the dish bright and vibrant—much like a sunny day at the market! -
Gluten-Free Option: Replace all-purpose flour with almond flour, ensuring a gluten-free version that’s just as delicious.
Almond flour adds nuttiness and helps maintain a perfect crumbly topping. Your friends with gluten restrictions will thank you! -
Citrus Zing: A splash of lemon or orange juice can brighten the strawberry filling, giving it some zing.
Citrus can elevate the flavors, cutting through sweetness and creating a well-rounded taste experience, leaving guests reaching for seconds. -
Spicy Kick: Try adding a sprinkle of cayenne pepper or ground ginger to the filling for a unique heat.
This subtle warmth can tantalize the taste buds and add an unexpected twist that makes your dish memorable! -
Creamy Addition: Layer in some cream cheese or mascarpone between the strawberries and topping for richness.
The creaminess balances the fruitiness and adds a luxurious element that transforms a simple dessert into something spectacular! -
Herbed Delight: Infuse with fresh herbs like basil or mint to bring out fresh flavor contrasts.
Herb pairings with strawberries can truly inspire a burst of unexpected yet delightful flavors that sing of summer!
For more delicious variations, check out how to make a flavorful peach crisp or a mixed berry version by following this peach crisp recipe that’s just as easy and satisfying! Get excited to share this Strawberry Crisp with your loved ones—each bite is bound to create sweet memories!
How to Store and Freeze Strawberry Crisp
Fridge: Store leftovers in an airtight container in the fridge for up to 3 days. This keeps your Strawberry Crisp fresh and ready to enjoy again!
Freezer: To freeze, wrap individual portions tightly in plastic wrap and then place in a freezer-safe bag or container. It can be stored for up to 3 months.
Reheating: When ready to savor your Strawberry Crisp, remove from the freezer and thaw overnight in the fridge. Reheat in the oven at 350°F (175°C) for about 15-20 minutes or until warmed through.
Serving Reminder: Always serve your Strawberry Crisp warm for the best flavor, with a scoop of vanilla ice cream on top for an unforgettable dessert!
Expert Tips for Strawberry Crisp
Choose Ripe Strawberries: Always opt for fully ripe, juicy strawberries to maximize sweetness and flavor in your Strawberry Crisp.
Let It Cool: Allow the crisp to cool for 10 minutes before serving. This helps the juices to settle, making it easier to serve.
Don’t Overmix: When preparing the oat topping, avoid overmixing. A crumbly texture is key to keeping that delightful crunch.
Consider Alternatives: For a gluten-free option, substitute all-purpose flour with almond flour and use certified gluten-free oats.
Add Some Spice: Enhance the flavor by including a pinch of nutmeg or a splash of vanilla extract in the filling for extra depth!
Use Different Fruits: Feel free to swap strawberries for other seasonal fruits like blueberries or peaches, creating a fresh twist on this classic dessert.
What to Serve with Delicious Fresh Strawberry Crisp?
Savoring a warm bowl of this sweet delight is just the beginning! Let’s craft an unforgettable meal experience.
-
Creamy Vanilla Ice Cream: The classic pairing adds richness that beautifully complements the warm fruit beneath.
-
Whipped Cream Delight: Light and airy, whipped cream balances the warm crisp for a delightful texture contrast.
-
Fresh Mint Leaves: A sprinkle of fresh mint adds a refreshing twist, enhancing the fruity flavors of the strawberry crisp.
-
Lemonade Spritz: A cool, tangy lemonade refreshes the palate, making each bite of the warm dessert even more enjoyable.
-
Grilled Peaches: Grilled fruits mimic the crisp’s warmth; their smokiness pairs beautifully with the sweet strawberries.
-
Chilled White Wine: A glass of Pinot Grigio or Riesling enhances the berry flavors and adds sophistication to your dessert experience.
-
Chocolate Drizzle: A light drizzle of melted dark chocolate elevates every bite, offering a decadent touch to your strawberry crisp.
-
Simple Shortbread Cookies: The buttery crunch of shortbread complements the fruitiness while providing added texture to your dessert table.
Strawberry Crisp Recipe FAQs
How do I choose the best strawberries for this recipe?
Absolutely! When selecting strawberries, look for ones that are bright red all over, firm, and free from dark spots or bruises. The more ripe the berry, the sweeter and juicier it will taste. I recommend using seasonal, locally-sourced strawberries for an improved flavor experience.
How should I store leftovers of Strawberry Crisp?
Very simple! Store any leftover Strawberry Crisp in an airtight container in the fridge for up to 3 days. Make sure it’s completely cool before sealing to prevent condensation, which can make the topping soggy.
Can I freeze Strawberry Crisp for later enjoyment?
Absolutely! To freeze, wrap individual portions tightly in plastic wrap, then place them in a freezer-safe bag or container. You can store it for up to 3 months. When you’re ready to indulge, just thaw overnight in the fridge and reheat in the oven at 350°F (175°C) for 15-20 minutes until warm.
What should I do if my topping is too wet and not crumbly?
If your topping turns out too wet, it may be due to overmixing or adding too much butter. To fix this, try adding a bit more oats or flour to achieve that perfect crumbly texture. Make sure to mix gently, just until combined. If you find that your topping is too dry, add a little melted butter, one tablespoon at a time, until it clumps together nicely.
Is this Strawberry Crisp suitable for those with gluten allergies?
Very much so! To make a gluten-free Strawberry Crisp, simply substitute the all-purpose flour with almond flour, and use certified gluten-free oats. Both options will maintain the delightful taste and texture of this summer dessert, so everyone can enjoy it!
Can pets eat any of the ingredients in Strawberry Crisp?
While strawberries are safe for dogs in moderate amounts, the brown sugar and buttery topping may not be suitable for them. It’s best to enjoy this dessert yourself and not share it with your furry friends!
Irresistible Strawberry Crisp with Buttery Oat Topping
Ingredients
Equipment
Method
- Preheat your oven to 350°F (175°C).
- Wash and slice about four cups of fresh strawberries. In a large bowl, combine with brown sugar and let sit for 10 minutes.
- In a separate bowl, combine oats, all-purpose flour, and cinnamon. Pour in the melted butter and stir until crumbly.
- In a greased baking dish, spread the strawberry filling and sprinkle the oat topping over it evenly.
- Bake in the preheated oven for 25–30 minutes until golden brown.
- Allow to cool for 10 minutes before serving warm, ideally with vanilla ice cream.
Leave a Reply