
As the warm sun filters through the kitchen window, the sweet aroma of fresh strawberries and ripe bananas dances through the air, reminding me of summer picnics filled with laughter. This No-Bake Strawberry Banana Pudding Dream is not only a tribute to those carefree moments but also a delightful solution for your busy days. In just 20 minutes, you can whip up this vibrant dessert that effortlessly wows at any gathering. It’s a total crowd-pleaser that combines luscious fruit with creamy layers, and because it’s no-bake, it’s as easy as pie—well, easier! Whether you’re treating yourself or planning a family gathering, this dessert achieves the perfect balance between a comforting classic and a refreshing twist. Are you ready to bring a slice of summer into your home?
Why is this dessert a must-try?
No-Bake Simplicity: This Strawberry Banana Pudding Dream requires no oven, making it a breeze for even the busiest cooks. Just layer and chill!
Vibrant Flavor: The combination of fresh strawberries and bananas creates a light, refreshing taste that dances on your palate, perfect for warm days.
Crowd-Pleasing Delight: Whether for a family dinner or a potluck, this dessert is sure to impress your guests, sparking joy with every spoonful.
Versatile Recipe: Feel free to experiment with flavors—swap in blueberries or peaches for a delicious twist that suits your taste buds!
Make-Ahead Magic: Preparing this dish a day in advance enhances the flavors, allowing you to focus on enjoying it with loved ones rather than rushing in the kitchen.
Treat yourself and your friends to this ultimate dessert that melds classic comfort with bright, fruity freshness!
Strawberry Banana Pudding Dream Ingredients
• Get ready to create your own no-bake masterpiece!
For the Base
- 2 boxes Vanilla Wafers – These provide the essential crunch; opt for gluten-free wafers if you’re looking for a suitable substitute.
- 6 to 8 Bananas, sliced – They add a natural sweetness; choose ripe bananas for the best flavor!
- 1 container Strawberries – Fresh strawberries are best, but if using frozen, make sure to thaw and drain them thoroughly.
For the Creamy Filling
- 1 (5 oz.) box French Vanilla Pudding – This is crucial for that creamy texture; stick to standard pudding mix for optimal results.
- 2 cups Milk – Whole or 2% milk is recommended to give richness to the pudding mixture.
- 1 (8 oz.) package Cream Cheese – For an extra creamy layer; Greek yogurt can be an excellent lighter option.
- 1 (14 oz.) can Sweetened Condensed Milk – This ingredient boosts sweetness and creaminess; unfortunately, no substitutions are recommended here.
For the Topping
- 1 (12 oz.) container Whipped Topping – Lightens up the final layer; feel free to use homemade whipped cream for an added freshness!
With these ingredients, you’re all set to whip up a tantalizing Strawberry Banana Pudding Dream that will surely make your heart sing!
Step‑by‑Step Instructions for Strawberry Banana Pudding Dream
Step 1: Prepare the Creamy Filling
In a large mixing bowl, combine the softened cream cheese and sweetened condensed milk using a hand mixer or whisk until the mixture is smooth and creamy, about 2-3 minutes. Then, gradually add the French vanilla pudding mix along with the 2 cups of milk. Continue blending until completely combined and lump-free, creating the luscious base for your Strawberry Banana Pudding Dream.
Step 2: Layer the Vanilla Wafers
In a large serving dish, start layering the vanilla wafers at the bottom, forming an even base. Don’t rush this step; a neat layer will ensure a beautiful presentation. Take your time to gently press them down so they hold their shape and texture. This crunch will contrast beautifully with the creamy filling and fresh fruits to come.
Step 3: Add the Fresh Fruits
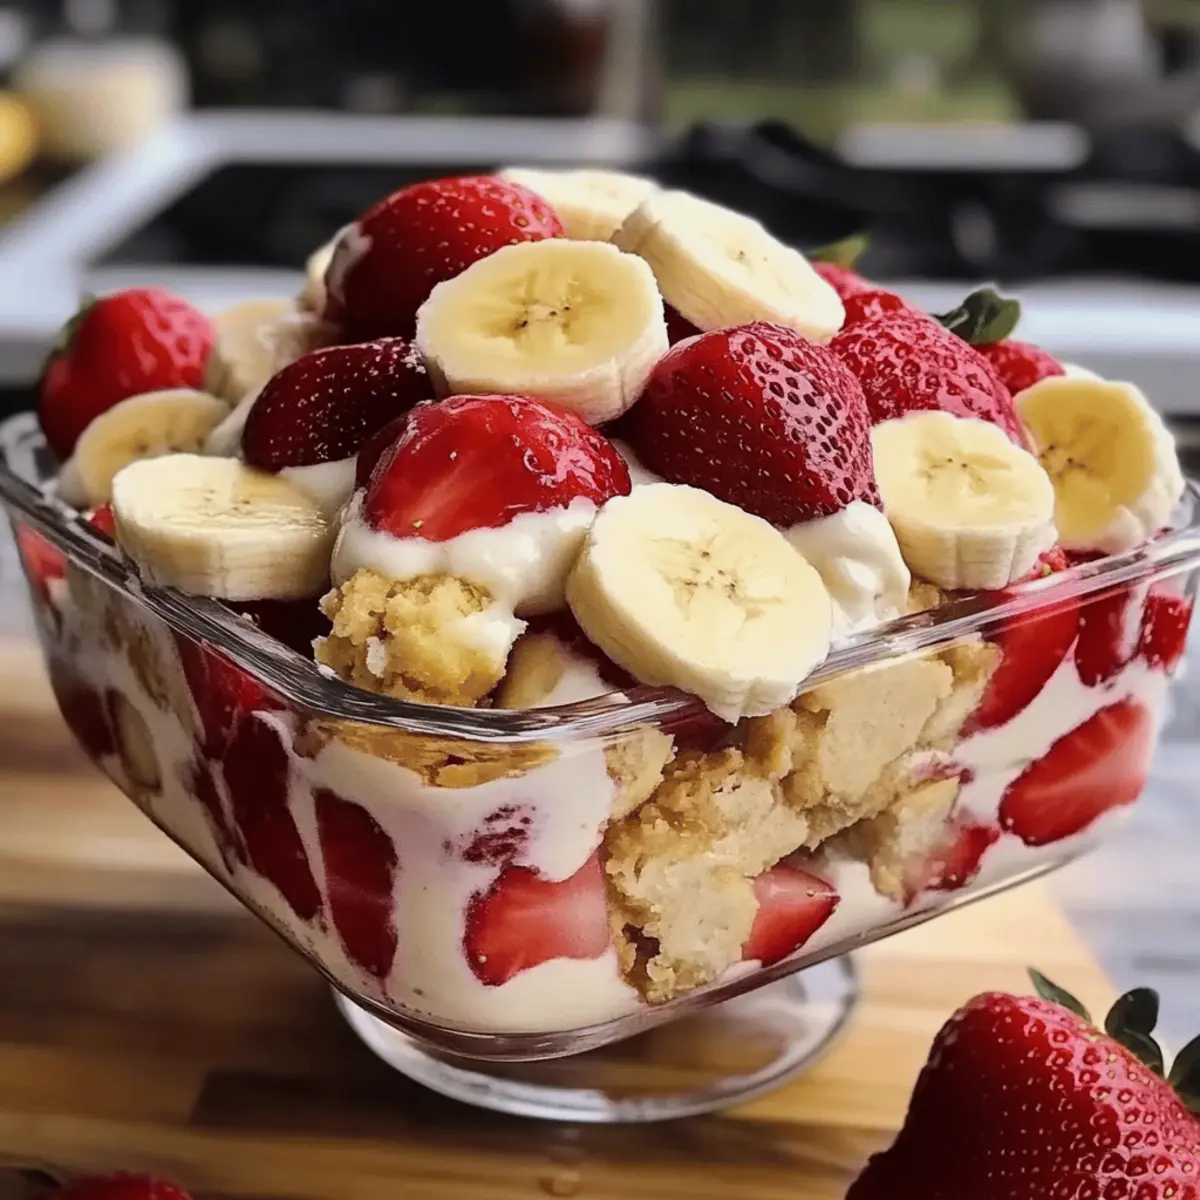
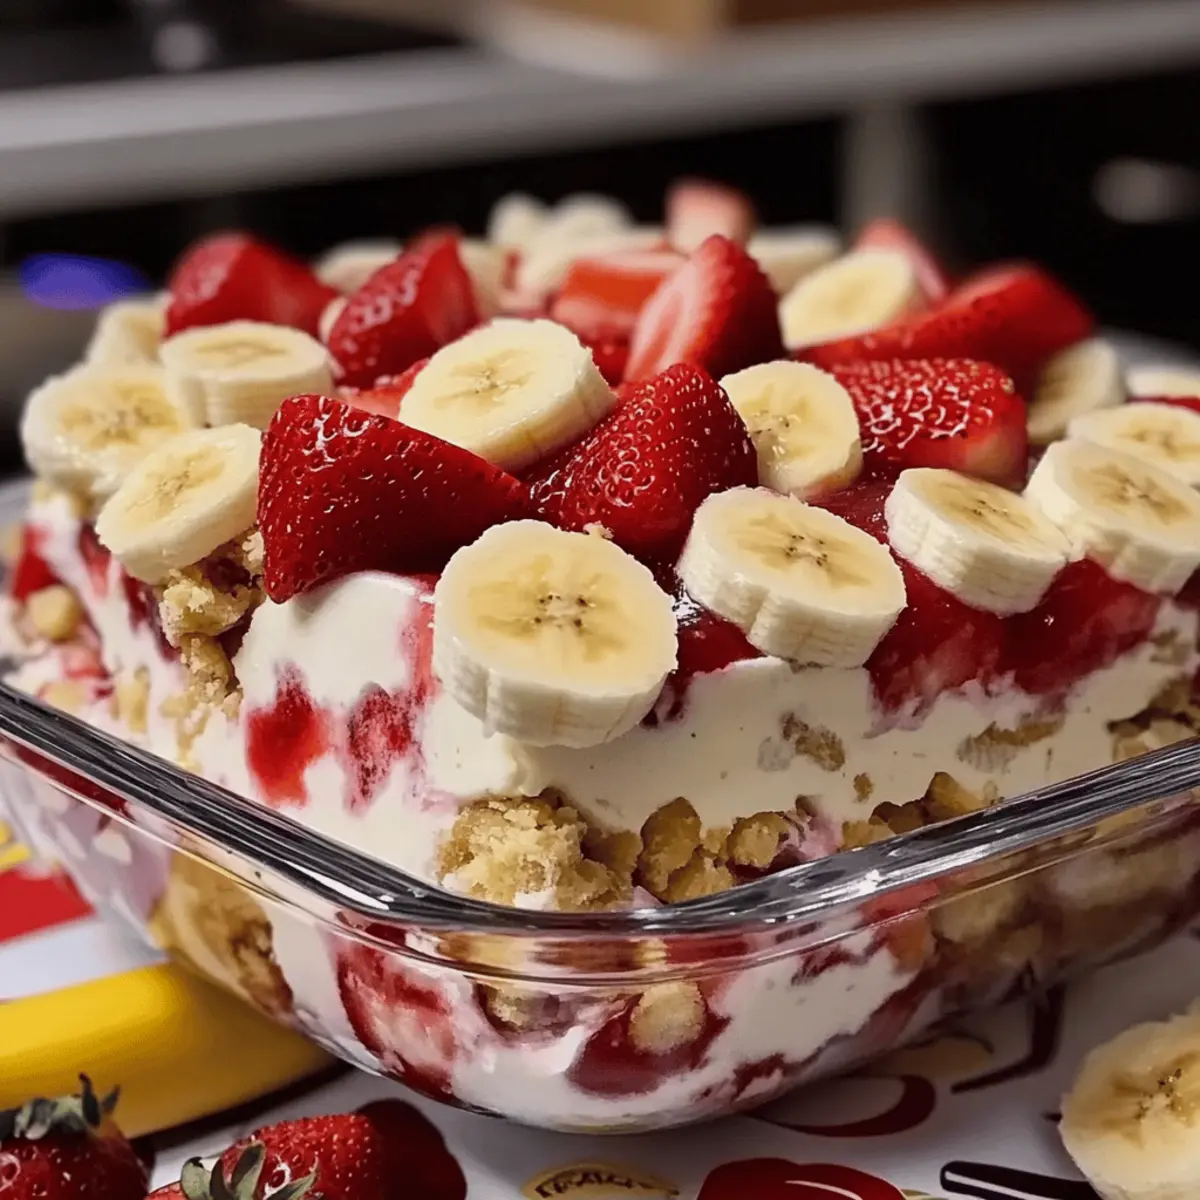
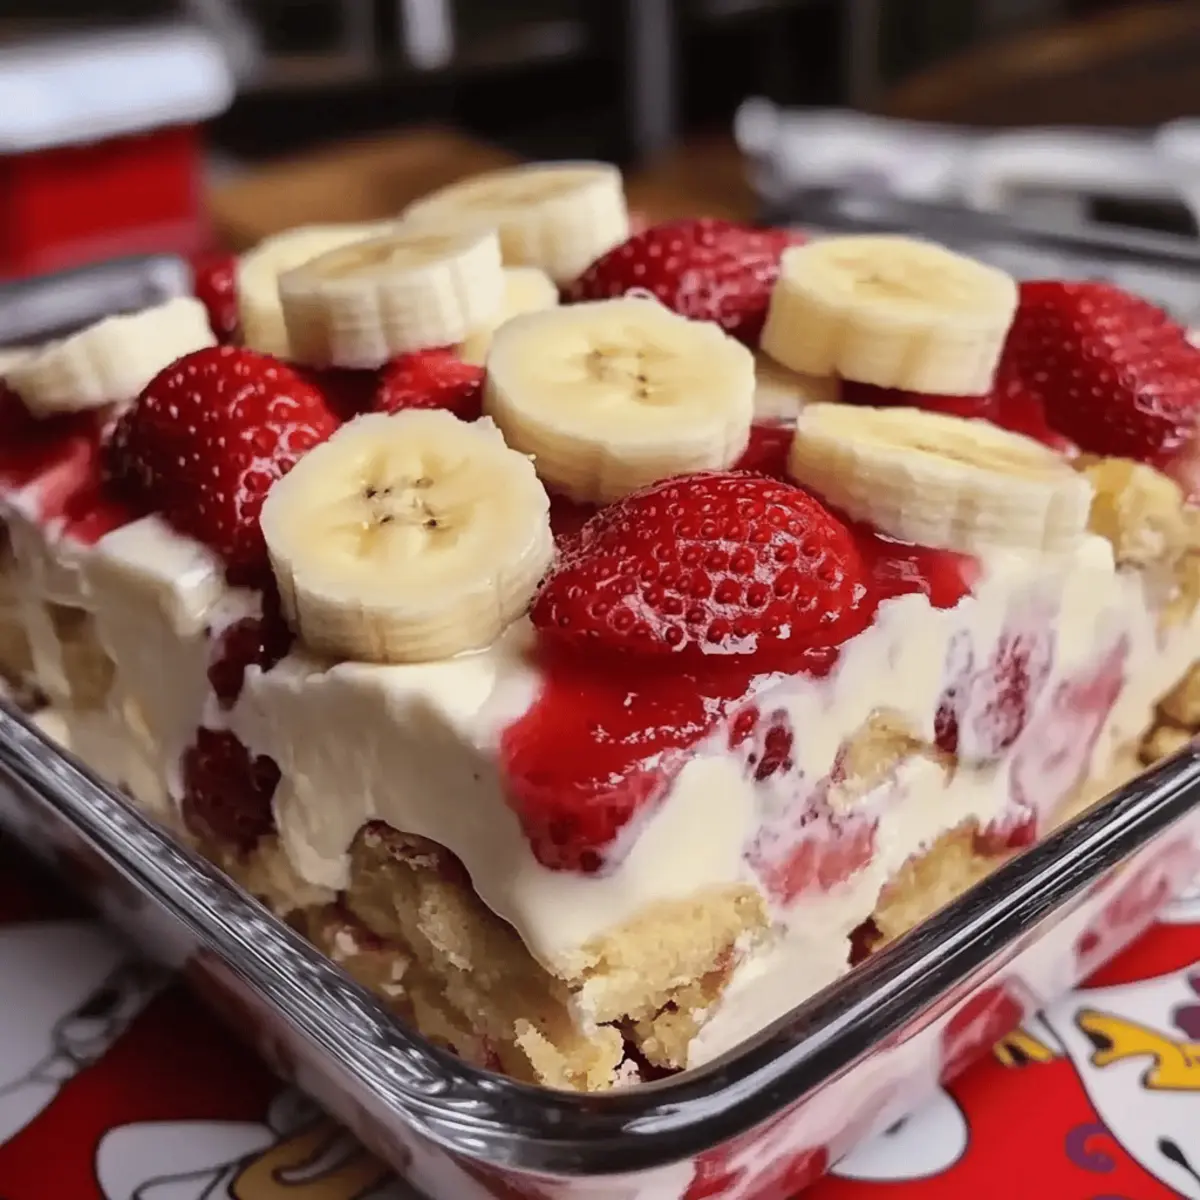
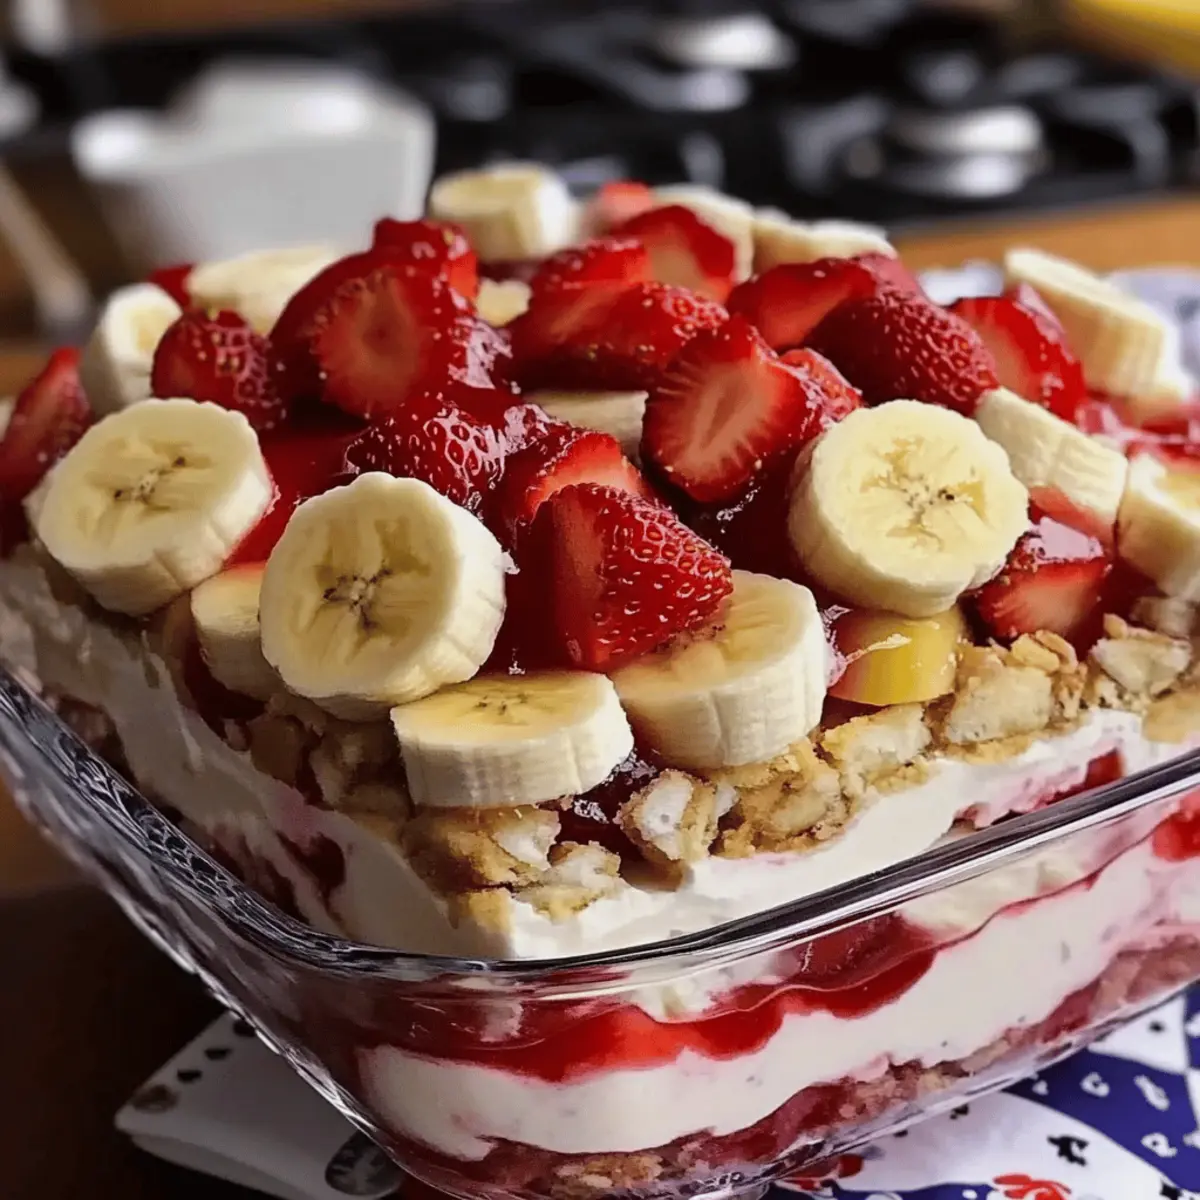
Next, evenly distribute a layer of sliced bananas over the vanilla wafers, followed by a layer of fresh strawberries. Make sure the fruit is evenly spread, with every bite potentially revealing a delightful pop of sweetness. This layering will enhance the visual appeal of your Strawberry Banana Pudding Dream, making each scoop a treat for the eyes as well as the taste buds.
Step 4: Pour the Pudding Mixture
Carefully pour half of your creamy pudding mixture over the fruit and wafers, using a spatula to gently spread it out for even coverage. This will bind the layers together, so take your time to ensure that all the fruit and wafers are encompassed in this rich layer. It’s essential for melding the flavors and creating that dreamy texture everyone loves.
Step 5: Repeat the Layers
Now, repeat the layering process with the remaining ingredients: add another layer of vanilla wafers, followed by another layer of sliced bananas and strawberries. Finally, pour the rest of the pudding mixture over the top, using the spatula again to make sure it’s evenly spread. This double layering adds depth to the Strawberry Banana Pudding Dream, ensuring each serving is packed with flavor.
Step 6: Top with Whipped Topping
Spread the whipped topping evenly over the final layer of pudding, smoothing it out to create a visually appealing finish. This light and creamy layer adds a delightful touch to the overall dessert. You might want to grab a spatula to achieve that fluffy look that contrasts perfectly against the creamy pudding below—this is where the magic happens!
Step 7: Refrigerate and Chill
Cover the dish with plastic wrap and place it in the refrigerator to chill for at least 4 hours, allowing the flavors to meld together beautifully. This crucial step also helps the pudding set, creating a texture that can be scooped and served easily. For the best results, consider chilling it overnight for an even more delightful experience when you unveil your Strawberry Banana Pudding Dream.
How to Store and Freeze Strawberry Banana Pudding Dream
Fridge: Store covered in the refrigerator for up to 3 days. The flavors can enhance as it sits, making it even more delightful!
Room Temperature: Avoid leaving the pudding at room temperature for over 2 hours to ensure freshness and food safety.
Freezer: It’s not recommended to freeze Strawberry Banana Pudding Dream, as thawing may alter the texture of the creamy layers and fresh fruits.
Reheating: Since it’s served cold, no reheating is necessary. Simply enjoy it straight from the fridge!
Make Ahead Options
These delightful Strawberry Banana Pudding Dream layers are perfect for meal prep, allowing you to enjoy this creamy dessert without last-minute stress! You can prepare the creamy filling—made from cream cheese, sweetened condensed milk, vanilla pudding mix, and milk—up to 24 hours in advance. Simply combine all the filling ingredients in a bowl, cover with plastic wrap, and refrigerate. You can also layer the vanilla wafers, bananas, and strawberries ahead of time, but it’s best to add them just a few hours before serving to prevent the bananas from browning. When ready to indulge, finish by pouring the prepared pudding mixture over the layers, topping with whipped cream, and chilling for at least 4 hours for the flavors to meld beautifully. Enjoy the convenience of having a scrumptious dessert that tastes just as delicious while saving precious time!
What to Serve with Strawberry Banana Pudding Dream
As you prepare to savor each spoonful of this luscious dessert, consider elevating your meal experience with delightful pairings that enhance the fruity goodness.
-
Creamy Mashed Potatoes: The buttery richness and smooth texture create a rich contrast to the lightness of the pudding dream, balancing flavors beautifully.
-
Garlic Roasted Vegetables: Earthy, roasted veggies tossed with garlic add a savory note, perfectly offsetting the sweetness of the pudding.
-
Grilled Chicken: A marinated chicken grilled to perfection offers a protein-packed option that complements the light, refreshing dessert while keeping the meal balanced.
-
Fresh Green Salad: A crisp salad with mixed greens and a zesty vinaigrette will add freshness to your meal, echoing the vibrant flavors of the strawberries and bananas.
-
Lemonade: A chilled glass of tart lemonade offers a refreshing contrast, enhancing the sweet notes of the pudding and keeping you cool.
-
Chocolate Chip Cookies: For an indulgent treat, pair your pudding with warm chocolate chip cookies for a nostalgic, comforting dessert experience.
Find joy in sharing and experimenting with these pairings, making your Strawberry Banana Pudding Dream the star of your table!
Expert Tips for Strawberry Banana Pudding Dream
-
Prep Ahead: Prepare the Strawberry Banana Pudding Dream a day in advance to enhance flavor and reduce stress on serving day.
-
Ripe Bananas: Choosing ripe bananas is crucial for the best sweetness and texture—too green and they won’t add the right flavor!
-
Layering Technique: Take your time with layering to ensure a visually stunning dessert. Avoid overfilling layers, as this can lead to messy servings.
-
Chill Time: Allow the pudding to chill for at least 4 hours, but overnight is even better for flavors to meld and the pudding to set properly.
-
Storage Tips: Cover leftovers tightly and store in the refrigerator to keep them fresh for up to 3 days, while the flavor actually improves!
Strawberry Banana Pudding Dream Variations
Feel free to get creative and make this recipe your own, adding exciting twists that will delight your taste buds!
-
Gluten-Free: Swap vanilla wafers for gluten-free alternatives for a dessert everyone can enjoy without sacrificing flavor.
-
Additional Fruits: Try adding blueberries or raspberries to the layers for an extra burst of sweetness and color. Mixing fruits introduces delightful surprises in each bite!
-
Nutty Flavor: Stir in chopped nuts like walnuts or pecans into the creamy mixture for an added crunch and rich flavor contrast.
-
Chocolate Twist: Drizzle melted chocolate or add chocolate chips into the pudding mixture for a decadent chocolate-strawberry experience that’s hard to resist.
-
Dairy-Free Option: Substitute cream cheese and milk with coconut cream and almond milk for a lactose-free alternative that doesn’t skimp on creaminess.
-
Lower-Calorie Version: Use fat-free cream cheese and light whipped topping. This allows you to enjoy the delicious indulgence with fewer calories.
-
Tropical Flair: Add diced pineapple or mango slices to bring a tropical vibe to your pudding, perfect for summer gatherings.
For a deeper dive into customizing your desserts, consider exploring how to make homemade whipped cream for a truly personal touch.
Strawberry Banana Pudding Dream Recipe FAQs
What kind of bananas should I use?
For the best flavor and texture, I recommend using ripe bananas. Look for bananas that are slightly speckled with brown spots—this indicates they are sweet and flavorful. Avoid green bananas, as they won’t provide the natural sweetness you want for this dessert.
How should I store leftovers?
Store your Strawberry Banana Pudding Dream covered tightly in the refrigerator for up to 3 days. This allows the flavors to meld even more, making it taste simply delightful! If you have any leftovers, I suggest stacking it in an airtight container to keep all that creamy goodness fresh.
Can I freeze the Strawberry Banana Pudding Dream?
Unfortunately, it’s not advisable to freeze this dessert. Freezing can alter the creamy texture of the filling and affect the freshness of the layers. If you’re looking for make-ahead options, preparing it a day in advance and refrigerating will be your best bet for retaining that luscious consistency.
What if the pudding mixture is lumpy?
If your pudding mixture is lumpy, don’t fret! Simply pour it into a larger mixing bowl and use a hand mixer to thoroughly blend until smooth. This should only take a couple of minutes, so you’ll be back on track quickly! Remember to combine well after adding each ingredient to avoid lumps in the first place.
Is this dessert suitable for people with allergies?
This recipe contains dairy, including cream cheese and whipped topping, which may not be suitable for those with lactose intolerance or dairy allergies. For alternatives, consider using dairy-free cream cheese and whipped topping to make it more inclusive. Always check the labels for allergens, especially if sharing with friends or family!
Can I use frozen strawberries instead of fresh?
Absolutely! If you’re using frozen strawberries, make sure to thaw and drain them thoroughly before layering them into your dessert. This will help avoid excess moisture which can affect the overall consistency of your Strawberry Banana Pudding Dream.
Delightful Strawberry Banana Pudding Dream to Savor at Home
Ingredients
Equipment
Method
- In a large mixing bowl, combine softened cream cheese and sweetened condensed milk until smooth. Gradually add pudding mix and milk, blending until lump-free.
- Layer vanilla wafers at the bottom of a large serving dish, pressing down gently.
- Add a layer of sliced bananas followed by a layer of fresh strawberries.
- Pour half of the pudding mixture over the fruit and wafers.
- Repeat layering with the remaining ingredients: wafers, bananas, strawberries, and remaining pudding mixture.
- Spread whipped topping evenly over the final layer.
- Cover with plastic wrap and refrigerate for at least 4 hours to chill.
Leave a Reply