
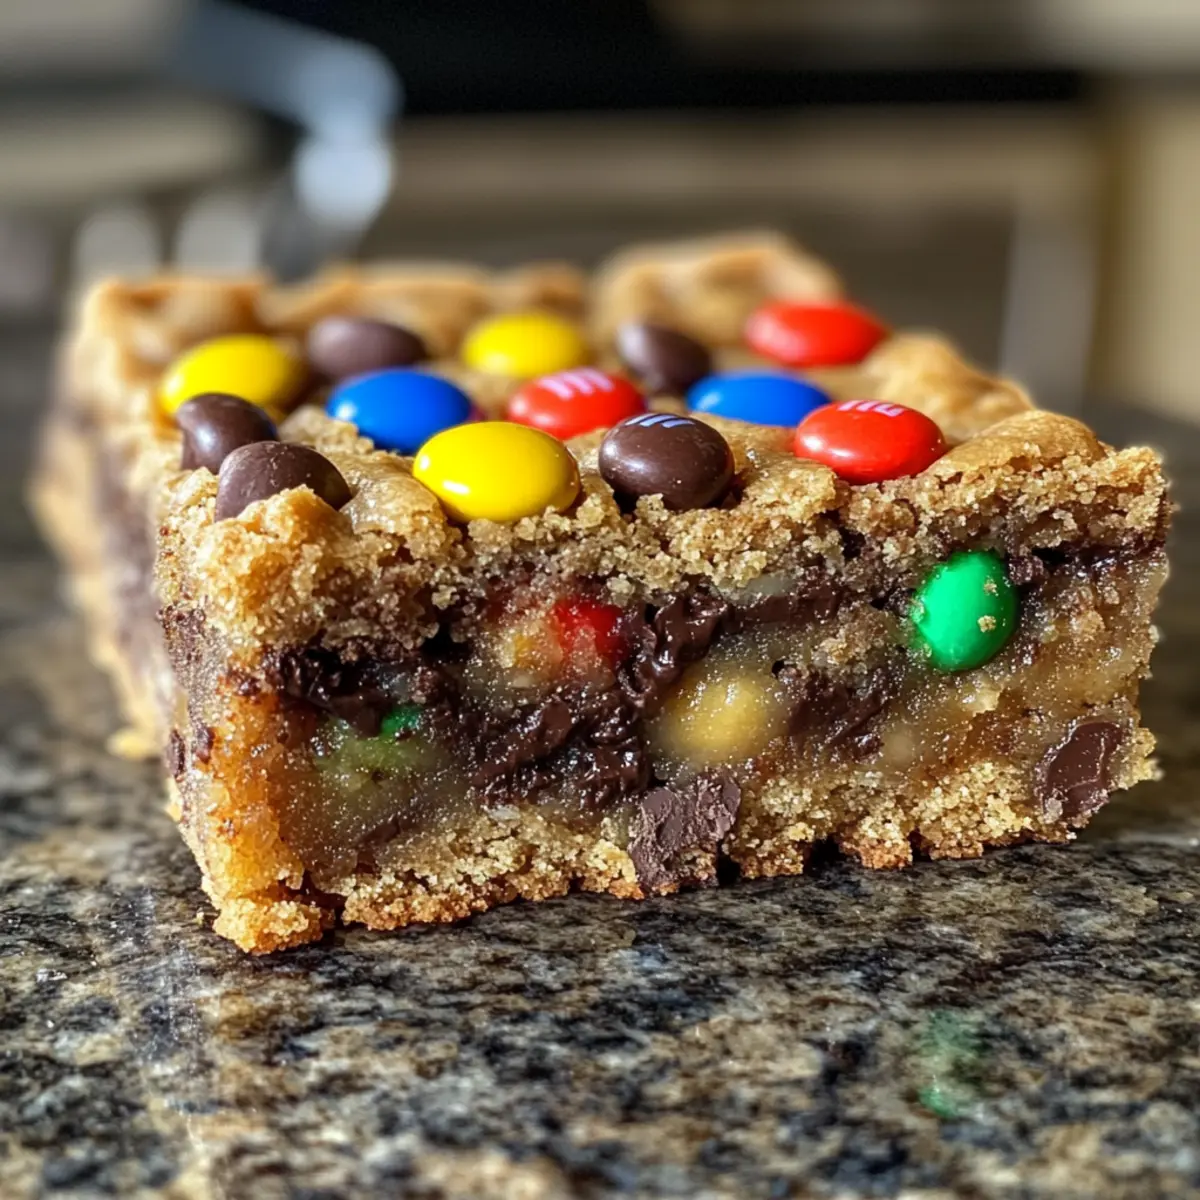
As I sift through the holiday decorations, a sweet craving takes hold, whispering of festive delights. Enter my Christmas Magic Cookie Bars, an easily crafted dessert that captures the spirit of the season! These vibrant squares are a spectacular combination of graham crackers, gooey chocolate, and a colorful sprinkle of M&M’s, all nestled in a luscious blanket of sweetened condensed milk. What I love most about this recipe is its quick 5-minute prep time, allowing me to whip up an irresistible treat without the stress. Plus, they’re perfect for sharing at gatherings or stashing away for late-night snacking. Does it get any better than a no-bake, crowd-pleasing treat that’s ready in a flash? Let’s dive into the festivities with these fabulous bars!
Why Are Christmas Magic Cookie Bars Perfect?
Easy Preparation: The no-bake element ensures that you can create these delightful bars in just 5 minutes! This is a lifesaver during the hectic holiday season.
Festive Flavors: With a cheerful mix of chocolate, peanut butter, and M&M’s, each bite offers a burst of flavor that’s sure to impress everyone around the dessert table.
Crowd-Pleasing Appeal: These bars are loved by both kids and adults alike, making them a perfect addition to any holiday gathering. You may also want to check out more no-bake dessert ideas for other festive treats!
Versatile Variations: Feel free to switch up the mix-ins based on your taste preferences—whether it’s butterscotch chips or different candies, there’s room for creativity in every batch!
Storage Friendly: Bake a large tray and enjoy for days—these bars store well in an airtight container, allowing you to savor the festive spirit throughout the season.
Christmas Magic Cookie Bars Ingredients
For the Base
• Butter – 1/2 cup, melted; provides richness and binds the crust. Substitution: Can use margarine for a lighter option.
• Graham Cracker Crumbs – 1 1/4 cups; creates the base layer for the bars. Note: Ensure they’re finely crushed for a firm crust.
For the Filling
• Shredded Coconut – 1/2 cup; adds texture and a sweet coconut flavor. Substitution: Use quick cooking oats if coconut is disliked.
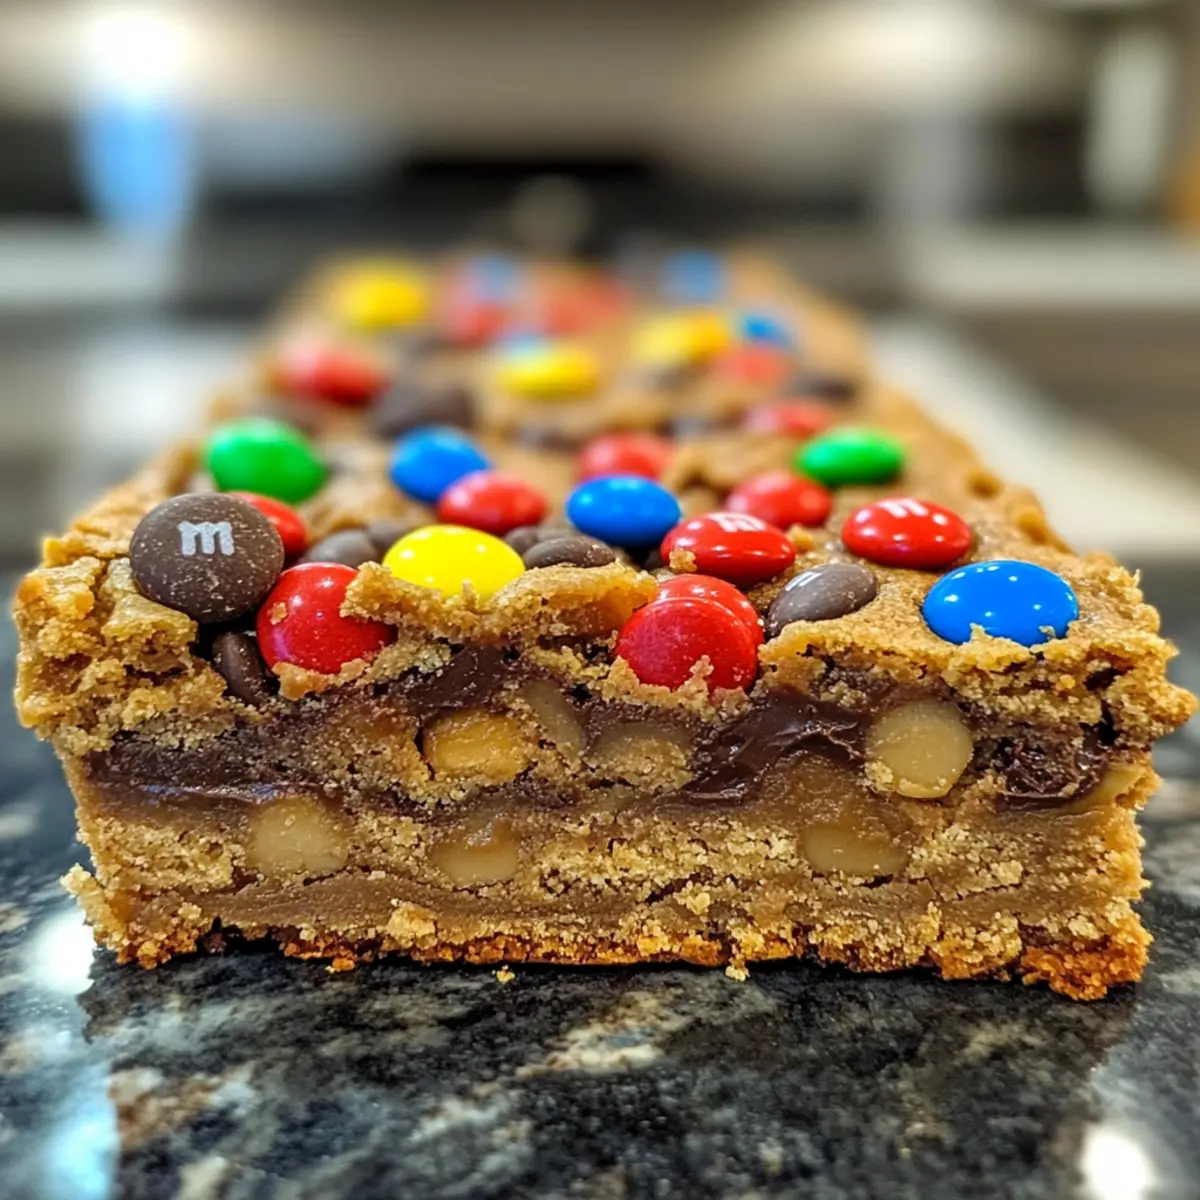
• Peanut Butter Chips – 1 cup; introduces whimsy and nuttiness to the bars. Substitution: Any preferred “chip” flavor can be used for variation.
• Semi-Sweet Chocolate Chips – 1 1/2 cups; provides a classic chocolatey taste. Note: Dark chocolate chips offer a richer flavor option.
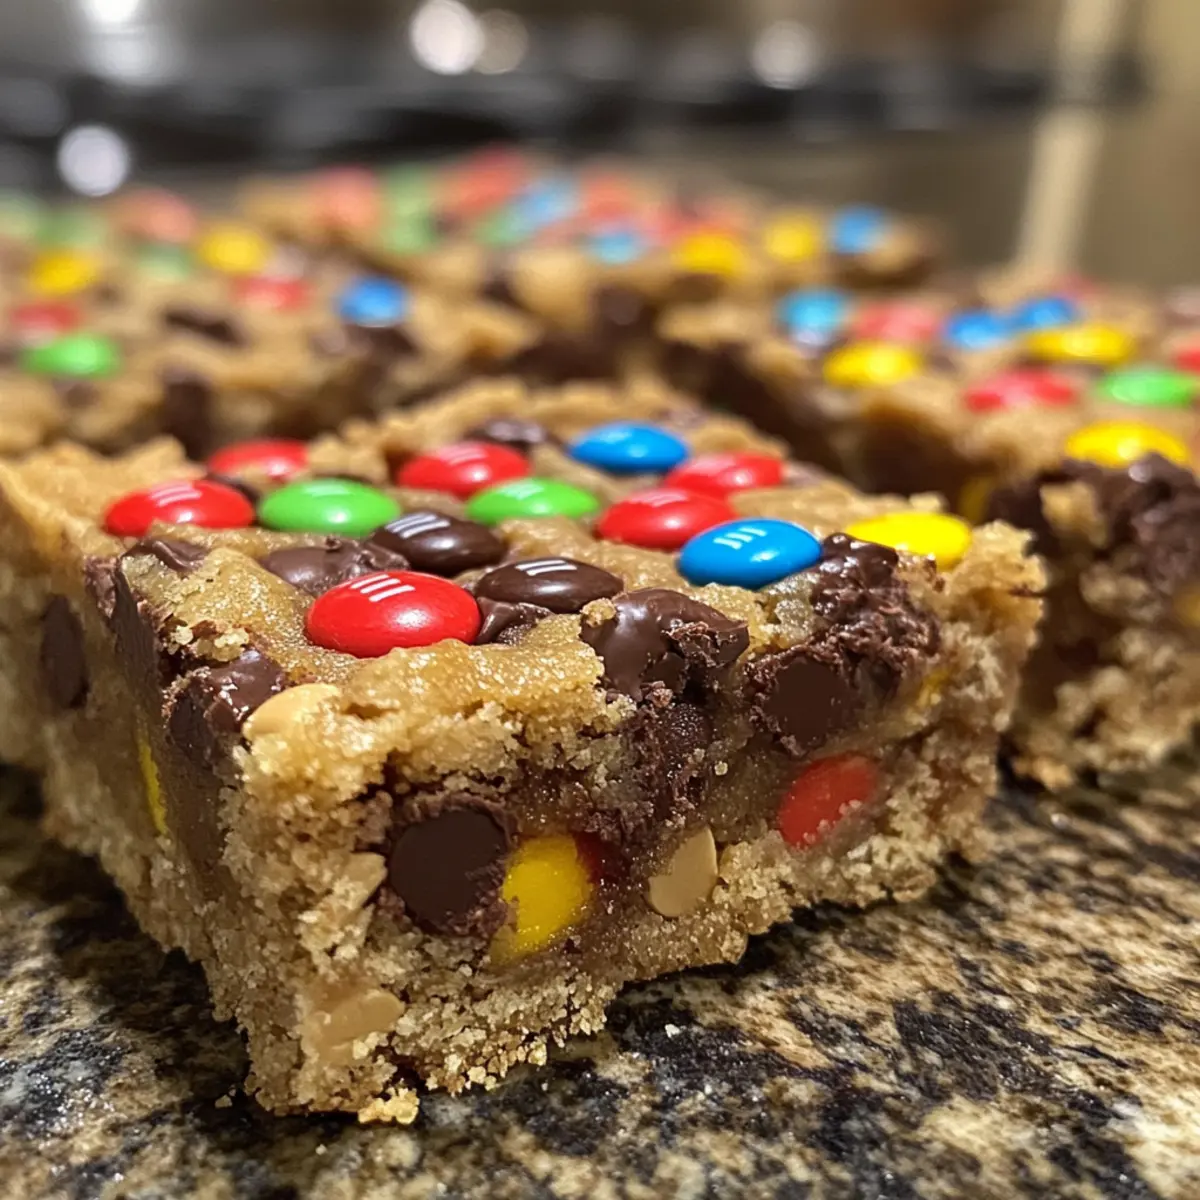
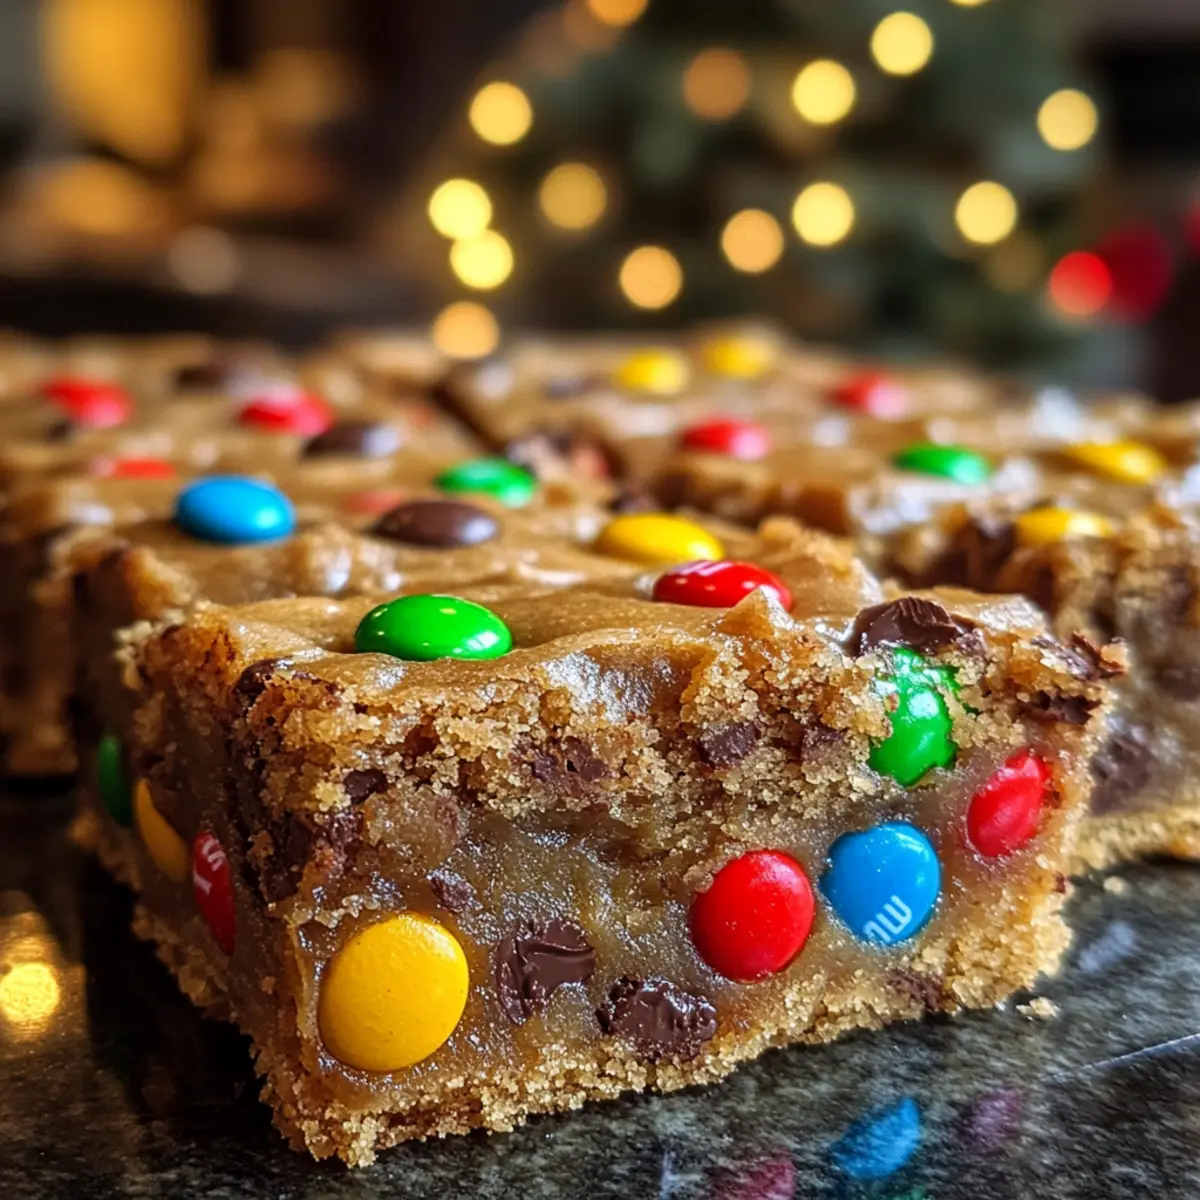
• M&M’s – 1 cup; adds vibrant color and crunch. Note: Use seasonal M&M’s for a festive appearance.
• Sweetened Condensed Milk – 14 oz can; acts as a binding agent and adds sweetness. Note: Essential for that gooey texture in your Christmas Magic Cookie Bars.
Step‑by‑Step Instructions for Christmas Magic Cookie Bars
Step 1: Preheat the Oven
Start your holiday baking by preheating your oven to 350°F (175°C). This step is crucial as it ensures your Christmas Magic Cookie Bars bake evenly and develop that delicious golden color. While the oven heats up, gather your baking dish and ingredients, so you’re ready to create this festive treat in no time!
Step 2: Prepare the Base
In a 13×9 inch baking dish, blend the melted butter with the graham cracker crumbs until well combined. Press this mixture firmly into an even layer at the bottom of the dish using your fingers or the back of a measuring cup. You want a compact crust that serves as the sturdy foundation for your Christmas Magic Cookie Bars, setting the stage for all those delightful layers.
Step 3: Add Shredded Coconut
Once the crust is prepared, evenly sprinkle the shredded coconut over the graham cracker layer. This adds a subtle sweetness and a delightful chewiness to your bars. Make sure the coconut is spread out in a thin, even layer to ensure every bite captures that lovely tropical essence, creating a flavorful contrast to the richer chocolate layers that follow.
Step 4: Layer the Chocolate and Peanut Butter Chips
Next, it’s time to elevate your bars with flavor! Begin layering the semi-sweet chocolate chips, followed by the peanut butter chips, over the coconut layer. Aim for an even distribution, ensuring that every corner is generously packed with this delicious concoction. The combination of flavors will bring joy and nostalgia, truly embodying the spirit of holiday treats.
Step 5: Add M&M’s for Color and Crunch
Now, sprinkle the vibrant M&M’s over the chocolate and peanut butter layers. This step not only adds a pop of color, perfect for the festive season, but also adds a delightful crunch. Feel free to mix in seasonal M&M’s for a special touch, making your Christmas Magic Cookie Bars even more visually appealing as well as tasty.
Step 6: Drizzle with Sweetened Condensed Milk
Take your can of sweetened condensed milk and evenly drizzle it over all the layers you’ve built so far. Ensure that you cover the entire surface, as this not only binds everything together but also infuses the bars with rich sweetness. As you pour, watch how the milk seeps into the layers, creating that gooey texture which is a hallmark of the classic magic cookie bars.
Step 7: Bake to Perfection
Carefully place your baking dish in the preheated oven and bake for 25-30 minutes. Keep an eye on the bars as they bake; you’re looking for a golden-brown hue and a slight puffing up of the bars. Once baked, the edges should be firm while the center remains a bit gooey, showcasing that delightful texture characteristic of Christmas Magic Cookie Bars.
Step 8: Cool and Slice
Once out of the oven, allow the bars to cool completely in the dish on a wire rack. This cooling period is essential, as it helps them set properly. After about an hour, or once they reach room temperature, slice the bars into squares of your desired size. Each piece should reveal those beautifully layered ingredients, ready for festive enjoyment!
What to Serve with Christmas Magic Cookie Bars
Indulging in these festive treats is always better when paired with complementary delights that enhance your holiday spirit.
-
Creamy Vanilla Ice Cream: This classic pairing adds a scoop of cool creaminess, creating a delightful contrast against the warm, gooey cookie bars. Imagine the melted chocolate melding with the ice cream for a truly indulgent experience.
-
Fresh Fruit Salad: A mix of vibrant fruits brings brightness and balances the richness of the cookie bars. Think juicy strawberries and tart blueberries, offering a refreshing bite between sweet morsels.
-
Homemade Hot Chocolate: Cozy up with rich, warm hot chocolate flecked with marshmallows. It perfectly complements the chocolatey goodness of the bars while warming up your holiday gatherings.
-
Peanut Butter Milkshake: For the peanut butter lovers, a creamy milkshake adds a playful twist. The smooth texture harmonizes with the layers of peanut butter chips in the bars, creating a delightful flavor synergy.
-
Spiced Eggnog: Enjoy the holiday spirit with a frothy cup of eggnog. The warm spices beautifully enhance the sweet, festive flavors of the cookie bars, making each bite more enjoyable.
-
Caramel Sauce Drizzle: Add a drizzle of warm caramel atop your cookie bars for an extra layer of sweetness. The rich, buttery sauce melts into the layers, elevating the experience to something truly divine.
-
Chocolate Dipped Pretzels: These crunchy snacks provide a wonderful contrast in texture and a playful salty-sweet balance that pairs beautifully alongside your Christmas Magic Cookie Bars. They add another layer of holiday cheer to the spread!
Make Ahead Options
These Christmas Magic Cookie Bars are perfect for those busy holiday weeks! You can prepare the crust and layer the chocolate, peanut butter chips, and coconut up to 24 hours in advance, covering them tightly with plastic wrap in the refrigerator to maintain freshness. Right before baking, simply drizzle the sweetened condensed milk over the prepped layers and bake as directed. To ensure the bars stay just as delicious, avoid adding the M&M’s until you’re ready to bake, as they maintain their vibrant color and crunch. By prepping ahead, you’ll save precious time, letting you focus on enjoying the festivities!
Storage Tips for Christmas Magic Cookie Bars
Room Temperature: Store your Christmas Magic Cookie Bars in an airtight container at room temperature for up to 1 week. This preserves their chewy texture and delightful flavors.
Fridge: For an extra cooling treat, keep the bars in the fridge, where they can last up to 2 weeks. Just remember to cover them to prevent drying out!
Freezer: If you want to save some bars for later, freeze them! Wrap individual squares in plastic wrap and place them in a freezer-safe container for up to 3 months.
Reheating: To enjoy them warm, pop a bar in the microwave for about 10-15 seconds. This will revive that gooeyness and bring back the joyful flavors of fresh Christmas Magic Cookie Bars!
Expert Tips for Christmas Magic Cookie Bars
-
Greasing the Dish: Ensure your baking dish is well greased to prevent sticking and make slicing easier. A non-stick spray or butter works best for your Christmas Magic Cookie Bars.
-
Cooling Time: Allow the bars to cool completely before slicing them. This step is vital for achieving clean cuts and ensuring the layers hold together beautifully.
-
Checking for Doneness: Bake until golden brown around the edges; if the bars seem overly sticky post-baking, they may need a few more minutes in the oven.
-
Layering Evenly: Aim for even distribution of your M&M’s, chips, and coconut to ensure every bite of your Christmas Magic Cookie Bars has balanced flavors and textures.
-
Serving Suggestions: For a festive touch, garnish with additional mini M&M’s or a sprinkle of holiday-themed sprinkles before slicing. This adds a delightful visual appeal!
Christmas Magic Cookie Bars Variations
Feel free to let your creativity shine with these delightful variations that offer a unique twist on your Christmas Magic Cookie Bars!
-
Nutty Delight: Add chopped pecans or walnuts for added crunch and nuttiness. This swap brings a satisfying texture contrast that complements the sweetness perfectly.
-
Choco-Mint Surprise: Incorporate peppermint chips alongside chocolate for a festive, minty flavor. It’s like a holiday hug with every bite, transporting you to winter wonderlands.
-
Dairy-Free Option: Substitute regular sweetened condensed milk with coconut cream for a creamy base without dairy. This swap maintains the rich texture while adding a tropical twist.
-
Fruit Fest: Toss in dried cranberries or chopped dried apricots for a fruity burst that brightens each bite. The tartness of the fruit complements the sweetness of the bars.
-
Spicy Kick: Infuse a hint of cinnamon or nutmeg into your graham cracker crust. This warm spice elevates the flavor profile, adding a cozy holiday aroma to each square.
-
Cookie Butter Bliss: Replace peanut butter chips with cookie butter for a unique and delicious twist. This flavor adds a warm, spiced sweetness that will have everyone reaching for seconds.
-
Coconut-Free: Swap shredded coconut for additional graham cracker crumbs or even crushed pretzels for an alternative crunch. This keeps the bars packed with texture while pleasing coconut haters.
-
Seasonal Sprinkles: Top your bars with festive holiday sprinkles or edible glitter before serving. This adds a fun and celebratory touch perfect for the festive spirit.
Explore these delightful variations, and don’t hesitate to mix and match to create your signature Christmas treat! For additional ideas, consider checking out these easy DIY holiday desserts for more inspiration.
Christmas Magic Cookie Bars Recipe FAQs
How can I select the right ripeness for the ingredients?
Absolutely! When choosing your ingredients, make sure your butter is fresh and unsalted. For the best flavors, ensure your semi-sweet chocolate chips are high-quality. While coconut doesn’t spoil easily, check for freshness by looking for any discoloration or unpleasant smell. Use graham cracker crumbs that are dry and crumbly for the best texture in your bars.
How should I store my Christmas Magic Cookie Bars, and how long will they last?
To keep your Christmas Magic Cookie Bars at their best, store them in an airtight container. They’ll last up to 1 week at room temperature and can be refrigerated for up to 2 weeks if you prefer them chilled. Make sure to cover them, so they don’t dry out! I often use layer parchment paper between the bars for easy serving and to keep them from sticking.
Can I freeze my Christmas Magic Cookie Bars? If so, how?
Yes! Your Christmas Magic Cookie Bars freeze beautifully. After they cool completely, slice them into squares and wrap each piece individually in plastic wrap. Place the wrapped bars in a freezer-safe container and they can last for up to 3 months. To enjoy them later, simply pop a bar in the microwave for about 10-15 seconds to bring back that gooey goodness. It’s like having a treat on demand!
What should I do if my cookie bars turn out too sticky?
Very! If your Christmas Magic Cookie Bars are too sticky, it could be due to underbaking or insufficient greasing of the pan. If they look overly gooey after the baking time is up, give them a few more minutes until the edges become golden and the center feels firm. Additionally, ensure you’ve generously greased your baking dish or you can use parchment paper for easier removal!
Are there any dietary considerations I should be aware of?
Indeed! If you’re preparing these bars for a gathering, it’s essential to note that they contain common allergens, such as peanuts and dairy. For those avoiding gluten, you can substitute graham cracker crumbs with gluten-free options. Always consider potential allergies to chocolate or coconut as well. If you’re worried about your pets, it’s best to keep these delicious treats away from furry friends since chocolate is toxic to dogs and cats.
What alternatives can I use for the ingredients if I have dietary restrictions?
Absolutely! There are plenty of creative substitutions. If you need a dairy-free option, use coconut oil instead of butter and almond or cashew milk in place of sweetened condensed milk. For nut allergies, consider using sunbutter or checking allergen-free alternatives for the chips. You can swap the peanut butter chips for butterscotch or even omit them altogether for a more chocolate-forward bar. The more the merrier with variations!
Irresistible Christmas Magic Cookie Bars for Holiday Joy
Ingredients
Equipment
Method
- Start your holiday baking by preheating your oven to 350°F (175°C).
- In a 13x9 inch baking dish, blend the melted butter with the graham cracker crumbs until well combined. Press this mixture firmly into an even layer at the bottom of the dish.
- Evenly sprinkle the shredded coconut over the graham cracker layer.
- Layer semi-sweet chocolate chips, followed by peanut butter chips, over the coconut layer.
- Sprinkle the vibrant M&M's over the chocolate and peanut butter layers.
- Evenly drizzle the sweetened condensed milk over all the layers.
- Carefully place your baking dish in the preheated oven and bake for 25-30 minutes.
- Allow the bars to cool completely in the dish on a wire rack. After about an hour, slice the bars into squares.
Leave a Reply