
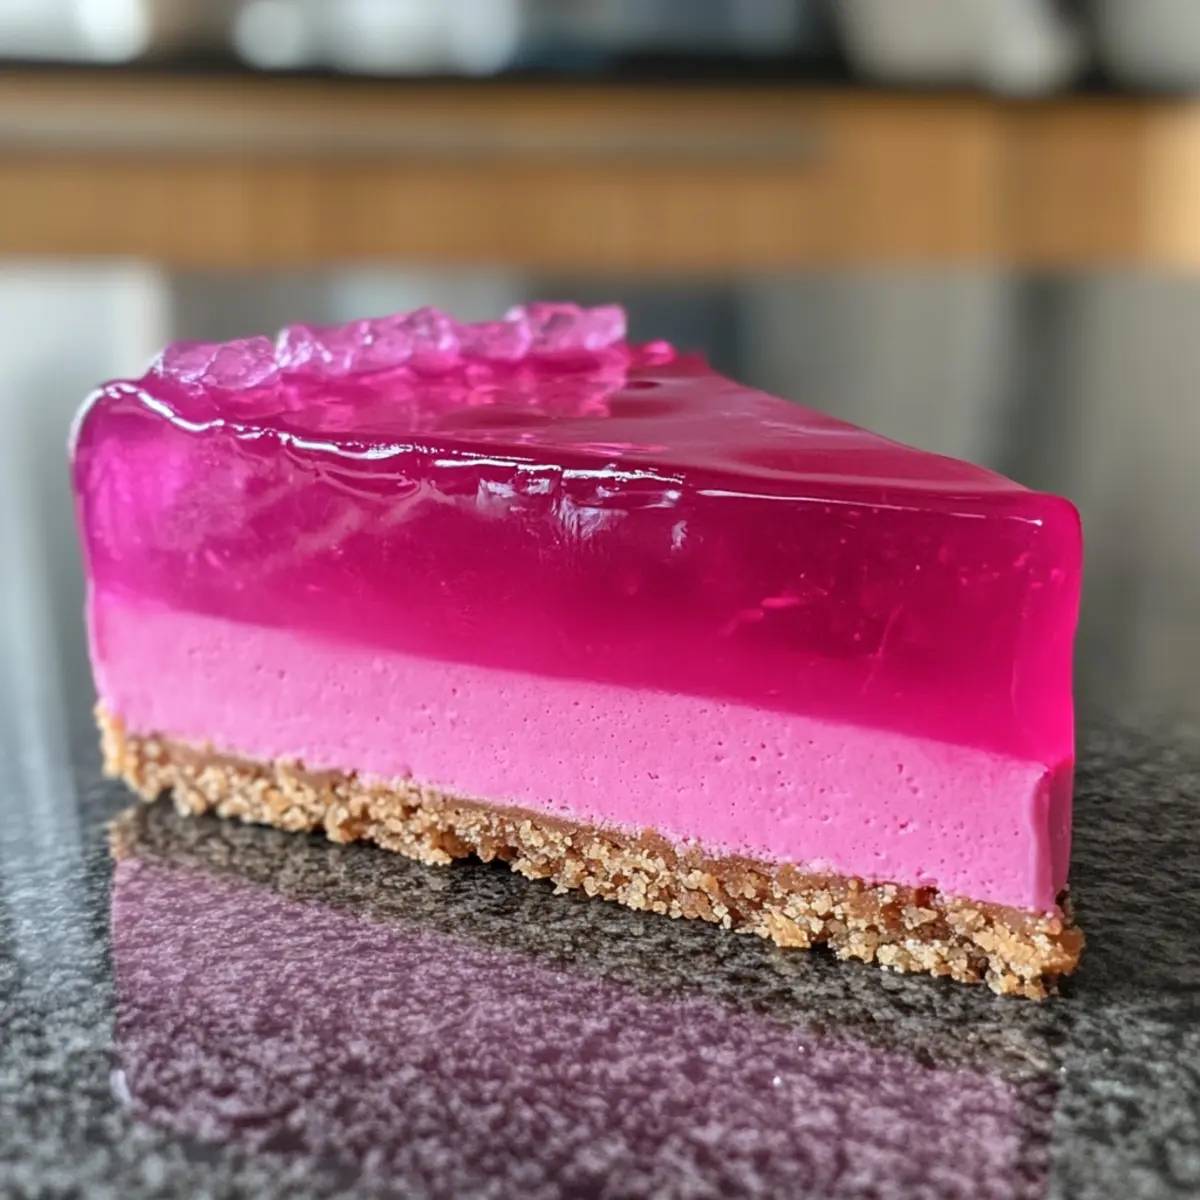
As I stood in my kitchen, bathed in the warm glow of the afternoon sun, I felt a rush of excitement thinking about creating something truly special: an elegant no-bake Dragon Fruit Mousse Cake. This vibrant dessert doesn’t just look like a piece of art; it’s also guilt-free and perfect for warm days when you seek something light and refreshing. With an airy dragon fruit mousse layered atop a nutty almond base, every bite invites a burst of tropical delight, making it an ideal centerpiece for gatherings or a sweet indulgence just for you. Plus, the best part? It requires no baking, allowing you to whip it up without any fuss. Are you ready to impress your loved ones with this show-stopping treat?
Why is this cake so irresistible?
Visually Stunning: The vibrant pink hue of dragon fruit creates a breathtaking dessert that will catch everyone’s eye at any gathering.
No-Bake Simplicity: With no baking required, you can create this elegant cake without the stress of an oven, making it perfect for busy days.
Light and Refreshing: The airy mousse paired with a nutty almond base makes for a dessert that feels indulgent yet light, perfect for warm-weather enjoyment.
Customizable Flavor: Feel free to experiment by using other fruit purees like raspberry or passion fruit, allowing for a unique spin every time you make it.
Crowd-Pleasing Appeal: This cake is sure to impress not just by looks but also by taste, making it an ideal choice for gatherings or casual family dinners.
Pair it with fresh fruit or mint leaves for garnish, and to keep it fresh, make sure to store any leftovers in the fridge for up to three days!
Dragon Fruit Mousse Cake Ingredients
For the Almond Base
• Almonds – Provides a delightful nutty flavor and a firm base for the mousse.
• Dates – Acts as a natural sweetener and binder to hold the crust together.
• Coconut Oil – Adds richness to the almond base; can substitute with unsalted butter if preferred.
For the Mousse
• Dragon Fruit Puree – The star ingredient that adds a vibrant color and refreshing taste to the mousse.
• Heavy Cream – Contributes a luxurious creaminess; replace with whipped coconut cream for a dairy-free version.
• Gelatin – Essential for setting the mousse; use agar-agar as an alternative for a vegetarian treat.
• Sugar – Balances the flavors of the dragon fruit; consider natural sweeteners like honey or agave syrup for a healthier option.
For the Jelly Layer
• Dragon Fruit Juice – Enhances the fruity flavor of the cake; freshly juiced is best for vibrant taste.
• Additional Gelatin – Needed for the jelly layer; ensure it’s fully dissolved to avoid lumps.
For the Glaze
• Neutral Glaze – A glossy finish that adds an elegant touch; can use store-bought or homemade apricot glaze for sweetness.
Each layer of this Dragon Fruit Mousse Cake not only heightens the flavor but also enhances its visual appeal, making it a showstopper for any occasion!
Step‑by‑Step Instructions for Dragon Fruit Mousse Cake
Step 1: Prepare the Almond Base
Begin by blending almonds, dates, and coconut oil until finely ground and sticky. Press this mixture firmly into the bottom of a 9-inch springform pan to form the almond base. Chill the crust in the refrigerator for about 30 minutes, allowing it to set while you prepare the mousse.
Step 2: Make the Mousse
In a mixing bowl, whip the heavy cream until it forms stiff peaks, which should take about 3-4 minutes with an electric mixer on high speed. Gently fold in the dragon fruit puree and previously softened gelatin until fully combined, maintaining the lightness of the mousse. Pour this vibrant mixture over the chilled almond base and smooth the top with a spatula.
Step 3: Chill the Mousse
Place the Dragon Fruit Mousse Cake in the refrigerator and let it chill for a minimum of 2-3 hours, or until the mousse is firm and set. Check for an airy texture; it should hold its shape when gently pressed. This wait allows all those tropical flavors to meld beautifully.
Step 4: Prepare the Jelly Layer
While the mousse sets, mix gelatin with warm dragon fruit juice, stirring until completely dissolved. Let the mixture cool for about 10 minutes at room temperature. Once cooled, gently pour the jelly layer over the set mousse, ensuring an even coat that enhances the visual appeal of your Dragon Fruit Mousse Cake.
Step 5: Glaze and Serve
After the jelly has set, carefully brush a neutral glaze over the top to give your cake a glossy finish. To serve, gently release the cake from the springform pan and slice it into wedges. The beautiful layers of the Dragon Fruit Mousse Cake will be a delightful surprise for your guests!
Expert Tips for Dragon Fruit Mousse Cake
-
Gelatin Preparation: Ensure the gelatin is fully dissolved in warm liquid to prevent lumps in your mousse. This step is crucial to achieving a smooth texture in your Dragon Fruit Mousse Cake.
-
Ripe Fruit Selection: When using fresh dragon fruit, choose fruit that is ripe; this ensures optimal sweetness and flavor, making your dessert even more delightful.
-
Whipping Cream: Beat the cream to stiff peaks for an airy mousse that holds its shape perfectly. Avoid overbeating, as this can cause the cream to separate.
-
Chilling Time: Patience is key! Allow the mousse to chill for 2-3 hours for it to set properly—rushing this step may result in a mousse that doesn’t hold its structure.
-
Layering Technique: Pour the jelly gently over the set mousse to avoid disturbing the delicate layers. Using a spatula can help to create an even layer without much disturbance.
These tips will ensure your Dragon Fruit Mousse Cake not only looks beautiful but tastes delicious, leaving your friends and family in awe!
Storage Tips for Dragon Fruit Mousse Cake
- Fridge: Keep your Dragon Fruit Mousse Cake covered in the refrigerator for up to 3 days. This helps maintain its freshness and delightful texture.
- Freezer: If you need to store it longer, freeze individual slices in airtight containers for up to 2 months. Thaw in the fridge before serving for the best quality.
- Reheating: As this is a no-bake dessert, there’s no need for reheating. Simply enjoy it cold, which enhances its refreshing qualities!
- Wrapping: Use plastic wrap or a cake dome to prevent any odors from the fridge from influencing the delicate flavors of the mousse.
What to Serve with Dragon Fruit Mousse Cake
As you prepare to wow your guests with this delightful dessert, consider these pairings that enhance your elegant creation.
- Fresh Berries: Their juicy, sweet-tart flavor balances the light mousse, adding a pop of color and freshness to each bite.
- Mint Leaves: Lightly sprinkled on top, they bring a refreshing aroma that complements the tropical notes of the cake perfectly.
- Coconut Whipped Cream: Offers a luxurious, creamy texture that pairs beautifully with the airy mousse, enhancing the tropical vibe.
- Honey Drizzle: A touch of natural sweetness over the cake can accentuate the dragon fruit’s flavor, making each slice even more indulgent.
- Fruit Salad: A medley of seasonal fruits provides additional textures and flavors, making for a delightful contrast with the mousse cake.
- Citrus Sorbet: A chilled scoop of sorbet refreshes the palate after the rich mousse, elevating the dessert experience to another level.
Each of these options adds a unique dimension to your Dragon Fruit Mousse Cake, turning a simple dessert into a stunning, full meal!
Dragon Fruit Mousse Cake Variations
Feel free to make this delightful dessert your own with some simple tweaks and substitutions!
-
Vegan Alternative: Replace heavy cream with whipped coconut cream and use agave syrup instead of sugar for a plant-based treat.
-
Gluten-Free Option: Swap the almond base for a gluten-free cookie crust, ensuring everyone can enjoy a slice without worry.
-
Tropical Twist: Incorporate other purees like mango or pineapple to brighten the flavors and give your mousse an exotic flair.
-
Flavor Boost: Add a teaspoon of vanilla extract or a pinch of lime zest to the mousse for an extra layer of complexity.
-
Berry Infusion: Use raspberry puree instead of dragon fruit for a vivid contrast and a slightly tangy flavor that pairs beautifully with the almond base.
-
Nutty Crunch: Stir in crushed pistachios or finely chopped macadamia nuts into the mousse mixture for added texture and a burst of flavor.
-
Zesty Kick: Drizzle a little lime or orange juice over the mousse before adding the jelly layer for a refreshing citrus note that elevates each bite.
-
Festive Presentation: Garnish with edible flowers or fresh mint leaves for a stunning visual that enhances the already gorgeous presentation.
Each variation brings its own charm, making this Dragon Fruit Mousse Cake perfect for any occasion. Why not explore the delicious nuances of this recipe, and don’t forget to pair it with fresh fruit or a sprig of mint for added flair! If you’re looking for more ideas, check out our scrumptious Gluten-Free Cookie Crust or discover how to work with different fruit purees to elevate your desserts even further!
Make Ahead Options
This elegant Dragon Fruit Mousse Cake is ideal for meal prep, allowing you to enjoy a stunning dessert without last-minute stress. You can prepare the almond base up to 24 hours in advance, simply press it into the pan and refrigerate. The mousse can also be made a day ahead; whip the heavy cream and fold in the dragon fruit puree and gelatin, then pour over the base. Refrigerate for at least 2-3 hours until set. For the best quality, add the jelly layer just before serving to maintain its glossy finish. With this prep, your dessert will be just as delicious yet perfectly ready for entertaining!
Dragon Fruit Mousse Cake Recipe FAQs
How do I choose the right dragon fruit?
Absolutely! When selecting dragon fruit, look for fruit that has vibrant skin without dark spots or blemishes. It should feel firm yet slightly soft when pressed, indicating ripeness. If it has too many dark spots all over, it may be overripe and not as flavorful.
What’s the best way to store leftovers of the mousse cake?
Very! To keep your Dragon Fruit Mousse Cake fresh, store it in the refrigerator, covered tightly with plastic wrap or a cake dome. It will maintain its best quality for up to 3 days. This way, you can continue enjoying its delightful textures without losing flavor!
Can I freeze the Dragon Fruit Mousse Cake?
Certainly! If you want to keep it longer, slice the cake into individual portions and place them in airtight containers. It can then be stored in the freezer for up to 2 months. To enjoy, just thaw in the refrigerator overnight for the best texture and flavor.
What if my mousse doesn’t set properly?
Oh no! If your mousse doesn’t set, it could be due to improperly dissolved gelatin or too much whipped cream folding into the mixture, which compromises its structure. To troubleshoot, you can try refrigerating it longer or preparing a new batch of gelatin, warming it gently to dissolve completely, and folding it into the mousse once more.
Are there any dietary concerns I should consider?
Of course! For anyone with allergies, be aware that this recipe contains nuts and dairy. If you’re looking for dairy-free options, simply swap heavy cream with whipped coconut cream and use agar-agar in place of gelatin for a vegetarian-friendly dessert. Always check labels to ensure all ingredients suit your dietary needs.
How can I enhance the flavor of the mousse?
Absolutely! You can experiment with flavoring by adding a teaspoon of vanilla extract to the mousse for extra depth. Additionally, using a mix of fruit purees like raspberry or passion fruit can give your Dragon Fruit Mousse Cake a delicious twist every time you prepare it!
Refreshing Dragon Fruit Mousse Cake That Wows Every Time
Ingredients
Equipment
Method
- Blend almonds, dates, and coconut oil until finely ground and sticky. Press into the bottom of a 9-inch springform pan to form the almond base. Chill for 30 minutes.
- Whip the heavy cream until stiff peaks form, about 3-4 minutes. Gently fold in the dragon fruit puree and softened gelatin until combined. Pour over the almond base and smooth the top.
- Refrigerate for 2-3 hours until mousse is firm. Check for airy texture; it should hold its shape.
- Mix gelatin with warm dragon fruit juice until dissolved. Let cool for 10 minutes, then gently pour over the set mousse for an even coat.
- Brush a neutral glaze over the top for a glossy finish. Release from the springform pan and slice into wedges to serve.
Leave a Reply