
As I stood in my kitchen, the sweet smell of cookies wafted through the air, transporting me back to carefree childhood days. It was time to whip up an Oreo Milkshake, the ultimate indulgence that offers a quick and satisfying escape from the ordinary. With only three simple ingredients, this creamy delight promises to be an effortless treat that’s perfect for warm afternoons or cozy movie nights. Plus, it’s highly customizable—whether you prefer a classic flavor or a fun twist like peanut butter or strawberry, each blend is sure to impress. Curious about how you can make this deliciously simple shake your own? Let’s dive in!
Why is this Oreo Milkshake a must-try?
Irresistible Flavor: This milkshake bursts with the delicious taste of classic Oreo cookies, making every sip a blast from the past.
Three Ingredients: With just three ingredients, it’s a breeze to whip up, allowing you to indulge without a fuss.
Customizable Options: Feeling adventurous? This recipe invites you to experiment with variations like Peanut Butter or Golden Caramel Swirl for endless enjoyment.
Crowd-Pleaser: Perfect for parties or family gatherings, it’s sure to delight to both kids and adults alike.
Quick and Easy: Whether it’s a hot day or a cozy movie night, this shake delivers a satisfying treat in minutes, freeing up your time for more fun.
Nostalgic Vibes: Milkshakes evoke the charm of diner-style treats, making this Oreo Milkshake not just refreshing but also a walk down memory lane.
Try serving it at your next gathering, and don’t forget to check out our Peanut Butter Oreo Shake variation for a delightful twist!
Oreo Milkshake Ingredients
• You’ll love how simple it is!
For the Milkshake
- Oreo Cookies – Adds that signature cookies and cream flavor; classic Oreos work best but feel free to explore alternatives!
- Vanilla Ice Cream – This provides creaminess and sweetness; swap in chocolate or strawberry ice cream for a twist.
- Whole Milk – Achieves the perfect texture; almond milk or oat milk work great for a dairy-free option.
For the Toppings
- Whipped Cream – A delightful topping that adds elegance; use homemade for a touch of freshness.
- Chocolate Syrup – A drizzle at the end gives extra chocolatey goodness; consider caramel syrup for a change-up!
- Extra Oreo Coins – These make a charming garnish; totally optional but elevate the presentation!
Enjoy mixing these ingredients for a deliciously creamy Oreo Milkshake that’s sure to be a hit!
Step‑by‑Step Instructions for Oreo Milkshake
Step 1: Crush Oreos
Begin by placing your Oreo cookies into a sturdy plastic bag or a blender. Use a rolling pin or a pulsing motion on the blender to crush them gently but thoroughly, creating a crumbly texture. Aim for small bits, as they will blend beautifully into your milkshake. This step only takes about 3-5 minutes and will set the foundation for that signature cookies and cream flavor.
Step 2: Blend Ingredients
Next, grab your blender and combine the crushed Oreos, vanilla ice cream, and whole milk. Blend on high for 30-60 seconds until the mixture becomes smooth and creamy, but be careful not to over-blend; a thick consistency is perfect for your Oreo milkshake. The color will change to a delightful light brown, filled with swirls of cookie goodness as you blend.
Step 3: Taste and Adjust
Once blended, take a moment to taste your milkshake. If you prefer it thicker, add a touch more ice cream; if you’d like it a bit thinner, pour in a splash more milk. Blend again for another 15-30 seconds, watching for the creamy texture you desire. This step ensures that the Oreo milkshake perfectly matches your preferences, creating a personalized treat.
Step 4: Pour and Garnish
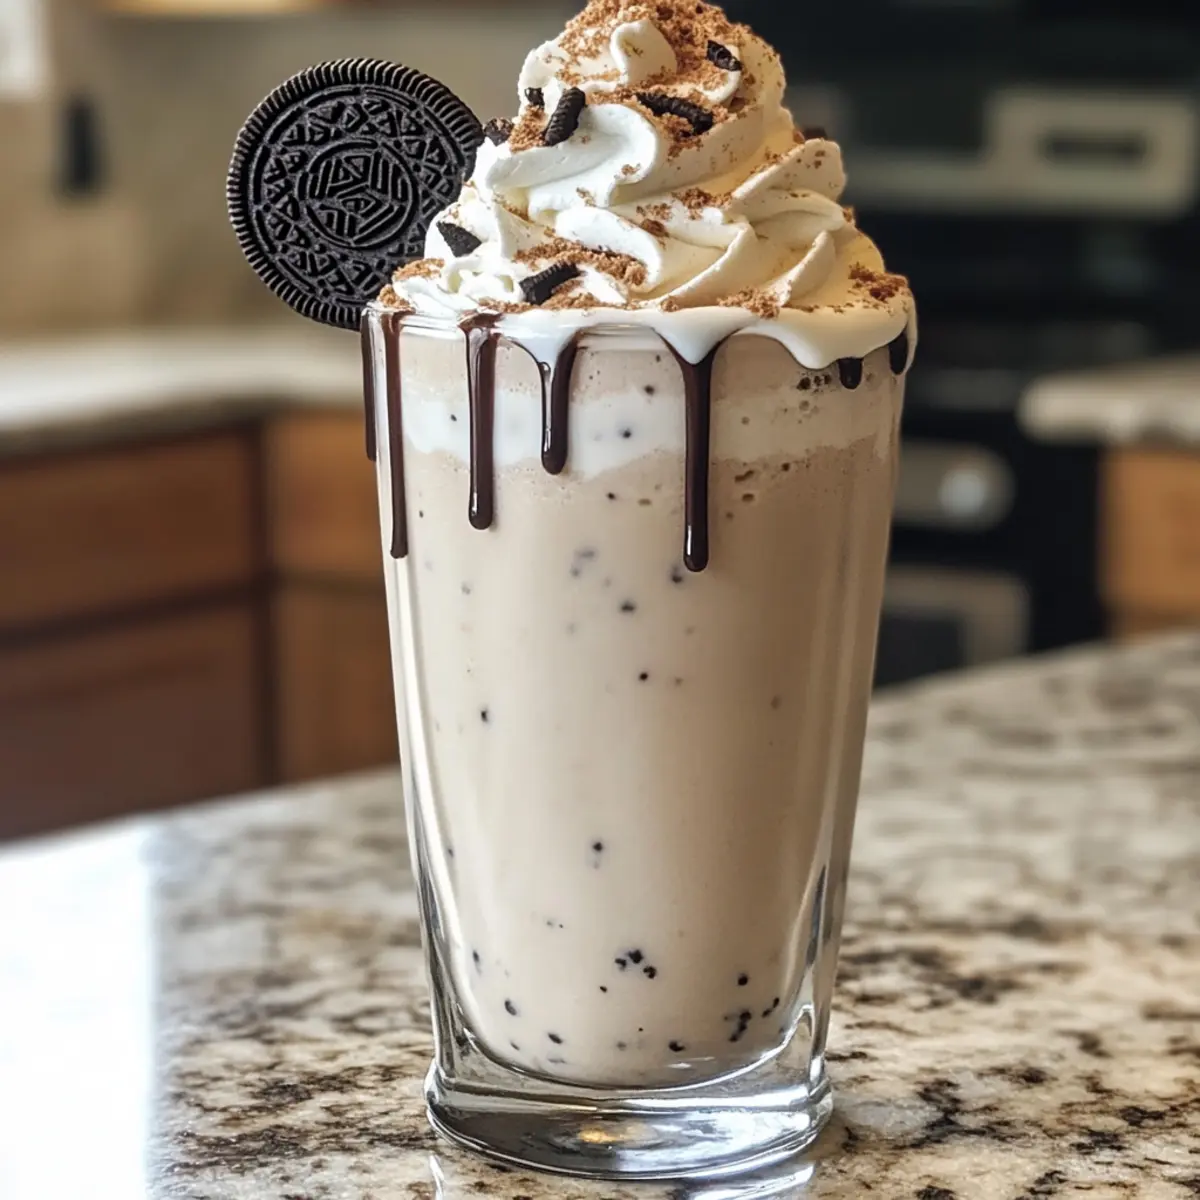
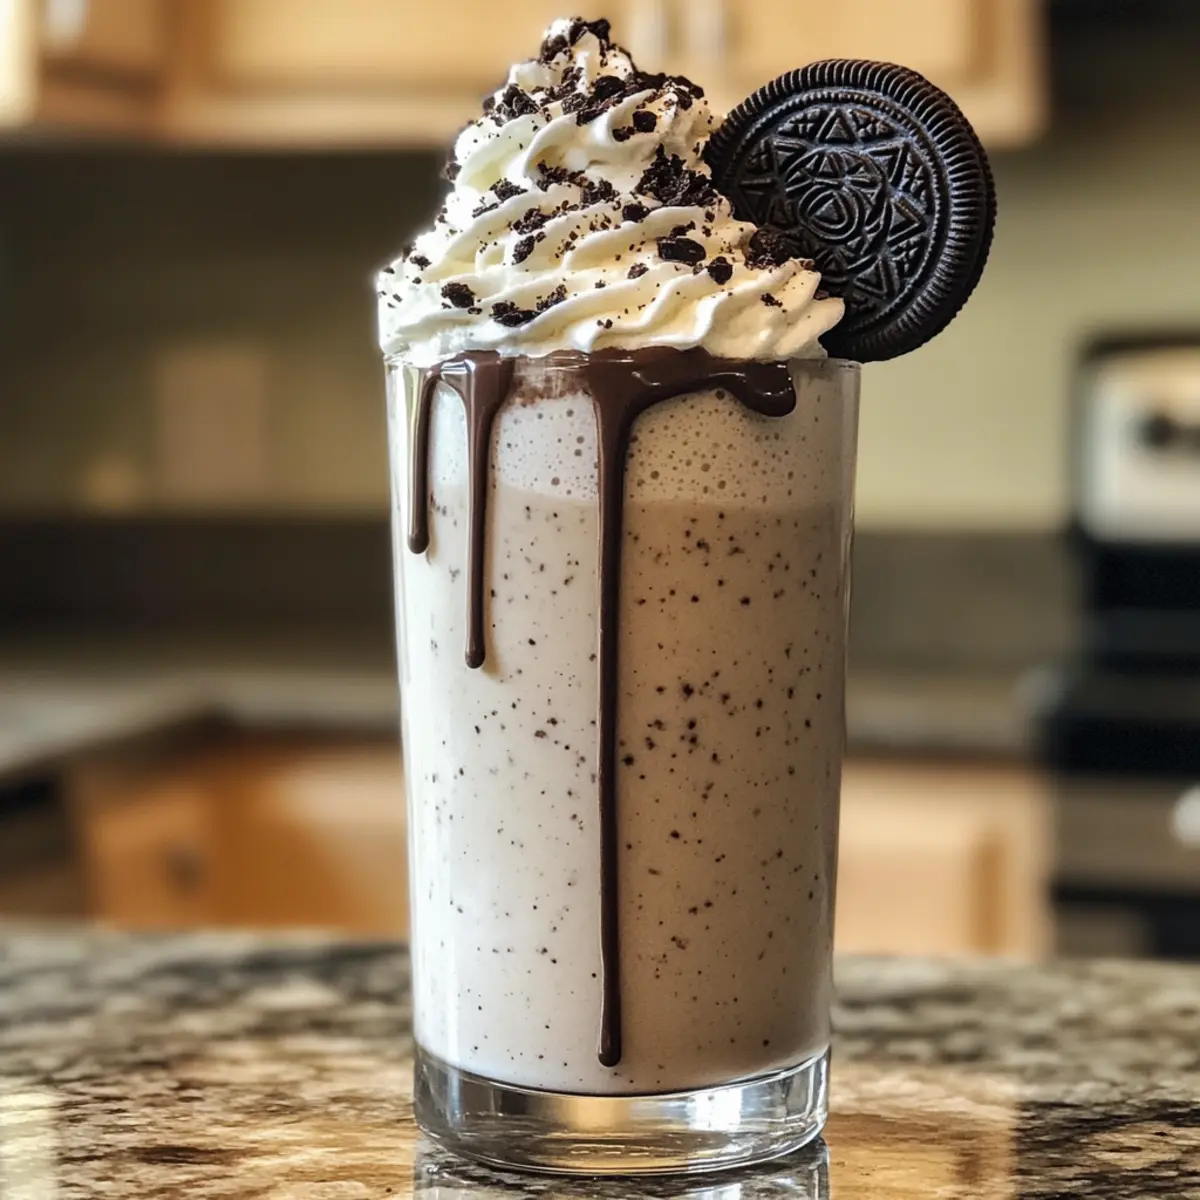
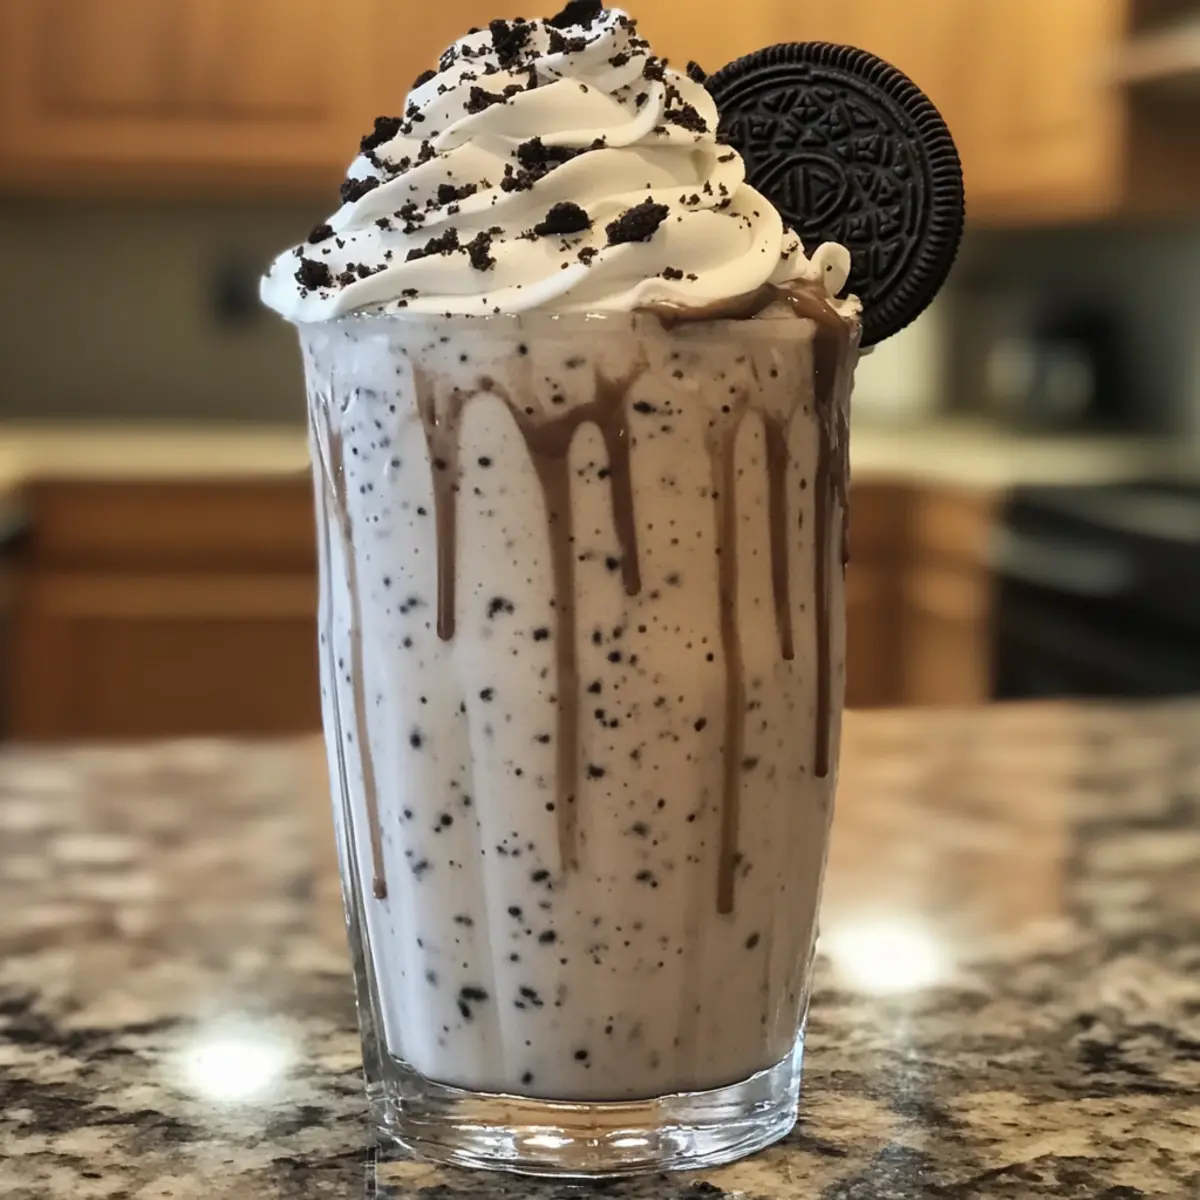
Carefully pour the creamy Oreo milkshake into chilled glasses, filling each about three-quarters full. Next, it’s time to add some flair! Generously top each milkshake with whipped cream, and drizzle a lovely stream of chocolate syrup over the top. For an extra touch, place a whole Oreo cookie atop the whipped cream garnish, inviting everyone to dig in!
Step 5: Serve and Enjoy
Grab some straws or spoons and serve your deliciously refreshing Oreo milkshake immediately. As your friends or family take their first sip, watch their faces light up with joy. This indulgent treat is perfect for hot days or cozy evenings, making it a delightful addition to any gathering or a sweet solo treat. Enjoy every creamy, cookie-filled moment!

Expert Tips for the Best Oreo Milkshake
-
Use Quality Oreos: Start with fresh, classic Oreo cookies for the best cookies and cream flavor; stale cookies may affect the milkshake’s taste.
-
Adjust Thickness: If you prefer a thicker Oreo milkshake, reduce the milk; add more ice cream for creaminess without losing that delightful texture.
-
Don’t Over-Blend: Blend just until smooth; over-blending can result in a runny shake instead of the desired thick, creamy consistency.
-
Chill Your Glasses: For an extra touch of indulgence, chill your glasses in the freezer before pouring in the milkshake; it keeps your treat cold longer.
-
Explore Variations: Try adding a spoonful of peanut butter or swapping in chocolate ice cream to discover your perfect version of the Oreo milkshake!
How to Store and Freeze Oreo Milkshake
-
Room Temperature: It’s best to enjoy your Oreo milkshake fresh. Leaving it at room temperature can affect the creamy texture; consume within 2 hours if left out.
-
Fridge: If you have leftovers, store your milkshake in an airtight container in the fridge for up to 3 days. Stirring may be necessary before serving to combine any separated ingredients.
-
Freezer: You can freeze the Oreo milkshake for up to 2 months. When ready to enjoy, let it thaw for a few minutes then re-blend for that perfect creamy texture.
-
Reheating: Since it’s a cold treat, there’s no reheating involved. Just blend again to revive its freshness before serving.
What to Serve with Oreo Milkshake
Elevate your Oreo milkshake experience by pairing it with these delightful complements that will take your dessert game to new heights.
-
Chocolate Chip Cookies: Warm cookies alongside the milkshake create a delicious contrast in temperature and texture, making each bite heavenly.
-
Fruit Platter: Fresh, juicy fruits like strawberries and bananas add a refreshing brightness, balancing the richness of the Oreo milkshake perfectly.
-
Brownie Bites: Decadent and fudgy brownies mirror the milkshake’s intensity, making for a satisfying and indulgent dessert duo.
-
Sweet Potato Fries: The salty sweetness of these crispy fries pairs wonderfully, offering a fun and unique twist to your dessert spread.
-
Milkshake Float: Make it a shake celebration! Add a scoop of ice cream to a glass of soda, creating a fun and fizzy counterpart to your milkshake.
-
Caramel Sauce Drizzle: A simple yet elegant drizzle of warm caramel on the milkshake will enhance its flavor, adding a luxurious touch that’s sure to impress.
Enhancing your Oreo milkshake with these thoughtful pairings ensures a memorable dessert experience, making every bite a delightful adventure!
Oreo Milkshake Variations & Substitutions
Feel free to get creative with your Oreo milkshake by trying out these delightful variations that will excite your taste buds!
-
Peanut Butter: Stir in a generous spoonful of creamy peanut butter for an irresistible flavor combination. The nutty richness elevates your shake to a whole new level.
-
Strawberry Oreo Shake: Substitute vanilla ice cream with strawberry for a fruity twist that brightens up the classic milkshake taste. The combination of cookies and berries creates a refreshing contrast.
-
Chocolate Overload: Replace vanilla with chocolate ice cream for a richer, more decadent experience. Each sip becomes a chocolate lover’s dream come true!
-
Golden Caramel Swirl: If you’re using Golden Oreos, drizzle caramel syrup instead of chocolate for a sweet, buttery note. The golden hue and sweet caramel create a delightful harmony.
-
Boozy Adult Shake: For a grown-up treat, add a splash of whipped cream vodka to your milkshake. The added kick makes it a perfect indulgence for a night in with friends.
-
Minty Fresh: Add a drop of mint extract for an invigorating mint cookies and cream experience. This refreshing twist is perfect for a summer evening treat.
-
Vegan Delight: Swap in vegan vanilla ice cream and almond milk to create a dairy-free version of this classic treat. It’s equally creamy and delicious while accommodating dietary preferences.
-
Spiced Choco-Oreo: Mix in a pinch of cinnamon or nutmeg for a warm flavor twist that transports you to cozy nights with its aromatic essence. Each sip feels like a hug in a glass!
Curious about more ways to customize? Check out our tempting Peanut Butter Oreo Shake variation that adds a nutty flair to this creamy classic!
Make Ahead Options
These Oreo Milkshakes are perfect for busy home cooks looking to save time while still indulging in a delicious treat! You can prepare the crushed Oreo cookie mixture and blend it with the ice cream and milk up to 24 hours in advance. Simply refrigerate the blended mixture in an airtight container to keep it fresh and prevent freezer burn. When you’re ready to serve, just give it a quick stir or re-blend if the mixture has thickened too much. Top with whipped cream and chocolate syrup right before enjoying for that fresh, indulgent experience. With this prep, delightful Oreo Milkshakes await you at a moment’s notice, making your dessert plans effortless!
Oreo Milkshake Recipe FAQs
What type of Oreo cookies should I use?
Absolutely! For the best flavor, I recommend using classic Oreo cookies. However, feel free to switch it up with flavored variations—like birthday cake or mint Oreos—to tailor the milkshake to your tastes.
How long can I store an Oreo milkshake?
You can store your Oreo milkshake in the fridge for up to 3 days in an airtight container. Just keep in mind it’s best enjoyed fresh, so try to consume it soon after making it!
Can I freeze an Oreo milkshake?
Yes! You can freeze your Oreo milkshake for up to 2 months. Here’s how: Pour your milkshake into an airtight container, leaving a little space at the top to allow for expansion, and seal it tightly. When you’re ready to enjoy it, let it thaw in the fridge for about 30 minutes, then blend it again to restore that creamy texture.
What should I do if my milkshake is too thick?
Not a problem! If your Oreo milkshake turns out thicker than you like, simply add a splash of whole milk (or any milk substitute) and blend again for about 15-30 seconds. If it’s still too thick, repeat until you reach your desired consistency.
Is this milkshake safe for allergies?
Great question! This Oreo milkshake contains dairy and gluten, so it’s not suitable for those with lactose intolerance or gluten allergies. For a dairy-free option, you can substitute both the milk and ice cream with alternatives like almond milk and coconut-based ice cream. Always check packaging for allergen information, as recipes can vary by brand.
Can I make a lower-calorie version?
Very much so! To lighten up your Oreo milkshake, opt for low-fat or non-fat ice cream and consider using unsweetened almond or oat milk. You can also reduce the number of Oreos used and add a few more banana slices for added sweetness without the extra calories. Enjoy experimenting with healthier versions of your Oreo milkshake!
Irresistibly Creamy Oreo Milkshake – Your New Favorite Treat
Ingredients
Equipment
Method
- Begin by placing your Oreo cookies into a sturdy plastic bag or a blender. Use a rolling pin or a pulsing motion on the blender to crush them gently but thoroughly.
- Next, grab your blender and combine the crushed Oreos, vanilla ice cream, and whole milk. Blend on high until the mixture becomes smooth and creamy.
- Once blended, take a moment to taste your milkshake. If you prefer it thicker, add a touch more ice cream; if you'd like it a bit thinner, pour in a splash more milk.
- Carefully pour the creamy Oreo milkshake into chilled glasses, filling each about three-quarters full. Top each milkshake with whipped cream and drizzle chocolate syrup over the top.
- Grab some straws or spoons and serve your deliciously refreshing Oreo milkshake immediately.
Leave a Reply