
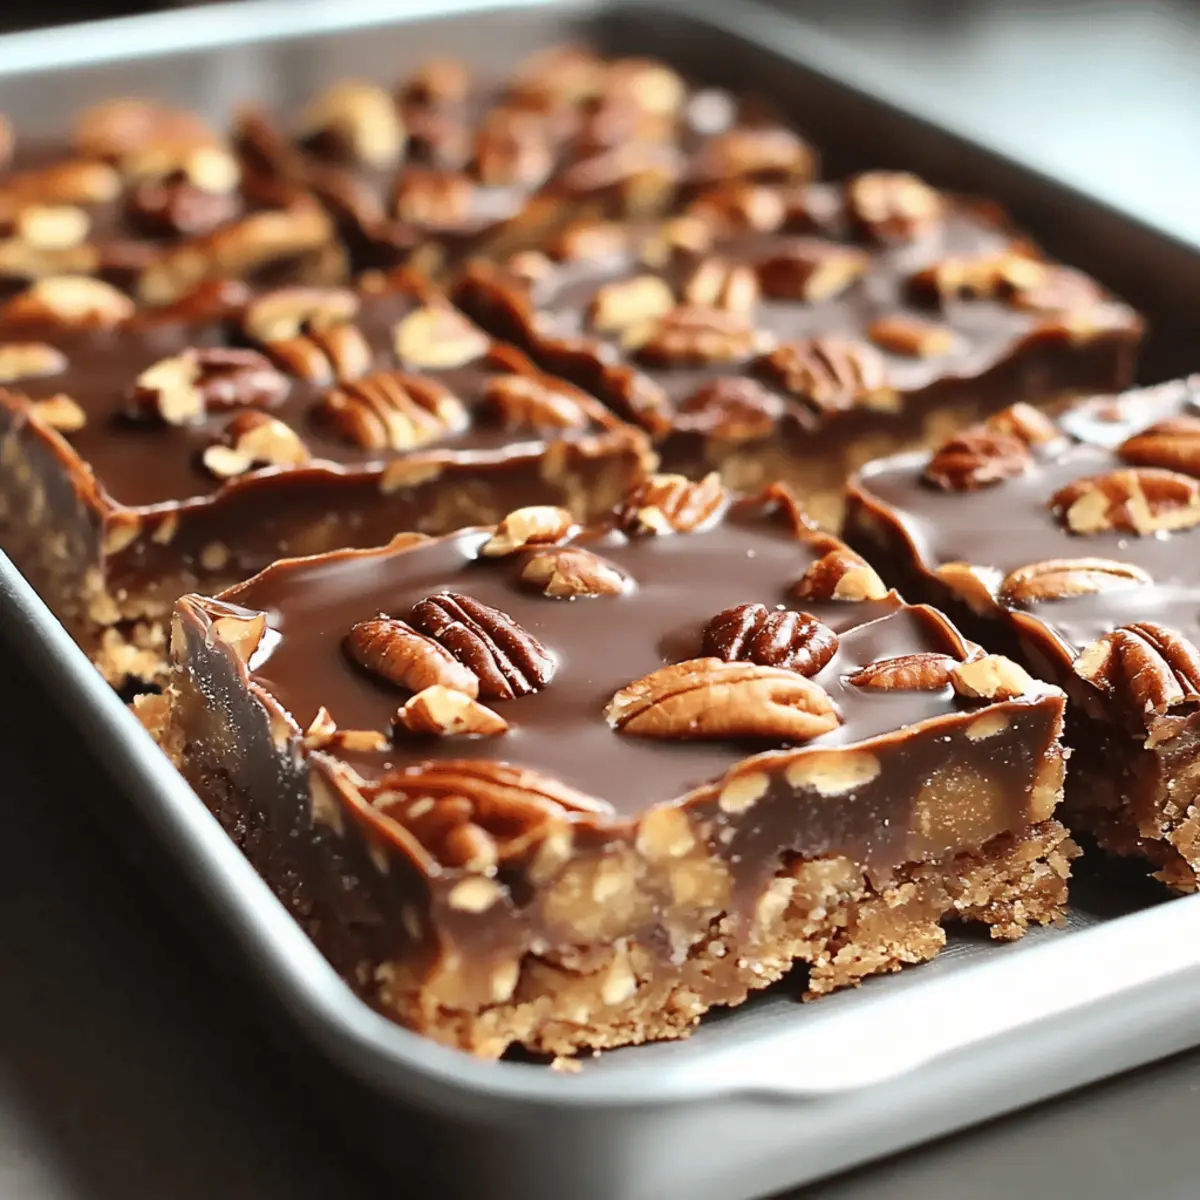
The sweet aroma of melting chocolate and caramel wafting through the kitchen brings back memories of carefree afternoons spent baking with loved ones. Today, I’m excited to share my Easy Turtle Bars, where rich chocolate, gooey caramel, and crunchy pecans come together in blissful harmony. This recipe strikes the perfect balance between indulgence and simplicity, making it a delightful treat for both beginner and experienced bakers. Plus, these bars are a crowd-pleaser that you can whip up in no time, perfect for satisfying that sweet tooth without the fuss. Are you ready to uncover the magic of Turtle Bars and create a dessert that will impress your friends and family? Let’s dive in!
Why Are Turtle Bars So Irresistible?
Indulgent, these Easy Turtle Bars combine rich chocolate, gooey caramel, and crunchy pecans into a treat that offers a luxurious experience with every bite. Effortless to make, even novice bakers can conquer this recipe without stress, ensuring homemade delight that’s quick and simple. Diverse options allow you to customize these bars—swap out pecans for almonds or sprinkle sea salt on top for added flair. Crowd favorites for gatherings, these bars are sure to impress family and friends alike. Experience the joy of baking and the delicious results with our simple guide to Turtle Bars!
Turtle Bars Ingredients
For the Crust
- Butter – Use cold for a flaky texture that forms the perfect base for your Turtle Bars.
- Brown Sugar – Sweetens the crust and adds a hint of molasses; coconut sugar works as a great substitute for a deeper flavor.
- Flour – All-purpose flour creates the ideal structure; gluten-free all-purpose flour can be used for a similar result.
For the Caramel Layer
- Caramel – This is the star of the middle layer, providing that gooey consistency; choose between homemade or store-bought for convenience.
- Pecans – Contributes the desired crunch and nutty flavor; feel free to swap for walnuts or almonds based on your preference.
For the Chocolate Topping
- Chocolate Chips – The rich topping can be enhanced with dark chocolate for indulgence or milk chocolate for a sweeter touch.
Step‑by‑Step Instructions for Easy Turtle Bars
Step 1: Prepare the Crust
Begin by preheating your oven to 350°F (175°C). In a mixing bowl, combine cold butter, brown sugar, and flour until crumbly. Press this mixture firmly into the bottom of a greased baking dish, creating an even layer. Bake the crust for about 10 minutes, or until it is slightly golden and fragrant.
Step 2: Create the Caramel Layer
While the crust bakes, melt the caramel in a saucepan over low heat, adding a splash of cream. Stir continuously for about 5–7 minutes, until the mixture is smooth and glossy. Once the crust is done, carefully pour the melted caramel evenly over the warm crust, then sprinkle it generously with toasted pecans, pressing down gently to help them adhere.
Step 3: Melt the Chocolate Topping
In a microwave-safe bowl, add the chocolate chips and heat in 30-second intervals, stirring in between until smooth and fully melted—this should take about 1–2 minutes total. Once melted, pour the chocolate over the caramel and pecan layer, spreading it evenly with a spatula. Allow it to cool slightly here, creating a beautifully glossy finish.
Step 4: Cool and Cut the Bars
Let your Easy Turtle Bars cool at room temperature for at least 1 hour, or until completely set. For best results, refrigerate them for an additional 30 minutes to make cutting easier. Once chilled, slice into squares with a sharp knife, ensuring neat and clean edges for a stunning presentation.
How to Store and Freeze Turtle Bars
Room Temperature: Keep your Turtle Bars in an airtight container at room temperature for up to 5 days to retain their delightful texture and flavor.
Fridge: For longer freshness, store the bars in the refrigerator. They will stay delicious for up to 2 weeks when kept in an airtight container.
Freezer: You can freeze Turtle Bars for up to 2 months. Wrap them tightly in plastic wrap or aluminum foil, then place them in a freezer-safe bag for optimal preservation.
Reheating: To enjoy them warm, simply microwave individual bars for about 15-20 seconds or place them in a warm oven (350°F) for 5-10 minutes before serving.
Make Ahead Options
These Easy Turtle Bars are perfect for meal prep enthusiasts! You can prepare the crust and caramel layer up to 24 hours in advance. Simply bake the crust, let it cool, and then store it covered at room temperature. For the caramel layer, melt the caramel as directed and pour it over the crust, then add the pecans; cover and refrigerate until you’re ready to melt the chocolate topping. When you’re ready to serve, simply melt the chocolate, pour it over, and allow it to set. By allowing the flavors to meld overnight, you’ll achieve even more delicious results—just as indulgent and satisfying when you finish with the chocolate topping.
What to Serve with Easy Turtle Bars
Transform your dessert experience by pairing these indulgent bars with complementary flavors and textures that enhance their rich goodness.
- Vanilla Ice Cream: A scoop of creamy vanilla ice cream adds a refreshing contrast to the sweet, sticky bars, making each bite melt in your mouth.
- Whipped Cream: Light and airy, homemade whipped cream brings a lightness that beautifully complements the richness of the Turtle Bars. A sprinkle of cocoa powder can elevate this classic pairing.
- Coffee or Espresso: The bold flavors of coffee or a shot of espresso enhance the bittersweet notes of the chocolate while balancing the sweetness. This combination is perfect for cozy gatherings.
- Fresh Berries: Juicy raspberries or sliced strawberries brighten the dessert with a pop of freshness, providing a tart contrast that helps cut through the richness. A delightful addition for summer brunches!
- Chocolate Drizzle: Add a drizzle of warm chocolate sauce over the bars just before serving for a touch of decadence. It amplifies the chocolate flavor and creates a stunning visual appeal.
- Nutty Biscotti: Serve with crunchy pecan or almond biscotti for a delightful texture contrast. Dipping them into your coffee or tea offers a gourmet twist to this comforting dessert experience.
- Chilled White Wine: A glass of sweet Riesling or a sparkling wine pairs nicely with the Turtle Bars, enhancing their flavors without overpowering them. Perfect for a celebratory meal.
- Salted Caramel Sauce: For that extra decadent touch, drizzle on some salted caramel sauce to intensify those delightful flavors. The savory salt enhances the sweetness beautifully.
Expert Tips for Easy Turtle Bars
- Cold Butter Key: Using cold butter in the crust ensures it turns out flaky and tender. Avoid overmixing to keep the texture light.
- Constant Caramel Stirring: Stirring the caramel consistently while melting prevents any scorching and ensures a smooth, gooey layer.
- Complete Cooling: Let the Turtle Bars cool completely before cutting. This helps achieve clean edges and prevents messy servings.
- Make Ahead Advantage: These bars taste even better after a day in the fridge, allowing the flavors to meld beautifully.
- Customization Options: Feel free to swap pecans for walnuts or add a pinch of sea salt on top of the chocolate for an exciting flavor twist!
Turtle Bars Customization Ideas
Feel free to get creative and make these Turtle Bars uniquely yours with these delightful variations!
-
Nut Alternatives: Swap pecans for walnuts or almonds for a different nutty flavor. Each choice adds its own character to the bars.
-
Chocolate Twist: Use white chocolate chips instead of semi-sweet for a sweeter and creamier topping. This adds a fun visual contrast as well!
-
Salted Caramel: Drizzle some salted caramel on top for an extra indulgent touch that enhances the sweet and salty balance.
-
Gluten-Free Option: Switch the all-purpose flour with a gluten-free all-purpose blend. It’s an easy adjustment for your gluten-sensitive friends!
-
Additional Layers: Add a layer of shredded coconut before pouring the chocolate to introduce a unique flavor and chewiness.
-
Heat it Up: Mix in some crushed red pepper flakes or a teaspoon of cayenne with the chocolate for a surprising kick that’ll tingle your taste buds.
-
Flavor Infusion: Add a splash of vanilla or almond extract to the melted chocolate for an extra depth of flavor. It’ll make each bite sing!
-
Serving Suggestions: Pair these bars with a dollop of whipped cream or a scoop of ice cream. The contrasting temperature and texture will elevate your dessert experience!
For more delicious ideas, don’t hesitate to explore easy dessert recipes or try your hand at creating decadent flourless brownies to complement your sweet treats!
Easy Turtle Bars Recipe FAQs
What type of pecans are best for Turtle Bars?
Absolutely! For the best flavor and crunch, I recommend using toasted pecans in your Turtle Bars. Toasting enhances their natural nuttiness. If you’d like to use a different nut, walnuts or almonds also make great substitutes.
How should I store Turtle Bars after baking?
You can store your Turtle Bars in an airtight container at room temperature for up to 5 days. If you want to keep them fresh for longer, placing them in the refrigerator will extend their shelf life to about 2 weeks. Just make sure to keep them covered!
Can I freeze Turtle Bars?
Yes! Freezing is a great way to enjoy Turtle Bars at a later date. To freeze, wrap the bars tightly in plastic wrap or aluminum foil, then place them in a freezer-safe bag. They will stay fresh for up to 2 months. When you’re ready to enjoy, thaw them in the fridge overnight, or simply microwave for about 15-20 seconds if you want them warm.
What can I do if the caramel layer is not smooth?
No worries! If your caramel doesn’t turn out smooth, simply place it back on low heat and add a splash of cream or milk while stirring vigorously. This should help achieve that perfect gooey texture. Always remember to stir continuously to avoid any burning.
Are there any allergy considerations for Turtle Bars?
Very important! If you have nut allergies, simply omit the pecans and replace them with seeds like sunflower or pumpkin seeds for a nut-free option. Also, check your chocolate chips for any dairy if you’re catering to a dairy allergy; choose dairy-free chocolate chips as a delicious alternative.
Can I make Turtle Bars ahead of time?
Absolutely! In fact, making Turtle Bars a day ahead can enhance their flavor as the ingredients meld together beautifully. Just let them cool completely, store them in an airtight container, and they will taste even more delightful the next day!
Irresistible Turtle Bars: Silky, Crunchy Delight Awaits
Ingredients
Equipment
Method
- Preheat oven to 350°F (175°C). Mix cold butter, brown sugar, and flour until crumbly. Press into greased baking dish. Bake for 10 minutes until slightly golden.
- Melt caramel in a saucepan over low heat with a splash of cream, stirring for 5–7 minutes until smooth. Pour over warm crust and press toasted pecans into caramel.
- Melt chocolate chips in a microwave-safe bowl, heating in 30-second intervals until smooth. Pour over caramel layer and spread evenly.
- Let bars cool at room temperature for at least 1 hour, then refrigerate for 30 minutes before cutting into squares.
Leave a Reply