
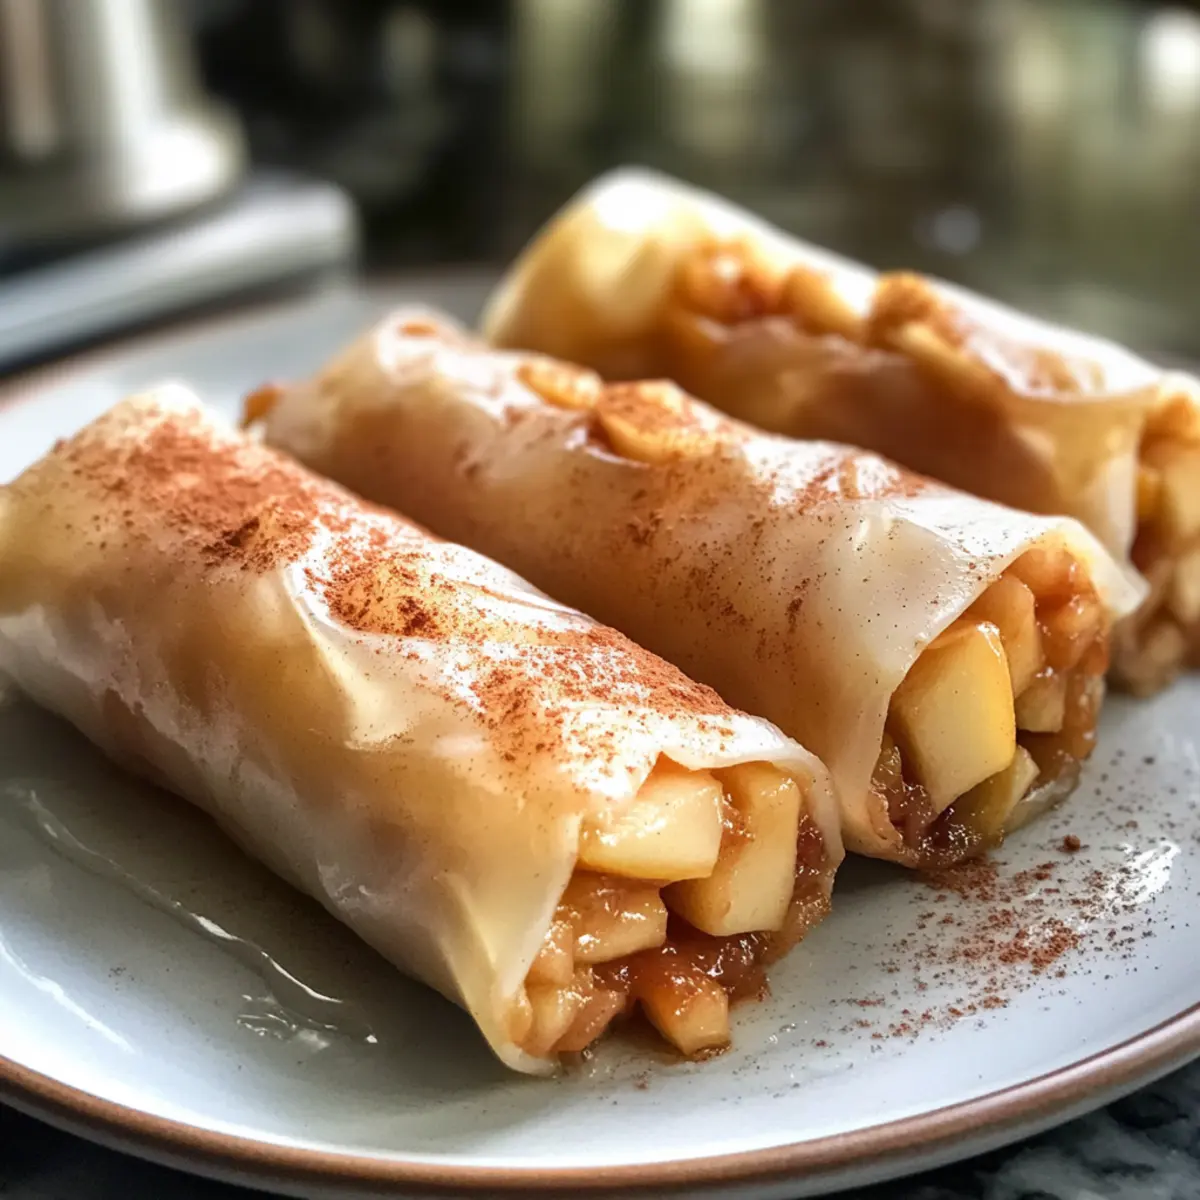
As I stood by the oven, the enticing scent of cinnamon and baked apples filled my kitchen, instantly transporting me to autumn holidays filled with warmth and joy. These Easy Gluten-Free Vegan Baked Apple Pie Rice Paper Rolls capture that same cozy feeling, combining the traditional flavors of apple pie with a light, crispy rice paper shell. With just five simple ingredients, this dessert is not only incredibly easy to prepare, but it’s also suitable for anyone seeking a delicious gluten-free and vegan option. Whether you’re in need of a quick sweet fix or a unique treat to impress friends and family, these rolls are sure to become a go-to favorite. Ready to roll into the delight of this innovative dessert?

Why are these rolls an irresistible treat?
Simplicity is key! With just five ingredients, you’ll whip these up in no time. Crispy Delight: The rice paper shell gives you a satisfying crunch that pairs perfectly with the warm, spiced apple filling. Unique Flavor Fusion: This recipe combines classic apple pie flavors with a modern twist, making them stand out at any gathering. Crowd-Pleasing: Perfect for sharing, these rolls are gluten-free and vegan, catering to everyone’s dietary needs. For more easy dessert ideas, don’t miss my post on delectable vegan desserts.
Baked Apple Pie Rice Paper Rolls Ingredients
For the Filling
• Apples – Use Granny Smith or Honeycrisp for a perfect balance of tart and sweet.
• Brown Sugar – Adds depth; substitute with coconut sugar if you’d prefer a refined-sugar-free option.
• Cinnamon – A classic warming spice that enhances the flavor of the apples; feel free to swap it with apple pie spice for added variety.
For the Wrapper
• Rice Paper – The magical element that creates a crispy exterior; just be careful when soaking to prevent tearing.
• Cooking Oil – Essential for brushing rolls to achieve that gorgeous golden-brown hue; melted coconut oil provides a delightful flavor twist.
Each component of these Baked Apple Pie Rice Paper Rolls works harmoniously to deliver a dessert that is as appealing to the taste buds as it is to the eyes!
Step‑by‑Step Instructions for Baked Apple Pie Rice Paper Rolls
Step 1: Preheat the Oven
Begin by preheating your oven to 450°F (232°C) to ensure it reaches the right temperature for baking your Baked Apple Pie Rice Paper Rolls. This step is crucial as it allows the rolls to cook evenly and achieve that perfectly crispy exterior as they bake.
Step 2: Prepare the Apple Filling
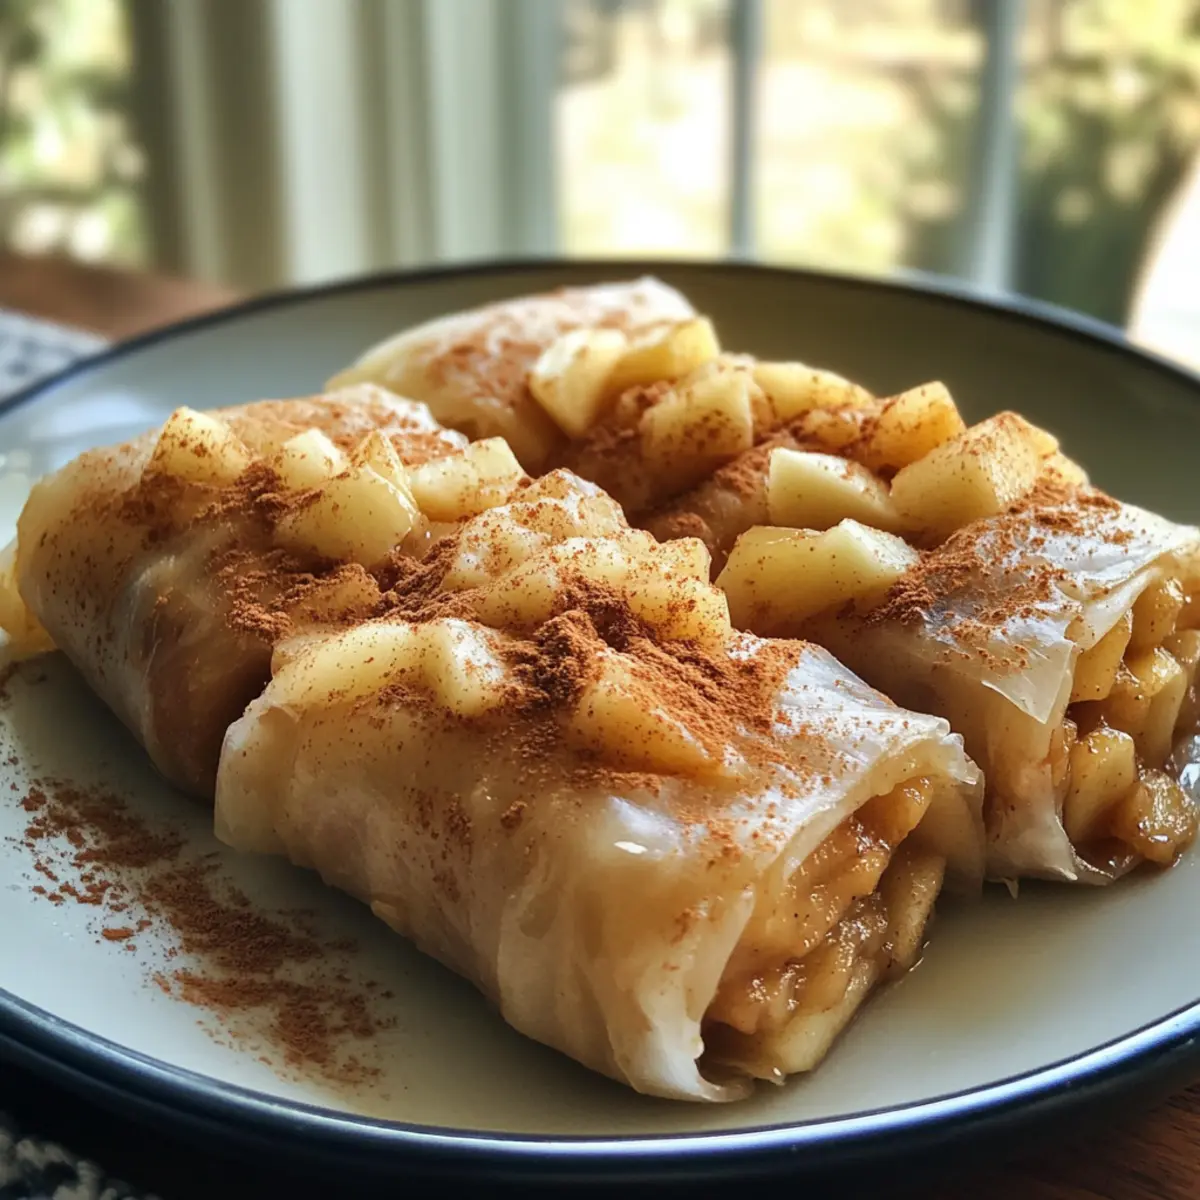
While the oven is heating, peel and slice your apples into small chunks, then place them into a mixing bowl. Add brown sugar and a generous sprinkle of cinnamon to the apples, and toss everything together until the apple pieces are well-coated. This mixture will create the warm, sweet filling reminiscent of traditional apple pie.
Step 3: Soak the Rice Paper
Fill a large bowl with warm water and prepare to soak your rice paper sheets. Carefully dip one sheet of rice paper into the water until it softens, but be cautious not to over-soak; it should remain pliable yet firm. This typically takes about 20-30 seconds. Drain it briefly before placing it on a flat, clean surface for filling.
Step 4: Assemble the Rolls
Lay the softened rice paper sheet on your work surface, and spoon 1-2 tablespoons of the apple filling into the center of the sheet. Begin by folding the bottom of the rice paper up over the filling, then fold in the sides tightly, and finally roll the top down to close the roll securely. Repeat this process until all filling is used.
Step 5: Arrange on Baking Tray
Prepare a baking tray by lining it with parchment paper or lightly oiling it to prevent sticking. Carefully place each rolled rice paper filled with apple pie mixture onto the tray, leaving a little space between each roll. This will help them crisp up nicely while baking.
Step 6: Brush with Oil
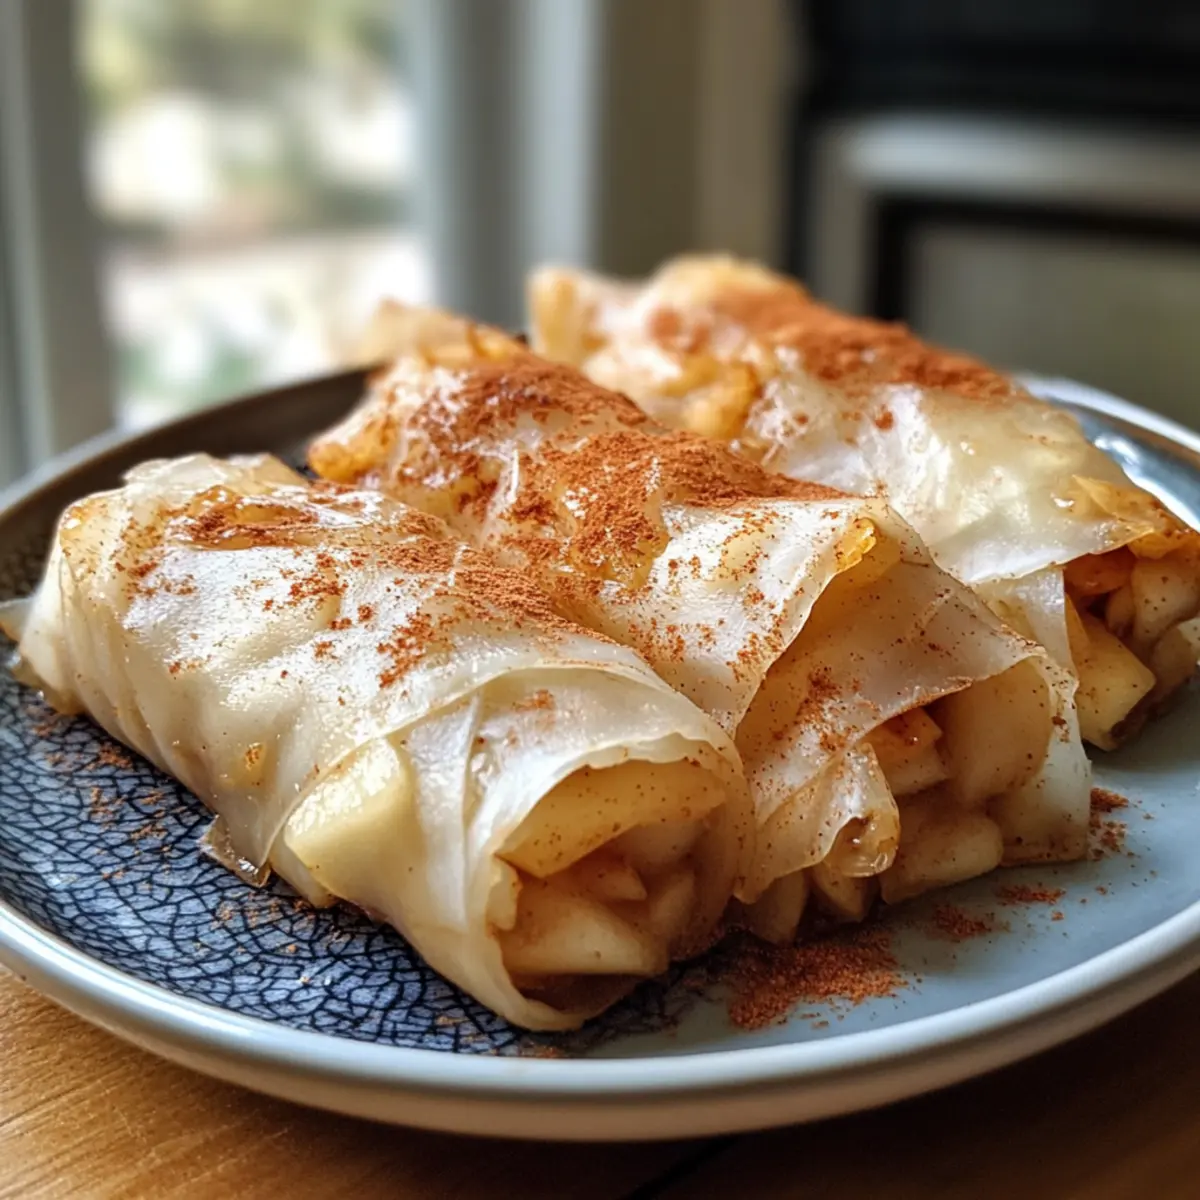
To achieve that enticing golden-brown color, gently brush the tops and sides of each rice paper roll with your chosen cooking oil. This adds flavor and encourages a crispy texture, making your Baked Apple Pie Rice Paper Rolls even more delightful when ready to serve.
Step 7: Bake the Rolls
Slide your baking tray into the preheated oven and bake for about 20-30 minutes. Keep an eye on them and turn the rolls halfway through for even browning. They are ready when they turn a beautiful golden color and you can see a crispy texture forming on the outside.
Step 8: Cool and Serve
Once baked to perfection, remove the Baked Apple Pie Rice Paper Rolls from the oven and allow them to cool slightly on the tray. This cooling period will enable the filling to set a bit, making them easier to handle. Serve warm, perhaps with a scoop of dairy-free ice cream for an irresistible treat!
Make Ahead Options
These Baked Apple Pie Rice Paper Rolls are perfect for meal prep and make your dessert planning a breeze! To save time, you can prepare the apple filling up to 3 days in advance; simply toss the chopped apples with brown sugar and cinnamon, then refrigerate in an airtight container to keep them fresh. Additionally, you can pre-soak the rice paper sheets and keep them stacked between damp paper towels for up to 24 hours. When you’re ready to serve, simply assemble the rolls, brush them with oil, and bake at 450°F (232°C) for about 20-30 minutes. This way, you’ll enjoy delicious, homemade dessert flavors with minimal effort on busy weeknights!
Tips for the Best Baked Apple Pie Rice Paper Rolls
- Rice Paper Handling: Ensure rice paper is soaked just right; too much water leads to tearing. Keep them pliable yet firm for easy wrapping.
- Filling Balance: Don’t overload the filling; 1-2 tablespoons per roll is sufficient. This helps them bake evenly and stay crispy without bursting.
- Crispy Texture: For extra crunch, consider double-wrapping the filling with another layer of rice paper. This creates a delightful contrast in textures!
- Baking Watch: Keep a close eye on the rolls while baking. They can go from golden to burnt quickly, so turn them halfway for an even bake.
- Storage Tips: These Baked Apple Pie Rice Paper Rolls are best enjoyed fresh but can be stored in an airtight container in the fridge for up to 2 days.
Storage Tips for Baked Apple Pie Rice Paper Rolls
Fridge: Store baked rolls in an airtight container for up to 2 days to maintain their flavor and freshness.
Freezer: If you want to keep them longer, freeze the rolls in a single layer on a baking sheet before transferring them to a freezer-safe bag. They can last up to 1 month.
Reheating: To reheat, bake from frozen at 350°F (175°C) for about 15-20 minutes, or until heated through and crispy again. Enjoy your Baked Apple Pie Rice Paper Rolls warm for the best texture!
What to Serve with Baked Apple Pie Rice Paper Rolls
Pair these delightful rolls with complimentary flavors to create a cozy, satisfying meal experience.
- Dairy-Free Ice Cream: A creamy scoop enhances the warm, spiced filling, making for a heavenly dessert indulgence.
- Caramel Sauce: Drizzling this sweet treat over the rolls adds richness, elevating the delightful apple pie flavors.
- Cinnamon Sugar Dusting: A sprinkle of this classic mix gives additional sweetness and hints of spice, reminiscent of freshly baked goods.
- Fresh Fruit Salad: Bright, citrusy notes from fruits like oranges and berries offer a refreshing contrast to the warm, comforting rolls.
- Herbal Tea: A warm cup of chamomile or peppermint helps cleanse the palate and complements the sweet flavors beautifully.
- Vegan Whipped Cream: Fluffy and light, this topping adds a luxurious texture alongside the crispy rolls.
- Coffee: Rich and aromatic, a cup of black coffee pairs wonderfully, balancing the sweetness of the dessert with its boldness.
Baked Apple Pie Rice Paper Rolls Variations
Feel free to explore these delicious twists on your Baked Apple Pie Rice Paper Rolls to make them uniquely yours!
-
Fruity Mix: Substitute apples with other fruits like pears or peaches for a different flavor adventure. Each fruit brings its own sweetness and character, making each roll a delightful surprise!
-
Nutty Crunch: Add crushed almonds or walnuts to the filling for a satisfying crunch and rich flavor. A handful of nuts not only enhances texture but also adds a nutritious boost!
-
Spice It Up: Experiment with spices like nutmeg or cardamom in place of cinnamon to elevate the warmth of your filling. The aromatic spices create a comforting aroma that makes each bite a cozy experience.
-
Sweetener Swap: Use maple syrup or agave nectar instead of brown sugar for a different sweet note. This change ensures a perfectly balanced filling that feels both indulgent and wholesome.
-
Chocolate Surprise: For a decadent twist, melt some dairy-free chocolate and drizzle it into the filling before rolling. Chocolate and apple are a match made in heaven, adding an unexpected richness!
-
Savory Option: Turn the dessert into a savory snack by filling rice paper with sautéed apples, onions, and a sprinkle of sage. It creates a delicious contrast that’s perfect for appetizer gatherings.
-
Add Heat: Spice up your rolls by adding a pinch of cayenne pepper to the filling. This surprising kick will awaken your taste buds and create a unique flavor profile that daring palates will love!
Fancy more delightful dessert inspiration? Check out my post on scrumptious vegan desserts to keep the sweet creations rolling!
Baked Apple Pie Rice Paper Rolls Recipe FAQs
How do I select the best apples for this recipe?
When choosing apples for your Baked Apple Pie Rice Paper Rolls, I recommend using Granny Smith or Honeycrisp varieties. Granny Smith offers a perfect tartness that balances well with sweetness, while Honeycrisp adds a delightful crunch. Look for apples that are firm to the touch and free from dark spots or blemishes for the best results.
What is the best way to store leftover rice paper rolls?
To keep your baked rolls fresh, store them in an airtight container in the refrigerator for up to 2 days. If you notice any signs of sogginess, consider reheating them in the oven to regain their crispiness. Simply place them on a baking sheet at 350°F (175°C) for about 10-15 minutes, checking occasionally.
Can I freeze the Baked Apple Pie Rice Paper Rolls?
Absolutely! To freeze, first, allow the baked rolls to cool completely. Then, place them in a single layer on a baking sheet and put them in the freezer until solid. Once frozen, you can transfer them to a freezer-safe bag, where they will keep for up to 1 month. When you’re ready to enjoy, reheat them from frozen by baking at 350°F (175°C) for about 15-20 minutes, or until heated through.
What should I do if the rice paper tears while wrapping?
If you find that your rice paper tears, don’t worry! Simply use another sheet of rice paper to wrap the filling. To prevent tearing in the first place, soak the rice paper sheets for just about 20-30 seconds until they’re pliable but still slightly firm. Handling them gently and ensuring they’re not overly wet will greatly reduce the chance of tearing.
Are these rice paper rolls safe for those with dietary restrictions?
Yes! My Baked Apple Pie Rice Paper Rolls are both gluten-free and vegan, making them a great dessert choice for those with dietary restrictions. However, it’s always wise to check the labels on your rice paper and cooking oil to ensure they don’t have any additives that may contain allergens. If making these for someone with specific allergies, such as nut allergies, you may want to avoid using any nut-based oils or toppings.
Baked Apple Pie Rice Paper Rolls: Crisp, Sweet, Vegan Delight
Ingredients
Equipment
Method
- Preheat your oven to 450°F (232°C) to ensure it reaches the right temperature for baking your rolls.
- Peel and slice the apples into small chunks, then mix them with brown sugar and cinnamon until well-coated.
- Soak rice paper sheets in warm water for 20-30 seconds until soft, then drain briefly.
- Assemble by placing 1-2 tablespoons of the apple filling in the center of the rice paper, then fold and roll tightly.
- Arrange the rolls on a lined baking tray, ensuring space between each roll.
- Brush the tops with cooking oil for a crispy texture.
- Bake for 20-30 minutes, turning halfway through for even browning.
- Remove from the oven and allow to cool slightly before serving.
Leave a Reply