
As I sifted through my pantry in search of inspiration, a forgotten bag of mini chocolate chips caught my eye, instantly motivating me to whip up something special. That’s when I decided to recreate the joy of Italian cannoli in cookie form—introducing my Crispy Cannoli Cookies with Creamy Filling! These delightful treats not only offer the satisfaction of baking from scratch, but they also pack a punch of rich, creamy goodness that captures the essence of traditional cannoli. With a crispy exterior and a luscious filling, these cookies are a fantastic homemade alternative to your average sweet snack, and they’re perfect for gatherings or simply enjoying alongside your afternoon coffee. Curious how simple ingredients can transform into such luxurious bites? Let’s dive into the recipe!
Why Are Cannoli Cookies So Special?
Irresistible flavors: The blend of ricotta, lemon zest, and mini chocolate chips gives these cookies a fresh take on a classic Italian dessert.
Quick and easy: With just six simple steps, you can bring the taste of Italy into your kitchen without the fuss.
Crowd-pleaser: Perfect for any occasion, these cookies are sure to be a hit at parties, holidays, or family get-togethers.
Versatile options: Feel free to customize with your favorite nuts or flavored extracts, making each batch uniquely yours.
Delightfully crispy: Enjoy a satisfying crunch paired with a creamy filling that melts in your mouth—a true treat for the senses!
Whether you’re a seasoned chef or just starting out, these Cannoli Cookies will have you feeling inspired. Don’t forget to check out my tips for storing cookies to keep them fresh!
Cannoli Cookies Ingredients
For the Dough
- All-Purpose Flour – Provides structure; use a quality brand for best results.
- Granulated Sugar – Adds sweetness; can be substituted with coconut sugar for a healthier option.
- Ricotta Cheese (¼ cup) – Offers moisture and creaminess; ensure it’s at room temperature for even blending.
- Large Egg – Acts as a binding agent; be sure it’s at room temperature to incorporate easily.
- Vanilla Extract – Enhances flavor; opt for pure vanilla extract for a richer taste.
- Lemon Zest – Adds brightness and flavor; try substituting with orange zest for a different twist.
For the Filling
- Ricotta Cheese (¼ cup) – Provides that classic creamy filling; blend until smooth to avoid graininess.
- Mini Chocolate Chips – Sweet bursts of chocolate; can be swapped with white chocolate chips or omitted altogether.
- Chopped Pistachios – Adds crunch and a nutty flavor; feel free to replace with almonds or walnuts if desired.
For Dusting
- Powdered Sugar – For a sweet finish; optional, but it enhances the presentation beautifully.
Prepare to impress with these Cannoli Cookies that combine traditional flavors into a delightful homemade treat!
Step‑by‑Step Instructions for Cannoli Cookies
Step 1: Preheat the Oven
Start by preheating your oven to 350°F (175°C). This ensures that your baking experience is smooth and your Cannoli Cookies become perfectly golden. While your oven warms up, gather your mixing bowls and prepare your workspace for a delightful cooking session.
Step 2: Mix Dry Ingredients
In a medium bowl, whisk together the all-purpose flour and granulated sugar until well combined. This step helps to aerate your flour, ensuring a lighter texture. Set this mixture aside for now, as it will be folded into your wet ingredients to form the dough for your Cannoli Cookies.
Step 3: Prepare Wet Ingredients
In a separate mixing bowl, blend together the ricotta cheese (¼ cup for the dough), large egg, vanilla extract, and lemon zest. Use a whisk or spatula to mix until the mixture is smooth and creamy. This rich blend will provide the base flavor and moisture for your delectable cookies, ensuring a truly authentic taste.
Step 4: Combine Mixtures
Gradually add the dry flour mixture to the wet ingredients, stirring gently until a soft dough forms. Be careful not to overmix; a little lumpiness is okay. The dough should be soft and slightly sticky, ready to rest and develop flavors. Cover your bowl with a cloth or plastic wrap and allow it to rest for 30 minutes.
Step 5: Roll and Cut the Dough
After resting, lightly flour your countertop and turn out the dough onto the surface. Roll it out to about ¼ inch thickness. Use a sharp knife or a pizza cutter to cut the dough into rectangular shapes, approximately 2×3 inches. Make sure to keep the edges neat for easy folding and sealing when creating your Cannoli Cookies.
Step 6: Make the Filling
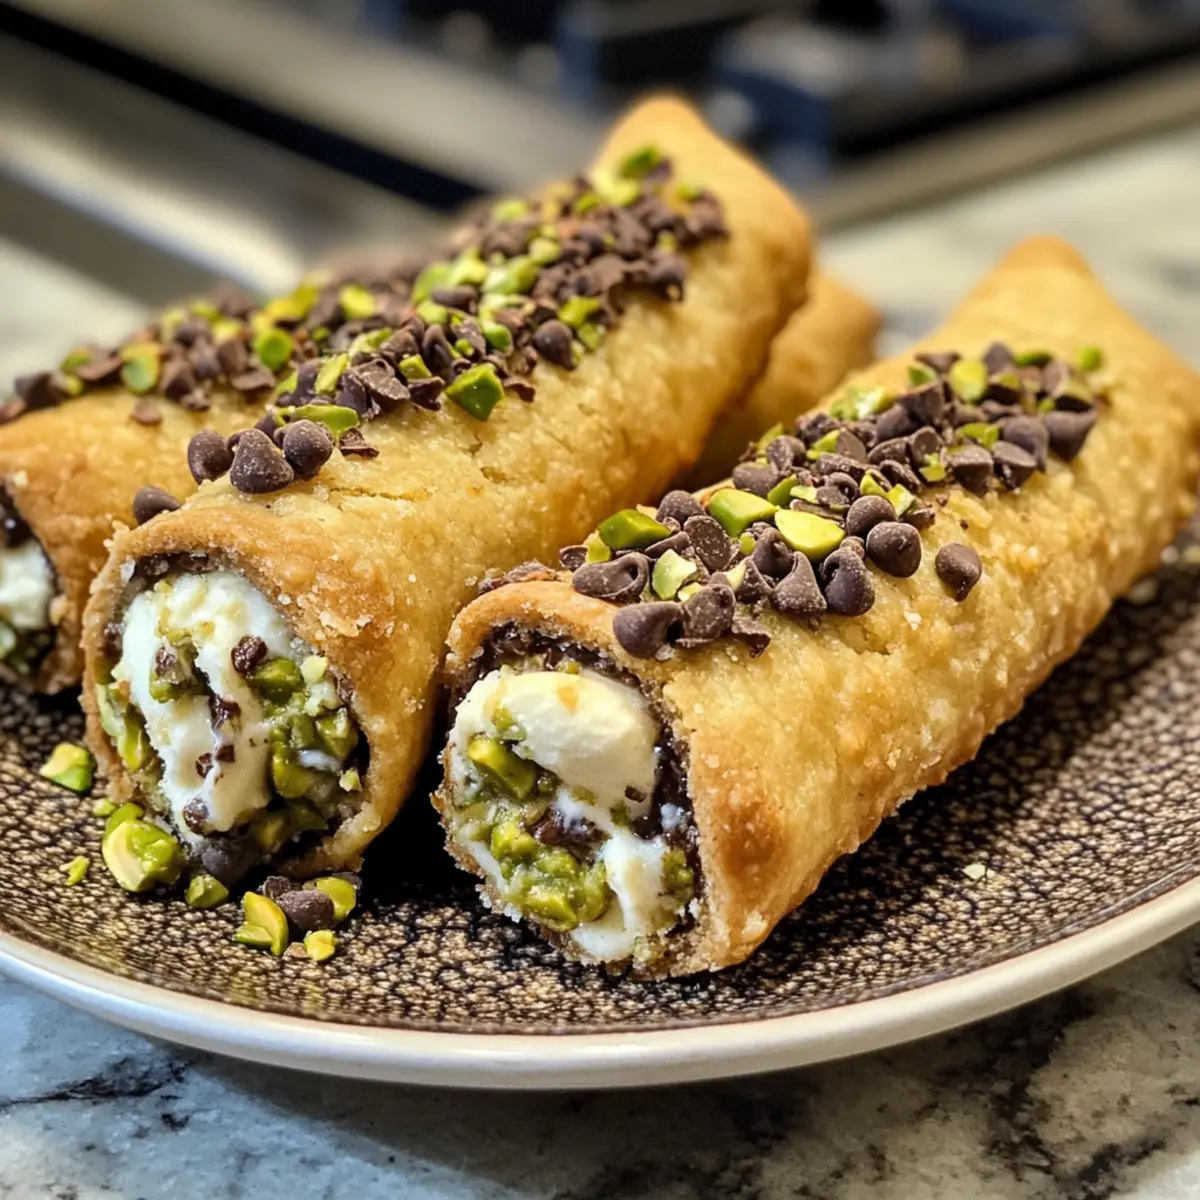
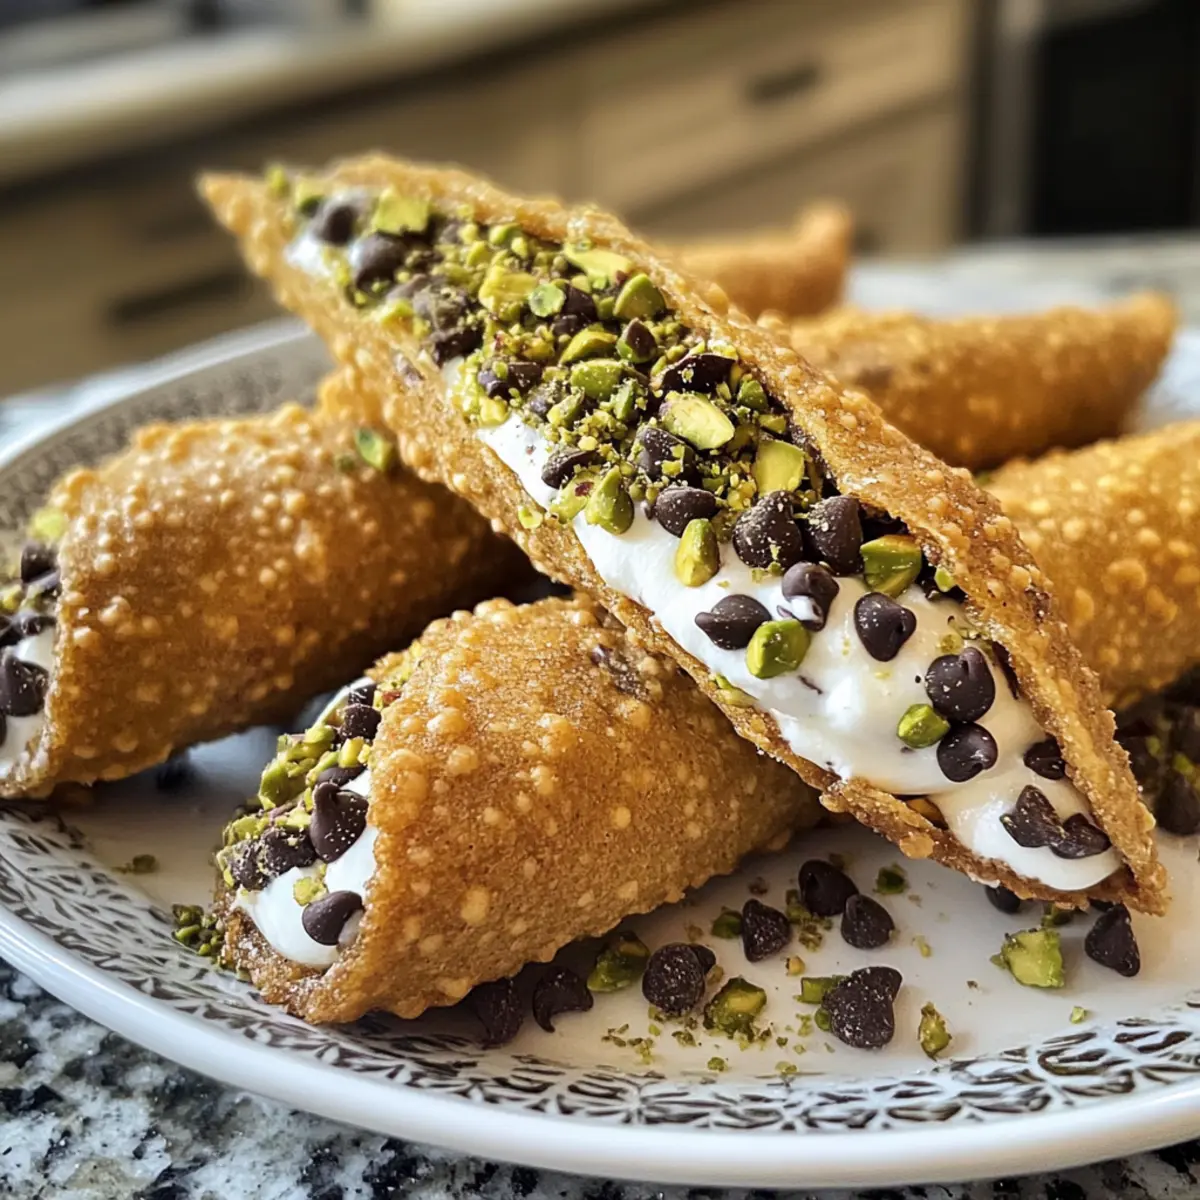
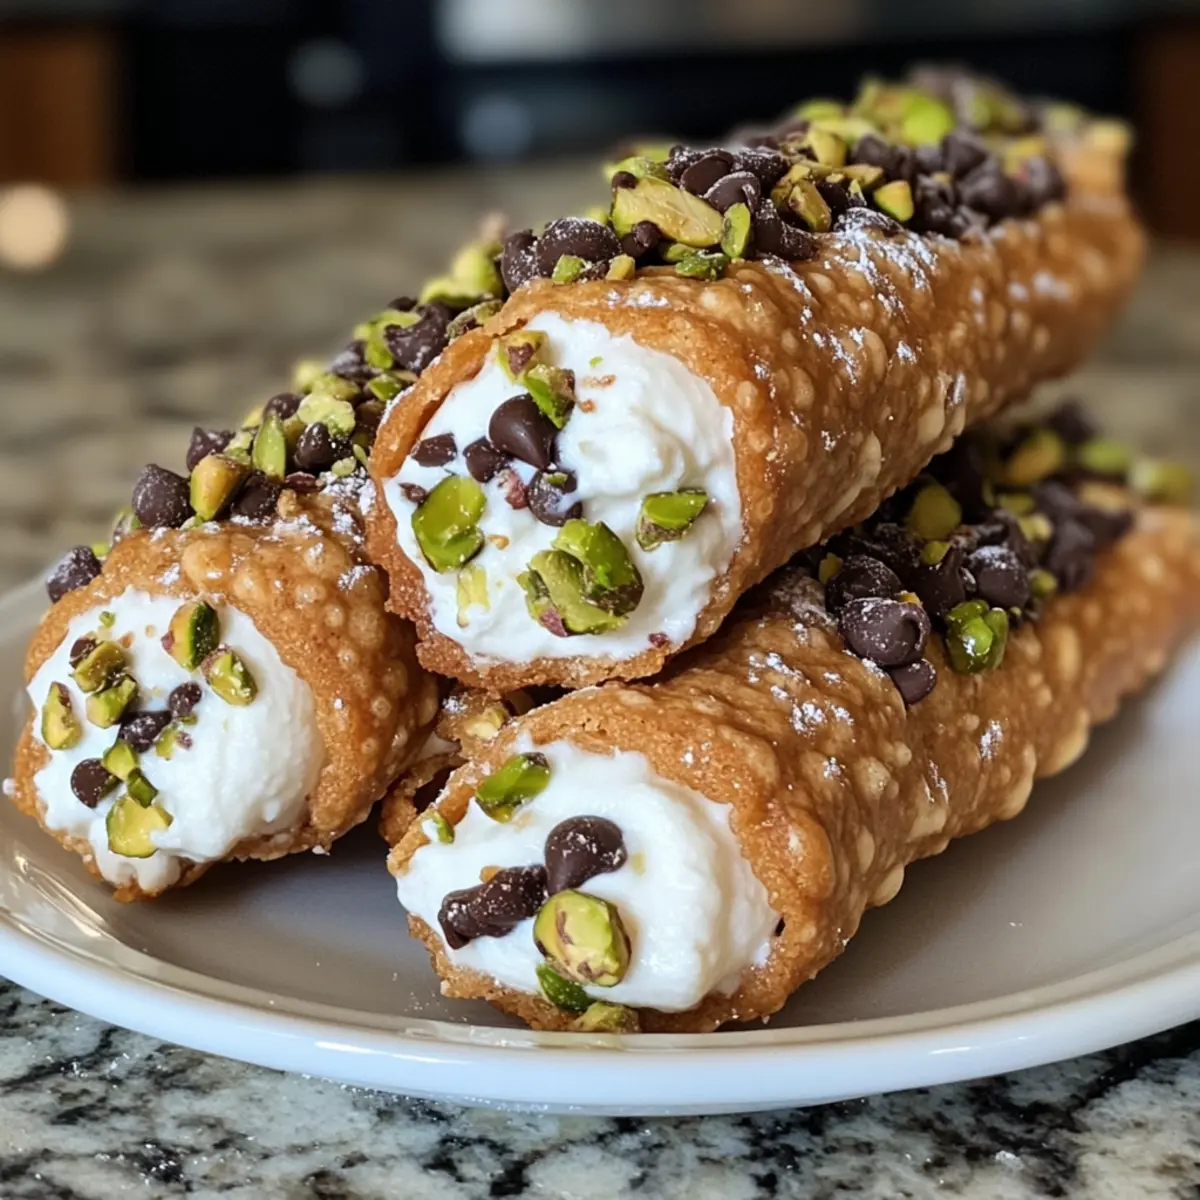
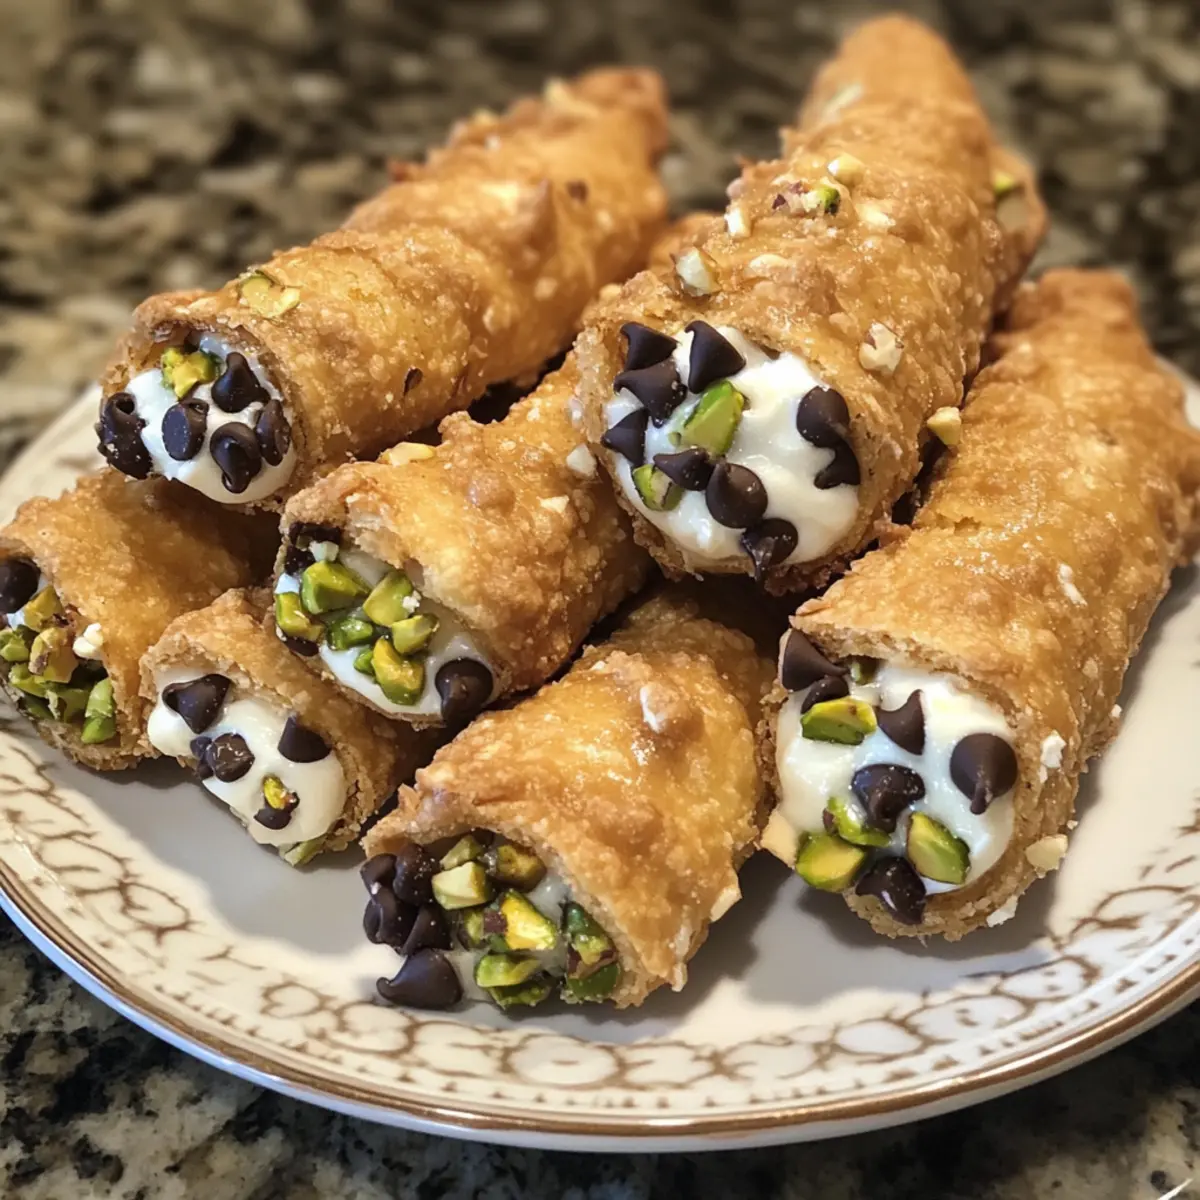
In a separate bowl, combine the remaining ricotta cheese (¼ cup), mini chocolate chips, and chopped pistachios. Stir until everything is evenly mixed; this creamy filling will be bursting with delightful flavors. Taste it to make sure it’s as delicious as you envision for your Cannoli Cookies, adjusting sweetness if necessary.
Step 7: Fill and Seal the Cookies
Place a small dollop of the filling onto one side of each rectangular dough piece. Carefully fold the dough over the filling, creating a nice pocket, and pinch the edges tightly to seal. This step is crucial to prevent any of the luscious filling from leaking during baking, so your Cannoli Cookies will be a delicious surprise.
Step 8: Bake the Cookies
Arrange the filled Cannoli Cookies on a parchment-lined baking sheet, spacing them about an inch apart. Bake in the preheated oven for 15-18 minutes or until they turn a golden brown. Keep a close eye on them towards the end, as the perfect color will indicate they’re ready to come out and cool.
Step 9: Cool and Dust
Once baked, allow the cookies to cool on the baking sheet for a few minutes before transferring them to a wire rack. This helps them set while still being warm and a bit soft. After they fully cool, dust them lightly with powdered sugar to enhance both presentation and sweetness.
Step 10: Serve and Enjoy
Your Cannoli Cookies are now ready to be served! Arrange them on a beautiful platter, perhaps garnished with extra chopped pistachios or a drizzle of chocolate for a special touch. These delightful treats will surely impress family and friends, capturing the essence of Italian tradition in every bite.
Expert Tips for Cannoli Cookies
- Sift Flour: Sift the flour twice for a lighter texture in your Cannoli Cookies. This little step makes a big difference in the final result.
- Smooth Ricotta: Ensure the ricotta is blended until smooth to avoid any graininess in the filling; this helps achieve that rich, creamy taste.
- Watch Baking Time: Keep an eye on the cookies during baking, especially in the last few minutes, to prevent them from over-browning and becoming too hard.
- Resting Dough: Allowing the dough to rest for 30 minutes is essential for flavor development and ensures easier rolling and cutting.
- Creative Fillings: Don’t hesitate to experiment! Try adding cinnamon or swap out pistachios for your favorite nuts to make these Cannoli Cookies uniquely yours.
Make Ahead Options
These Cannoli Cookies are a fantastic choice for busy home cooks looking to save time without compromising on flavor! You can prepare the cookie dough and filling up to 24 hours in advance. Simply mix the dough and form it into rectangles, then wrap it tightly in plastic wrap and refrigerate. For the filling, combine the ricotta, chocolate chips, and pistachios, and store it in an airtight container in the fridge. When you’re ready to bake, take the dough out, let it sit at room temperature for about 15 minutes, then fill, seal, and bake as directed. This way, you can enjoy freshly baked Cannoli Cookies with minimal effort, making them just as delicious as if they were made from scratch on the spot!
Cannoli Cookies Variations & Substitutions
Feel free to explore these delightful variations that can add a personal touch to your Cannoli Cookies!
-
Dairy-Free: Replace ricotta with a dairy-free cream cheese alternative for a vegan-friendly option. Just make sure to check the packaging for texture similarities.
-
Gluten-Free: Substitute all-purpose flour with a gluten-free flour blend. Ensure it includes xanthan gum for the right consistency and texture.
-
Nut-Free: Omit the pistachios and switch to sunflower seeds for that added crunch. This makes the cookies suitable for nut-free diets while maintaining a delightful texture.
-
Citrus Zest: Swap lemon zest for lime or orange zest. This small change will give your cookies a delightful twist and a burst of fresh flavor.
-
Spiced Cookies: Incorporate a pinch of cinnamon or nutmeg into the dough for a cozy, aromatic sensation that elevates the overall taste profile.
-
Filled Variations: Try adding various flavored extracts like almond or hazelnut to the filling for a unique, standout taste. Your cookie experience will be even more fascinating!
-
Syrup Drizzle: For an extra layer of sweetness and a luxurious finish, drizzle with a homemade chocolate or caramel syrup before serving. Your guests will love this treat!
Don’t hesitate to check out my tips for storing cookies or explore how to pair these cookies with your favorite drinks for a delightful culinary experience!
How to Store and Freeze Cannoli Cookies
Room Temperature: Store your Cannoli Cookies in an airtight container at room temperature for up to 3 days to maintain their delightful flavor and texture.
Fridge: For longer freshness, you can keep the cookies in the refrigerator; they will stay tasty for up to 5 days. Just be sure to let them come to room temperature before serving for the best texture.
Freezer: If you want to enjoy these cookies later, freeze them in a single layer on a baking sheet before transferring to a freezer-safe bag. They can be frozen for up to 3 months. Defrost in the fridge overnight before enjoying.
Reheating: To revive the crispy texture, reheat the cookies in a preheated oven at 300°F (150°C) for about 5-7 minutes. Dust with powdered sugar again for extra sweetness if desired!
What to Serve with Cannoli Cookies
Indulging in Cannoli Cookies is just the beginning of a delightful experience; pair them with complementary flavors for a truly memorable meal.
-
Creamy Mashed Potatoes: Their buttery richness and smooth texture provide a comforting contrast to the crispy cookies, making every bite a dream.
-
Fresh Italian Salad: A mix of arugula, cherry tomatoes, and olives adds zestiness and freshness, balancing the sweetness of Cannoli Cookies beautifully.
-
Espresso: This bold, rich coffee enhances the cookie’s flavors, creating an espresso and dessert pairing that’s a classic Italian treat. Sip it slowly alongside your cookie for a perfect afternoon interlude.
-
Pistachio Gelato: The nutty flavor echoes the pistachios in the cookies, and the creamy texture adds a luxurious touch to your sweet experience.
-
Chocolate Drizzle: A simple drizzle of melted chocolate over the cookies enhances their appeal, giving them an elegant finish that’s sure to impress guests.
-
Lemon Sorbet: The bright and refreshing citrus flavor provides a delightful contrast, cleansing the palate and preparing you for another cookie!
With these pairings, your Cannoli Cookies will shine even brighter at your next gathering!
Cannoli Cookies Recipe FAQs
How do I choose the best ricotta cheese for my Cannoli Cookies?
Absolutely! When selecting ricotta cheese, go for a brand that is creamy and rich, ideally at room temperature for smoother mixing. I recommend checking for a texture that is smooth and not too watery; this ensures your filling will be perfectly creamy. If you can find whole milk ricotta, that’s even better for a richer flavor!
What’s the best way to store Cannoli Cookies?
To keep your Cannoli Cookies fresh, store them in an airtight container at room temperature for up to 3 days. If you want to extend their shelf life, you can refrigerate them for about 5 days. Just remember to let them warm up to room temperature before serving for optimal texture!
Can I freeze my Cannoli Cookies?
Yes! To freeze your cookies, start by placing them in a single layer on a baking sheet until they are firm. Once frozen, transfer them to a freezer-safe bag or container, where they can stay fresh for up to 3 months. When you’re ready to enjoy them, simply defrost in the fridge overnight, and if you want to revive their crispy texture, reheat in a preheated oven at 300°F (150°C) for about 5-7 minutes.
What should I do if my dough is too sticky?
Very! If you find that your dough is stickier than expected, don’t worry! Simply dust your work surface and rolling pin with a little more flour as you roll it out. Also, ensure you’re measuring your flour correctly; using a kitchen scale can help achieve better consistency. If the humidity is high, you may need to add just a touch more flour to balance it out.
Can I use alternatives for the nuts in these cookies?
Of course! If you have nut allergies or just prefer a different flavor, you can easily replace chopped pistachios with finely chopped almonds, walnuts, or even omit them altogether. The filling will still be delicious without nuts! Additionally, crushed cookies can be a fun way to add texture and flavor.
Are Cannoli Cookies suitable for pets?
No, these cookies are not suitable for pets due to ingredients like sugar and chocolate. If you’ve got pets hanging around while you bake, it’s best to keep these delightful treats out of their reach. Always check for pet-safe alternatives if you want to share something special with your furry friends!
Irresistible Cannoli Cookies: A Taste of Italy at Home
Ingredients
Equipment
Method
- Preheat your oven to 350°F (175°C).
- In a medium bowl, whisk together the all-purpose flour and granulated sugar until well combined.
- In a separate mixing bowl, blend together the ricotta cheese, large egg, vanilla extract, and lemon zest until smooth and creamy.
- Gradually add the dry flour mixture to the wet ingredients, stirring gently until a soft dough forms. Cover and let rest for 30 minutes.
- Roll out the dough to about ¼ inch thickness and cut into rectangular shapes (approx. 2x3 inches).
- In a separate bowl, combine the remaining ricotta cheese, mini chocolate chips, and chopped pistachios. Mix until evenly combined.
- Place a small dollop of filling on each dough piece, fold over, and pinch to seal.
- Arrange on a baking sheet and bake for 15-18 minutes until golden brown.
- Allow to cool and dust with powdered sugar.
- Serve and enjoy your Cannoli Cookies!
Leave a Reply