
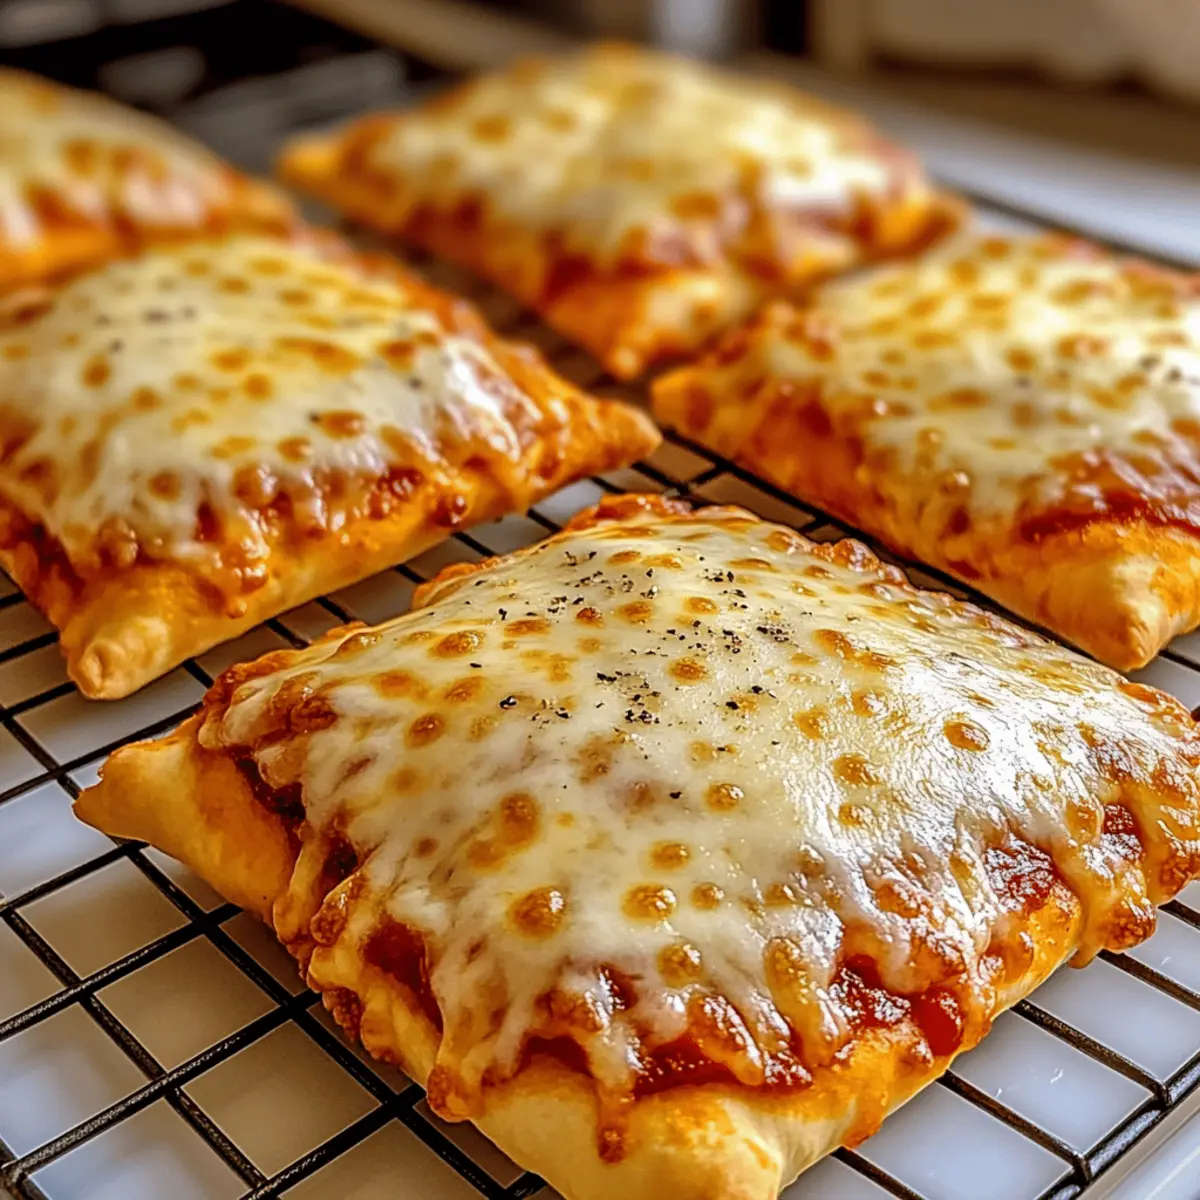
“Is there anything more comforting than a warm, cheesy snack at the end of a long day?” As I ponder this question, I can’t help but think of my beloved Cheesy Pizza Pockets. These little culinary gems are ridiculously easy to whip up, and they make for the perfect crowd-pleaser, whether it’s a family dinner or a last-minute party snack. What’s more, they’re incredibly customizable—load them up with your favorite fillings, and even let the kids join in on the fun of creating their own! Whether you choose to bake or fry them, each bite reveals a gorgeous, crispy crust hugging oozing cheese and flavorful goodness. Are you ready to elevate your snacking game and create a delicious homemade treat that you’ll crave every night?
Why Are Cheesy Pizza Pockets So Irresistible?
Convenient and Quick: These cheesy delights come together in a flash, perfect for busy weeknights or spontaneous gatherings.
Customizable Fillings: The options are endless! From classic pepperoni to veggie-packed delights, tailor them to suit every palate.
Kid-Friendly Fun: Let your little ones get creative in the kitchen! They’ll love choosing their fillings and sealing their own pizza pockets.
Crispy Texture: Whether baked or fried, each bite offers a delightful crunch, giving you that satisfying experience you crave.
Party-Ready Snack: Your friends and family will adore these finger-friendly snacks, making them a favorite for any celebration!
Make-Ahead Meal: Freeze extra pockets for easy reheating later! Just pop them in the oven, and you have a quick snack ready in no time.
Cheesy Pizza Pockets Ingredients
For the Dough
• Refrigerated Pizza Crust – Provides a flaky texture; opt for whole wheat or cauliflower crust for healthier choices.
For the Filling
• Pasta or Marinara Sauce – Adds tang and moisture; use sparingly to avoid sogginess.
• Shredded Mozzarella Cheese – Offers that classic melty goodness; mix with provolone or cheddar for a flavor twist.
• Pepperoni Slices – Adds savory depth; swap for veggies for a vegetarian option or shredded chicken for heartiness.
For the Seasoning
• Dried Oregano – Enhances flavor with a sprinkle of Italian flair; use as an optional garnish.
For the Topping
• Olive Oil – Brush on top for a golden finish; melted butter can be used for extra richness.
Remember, these Cheesy Pizza Pockets are not just delicious; they’re customizable to your heart’s content!
Step‑by‑Step Instructions for Cheesy Pizza Pockets
Step 1: Preheat the Oven
Begin by preheating your oven to 425°F (220°C). While it’s warming up, line a baking sheet with parchment paper to prevent sticking and ensure an easy cleanup. This preparation sets the stage for your Cheesy Pizza Pockets, helping them achieve that perfect, crispy golden crust as they bake.
Step 2: Prepare the Dough
On a floured surface, unroll the refrigerated pizza crust with care, ensuring it doesn’t stick. Use a knife or pizza cutter to slice the dough into six equal squares. This step is crucial as your dough will cradle all the delicious fillings you choose to stuff inside your Cheesy Pizza Pockets.
Step 3: Add the Sauce and Cheese
Take each dough square and generously spread 1 tablespoon of marinara or pasta sauce on one half, avoiding the edges to prevent sogginess. Sprinkle a handful of shredded mozzarella cheese over the sauce, making sure to keep it contained for easy folding. These tasty layers will contribute to the cheesy goodness in every bite of your pocket.
Step 4: Add the Toppings
Next, place two slices of pepperoni, or your preferred filling, on top of the cheese. If you’re feeling adventurous, now is the time to customize your Cheesy Pizza Pockets with veggies or other proteins. Just remember not to overfill, as they need to seal properly.
Step 5: Seal the Pockets
Carefully fold each square diagonally to create a triangle shape, encasing your scrumptious filling. Use a fork to tightly seal the edges; this step is essential to ensure no filling leaks out during the baking process. A thorough seal means more deliciousness inside every pocket!
Step 6: Brush with Olive Oil
(Optional step for that extra touch): Gently brush the tops of each sealed Cheesy Pizza Pocket with olive oil to achieve a beautifully golden finish. Sprinkle with dried oregano or add more cheese on top if you desire. This little step elevates the flavor and adds a mouthwatering aroma to your recipe.
Step 7: Bake to Perfection
Place your assembled pockets on the prepared baking sheet and slide them into the preheated oven. Bake for 10 to 13 minutes, or until the crust turns golden brown and the cheese begins to bubble enticingly. Keep an eye on them as they bake to ensure you achieve that perfect crispy texture you crave.
Step 8: Cool and Serve
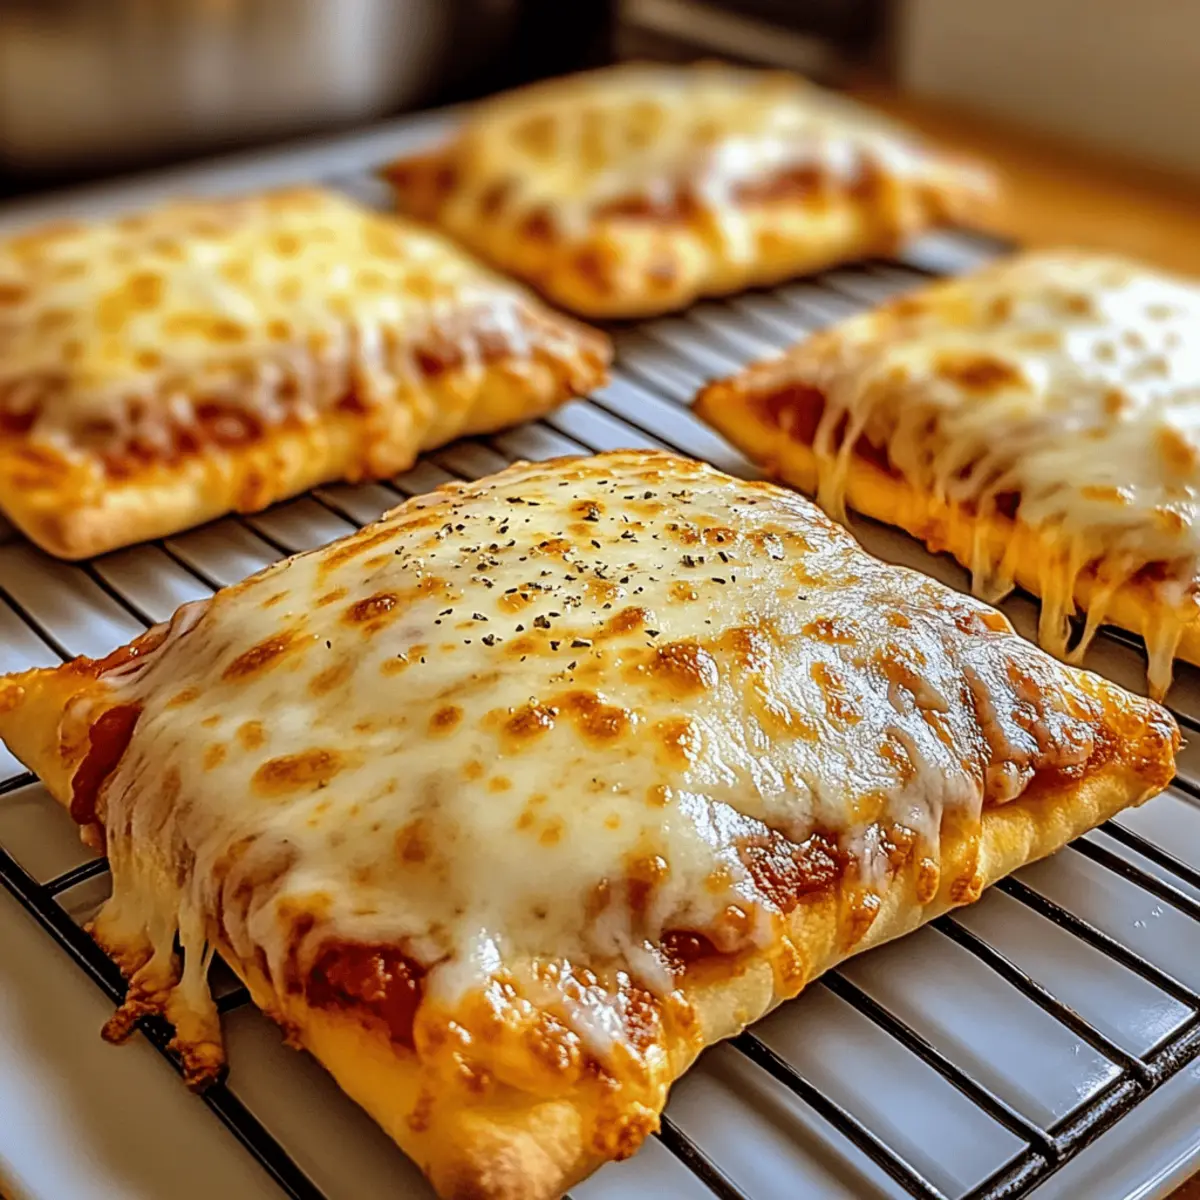
Once golden and bubbling, remove the Cheesy Pizza Pockets from the oven and let them cool slightly on a wire rack for about 5 minutes. This chill time allows the cheese to set a bit and makes them easier to handle. Serve warm with dipping sauces and watch as everyone enjoys this delightful snack!
How to Store and Freeze Cheesy Pizza Pockets
Fridge: Store leftover Cheesy Pizza Pockets in an airtight container for up to 3 days. Reheat in the oven or microwave until warmed through.
Freezer: Place uncooked pizza pockets on a baking sheet; freeze until solid before transferring to a freezer bag. They can be stored for up to 2 months.
Reheating: Bake frozen pizza pockets directly from the freezer at 425°F (220°C) for about 15-20 minutes or until heated through and golden.
Make-Ahead: Prepare your pizza pockets ahead of time for stress-free entertaining; they’re perfect for quick snacks or easy meals!
Make Ahead Options
Cheesy Pizza Pockets are perfect for meal prep enthusiasts looking to save time during busy weeknights! You can prepare the filling and assemble the pockets up to 24 hours in advance. Simply complete steps 1-5, then cover the pockets with plastic wrap and refrigerate. This helps to maintain their freshness while preventing the dough from drying out. When you’re ready to bake, brush them with olive oil and season as desired, then pop them in the oven straight from the fridge, adding an extra minute or two to cooking time for perfectly golden results. Enjoy delicious homemade snacks with minimal fuss!
Cheesy Pizza Pockets: Customization Ideas
Feel free to unleash your culinary creativity while making these delightful cheesy pizza pockets—your taste buds will thank you!
-
Breakfast Pockets: Swap out pepperoni for scrambled eggs, cheese, and crispy bacon. These pockets are a fantastic way to enjoy breakfast on the go!
-
Taco Pockets: Fill with seasoned beef, cheddar, and jalapeños for a zesty kick. Picture a taco fiesta wrapped in a crispy shell—it’s the best of both worlds!
-
BBQ Chicken Pockets: Mix shredded BBQ chicken, mozzarella, and onions for a mouthwatering experience. The sweet and smoky flavors will have you craving more.
-
Vegetarian Pockets: Load them up with sautéed bell peppers, mushrooms, and spinach. These pockets are vibrant, full of color, and just as satisfying for meat lovers!
-
Spicy Pepperoni: Spice things up by adding red pepper flakes to the pepperoni inside. Every bite will bring a fiery surprise, making you crave that extra kick.
-
Cheesy Garlic Pockets: Mix minced garlic into the oil before brushing on top. This aromatic addition elevates the flavor profile and will make your kitchen smell heavenly!
-
Herbed Crust: Sprinkle Italian herbs into the pizza dough before rolling it out. This simple twist adds an extra layer of flavor and makes every bite sing.
-
Dipping Sauce Variety: Pair your cheesy pizza pockets with various dips like marinara, ranch, or even a tangy tzatziki. This way, you can combine flavors to match your mood.
Remember, personalizing these cheesy pizza pockets can turn a simple snack into a delightful family tradition. Get inspired, mix and match, and enjoy delicious bites!
Expert Tips for Cheesy Pizza Pockets
-
Seal Edges Firmly: Ensure the edges are tightly sealed with a fork to prevent any cheesy goodness from leaking out during baking.
-
Customize Fillings: Encourage creativity! Using different fillings will keep the Cheesy Pizza Pockets exciting and cater to everyone’s taste preferences.
-
Don’t Overfill: While it’s tempting, avoid overstuffing the pockets to ensure they bake evenly and seal properly.
-
Monitor Baking Time: Keep a close eye on the Cheesy Pizza Pockets as they bake; ovens can vary, and you want the perfect golden crust without burning.
-
Involve the Kids: Let children help assemble their own pizza pockets; it’s a fun way to get them engaged in cooking and trying new flavors.
What to Serve with Cheesy Pizza Pockets?
Every bite of these cheesy delights is a flavor-packed experience, perfect for creating a delicious spread that will enthrall your guests and family alike!
-
Marinara Sauce: A classic dipping option that enhances the pizza flavor with its tangy richness. It’s delightful for those who want an extra touch of sauce.
-
Garlic Breadsticks: These addictive, buttery sticks offer a satisfying crunch and complement the cheesy pockets perfectly. Together, they create a comforting Italian-inspired feast.
-
Crispy Salad: A fresh, crunchy salad with mixed greens and a zesty vinaigrette provides a refreshing contrast to the warm, cheesy pockets. It adds a lightness and brightness to your meal.
-
Vegetable Platter: Pair with an array of colorful veggies and a creamy ranch dip for a wholesome option. This platter adds texture and nutrition, balancing the cheesy indulgence beautifully.
-
Potato Wedges: Crispy, seasoned potato wedges are a filling side that pairs wonderfully with the chewy texture of the pizza pockets. Their savory flavor complements the cheese without overpowering it.
-
Sparkling Lemonade: For drinks, a refreshing sparkling lemonade adds a zesty twist that cuts through the richness of the cheese. It’s the ideal bubbly companion for such a fun snack!
-
Chocolate Chip Cookies: To round out your meal with a sweet finish, nothing beats classic cookies. They bring nostalgia and joy, making for a beloved dessert after the savory pizza pockets.
Cheesy Pizza Pockets Recipe FAQs
How do I choose the right pizza crust?
Absolutely! For the best result, opt for a refrigerated pizza crust for its flaky texture. If you’re looking for a healthier choice, whole wheat or cauliflower crust are fantastic alternatives that still provide a satisfying bite. Just ensure you roll it out evenly on a floured surface.
Can I store leftover pizza pockets?
Very! Leftover Cheesy Pizza Pockets can be stored in an airtight container in the fridge for up to 3 days. Reheat them in the oven or microwave until they’re warmed through. For those busy nights, they make for a delightful quick snack!
How do I freeze Cheesy Pizza Pockets?
Certainly! To freeze, prepare the pizza pockets but don’t bake them. Place them on a baking sheet lined with parchment paper and freeze until solid, about 1-2 hours. Then transfer them into a freezer-safe bag or container. They can be stored like this for up to 2 months. When you’re ready to enjoy them, just bake from frozen at 425°F (220°C) for 15-20 minutes until golden and gooey.
What if my pizza pockets leak during baking?
Oh no! If you experience leaks, it’s usually due to overfilling or not sealing the edges firmly enough. Be careful to keep your filling contained and while sealing, use a fork to crimp the edges tightly. If some still escape, don’t worry—it’s part of the delicious fun!
Can I customize the fillings for dietary restrictions?
Absolutely! You can tailor these Cheesy Pizza Pockets to fit various dietary needs. For a vegetarian version, swap out the pepperoni for sliced vegetables or cooked quinoa. If lactose is a concern, try using dairy-free cheese. Just ensure each filling is properly cooked before assembly!
What types of dipping sauces pair well with pizza pockets?
Very! Dipping sauces can elevate your pizza pockets. Classic marinara is always a hit, but don’t shy away from ranch, buffalo sauce, or garlic sauce for a unique twist. Mix and match to delight your taste buds during every snack time!
Cheesy Pizza Pockets: Your New Favorite Snack Adventure
Ingredients
Equipment
Method
- Preheat your oven to 425°F (220°C) and line a baking sheet with parchment paper.
- On a floured surface, unroll the refrigerated pizza crust and slice it into six equal squares.
- Spread 1 tablespoon of pasta or marinara sauce on one half of each dough square and sprinkle shredded mozzarella on top.
- Add two slices of pepperoni or your preferred filling on top of the cheese.
- Fold each square diagonally, encasing the filling, and seal the edges with a fork.
- Brush the tops of each pocket with olive oil and sprinkle with dried oregano.
- Bake for 10 to 13 minutes or until the crust is golden brown and the cheese is bubbly.
- Remove from the oven and cool slightly on a wire rack before serving.
Leave a Reply