
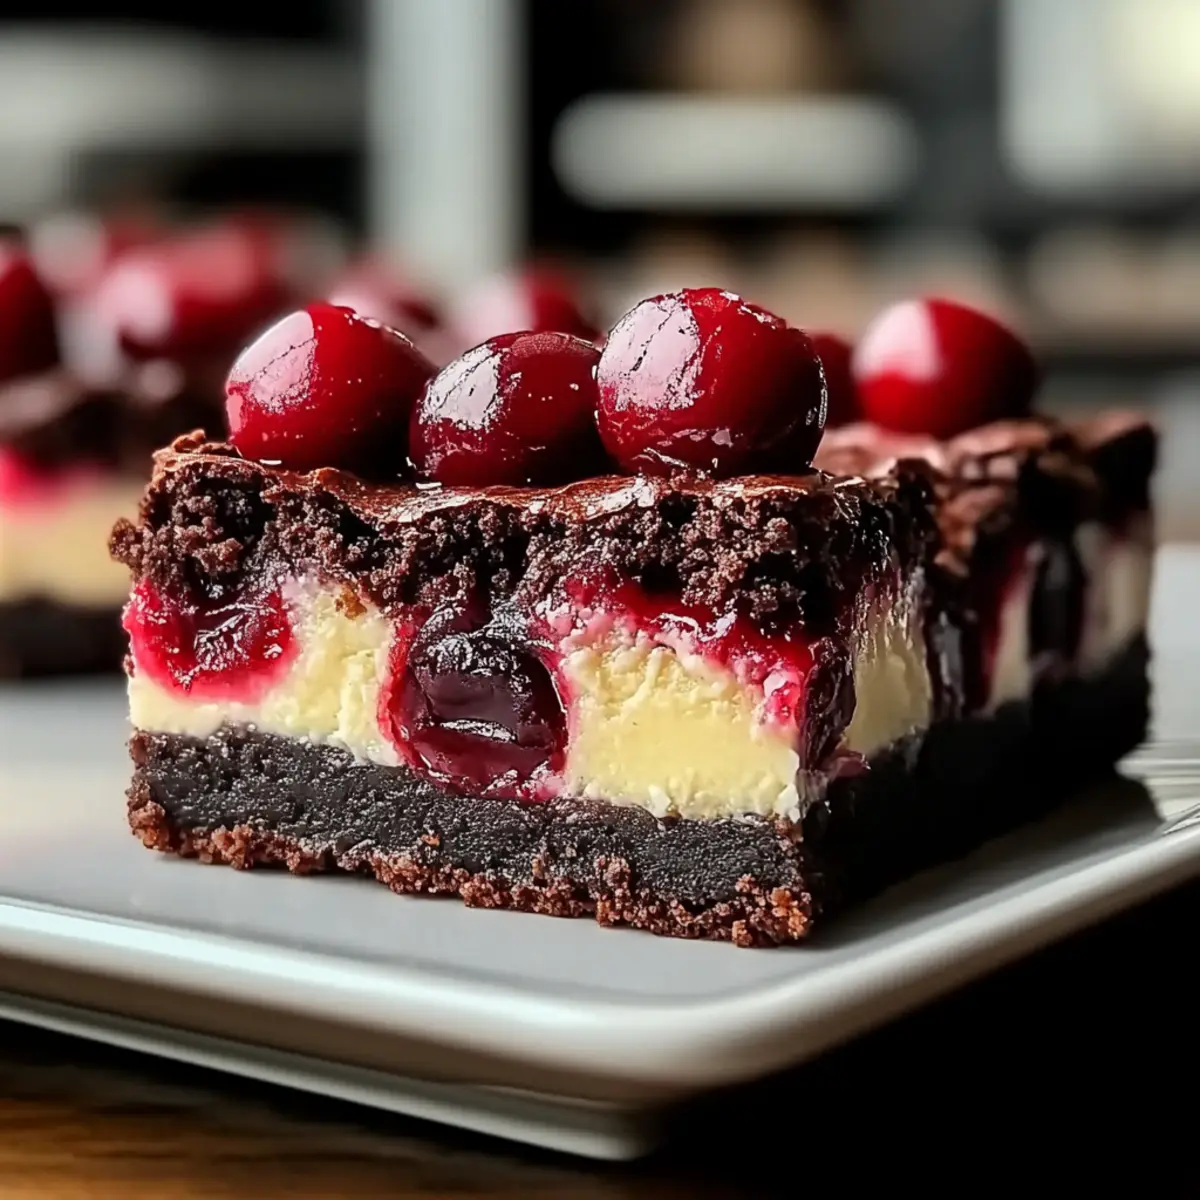
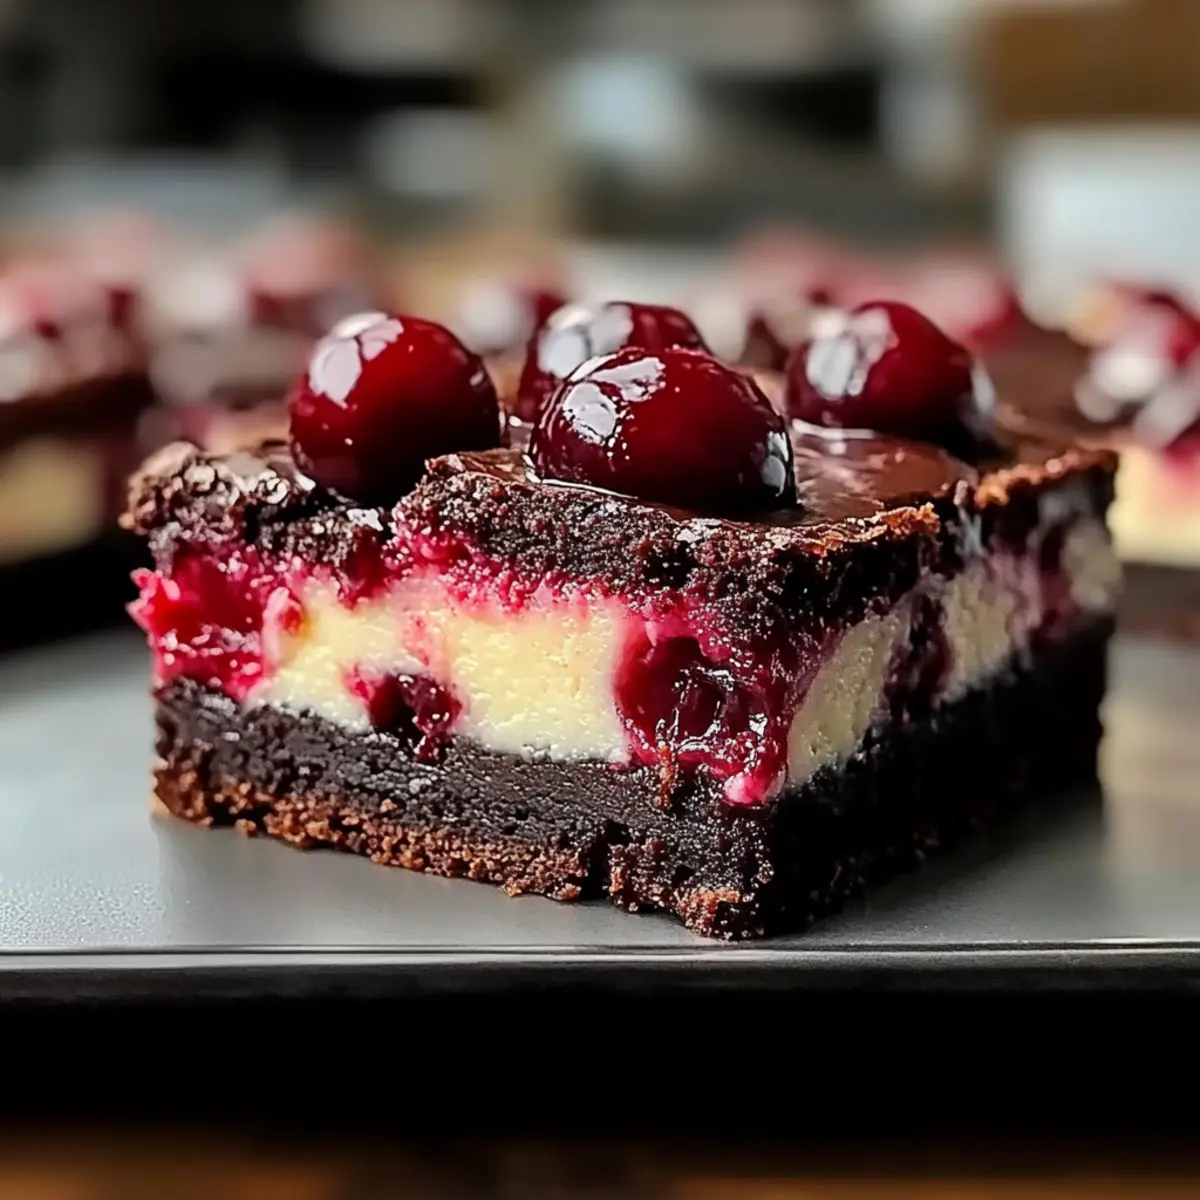
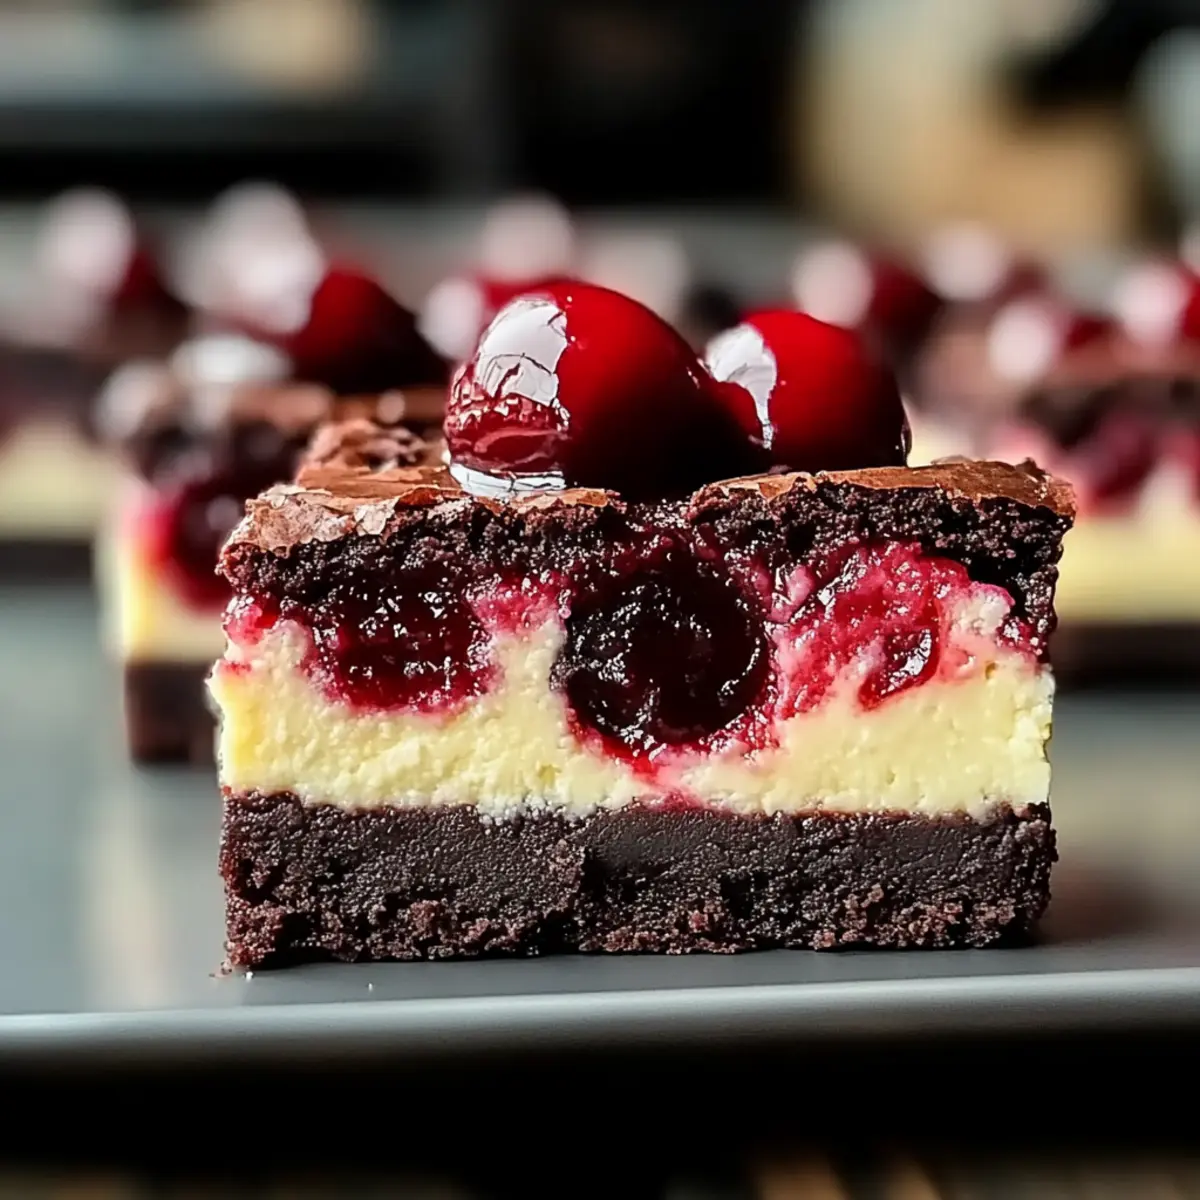
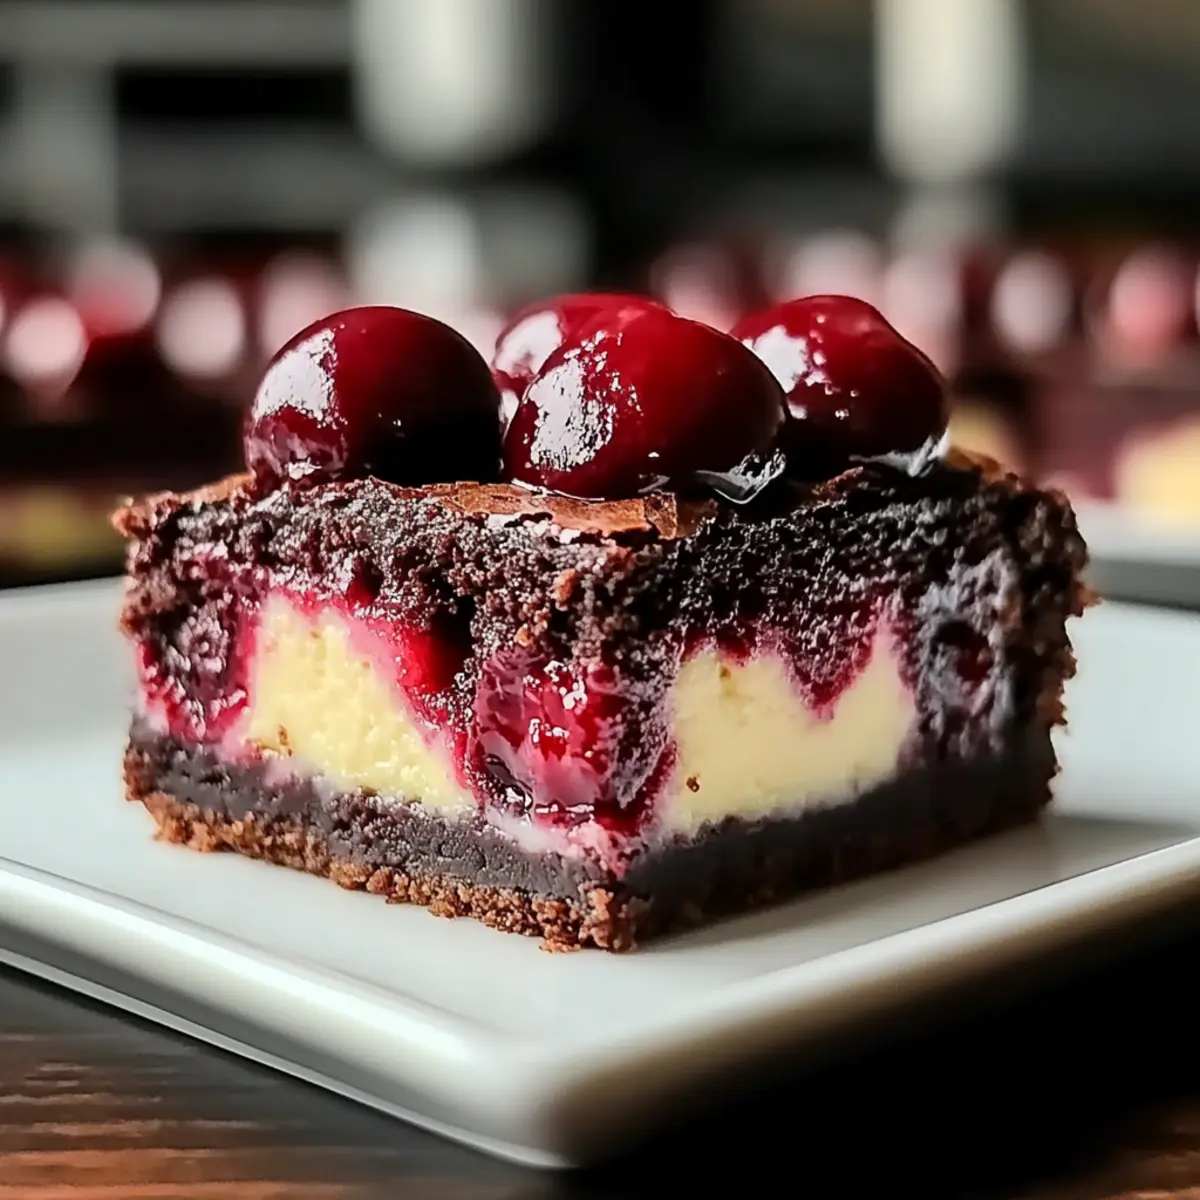
As I stood in my kitchen, a wave of irresistible chocolate aroma wrapped around me like a warm hug. That’s when I knew it was time to whip up these Cherry Cheesecake Brownie Bars. This delightful dessert marries the richness of fudgy brownies with the creaminess of cheesecake, topped off with a sweet cherry swirl that makes every bite an experience to savor. Perfect for those moments when you crave something quick yet impressive, this recipe comes together seamlessly in just 50 minutes! Not only does it satisfy your chocolate cravings, but it also works wonders at gatherings, becoming an instant crowd-pleaser among friends and family. Ready to indulge in a dessert that’s both comforting and strikingly beautiful? Let’s dive in!
Why are Cherry Cheesecake Brownie Bars special?
Irresistible flavors: The combination of rich fudgy chocolate and creamy cheesecake creates a delightful taste explosion.
Quick preparation: With just 50 minutes from start to finish, you’ll satisfy those sweet cravings in no time!
Crowd-pleaser: These bars are perfect for gatherings, impressing friends and family alike with their stunning appearance and flavor.
Versatile options: Enjoy a gluten-free or vegan twist easily, ensuring everyone at the table can partake in the indulgence. If you love experimenting, try swapping the cherry filling for your favorite fruit!
Textural contrast: The fudgy brownie base and smooth cheesecake layer create a perfect marriage of textures that’s simply irresistible.
Cherry Cheesecake Brownie Bars Ingredients
For the Brownie Layer
- Butter – Adds richness and moisture to the brownie; can be substituted with margarine.
- Sugar – Sweetens the dessert and helps with texture; coconut sugar can be used as an alternative.
- Eggs – Provide structure and moisture for the brownie layer; for a vegan option, use flax eggs.
- Vanilla Extract – Enhances the flavor of both the brownie and cheesecake layers; almond extract can be used as a substitute.
- All-Purpose Flour – Leavens the brownie; for gluten-free, substitute with a gluten-free 1:1 baking mix.
- Cocoa Powder – Provides deep chocolate flavor; dark cocoa works best for a richer taste.
- Salt – Balances sweetness and enhances flavors.
For the Cheesecake Layer
- Cream Cheese – Used for the creamy cheesecake layer; ensure it’s at room temperature for smooth mixing.
- Sugar – Sweetens the cheesecake layer; you can substitute with a sugar alternative.
For the Topping
- Cherry Pie Filling – Provides fruity flavor and visual appeal; fresh cherries can be used instead.
These ingredients come together to create the delightful Cherry Cheesecake Brownie Bars that will surely impress your guests!
Step‑by‑Step Instructions for Cherry Cheesecake Brownie Bars
Step 1: Preheat the Oven
Begin by preheating your oven to 350°F (175°C). While the oven warms up, take a moment to grease a 9×13 inch baking pan with butter or non-stick spray to ensure your Cherry Cheesecake Brownie Bars come out easily once baked.
Step 2: Make the Brownie Layer
In a mixing bowl, whisk together the melted butter and sugar until the mixture appears glossy and well combined. Then, beat in the eggs one at a time, along with the vanilla extract, until smooth. Carefully fold in the flour, cocoa powder, and salt until just combined, creating a rich brownie batter.
Step 3: Spread the Brownie Base
Pour the fudgy brownie batter into the prepared baking pan, using a spatula to spread it evenly across the bottom. Make sure it’s well distributed to ensure all parts of your Cherry Cheesecake Brownie Bars have that indulgent chocolate flavor baked to perfection.
Step 4: Prepare the Cheesecake Layer
In a separate bowl, beat the cream cheese with sugar until it turns smooth and creamy. Add in one egg and the vanilla extract, mixing gently until fully combined. This creamy layer will beautifully complement the brownie base, enhancing the overall flavor of the bars.
Step 5: Assemble Layers
Carefully pour the creamy cheesecake mixture over the brownie base, spreading it evenly. Next, dollop the cherry pie filling on top and use a knife or a skewer to swirl the filling through the cheesecake. This creates a beautiful marbled effect, adding both visual appeal and fruity flavor to your bars.
Step 6: Bake
Place your assembled pan in the preheated oven and bake for about 30 minutes. You’ll know they’re done when the edges are set, but the center still has a slight jiggle. This texture is key to achieving that perfect brownie-cheesecake combination in your Cherry Cheesecake Brownie Bars.
Step 7: Cool and Slice
Once baked, remove the pan from the oven and allow it to cool completely in the pan, which will take about 2 hours. Cooling is crucial for clean slicing, so resist the temptation to dig in too soon. Once cool, cut into squares, revealing those delicious layers within.
Storage Tips for Cherry Cheesecake Brownie Bars
-
Room Temperature: Allow the bars to cool completely, then store at room temperature for up to 24 hours in a covered container to maintain freshness.
-
Fridge: For longer storage, keep the Cherry Cheesecake Brownie Bars in an airtight container in the fridge for up to 5 days. They will stay moist and delicious!
-
Freezer: To freeze, wrap the bars tightly in plastic wrap, then place them in a freezer-safe bag or container for up to 3 months. Thaw overnight in the refrigerator when you’re ready to indulge!
-
Reheating: Enjoy them cold or gently warm in the microwave for 10-15 seconds for a melty brownie experience, but be careful not to overheat!
Cherry Cheesecake Brownie Bars Variations
Feel free to get creative and personalize these delightful bars to match your taste buds and dietary needs!
-
Berry Bliss: Swap cherry pie filling with blueberries or raspberries for a fresh twist. The bright colors and flavors will make your bars pop!
-
Chocolate Overload: Fold in chocolate chips or chunks into the brownie batter for an extra indulgent brownie experience. It’s the perfect surprise for chocolate lovers!
-
Vegan Delight: For a vegan version, use flax eggs in place of regular eggs and opt for vegan cream cheese. Everyone can enjoy a tasty treat without missing out!
-
Flavor Infusion: Experiment by adding flavored extracts, such as almond or lemon, to the cheesecake mixture. This adds a unique depth to the creamy layer, making it even more scrumptious.
-
Nutty Crunch: Incorporate chopped nuts like walnuts or pecans into the brownie layer for a satisfying crunch. The contrast in textures enhances the overall experience of your bars.
-
Spicy Sweetness: Add a pinch of cinnamon or nutmeg to the brownie batter for a cozy, spiced flavor profile. It’ll warm your heart and delight your palate!
-
Oreo Twist: Crush oreos and mix them into the brownie batter for a cookies and cream variation. It’s a fun way to add a beloved flavor and texture.
-
Layered Delight: Create a multi-layered dessert by adding a layer of cookie dough or a thin layer of peanut butter before the cheesecake. The combinations are endless!
If you’re thinking about enhancing your dessert table, don’t forget to check out my sumptuous Chocolate Lava Cake or refreshingly creamy Lemon Bars as perfect pairings with these Cherry Cheesecake Brownie Bars!
Make Ahead Options
Cherry Cheesecake Brownie Bars are fantastic for meal prep, allowing you to savor their deliciousness with minimal fuss during the week! You can prepare both the brownie and cheesecake layers up to 24 hours in advance. Simply whip up the brownie batter and spread it in the pan, then cover it tightly with plastic wrap. The cheesecake layer can also be mixed and stored in the refrigerator until you’re ready to assemble. When you’re ready to serve, pour the cheesecake over the brownie base, swirl in the cherry filling, and bake as directed. This way, you’ll enjoy the same delightful flavor and texture—perfect for those busy nights when you crave something sweet!
What to Serve with Cherry Cheesecake Brownie Bars
Imagine cozying up with friends, sharing laughter and love over bites of chocolatey bliss and creamy sweetness.
-
Vanilla Ice Cream: The creamy coldness of vanilla ice cream complements the rich flavors, creating a delightful contrast that melts in your mouth. A scoop on the side elevates the indulgence!
-
Fresh Fruit Salad: A medley of fresh fruits adds a refreshing element, cutting through the richness of the bars while providing a burst of color. It’s a light balance to the decadence.
-
Whipped Cream: A dollop of airy whipped cream adds an elegant touch, enhancing the dessert’s creaminess and inviting you to savor every luscious bite.
-
Chocolate Sauce: Drizzling warm chocolate sauce enriches the chocolate flavors, making every piece decadently irresistible. It’s a chocolate lover’s dream come true!
-
Almond Biscotti: For a crunchy texture and nutty flavor, serve with almond biscotti. The crispy treat provides a satisfying contrast to the soft cheesecake.
-
Sparkling Water: A refreshing glass of sparkling water cleanses the palate between bites, allowing you to truly enjoy the layers of flavor.
-
Iced Coffee: Pair with a glass of iced coffee to create a delightful coffee and dessert combo that energizes and indulges at the same time.
-
Cheese Platter: Add a cheese platter with sharp cheddar or brie for a sophisticated touch that balances sweetness with a savory element.
-
Decadent Hot Chocolate: Cozy up with a mug of decadent hot chocolate, its creamy richness echoing the flavors of the bars in a delightful symphony of sweetness.
Expert Tips for Cherry Cheesecake Brownie Bars
-
Room Temperature Cheese: Ensure cream cheese is at room temperature to avoid lumps in the cheesecake layer, providing that smooth, creamy texture you desire.
-
Avoid Overmixing: Overmixing the brownie batter can lead to a cakey texture. Mix it just until combined for a fudgy finish in your Cherry Cheesecake Brownie Bars.
-
Cool Completely: Allow the brownies to cool completely in the pan for about 2 hours before slicing. This ensures cleaner cuts and lets the flavors meld beautifully.
-
Chill for Sharp Cuts: For extra sharp slices, chill the bars in the fridge for an hour after they’ve cooled—this will make cutting a breeze and enhance the presentation.
-
Swirling Technique: When dolloping cherry pie filling, use a knife or skewer to create a marbled effect. This not only looks stunning but also distributes the flavor evenly throughout the bars.
Cherry Cheesecake Brownie Bars Recipe FAQs
How can I select the best cherries for the topping?
Absolutely! When selecting cherries for your topping, look for plump, vibrant red cherries without any dark spots or blemishes. Fresh cherries should be firm to the touch and have a shiny skin. If you’re using cherry pie filling, ensure it’s of good quality, as this will enhance the flavor of your bars.
What is the best way to store Cherry Cheesecake Brownie Bars?
For optimal freshness, store your Cherry Cheesecake Brownie Bars in an airtight container in the fridge for up to 5 days. Make sure they are completely cooled before sealing to prevent sogginess. They can also be kept at room temperature for up to 24 hours, but refrigeration is best for maintaining their texture.
Can I freeze Cherry Cheesecake Brownie Bars?
Yes, you can! To freeze, first cool the bars completely, then wrap them tightly in plastic wrap and place them in a freezer-safe bag. They will stay fresh for up to 3 months. When you’re ready to enjoy, thaw them overnight in the refrigerator or at room temperature for a few hours.
Why did my brownie layer become cake-like instead of fudgy?
Very! Overmixing the brownie batter can lead to a more cake-like texture. To maintain that rich fudginess, mix the ingredients just until combined. Also, double-check your oven temperature; an oven that runs hot can bake them too quickly, leading to a drier texture.
Are these Cherry Cheesecake Brownie Bars suitable for people with allergies?
If you want to accommodate dietary needs, these bars can be modified! For a gluten-free option, substitute all-purpose flour with a 1:1 gluten-free baking mix. For vegan versions, simply replace eggs with flax eggs (mix 1 tablespoon of flaxseed meal with 2.5 tablespoons of water and let it sit for 10 minutes) and swap standard cream cheese for a vegan alternative. Always check ingredient labels for allergens if you’re serving them to guests!
Irresistible Cherry Cheesecake Brownie Bars for Sweet Cravings
Ingredients
Equipment
Method
- Preheat your oven to 350°F (175°C) and grease a 9x13 inch baking pan.
- In a mixing bowl, whisk together the melted butter and sugar, then beat in the eggs and vanilla extract. Fold in flour, cocoa powder, and salt.
- Pour the brownie batter into the prepared baking pan and spread it evenly.
- In a separate bowl, beat the cream cheese with sugar until smooth, then add an egg and vanilla extract, mixing until combined.
- Pour the cheesecake mixture over the brownie base, dollop cherry pie filling on top, and swirl with a knife.
- Bake for about 30 minutes until edges are set and center has a slight jiggle.
- Allow to cool completely in the pan for about 2 hours before slicing.
Leave a Reply