
There’s something magical about transforming simple ingredients into a deliciously curated meal, and today, I’m excited to share my go-to recipe for Chicken Onigiri. These delightful Japanese rice snacks are perfect for when you’re in a hurry or simply want a tasty bite that’s easy to enjoy on the go. With tender teriyaki chicken nestled inside perfectly shaped sushi rice, this recipe provides a fun twist on traditional convenience food—making it a crowd-pleaser at lunches, picnics, or even as a quick snack after work. Plus, they’re quick to prepare, allowing you to whip them up with whatever chicken cut you have on hand. Curious how to create these portable delights? Let’s dive into the details!
Why Is Chicken Onigiri So Special?
Quick and Easy: You’ll love how simple it is to whip up these Chicken Onigiri in no time. Perfect for busy days when you crave something homemade yet convenient!
Bursting with Flavor: The tender teriyaki chicken filling infuses each bite with savory goodness, while the sushi rice adds a delightful soft texture.
Versatile Ingredients: Feel free to swap out chicken cuts or give it a spicy twist—this recipe adapts to your preferences!
Portable Snack: Perfect for lunches and on-the-go dining, these rice balls are ready to accompany you to work, school, or a picnic.
Crowd-Pleaser: Whether shared at a gathering or enjoyed solo, Chicken Onigiri are sure to impress anyone who takes a bite. Try serving them with pickled vegetables for an extra touch!
Chicken Onigiri Ingredients
For the Rice
- Short-grain sushi rice – This gives Chicken Onigiri its perfect sticky texture; remember to use more water than usual.
- Salt – Enhances flavor and ensures an even seasoning throughout the rice; opt for fine salt for better distribution.
- Furikake (optional) – This flavorful seasoning mix adds umami depth to the rice, making every bite more enticing.
For the Teriyaki Chicken Filling
- Boneless skinless chicken (drumsticks recommended) – Provides a juicy, satisfying protein base for your onigiri; swap with thighs or ground chicken for variety!
- Soy sauce – Brings savory depth to the marinade and sauce; choose low-sodium if desired.
- Sake (optional) – This cooking wine enhances overall flavor; feel free to substitute with water if necessary.
- Baking soda – Tenderizes the chicken during marination, ensuring it’s wonderfully juicy.
- Cornstarch – Helps create a beautifully seared texture; don’t skip this for a golden crust.
- Mirin – This sweet rice wine adds a hint of sweetness and complexity to your teriyaki sauce.
- Brown sugar – Sweetens the teriyaki glaze; pack it firmly for the best results.
- Oil – Use a neutral oil for cooking the chicken; it allows the flavors to shine without overpowering.
- Minced garlic – Infuses aromatic flavor into the chicken filling, making it taste deliciously home-cooked.
For Wrapping
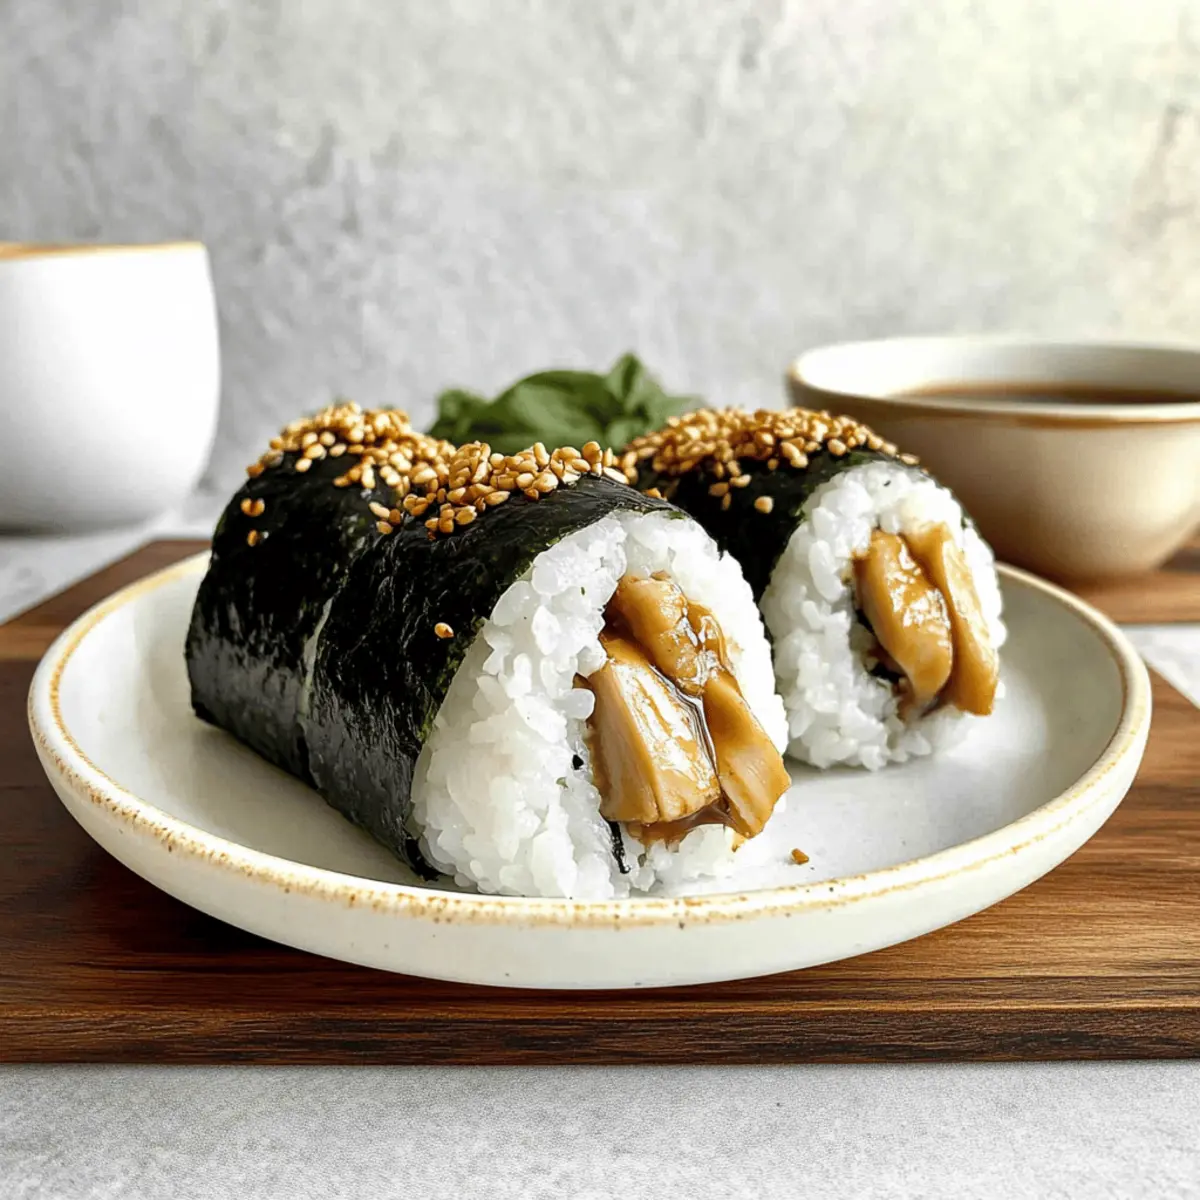
- Nori – Cut into easy-to-handle rectangles, this seaweed adds a necessary umami element and keeps the onigiri intact.
With these simple yet delightful ingredients, your Chicken Onigiri will be a quick and satisfying snack that’s ideal for any occasion!
Step‑by‑Step Instructions for Chicken Onigiri
Step 1: Prepare Sushi Rice
Rinse 1 cup of short-grain sushi rice under cold water until the water runs clear, then combine with 1.5 cups of water in a rice cooker. Add a pinch of salt and cook according to the rice cooker’s instructions, typically around 20 minutes. Once cooked, let it sit covered for 10 minutes to achieve the perfect sticky texture, enhancing your Chicken Onigiri.
Step 2: Marinate Chicken
While the rice is cooking, cut 1 pound of boneless skinless chicken into bite-sized pieces and place them in a bowl. Mix in 2 tablespoons of soy sauce, 1 tablespoon of sake, 1/2 teaspoon baking soda, and 1 tablespoon cornstarch. Allow the mixture to marinate for about 30 minutes in the refrigerator, which will tenderize the chicken, enriching the flavor of your onigiri filling.
Step 3: Make Teriyaki Sauce
In a small bowl, whisk together 3 tablespoons of soy sauce, 1 tablespoon of mirin, and 2 tablespoons of packed brown sugar until the sugar dissolves. Set aside, as this sweet and savory teriyaki sauce will later enhance the flavor of the chicken filling, giving your Chicken Onigiri that delightful umami kick.
Step 4: Cook Chicken
Heat 1 tablespoon of neutral oil in a nonstick pan over medium heat. Once hot, add the marinated chicken pieces and sauté for 2-3 minutes until they turn golden brown and are cooked through. Add 2 cloves of minced garlic and cook for an additional minute before pouring in the prepared teriyaki sauce, stirring until it thickens, which will take another 2 minutes.
Step 5: Shape Onigiri
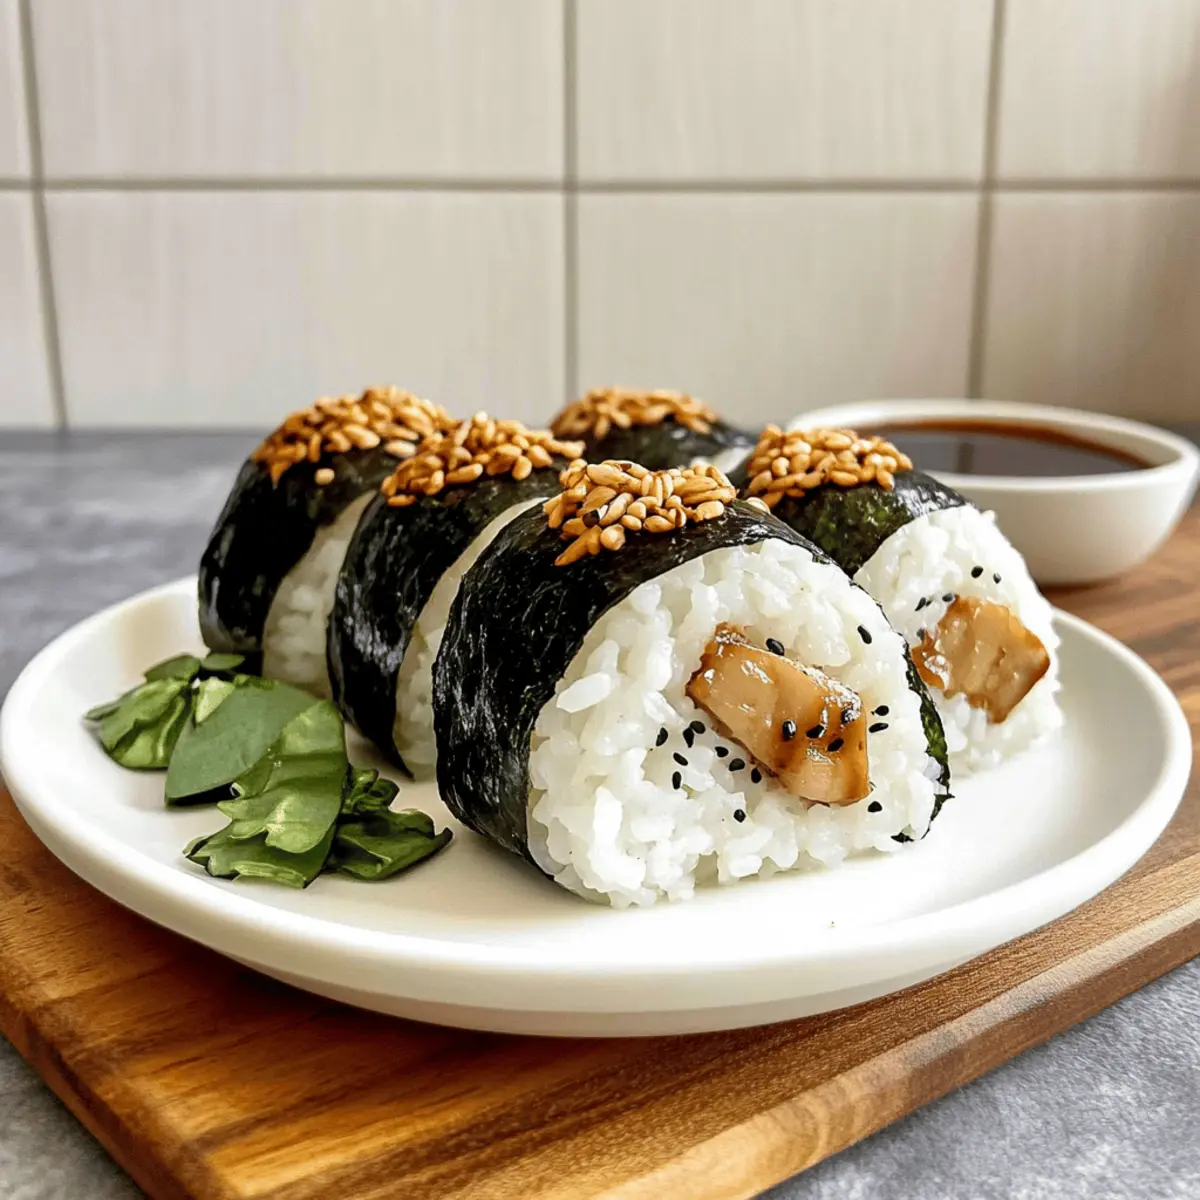
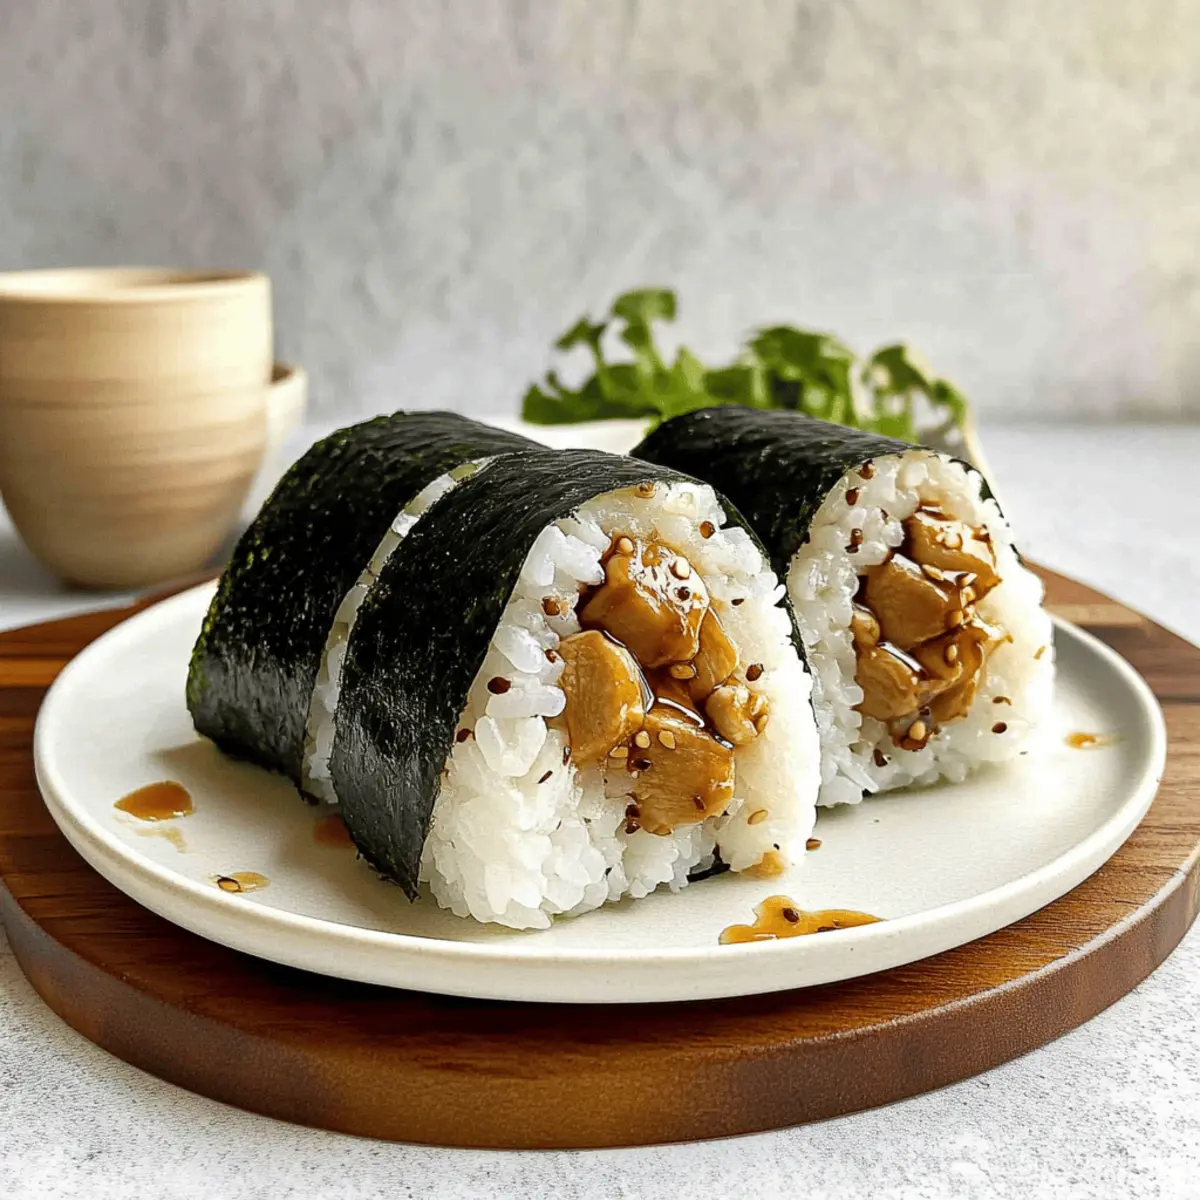
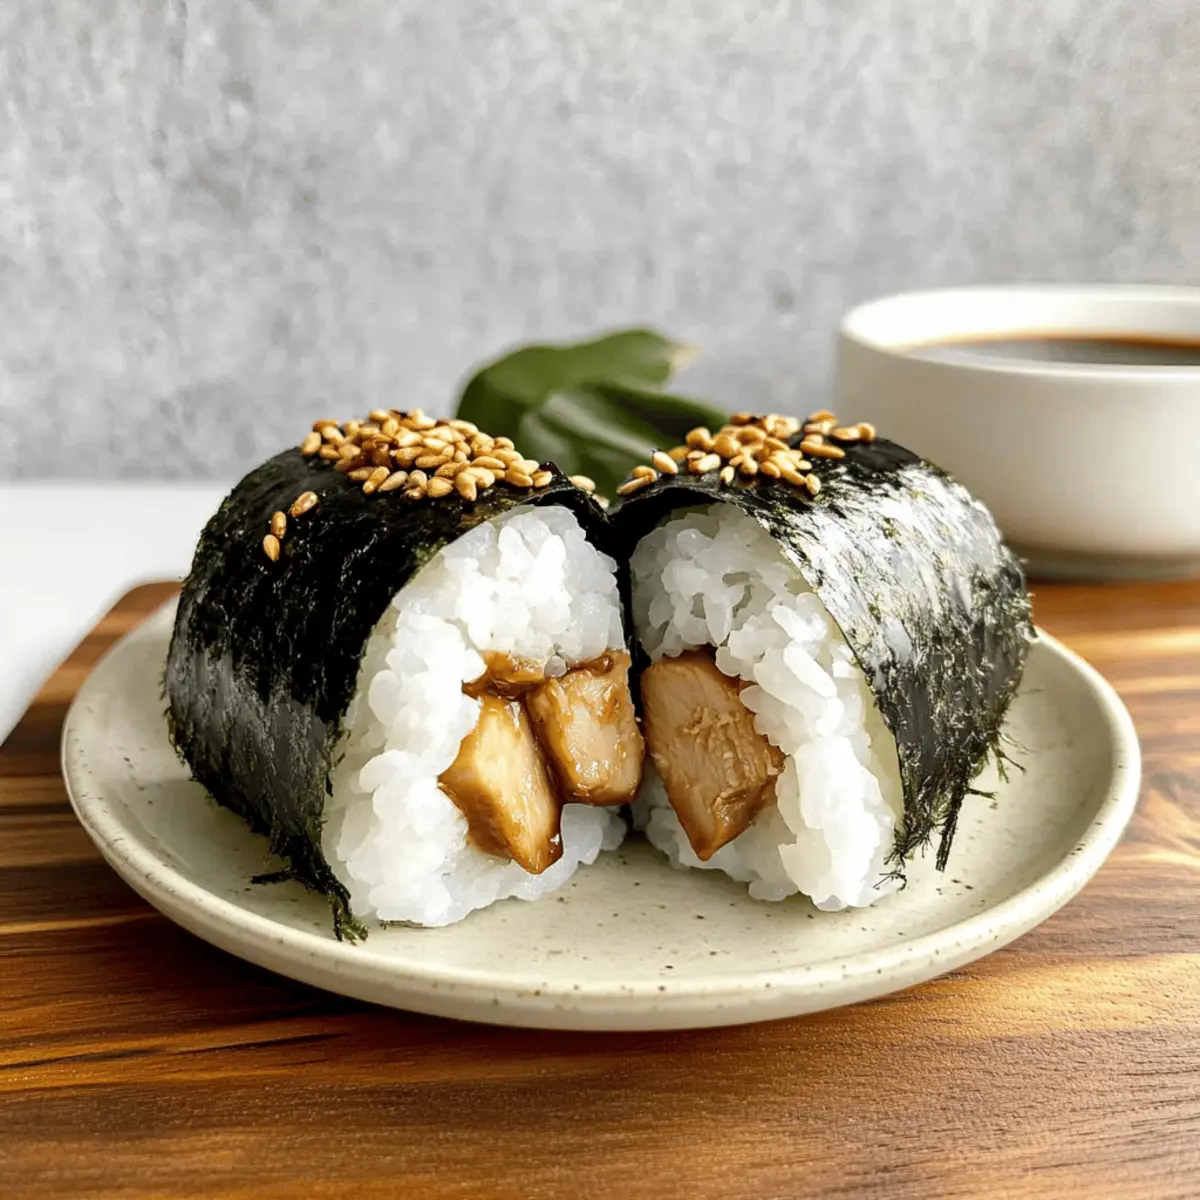
Once the sushi rice has cooled slightly, wet your hands to prevent sticking and scoop about 1/3 cup of rice into your palm to form a small ball. Create a well in the center and fill it with a generous spoonful of the teriyaki chicken mixture. Cover the filling with more rice and shape it into a triangle, pressing firmly but gently to hold it together.
Step 6: Wrap & Serve
Cut nori sheets into rectangles, and wrap a piece around the base of each Chicken Onigiri. This not only adds flavor but also provides a convenient handle for on-the-go snacking. Serve immediately, or pack them up for lunch boxes or picnics, enjoying this delightful portable snack at your leisure!
Make Ahead Options
Preparing Chicken Onigiri in advance is a fantastic way to streamline your meal planning! You can cook the sushi rice and marinate the chicken up to 24 hours ahead. Simply refrigerate the cooked rice in an airtight container and store the marinated chicken in a covered bowl until you’re ready to cook. When it’s time to assemble your onigiri, just sauté the marinated chicken until golden and mix it with the teriyaki sauce. Shape the rice and filling into triangles as you normally would, wrap them with nori, and they’ll still be just as delicious! By prepping these key components beforehand, you’ll save time on busy weekdays while still enjoying a homemade meal.
How to Store and Freeze Chicken Onigiri
Fridge: Store your Chicken Onigiri in an airtight container for up to 2 days. Reheat in the microwave briefly to enjoy warm, fluffy rice and juicy filling.
Freezer: For longer storage, freeze individually wrapped onigiri with plastic wrap. They can be kept for up to 1 month. Thaw in the fridge overnight and reheat in the microwave before serving.
Reheating: When ready to eat, reheat in a microwave or a steamer to maintain the moisture in the rice while warming the teriyaki chicken filling.
Enjoy Freshness: Though they can be stored, Chicken Onigiri are best enjoyed fresh for the ultimate flavor experience!
Expert Tips for Chicken Onigiri
-
Wet Hands: Always wet your hands when handling sticky rice to prevent it from clinging to your fingers. This ensures easy shaping and a neat presentation.
-
Cut Chicken Evenly: To achieve consistent cooking, cut the chicken into evenly sized pieces. This will help ensure that every bite of your Chicken Onigiri is juicy and cooked perfectly.
-
Marination Time: Extend the marinating time beyond 30 minutes for enhanced flavor and tenderness. If you can, let the chicken marinate for a few hours, or even overnight!
-
Use Soft Rice: After cooking the sushi rice, let it rest covered for about 10 minutes to achieve that desired sticky texture; this is vital for forming perfect onigiri.
-
Nori Application: Wrap nori just before serving to prevent it from becoming soggy. Enjoy the crispiness that elevates the overall experience of your Chicken Onigiri!
Chicken Onigiri Variations & Substitutions
Feel free to customize your Chicken Onigiri with these fun ideas that add unique flavors and textures to this delightful snack!
-
Chicken Cut Swaps: Use boneless chicken thighs or ground chicken instead of drumsticks for a different texture and taste.
-
Spicy Twist: Replace teriyaki sauce with your favorite spicy sauce or Sriracha for an electrifying kick that will awaken your taste buds.
-
Whole Grain Alternative: Swap short-grain rice for brown rice for added fiber. Cooking time may need adjustment.
-
Veggie Filling: For a vegetarian option, substitute the chicken with sautéed mushrooms and diced bell peppers mixed with teriyaki sauce.
-
Cheesy Surprise: Add a sprinkle of shredded cheese like mozzarella inside the onigiri for a creamy, unexpected twist that melts delightfully.
-
Herbaceous Flavor: Mix chopped green onions or fresh cilantro into the sushi rice for an aromatic enhancement that brightens the flavor.
-
Nutty Crunch: Sprinkle toasted sesame seeds on top of the finished onigiri for an enticing crunch that complements the soft rice.
-
Umami Boost: Experiment by using miso paste in the chicken marinade for an extra depth of flavor that makes each bite unforgettable.
For more delicious ideas, don’t hesitate to check out variations like our spicy chicken teriyaki or the always-popular vegetable onigiri for a different take!
What to Serve with Teriyaki Chicken Onigiri
Elevate your Chicken Onigiri experience by pairing it with delightful sides that complement its flavors and textures.
-
Pickled Vegetables: The tangy crunch of pickled vegetables adds a refreshing contrast, enhancing the savory profile of your onigiri.
-
Miso Soup: A warm bowl of miso soup offers a soothing and umami-rich companion, creating a balanced meal that embodies comfort.
-
Asian Salad: Crisp veggies dressed in sesame dressing bring a burst of freshness, lightening the richness of the teriyaki chicken filling.
-
Edamame: Lightly salted and steamed edamame provides a protein-packed snack that pairs beautifully without overpowering the dish.
-
Sliced Avocado: The creamy texture of sliced avocado adds a luxurious mouthfeel, enhancing the overall experience with its natural richness.
-
Green Tea: A warm cup of green tea refreshes the palate and harmonizes with the flavors, grounding the meal in beloved Japanese tradition.
Enjoy these side dishes for a complete and satisfying culinary experience!
Chicken Onigiri Recipe FAQs
What kind of rice should I use for Chicken Onigiri?
Absolutely, you’ll want to use short-grain sushi rice for Chicken Onigiri! This type of rice has the perfect stickiness that allows it to hold its shape while providing a wonderfully soft texture. Rinse the rice before cooking to remove excess starch, and remember to use more water than you typically would for regular rice—around 1.5 cups of water for every cup of rice for optimal results.
How long can I store Chicken Onigiri in the fridge?
You can store Chicken Onigiri in an airtight container in the refrigerator for up to 2 days. When you’re ready to enjoy them again, simply reheat them in the microwave for about 30 seconds to bring back that delightful warmth and flavor. They’re best eaten fresh, though, as the rice maintains its perfect texture when just made!
Can I freeze Chicken Onigiri?
The more the merrier when it comes to meal prep! You can freeze Chicken Onigiri by wrapping each piece individually in plastic wrap and then placing them in a zip-top freezer bag. They can be kept for up to 1 month. To thaw, simply put them in the fridge overnight and then reheat them in the microwave. This method helps keep the rice moist while warming the filling.
What should I do if the rice is too sticky to handle?
Very good question! If you find the rice too sticky, simply wet your hands with water before shaping the onigiri. This prevents the rice from clinging to your fingers and makes shaping them into triangles much easier. It’s a key trick that I often use in my kitchen!
Are there any dietary considerations with Chicken Onigiri?
Definitely! While Chicken Onigiri is a fantastic snack, it’s essential to consider any allergies, especially to soy sauce (which contains gluten) and chicken. For gluten-free options, use tamari instead of soy sauce. Additionally, if you’re sharing these with pets, remember to keep them away from the nori and chicken, as some ingredients may not be safe for animals.
Can I substitute the chicken with other proteins?
Yes, you can absolutely substitute different proteins! Ground chicken, turkey, or even tofu for a vegetarian twist work wonderfully in this recipe. Just adjust the cooking time accordingly—ground meats cook faster, while tofu may need to be cubed and pan-fried before adding to the onigiri. Enjoy experimenting with different flavors!
Delicious Chicken Onigiri: Your New Favorite Portable Snack
Ingredients
Equipment
Method
- Rinse sushi rice under cold water until clear, combine with water and salt, then cook according to rice cooker's instructions. Let sit covered for 10 minutes.
- Cut chicken into bite-sized pieces, marinate with soy sauce, sake, baking soda, and cornstarch for 30 minutes in the refrigerator.
- Whisk together soy sauce, mirin, and brown sugar in a bowl until dissolved to make the teriyaki sauce.
- Heat oil in a nonstick pan, sauté marinated chicken for 2-3 minutes until golden, add garlic, then pour in teriyaki sauce and cook until thickened.
- Wet hands, scoop rice into palm to form a ball, fill with teriyaki chicken, cover with more rice, and shape into a triangle.
- Wrap nori around each onigiri and serve immediately or pack them for lunch.
Leave a Reply