
As I cracked open a freshly roasted packet of green chiles, the smoky scent wrapped around me like a cozy blanket. There’s something undeniably comforting about digging into a dish that combines the rich flavors of traditional Mexican cuisine, which is exactly what you’ll find in this Chile Rellenos Casserole. This oven-baked delight not only offers a fun twist on a beloved classic but also makes for an incredibly easy and budget-friendly meal. Perfect for any occasion—be it an early breakfast or a hearty dinner—this casserole effortlessly captures the essence of comfort food while being flexible enough to accommodate various dietary needs. Are you ready to savor each warm, cheesy bite? Let’s get cooking!
Why is this casserole so comforting?
Comforting, Imagine a dish that embodies warmth and nostalgia; this Chile Rellenos Casserole delivers just that. Easy to prepare, you can whip it up quickly, making it perfect for busy weeknights. Flexibility is key—customize ingredients to suit your taste or dietary needs. Rich flavors of smoky chiles and gooey cheese create a delightful experience that pleases everyone at the table. Make-ahead option? You can assemble it in advance, ensuring a stress-free meal that you can pop in the oven anytime. Last but not least, this casserole is the ultimate crowd-pleaser, sure to impress guests and family alike!
Chile Rellenos Casserole Ingredients
For the Casserole
- Roasted Green Chiles – Adds smoky and slightly spicy flavor; if short on fresh, use canned fire-roasted chiles.
- Monterey Jack Cheese – Provides creaminess and excellent meltability; substitute with Pepper Jack for extra heat or Mozzarella for a milder option.
- Eggs – Act as the binding agent, giving the casserole its fluffy texture; be sure to beat until pale for best results.
- Whole Milk – Adds richness; can be replaced with half-and-half for extra creaminess or unsweetened almond milk for a dairy-free option.
- All-Purpose Flour – Helps structure the casserole; gluten-free flour blends can be used as a substitute.
- Salt and Pepper – Essential for seasoning; adjust to your taste as needed.
Optional Toppings
- Sour Cream – A dollop adds a tangy creaminess that complements the casserole perfectly.
- Fresh Cilantro – Sprinkle for a fresh burst of flavor and a pop of color.
- Sliced Avocado – Adds a buttery richness that pairs beautifully with the spicy chiles.
This Chile Rellenos Casserole is sure to deliver comfort and warmth to your family meals!
Step‑by‑Step Instructions for Chile Rellenos Casserole
Step 1: Preheat the Oven
Begin by preheating your oven to 350°F (175°C). This ensures that your Chile Rellenos Casserole bakes evenly and develops that lovely golden top. While the oven heats, you can prepare the remaining ingredients, allowing for a smooth cooking experience as everything comes together.
Step 2: Whisk the Egg Mixture
In a large mixing bowl, whisk together the eggs, whole milk, all-purpose flour, salt, and pepper until the mixture is smooth and pale in color. This step is crucial for achieving a light and fluffy texture in your casserole. Take your time here to incorporate everything well, ensuring a delightful custard-like base for your dish.
Step 3: Layer the Chiles
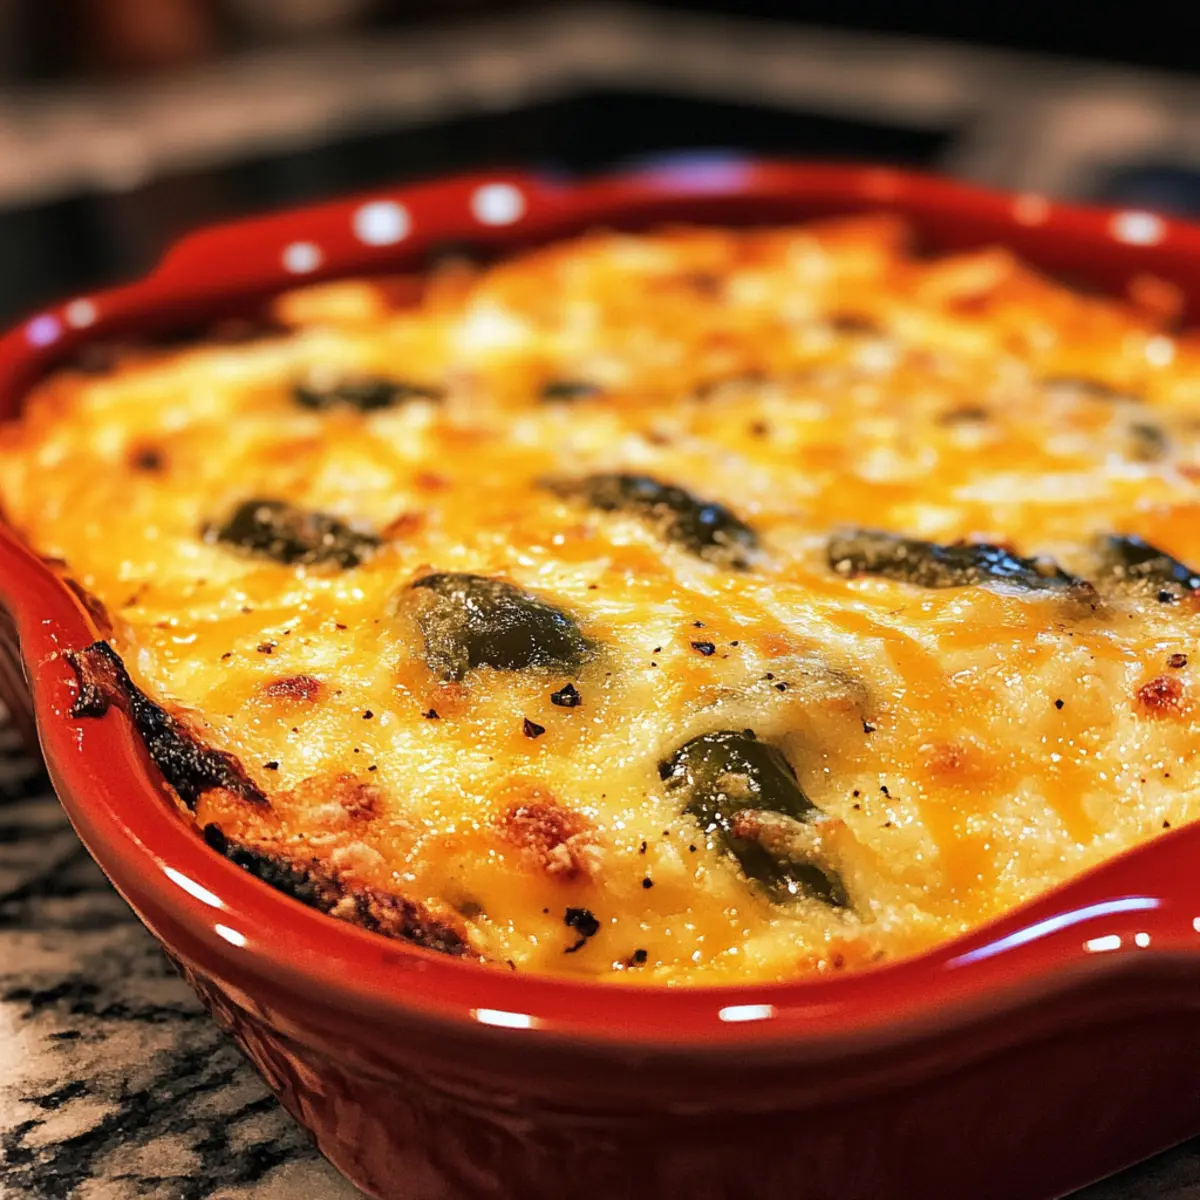
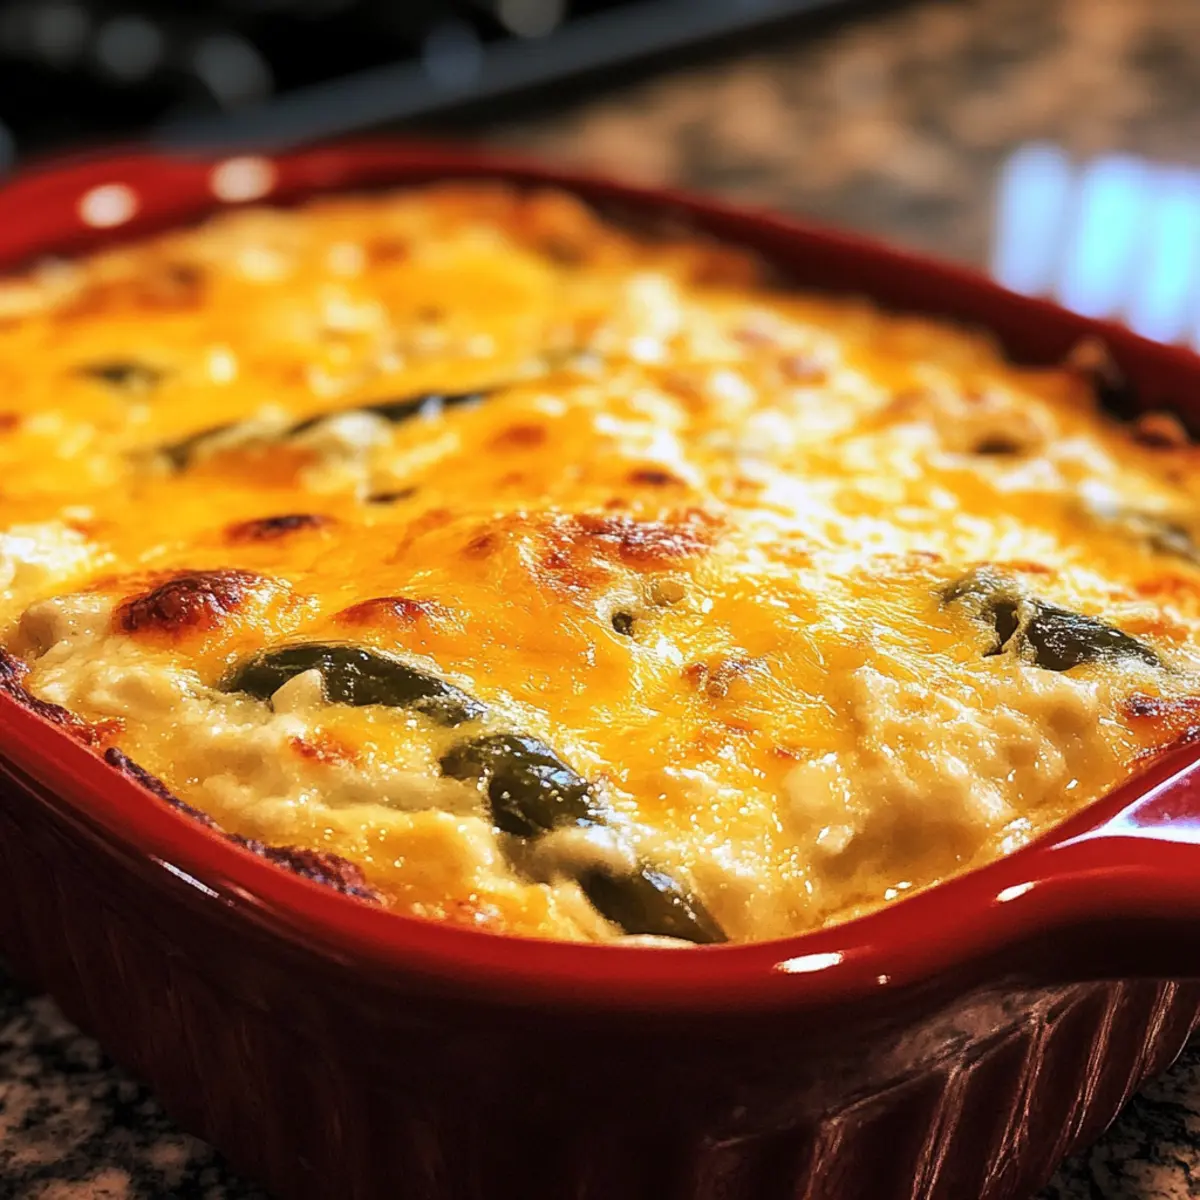
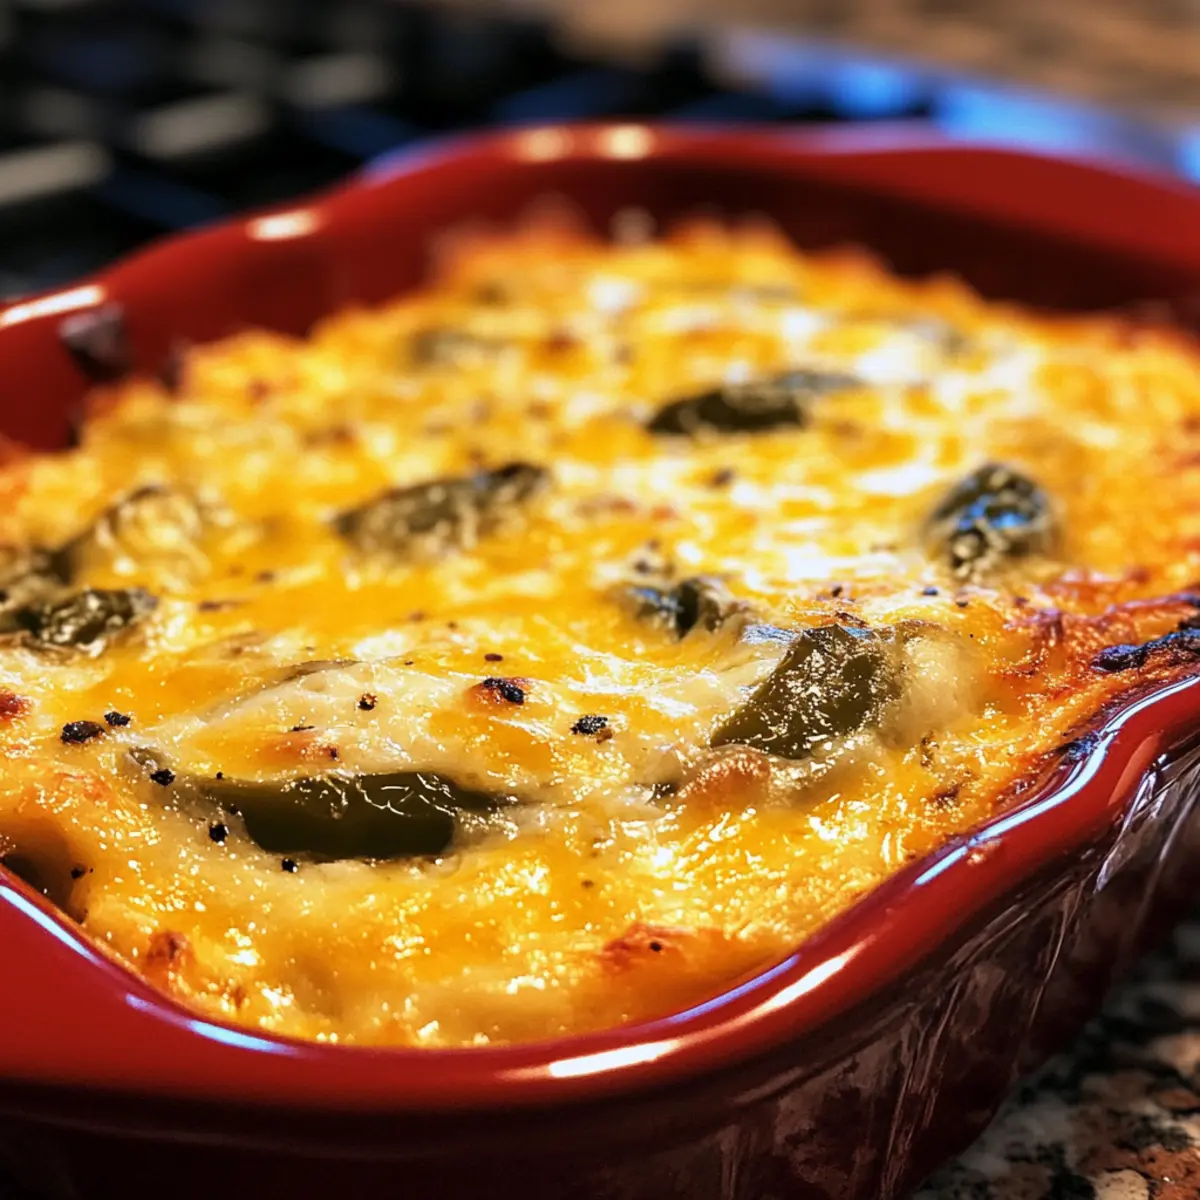
Grease a 9×9-inch baking dish to prevent sticking, then layer half of the roasted green chiles evenly across the bottom. These smoky peppers will add an irresistible flavor to your Chile Rellenos Casserole. Spread them out so that every bite has that rich, spicy goodness you love.
Step 4: Pour the Egg Mixture
Next, pour half of the egg mixture over the first layer of chiles, ensuring it seeps between them. This helps to bind the layers together beautifully. You’re creating a harmonious blend of flavors, so don’t rush—let it settle naturally before moving to the next step.
Step 5: Add Cheese
Sprinkle a generous layer of Monterey Jack cheese over the egg mixture, allowing its creamy richness to begin melting into the casserole. This cheese will enhance the comforting character of your dish as it bakes, turning golden and gooey. Make sure to cover the entire surface for maximum cheesy goodness.
Step 6: Repeat the Layers
Repeat the layering process by adding the remaining roasted chiles, followed by the rest of the egg mixture and another layer of cheese. This second round builds on the flavor and texture, ensuring every slice of your Chile Rellenos Casserole is just as delightful as the first.
Step 7: Bake to Perfection
Place the casserole in the preheated oven and bake for 35 minutes. Keep an eye on it; the top should be golden brown and a knife inserted into the center should come out clean. This indicates that your dish is perfectly set and ready to serve, infusing your kitchen with mouthwatering aromas.
Step 8: Cool Before Serving
Once baked to perfection, remove the casserole from the oven and let it cool for a few minutes before slicing. This brief cooling period allows the flavors to meld and makes serving easier. Your Chile Rellenos Casserole is now ready to dish out—gather your loved ones and enjoy the delightful meal together!
Expert Tips for Chile Rellenos Casserole
- Perfect Dish Size: Use an 8×8 or 9×9 baking dish for optimal baking results. This size ensures even cooking and a lovely golden top.
- Prevent Sogginess: Let the roasted chiles cool before adding them to your casserole. This prevents excess moisture that could make the casserole soggy.
- Cheese Options: Don’t hesitate to experiment with different cheese types! Pepper Jack adds heat, while Queso Fresco gives a nice crumbly texture. Just remember to keep the cheese layer generous for that gooey goodness in your Chile Rellenos Casserole.
- Batch Baking: If you want to bake from frozen, ensure to cover tightly with foil and add extra baking time. This helps it cook through evenly without burning the top.
- Texture Tips: Whisk your egg mixture until it’s really light and frothy. This step is key for achieving that fluffy texture everyone loves in a casserole.
What to Serve with Chile Rellenos Casserole
Elevate your Chile Rellenos Casserole experience by pairing it with delightful sides that complement its rich, comforting flavors.
- Warm Tortillas: Soft, warm tortillas are perfect for scooping up creamy bites, adding a delightful texture and enhancing the meal’s overall heartiness.
- Fresh Green Salad: A crisp, refreshing salad with a zingy vinaigrette cuts through the richness, providing a light, bright contrast to the casserole’s warmth.
- Black Beans: Seasoned black beans bring a protein-packed, hearty element, complementing the smoky chiles with their earthy flavor and creamy texture.
- Tangy Salsa: A dollop of homemade salsa introduces a burst of freshness and acidity, brightening each slice of the casserole and rounding out the flavors beautifully.
- Sour Cream: Creamy sour cream adds a cool, tangy note that balances the casserole’s heat perfectly, making every forkful even more enjoyable.
- Avocado Slices: Buttery avocado provides a rich, velvety texture that pairs wonderfully with the casserole, enhancing its comforting nature while providing healthy fats.
- Cornbread: Sweet and slightly crumbly, cornbread serves as a great side, soaking up the casserole’s flavors while offering a delightful contrast in texture.
- Chilled White Sangria: A fruity, chilled sangria is a refreshing drink option that enhances the overall meal vibe, making every bite feel like a festive celebration.
- Chocolate Flan: Finish off your meal with a slice of velvety chocolate flan, which offers a luscious and smooth end to your cozy culinary experience.
How to Store and Freeze Chile Rellenos Casserole
- Room Temperature: Allow the casserole to cool completely before storing; however, avoid leaving it out for more than 2 hours to keep it safe.
- Fridge: Store leftovers in an airtight container in the fridge for up to 4 days. Reheat individual portions in the microwave or bake in the oven until warmed through.
- Freezer: For longer storage, wrap the cooled casserole tightly in plastic wrap and then aluminum foil. Freeze for up to 2 months.
- Reheating: When ready to enjoy, thaw overnight in the fridge, and bake at 350°F (175°C) for 25-30 minutes, until heated throughout. Your Chile Rellenos Casserole will retain its delicious flavors!
Chile Rellenos Casserole Variations
Feel free to sprinkle some creativity into your Chile Rellenos Casserole with these delightful variations!
-
Meat Lover’s Delight: Add cooked chorizo or shredded chicken for hearty protein that enhances flavor and satisfaction. Just mix it in with the chiles for a meaty twist.
-
Spicy Kick: For those who crave heat, use jalapeños instead of green chiles or a splash of your favorite hot sauce in the egg mixture. A little spice can take the dish to fiery new heights!
-
Dairy-Free: Swap out the cheese and milk for plant-based alternatives like cashew cream and vegan cheese to create a delicious vegan version. This still keeps the comforting essence of the casserole intact.
-
Additional Veggies: Toss in sautéed bell peppers, zucchini, or corn for added texture and nutrition. They bring a colorful touch and make each bite even more visually appealing.
-
Herb-Infused: Mixing in fresh cilantro or green onions enhances the dish with fresh, aromatic flavors. Just fold them into the egg mixture before layering.
-
Breakfast Twist: Add diced breakfast potatoes or cooked crispy bacon for a brunch twist that’s great for family gatherings. Who can resist a savory breakfast casserole?
-
Cheese Varieties: Experiment with different cheeses like feta or Gouda for unique flavor profiles. Each type brings its own delightful character, so don’t hesitate to mix and match!
-
Gluten-Free: Substitute all-purpose flour with a gluten-free blend or use cornstarch for a light and airy base. This works beautifully to cater to gluten-sensitive family members.
By creating your own personalized version, you can turn this already special casserole into your family’s new favorite meal. Whether you opt for extra heat or fresh veggies, the possibilities are as endless as your culinary imagination!
Make Ahead Options
Preparing this Chile Rellenos Casserole ahead of time is a game changer for busy cooks! You can assemble the entire casserole up to 24 hours in advance. Simply layer all the ingredients as directed, cover tightly with plastic wrap, and refrigerate. This not only saves you time during your busy mornings or evenings but also allows the flavors to meld beautifully. If you need more time, you can freeze it for up to 2 months; just be sure to thaw it in the refrigerator overnight before baking. When ready to bake, simply remove it from the fridge, let it sit at room temperature for about 30 minutes, then pop it in the oven as per the recipe instructions. Enjoy a delicious, hassle-free meal!

Chile Rellenos Casserole Recipe FAQs
How do I choose the right roasted green chiles?
Absolutely! When selecting roasted green chiles, look for vibrant colors—bright green or even slightly charred peels. If using fresh, opt for firm, straight chiles without dark spots. If going for canned, choose fire-roasted products without added preservatives for a smoky flavor.
How should I store leftover Chile Rellenos Casserole?
Very easy! Allow the casserole to cool completely, then transfer it into an airtight container. It will keep well in the fridge for up to 4 days. If you want to enjoy it later, reheat individual portions in the microwave or pop the whole dish back in the oven at 350°F (175°C) until heated through.
Can I freeze the Chile Rellenos Casserole?
Yes, you can! To freeze, first let the casserole cool completely. Wrap it tightly with plastic wrap, then cover it with aluminum foil to prevent freezer burn. It can be stored in the freezer for up to 2 months. When you’re ready to enjoy it, thaw it overnight in the refrigerator, then reheat in the oven at 350°F (175°C) for about 25-30 minutes until it’s hot throughout.
What should I do if my casserole is soggy?
It’s a common issue that can be fixed! Make sure your roasted chiles are properly cooled and drained, as excess moisture can lead to a soggy casserole. If you’ve already baked it and find it too wet, letting it sit uncovered in the oven for a few minutes can help evaporate some moisture and improve the texture.
Are there any dietary considerations I should keep in mind when making this casserole?
Definitely! This Chile Rellenos Casserole is naturally vegetarian, but if you have any allergies, be aware of the ingredients. Common allergens include eggs, cheese (dairy), and gluten from flour. For a dairy-free version, substitute the cheese with a plant-based alternative and use unsweetened almond milk. Ensure to check labels for packaged products, especially canned chiles, to avoid added ingredients that could trigger allergies.
What can I do to make this casserole spicier if desired?
The more the merrier! If you prefer a spicier kick, you can use hotter varieties of chiles, such as Anaheim or Serrano, or mix in a dash of hot sauce into the egg mixture. Adjusting the amount of cheese is another way to control the heat level; a cheese such as Pepper Jack can also elevate the spice factor while adding creaminess.
Delicious Chile Rellenos Casserole for Cozy Family Meals
Ingredients
Equipment
Method
- Preheat the oven to 350°F (175°C). Prepare the remaining ingredients.
- In a large bowl, whisk together eggs, whole milk, all-purpose flour, salt, and pepper until smooth and pale.
- Grease a 9x9-inch baking dish and layer half of the roasted green chiles across the bottom.
- Pour half of the egg mixture over the first layer of chiles.
- Sprinkle a layer of Monterey Jack cheese over the egg mixture.
- Repeat the layering with the remaining roasted chiles, the rest of the egg mixture, and another layer of cheese.
- Bake in the preheated oven for 35 minutes, until golden brown.
- Let it cool for a few minutes before slicing and serving.
Leave a Reply