
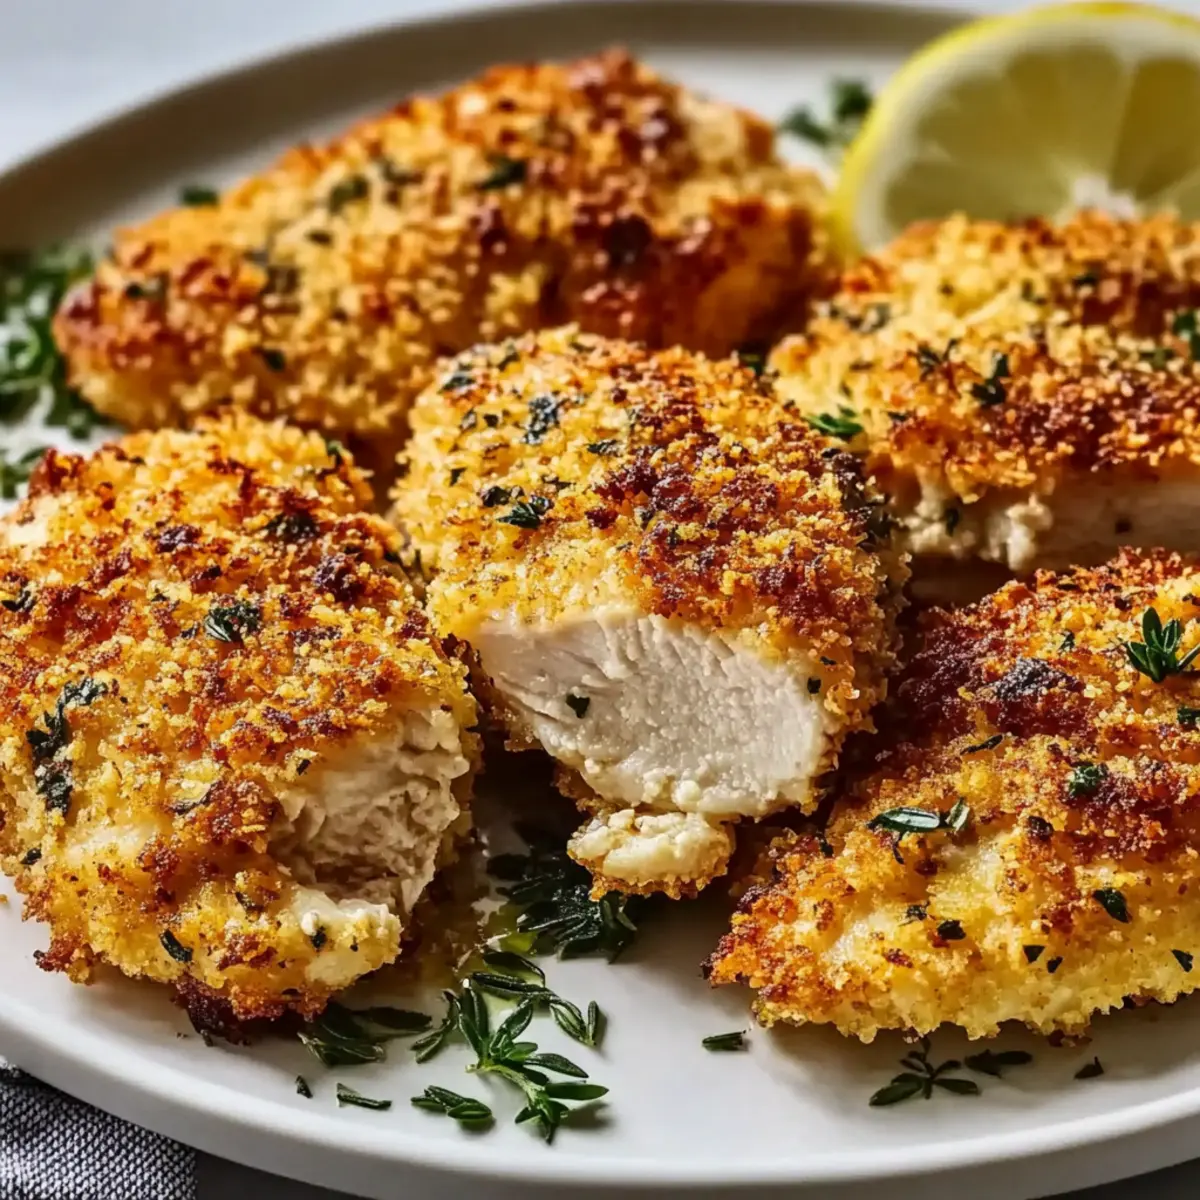
There’s nothing quite like the satisfying crunch of crispy panko baked chicken to lift your spirits after a long day. As I pulled this dish from the oven, the golden coating shimmered, promising a delightful contrast to the juicy chicken underneath. This isn’t just any chicken recipe; this crispy panko baked chicken offers a healthier alternative to traditional fried chicken, allowing you to indulge without the guilt. With minimal oil and the option to go gluten-free, this dish is as versatile as it is delicious—perfect for busy weeknights or casual family gatherings. Imagine serving this crowd-pleaser to your loved ones, and watching them eagerly reach for seconds! Are you ready to discover your new favorite go-to recipe?
Why is crispy panko chicken irresistible?
Crispy Crunch: Each bite of this crispy panko baked chicken delivers a satisfying crunch that’s hard to resist, providing the texture you crave without the excess oil.
Flavorful Simplicity: With simple ingredients like panko breadcrumbs and spices, this dish is packed with flavor yet easy to prepare, making weeknight dinners stress-free.
Healthy Alternative: Enjoy all the comfort of fried chicken, but with a guilt-free twist that fits seamlessly into your clean-eating lifestyle. For more healthy dinners, check out our collection of quick recipes.
Versatile Varieties: Customize your chicken with exciting flavors like a spicy kick or Italian herbs, making it a meal that satisfies everyone at the table.
Meal Prep Dream: Perfect for batch cooking! Prepare extra for quick lunches throughout the week—just reheat on a wire rack in the oven for that fresh crunch again!
Crispy Panko Baked Chicken Ingredients
• Here’s everything you need for this deliciously crispy dish!
For the Chicken
- Boneless chicken breasts – Ensure they’re pounded to ¾-inch thickness for even cooking.
- Eggs – Beaten to act as the adhesive for the panko.
For the Coating
- Panko breadcrumbs – Provides that essential crunchy texture; toasting them enhances crispiness.
- Whole-wheat flour – Lightly coating the chicken helps the panko adhere beautifully.
- Olive oil spray – A light mist ensures even browning; essential for achieving that crispy finish.
Seasoning
- Salt & black pepper – Vital for enhancing the overall flavor profile.
- Garlic powder – Optional, but it gives a wonderful flavor boost.
- Paprika – Adds a splash of color and a hint of flavor, if desired.
- Parmesan cheese – Optional for an umami punch; feel free to substitute or omit.
For Garnish
- Fresh parsley – A lovely addition for presentation and a hint of freshness.
Notes
- For a gluten-free version of this crispy panko baked chicken, simply swap the panko and flour with gluten-free alternatives!
Step‑by‑Step Instructions for Crispy Panko Baked Chicken
Step 1: Preheat the Oven
Start by preheating your oven to 425°F (220°C). This temperature is perfect for achieving that golden, crispy crust while keeping the chicken juicy inside. Grab a sturdy baking sheet and a wire rack to allow air circulation underneath the chicken, helping it cook evenly.
Step 2: Toast the Panko
In a dry skillet over medium heat, add the panko breadcrumbs. Toast them for 3-4 minutes, stirring frequently until they turn light golden brown. This step enhances the crunch factor of your crispy panko baked chicken. Keep a close eye to prevent burning, then remove from heat and set aside to cool slightly.
Step 3: Prepare the Dredging Station
Set up a dredging station using three shallow bowls. Place seasoned whole-wheat flour in the first bowl, beat your eggs in the second bowl, and pour the toasted panko into the third. This organized setup ensures efficient coating of each chicken piece, maximizing flavor and crunch for the crispy panko baked chicken.
Step 4: Dredge the Chicken
Take each prepared boneless chicken breast and dredge it in the seasoned flour until evenly coated. Next, dip it into the beaten eggs, allowing any excess to drip off. Finally, coat the chicken in the toasted panko, pressing gently to adhere. This three-step process guarantees a beautifully crispy exterior.
Step 5: Arrange and Mist the Chicken
Once all chicken pieces are coated, place them on the wire rack set atop the baking sheet. Ensure there’s space between each piece for optimal airflow and even cooking. Mist the chicken lightly with olive oil spray to promote browning and crispiness during baking.
Step 6: Bake Until Golden
Transfer the baking sheet to the preheated oven and bake the crispy panko baked chicken for 20-25 minutes. Halfway through, flip the chicken to ensure an even golden color. You’ll know it’s done when the coating is beautifully crisp and the chicken is cooked through with no pink inside.
Step 7: Broil for Extra Crispness
For an additional level of crunch, switch the oven to broil. Broil the chicken for just 1-2 minutes, keeping a close watch to prevent burning. This final step enhances the crispy texture of the panko coating, making your dish even more irresistible.
Step 8: Rest Before Serving
Once baked to perfection, remove the crispy panko baked chicken from the oven and let it rest for 5 minutes. This resting period allows juices to redistribute, ensuring your chicken remains moist and tender. After resting, garnish with fresh parsley if desired and prepare to serve!
Crispy Panko Baked Chicken Variations
Feel free to make this crispy panko baked chicken your own—let your creativity shine through in the kitchen!
-
Spicy Version: Mix in cayenne or hot sauce with the eggs for a fiery kick that will awaken your taste buds. If you love a bit of heat, this twist will add a delightful zing that transforms your dish into an exciting adventure.
-
Italian Style: Add dried oregano and more Parmesan to the panko for a Mediterranean flavor boost. This variation brings a burst of aromatic goodness with every bite, making it perfect for those evenings when you’re craving an Italian touch.
-
Asian Fusion: Incorporate sesame oil and a splash of soy sauce into the panko mixture for an umami-rich twist. This will transport your taste buds to Asia, creating a mouthwatering blend of flavors that will leave everyone at the table craving more.
-
Lemon Herb Twist: Zest up your serving with fresh lemon juice and thyme for a refreshing, bright finish. This variation not only enhances the flavor but also adds a vibrant touch that’s wonderful for spring and summer meals.
-
Family Feast: Drizzle a honey garlic glaze over the chicken for a delectable sweet-savory combo. This family-friendly twist brings everyone together, inviting seconds in a heartbeat!
-
Dairy-Free Delight: Substitute almond milk for eggs and skip the Parmesan for a dairy-free version. Catering to dietary needs doesn’t mean sacrificing flavor; keep it delicious while being mindful of preferences.
-
Nutty Panko: Blend in some crushed nuts like almonds or walnuts with the panko for added crunch and flavor. It’s a fantastic way to surprise your palate with delightful textures that enhance the chicken perfectly.
-
BBQ Bliss: Toss the baked chicken in your favorite barbecue sauce towards the end of baking for a smoky, tangy treat. This delightful edition is fantastic for summer get-togethers, making your dish the star of the show.
Why not pair your crispy panko baked chicken with a refreshing salad or roasted vegetables for a balanced meal? And for those lovely leftovers, remember to check out our tips on reheating to keep that crunch intact!
What to Serve with Crispy Panko Baked Chicken
The perfect meal companion can elevate your crispy panko baked chicken from delightful to extraordinary, creating a feast that tempts the senses.
-
Creamy Mashed Potatoes: These buttery potatoes offer a smooth and comforting contrast to the crunch of your chicken, making each bite a balanced delight.
-
Garlic Roasted Asparagus: The earthy flavors and slight bitterness of the asparagus complement the crunchiness of the chicken, adding a vibrant twist to your plate.
-
Fresh Garden Salad: Crisp greens and colorful veggies drizzled with a tangy vinaigrette add a refreshing touch that cuts through the richness of the chicken.
-
Honey Mustard Dipping Sauce: A sweet and tangy dip enhances the chicken’s flavor while giving you that extra dose of nostalgia—perfect for a finger-licking experience!
-
Quinoa Pilaf: Nutty and nutritious, quinoa offers a hearty base that pairs wonderfully with the crispy chicken, ensuring a wholesome meal without missing out on flavor.
-
Lemon Herb Couscous: Light and fluffy, the bright flavors of lemon and fresh herbs elevate the taste of the chicken, making every bite a burst of freshness.
-
Roasted Sweet Potatoes with Maple Glaze: Their natural sweetness beautifully balances the savory chicken, while their caramelized edges provide a delicious texture contrast.
-
Sparkling Water with Lime: A refreshing drink option that adds effervescence and a hint of citrus, cleansing the palate between bites of your crispy panko baked chicken.
-
Chocolate Fondue: End your meal with a touch of decadence! Pair fresh fruit and marshmallows with chocolate for a delightful sweet finish that everyone will love.
How to Store and Freeze Crispy Panko Baked Chicken
Fridge: Store leftover crispy panko baked chicken in an airtight container for up to 3 days. Keeping it sealed helps retain flavor and moisture.
Freezer: For longer storage, freeze individual pieces wrapped in plastic wrap and placed in a zip-top bag for up to 3 months. This way, you can enjoy them anytime!
Reheating: When you’re ready to enjoy your leftover crispy panko baked chicken, reheat it in the oven on a wire rack at 375°F (190°C) for 10-15 minutes. This will help maintain that delightful crunch.
Thawing: If frozen, move the chicken to the fridge the night before to thaw safely. Avoid using the microwave, as it can make the coating soggy.
Make Ahead Options
Crispy Panko Baked Chicken is a fantastic option for meal prep, saving you time during busy weeknights! You can marinate the boneless chicken breasts in a mixture of your favorite spices and even coat them with seasoned whole-wheat flour up to 24 hours in advance. Prepare the panko coating ahead of time by toasting the breadcrumbs and storing them in an airtight container for up to 3 days. When you’re ready to serve, simply dredge the marinated chicken in the egg wash and the prepared panko, then bake until golden. This way, you’ll enjoy just as delicious results with minimal evening effort!
Expert Tips for Crispy Panko Baked Chicken
-
Toast the Panko: Always toast panko before using. Un-toasted breadcrumbs yield a pale crust and less crunch, so don’t skip this step!
-
Space for Success: Avoid crowding the pan! Keep space between chicken pieces to allow air to circulate, preventing a soggy coating on your crispy panko baked chicken.
-
Watch the Temperature: Use a meat thermometer to check the chicken’s internal temp. Aim for 165°F (74°C) to ensure perfectly cooked chicken without drying it out.
-
Dry is Best: Pat chicken dry before dredging! Moisture can hinder the adherence of the panko, leading to a less crispy texture.
-
Rest for Juiciness: After baking, let the chicken rest for at least 5 minutes. This allows the juices to redistribute, keeping your chicken succulent and tender.
Crispy Panko Baked Chicken Recipe FAQs
What type of chicken is best for crispy panko baked chicken?
Absolutely! I recommend using boneless chicken breasts, as they cook evenly and stay juicy when pounded to ¾-inch thickness. If you prefer dark meat, boneless thighs also work beautifully!
How do I store leftover crispy panko baked chicken?
After you enjoy your meal, store leftovers in an airtight container in the fridge for up to 3 days. This helps retain the flavor and moisture, but try to eat them within this timeframe for the best experience.
Can I freeze crispy panko baked chicken?
Yes, you can! Wrap individual pieces tightly in plastic wrap, then place them in a zip-top bag or airtight container for up to 3 months. This way, you’ll have a delicious, ready meal waiting for you whenever you crave that guilt-free crunch!
What’s the best way to reheat crispy panko baked chicken?
To maintain the lovely crunch, reheat the chicken in the oven on a wire rack at 375°F (190°C) for about 10-15 minutes. This ensures that the coating stays crispy while the inside remains juicy. Avoid using the microwave, as it can make the crust soggy.
What should I do if my panko doesn’t stick to the chicken properly?
No worries! If you find the panko isn’t adhering well, make sure the chicken is patted dry before dredging. Moisture can interfere with adhesion. Additionally, ensuring that each layer—flour, egg, and finally the panko—is properly applied is key for that golden crust. Consider using a bit more egg to enhance adhesion!
Crispy Panko Baked Chicken for Guilt-Free Crunch Lovers
Ingredients
Equipment
Method
- Preheat your oven to 425°F (220°C).
- Toast the panko breadcrumbs in a dry skillet over medium heat for 3-4 minutes until golden brown.
- Set up a dredging station with seasoned flour, beaten eggs, and toasted panko in three shallow bowls.
- Dredge each chicken breast in seasoned flour, dip in beaten eggs, then coat in toasted panko.
- Arrange the coated chicken pieces on a wire rack over a baking sheet and mist lightly with olive oil spray.
- Bake for 20-25 minutes, flipping halfway, until golden and cooked through.
- Broil for 1-2 minutes for extra crispiness, keeping an eye to prevent burning.
- Let the chicken rest for 5 minutes before serving, garnished with fresh parsley.
Leave a Reply