
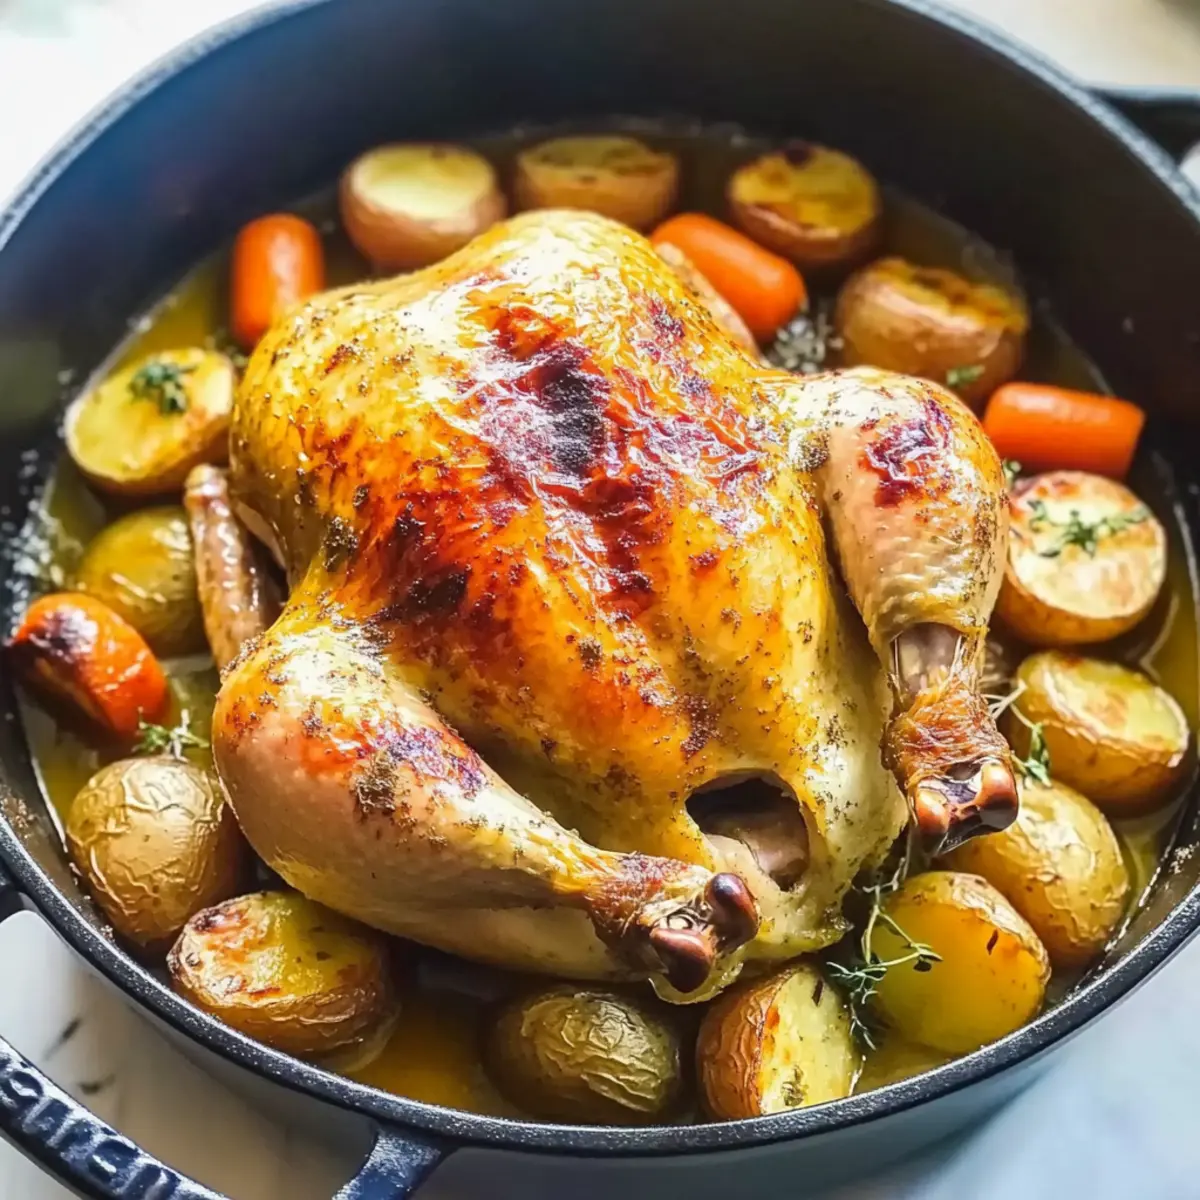
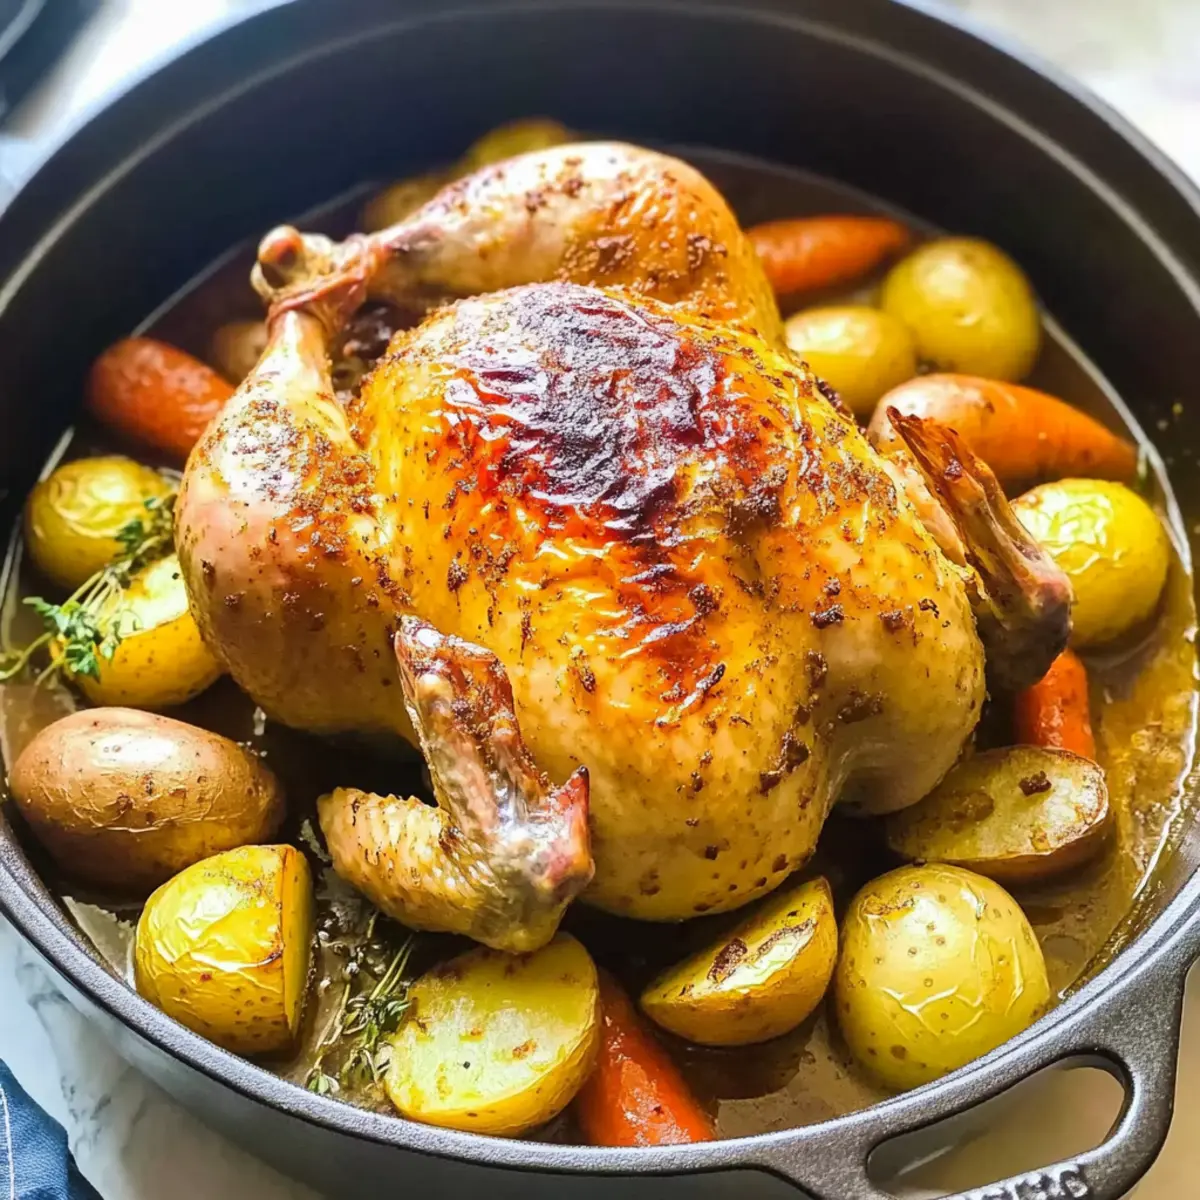
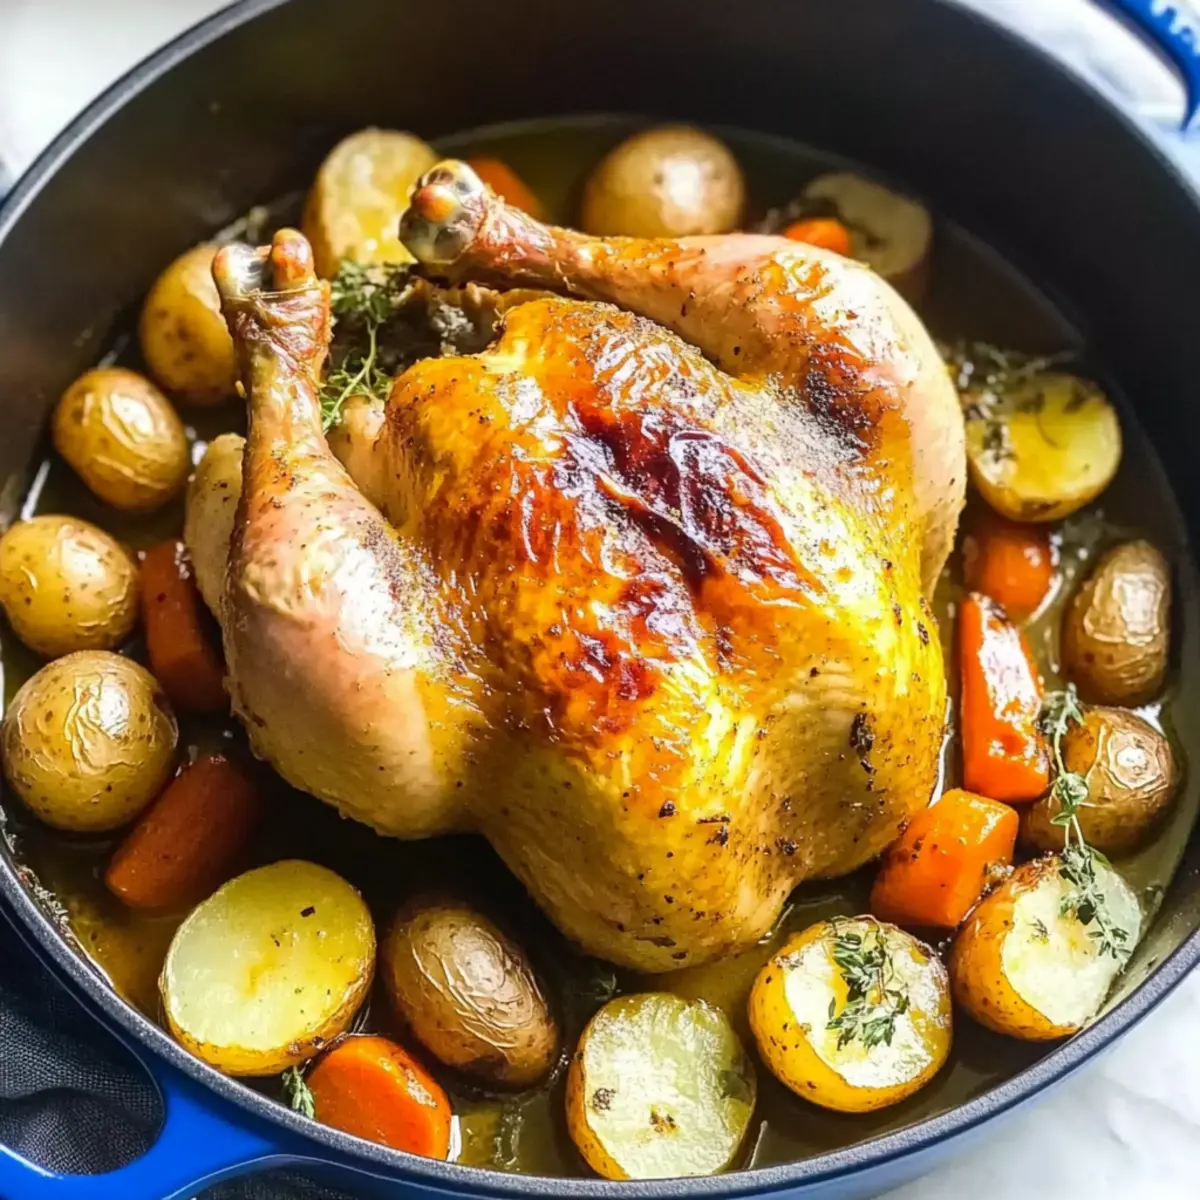
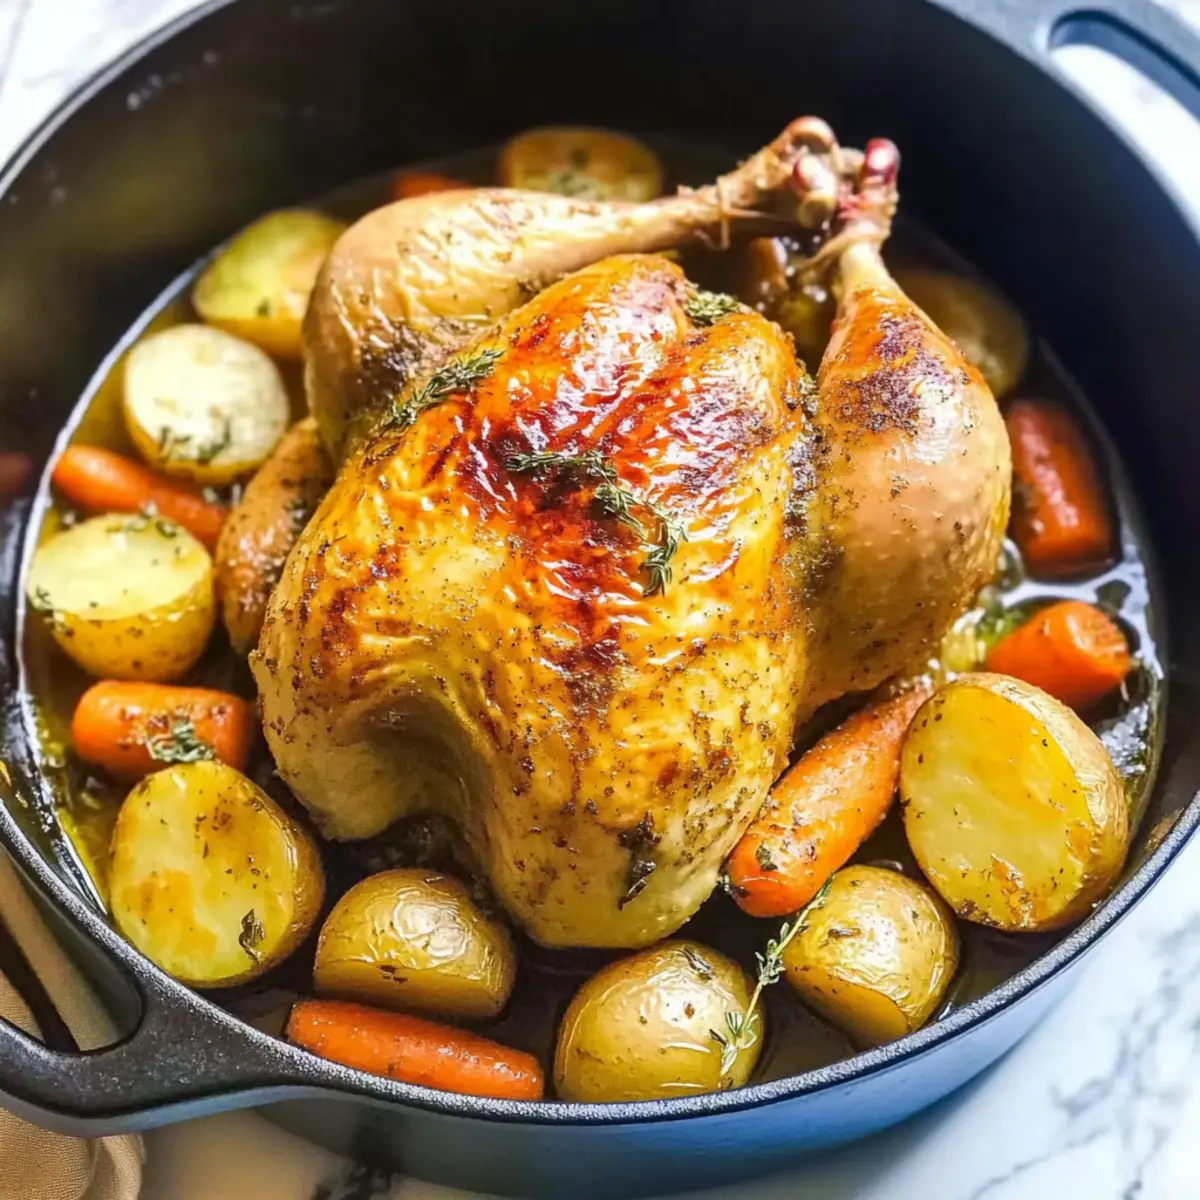
The aroma wafts through the kitchen, instantly transporting me to my childhood, where hearty meals meant warmth and family togetherness. This Juicy Dutch Oven Whole Chicken with Crispy Skin encapsulates that nostalgic comfort, delivering a perfectly roasted chicken that’s tender and moist, paired seamlessly with flavorful potatoes and carrots. What I adore about this one-pot wonder is not just how easy it is to prepare, but how it invites everyone to gather around the table, savoring each delicious bite. With minimal cleanup and maximum flavor, it’s the kind of meal that transforms ordinary evenings into special occasions. Ready to impress your loved ones with a dish that’s as comforting as it is tasty? Let’s dive into this simple yet unforgettable recipe!
Why is this chicken recipe a must-try?
Simplicity: With just one pot, you can create a complete meal that simplifies dinner time.
Crispy Skin: Achieve that coveted, crackling skin without any hassle, elevating your roast chicken game.
Juicy Meat: The juicy, tender meat will have everyone asking for seconds!
Versatility: Feel free to swap in seasonal veggies, making it a dish you can enjoy all year long.
Nostalgia: This recipe will bring comforting childhood memories to life, perfect for cozy family dinners.
Crowd-Pleasing: Ideal for gatherings, this Dutch Oven Whole Chicken guarantees smiles around the table! Need more dinner ideas? Check out our delicious one-pot meals here.
Dutch Oven Whole Chicken Ingredients
For the Chicken
- Whole Chicken – Use a 5-pound whole chicken for the best balance of flavor and moisture; adjust cooking time if your bird differs in weight.
- Unsalted Butter – Ensure the butter is softened for easy spreading under the skin, contributing moisture and flavor.
- Salt – Opt for kosher or sea salt to elevate the overall taste of your Dutch Oven Whole Chicken.
For the Seasoning
- Garlic Powder – Sprinkle this in for aromatic depth; fresh garlic may also be substituted if preferred.
- Onion Powder – Delivers a subtle sweetness, but fresh onion offers a more robust alternative if you desire.
- Dried Oregano – Infuses a lovely herbaceous note; feel free to swap it with Italian seasoning for variation.
- Dried Thyme – Provides warmth and earthiness; fresh thyme can be used for an even fresher flavor.
- Black Pepper – Adds seasoning with a hint of heat; white pepper serves well for a milder option.
For the Vegetables
- Baby Potatoes – These add heartiness and texture; parsnips can be a delightful substitute for a twist.
- Carrots – Sunglow orange and naturally sweet; consider celery or turnips for variety based on your preference.
For Moisture
- Chicken Broth – Keeps the meat moist while enhancing flavor; vegetable broth is a wonderful lighter substitute for this Dutch Oven Whole Chicken recipe.
Enjoy creating this comforting dish that’s sure to warm hearts and fill bellies!
Step‑by‑Step Instructions for Dutch Oven Whole Chicken
Step 1: Prepare the Butter Mixture
In a mixing bowl, combine softened unsalted butter with salt, garlic powder, onion powder, dried oregano, dried thyme, and black pepper until thoroughly mixed. This flavorful butter blend will ensure your Dutch Oven Whole Chicken is infused with rich seasonings. Aim for a creamy consistency to easily spread under the skin and over the meat.
Step 2: Prepare the Chicken
Remove the giblets from the 5-pound whole chicken and pat the surface dry with paper towels. This step is crucial for achieving crispy skin while roasting. Ensuring the skin is dry helps the butter mixture adhere better, allowing for optimal flavor distribution during cooking.
Step 3: Season the Chicken
Carefully rub the butter mixture over the entire chicken, making sure to work it under the skin and inside the cavity for maximum flavor. Take your time with this step as it guarantees your Dutch Oven Whole Chicken is aromatic and delicious. The buttery coating will help the skin become beautifully crispy while roasting.
Step 4: Preheat the Oven
Preheat your oven to 425°F (220°C). This high temperature is key to achieving that coveted, crackling skin on your chicken. While the oven heats up, you can prepare the vegetables and broth, ensuring everything is ready for a smooth cooking process.
Step 5: Prepare the Vegetables
In your Dutch oven, add baby potatoes and chopped carrots, sprinkling them generously with salt. Pour in the chicken broth, stirring to combine. This creates a flavorful bed for the chicken to rest atop, allowing the vegetables to absorb the savory juices as the Dutch Oven Whole Chicken cooks.
Step 6: Position the Chicken
Carefully place the seasoned chicken on top of the vegetables in the Dutch oven. Tie the chicken legs with kitchen twine to keep the form intact during roasting. This step helps the chicken cook evenly and retain moisture, resulting in juicy meat ready to impress.
Step 7: Cover and Bake
Cover the Dutch oven with its lid and bake in the preheated oven for 1 hour and 15 minutes. The covered environment traps moisture, ensuring your chicken cooks through while the flavors meld beautifully with the vegetables. You’ll start to smell that delicious aroma filling your kitchen!
Step 8: Crisp the Skin
After 1 hour and 15 minutes, remove the lid and continue baking for an additional 30 minutes, which allows the skin to turn golden and crispy. Keep an eye on the chicken to ensure it doesn’t over-brown, and use a meat thermometer to check that it reaches an internal temperature of 165°F (75°C).
Step 9: Rest the Chicken
Once perfectly roasted, remove the Dutch oven from the oven and allow the chicken to rest for at least 10 minutes before carving. Resting is crucial as it lets the juices redistribute, keeping the meat succulent. Your Dutch Oven Whole Chicken is now ready to serve, surrounded by the tasty vegetables!
Expert Tips for Dutch Oven Whole Chicken
- Dry the Skin: Pat the chicken skin dry before seasoning to achieve a perfectly crispy texture when roasted.
- Temperature Matters: Allow the chicken to come to room temperature before cooking for even doneness throughout.
- Use a Meat Thermometer: Checking the internal temperature ensures food safety; aim for 165°F to 175°F for the juiciest meat.
- Flavor Under the Skin: Don’t skip rubbing that buttery seasoning directly under the skin; it maximizes flavor and enhances crispy skin.
- Resting Time: Let the chicken rest after roasting for at least 10 minutes. This step helps redistribute the juices, keeping every bite moist.
Make Ahead Options
These Dutch Oven Whole Chicken preparations are perfect for busy home cooks who want to save time during the week! You can season the whole chicken with the butter mixture and refrigerate it up to 24 hours before cooking; this allows the flavors to penetrate the meat while also keeping it moist. Additionally, you can chop the vegetables and store them in an airtight container for up to 3 days in the fridge. When you’re ready to serve, simply follow the cooking instructions: place the chicken on the prepared vegetables and bake as directed. You’ll enjoy a flavorful, comforting meal with minimal effort at dinner time—just as delicious as if it were made fresh!
Dutch Oven Whole Chicken Variations
Feel free to personalize this delightful recipe and make it truly your own with these fun variations!
-
Seasonal Veggies: Swap out potatoes and carrots for zucchini, bell peppers, or squash for a fresh twist. This not only changes the flavor profile but also takes advantage of what’s seasonal and available.
-
Citrus Zest: Add a splash of brightness by incorporating lemon or orange zest into the butter mixture. This will infuse the chicken with a delightful, aromatic essence.
-
Herb Boost: Experiment with different fresh herbs like rosemary or sage to elevate the flavor of the chicken even more. Fresh herbs can be added directly to the butter for a vibrant taste.
-
Spicy Kick: For those who enjoy a bit of heat, mix in some chili flakes or cayenne pepper into the seasoning blend. It adds a fun and surprising element that can excite your taste buds.
-
Garlic Lovers: Increase the garlic flavor by using minced fresh garlic instead of powder. It creates a richer, bolder taste profile that many garlic enthusiasts will relish.
-
Smoky Variation: Introduce smoked paprika to the butter mix for an extra layer of smokiness. This twist adds depth and complexity, making the chicken even more flavorful.
-
Nutty Flavor: Drizzle a bit of toasted sesame oil over the vegetables before adding the chicken for a unique, nutty flavor. It’s a delightful surprise and can elevate your dish to new heights.
-
Vegetarian Option: If you want to try a vegetarian version, consider stuffing a whole cauliflower with a similar spice mix. Roast it in the Dutch oven with plenty of veggies for an impressive and tasty meal.
For more creative spins on classic meals, don’t miss our collection of dinner ideas that effortlessly combine flavor and comfort!
How to Store and Freeze Dutch Oven Whole Chicken
Fridge: Store leftovers in an airtight container or tightly wrapped in foil for up to 3-4 days. This will keep the chicken juicy and ready for quick meals.
Freezer: If you have more leftovers, freeze the Dutch Oven Whole Chicken in airtight freezer bags or containers for up to 3 months. Thaw in the fridge overnight before reheating.
Reheating: To reheat, place the chicken in a preheated oven at 350°F (175°C) until warmed through, about 20-25 minutes, ensuring it’s heated evenly throughout.
Avoid Room Temperature: Never leave leftover chicken out at room temperature; this can compromise safety. Aim to refrigerate or freeze within two hours of cooking.
What to Serve with Juicy Dutch Oven Whole Chicken
The delightful aroma of roasted chicken and veggies sets the stage for a comforting, satisfying meal that brings loved ones together.
- Creamy Mashed Potatoes: Perfectly buttery with a hint of garlic, these velvety potatoes complement the chicken’s crispy skin beautifully and delightfully soak up any juices from the meat.
- Honey Glazed Carrots: Sweet and tender, these vibrant carrots add a splash of color and flavor, enhancing the hearty, rustic vibe of the dish.
- Crisp Green Salad: A refreshing blend of mixed greens, cherry tomatoes, and a tangy vinaigrette lightens the meal while offering a refreshing contrast to the richness of the chicken.
- Roasted Brussels Sprouts: Caramelized and crunchy, they provide an earthy note that balances the dish while ensuring your plate has an inviting array of textures.
- Crusty Garlic Bread: This warm, toasty bread is perfect for soaking up all those delicious juices, making every bite of chicken and vegetable even more comforting.
- Apple Pie: For dessert, embrace nostalgia with a slice of warm apple pie. The sweet and tart flavors perfectly round out this classic meal, leaving everyone satisfied.
- Chardonnay: A glass of chilled Chardonnay complements the chicken’s buttery flavors, enhancing your dining experience with a crisp, refreshing note.
- Homemade Biscuits: Light and flaky, they are perfect for mopping up the savory sauce from the chicken and vegetables, adding a delightful touch of comfort.
Dutch Oven Whole Chicken Recipe FAQs
How do I choose the right whole chicken?
Absolutely! When selecting a whole chicken, look for one that is fresh with no dark spots or bruises. A 5-pound chicken is ideal for this recipe, but if you opt for a larger or smaller bird, just adjust the cooking time accordingly. Always check for a firm texture and bright, plump appearance.
What is the best way to store leftover Dutch Oven Whole Chicken?
Very! To store leftovers, place the chicken in an airtight container or wrap it tightly in aluminum foil. It can be kept in the refrigerator for up to 3-4 days. If you want to keep it longer, consider freezing it in a freezer-safe bag or container for up to 3 months. Make sure to label the container with the date for easy tracking!
Can I freeze leftovers from my Dutch Oven Whole Chicken?
Yes, you can! If you have leftover chicken, allow it to cool completely before freezing. Portion it into meal-sized pieces for convenience, then pack them in airtight freezer bags, removing as much air as possible. To thaw, simply move the chicken to the refrigerator the night before you plan to reheat. It’s that easy!
My chicken skin didn’t get crispy; what went wrong?
Don’t worry! If your chicken skin didn’t crisp up, the likely culprits could be moisture or not enough heat. Ensure you pat the skin completely dry before applying the butter mixture, as excess moisture can lead to soggy skin. Also, the oven should be preheated to 425°F (220°C) to get that crisp factor just right. If necessary, broil the chicken for an additional 2-3 minutes at the end of cooking to achieve that golden finish.
Can I use fresh herbs instead of dried ones in this recipe?
Absolutely! Fresh herbs can enhance the flavor beautifully! Use about three times the amount of fresh herbs as dried herbs. If the recipe calls for 1 teaspoon of dried oregano, fresh oregano would be around 1 tablespoon. Just chop them finely and mix them into your butter mixture for a fresh twist.
Is this Dutch Oven Whole Chicken recipe healthy for my pets?
Very! When it comes to sharing with pets, always ensure that the chicken is cooked plain, without any seasoning or salt. While the meat is generally safe, do avoid giving them any skin, as it can be too fatty. Always consult your veterinarian if you’re unsure about sharing human food with your pets.
Succulent Dutch Oven Whole Chicken with Crispy Skin Delight
Ingredients
Equipment
Method
- In a mixing bowl, combine softened unsalted butter with salt, garlic powder, onion powder, dried oregano, dried thyme, and black pepper until thoroughly mixed.
- Remove the giblets from the whole chicken and pat the surface dry with paper towels.
- Rub the butter mixture over the entire chicken, under the skin and inside the cavity.
- Preheat your oven to 425°F (220°C).
- In your Dutch oven, add baby potatoes and chopped carrots, sprinkling them with salt, and pour in the chicken broth.
- Place the seasoned chicken on top of the vegetables and tie the chicken legs with kitchen twine.
- Cover the Dutch oven with its lid and bake for 1 hour and 15 minutes.
- Remove the lid and continue baking for an additional 30 minutes.
- Once roasted, remove the Dutch oven from the oven and allow the chicken to rest for at least 10 minutes before carving.
Leave a Reply