
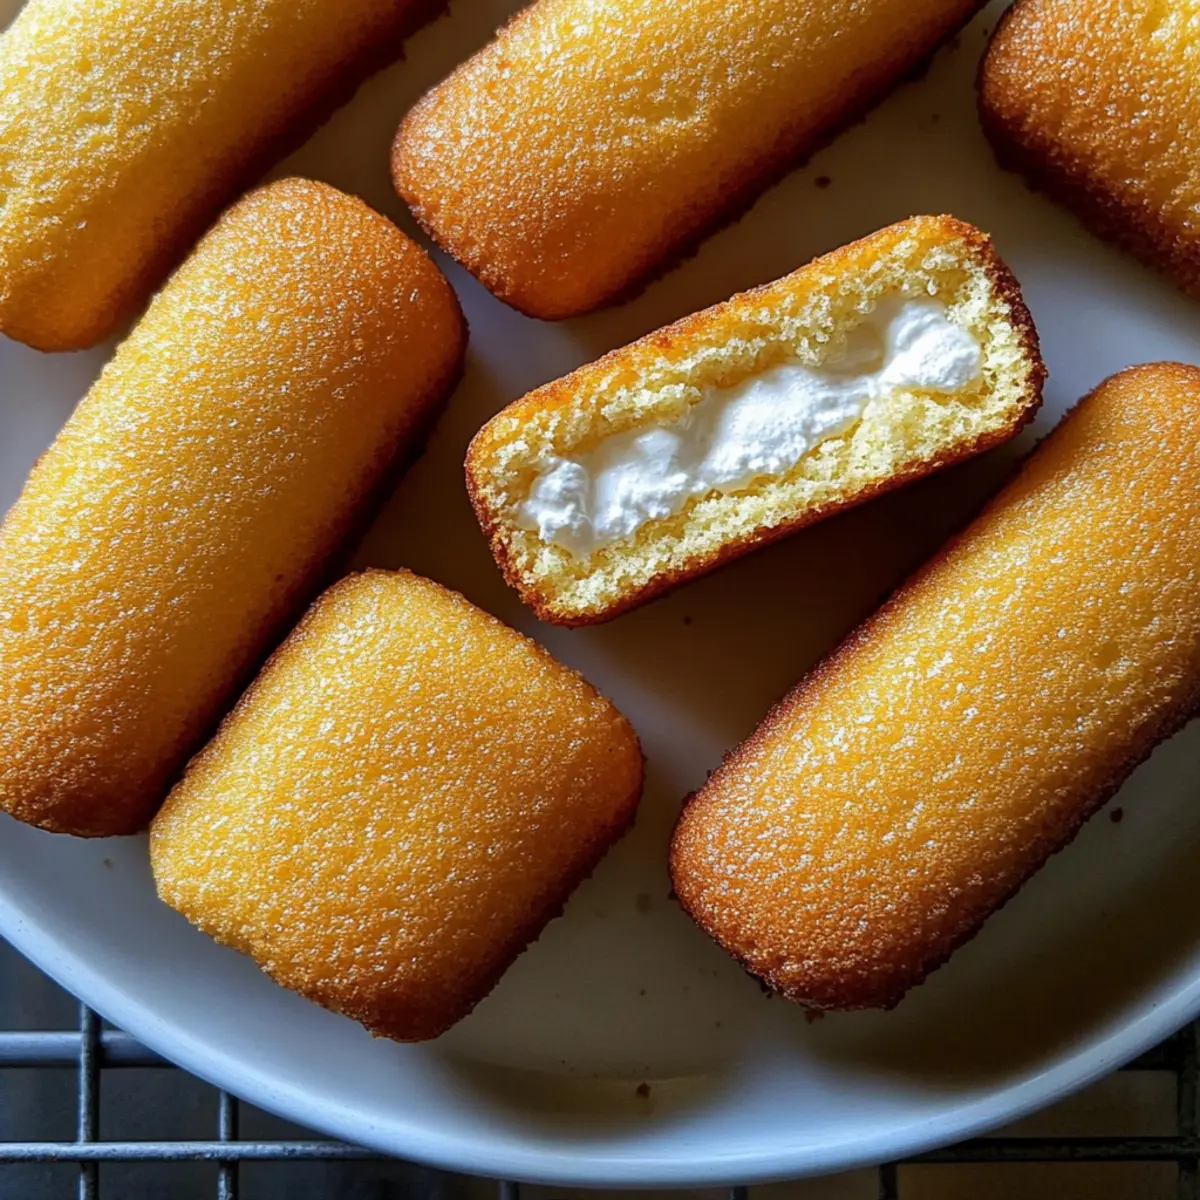
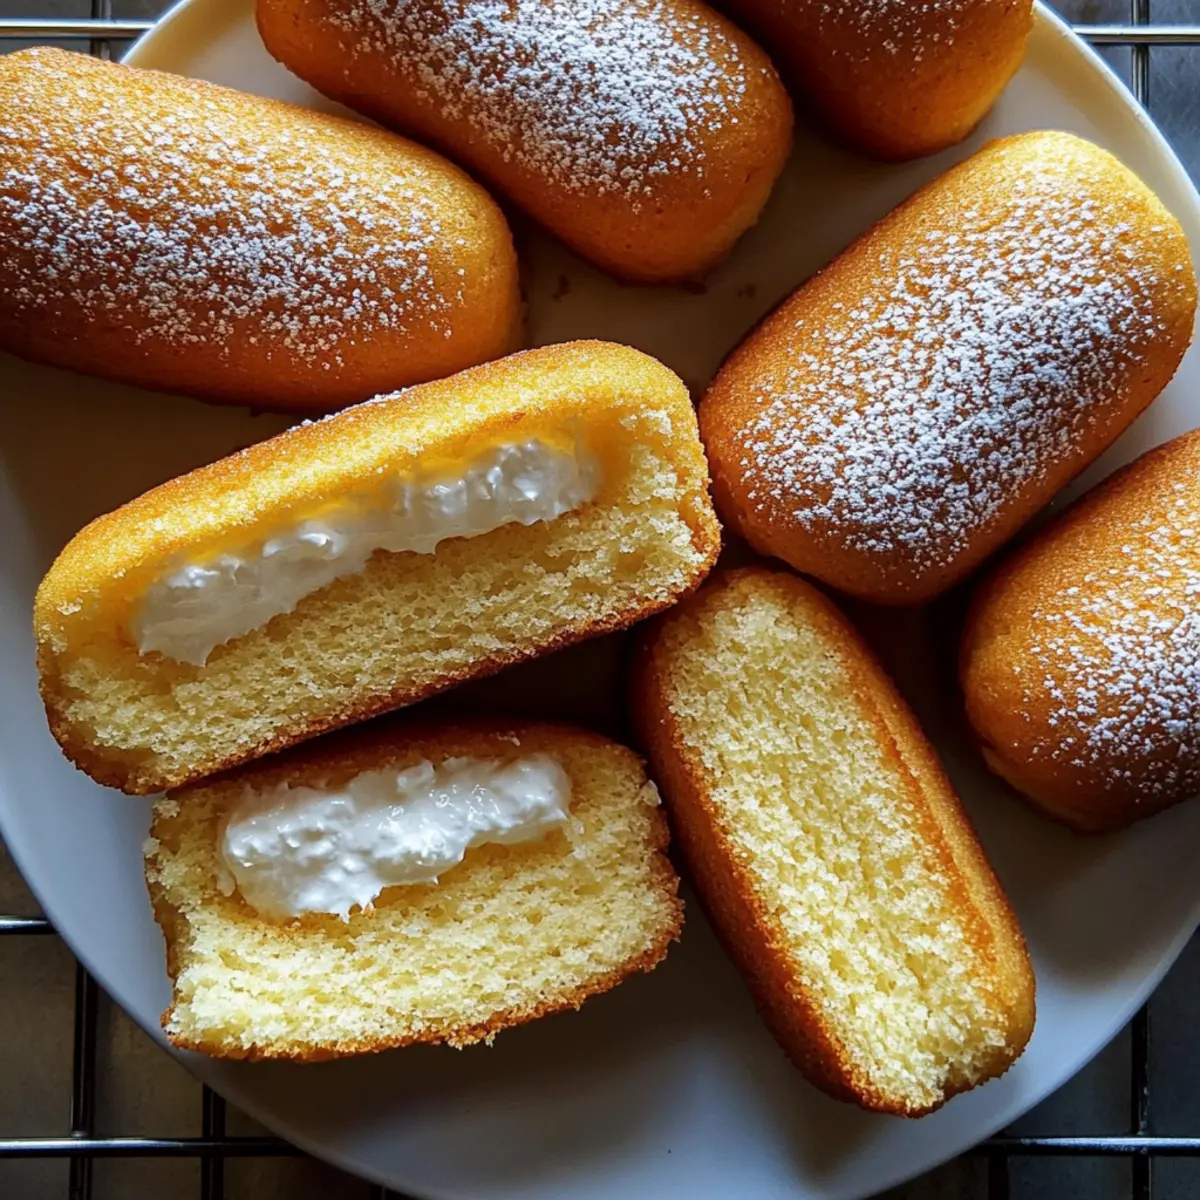
As I pulled the warm Twinkies from the oven, memories of childhood flooded back—those afternoons spent savoring the sweet, creamy goodness of these iconic treats. This homemade Twinkies recipe takes the beloved nostalgia to a whole new level, using real, wholesome ingredients that are free from preservatives. Not only is it a fun and customizable baking project, but it also delivers a tender golden sponge and a delightful marshmallow crème filling that’s sure to impress family and friends. Perfect for parties, bake sales, or just a cozy night in, these delightful bites capture the joy of yesteryears while bringing a modern twist to your dessert table. Ready to bite into a piece of nostalgia and transform your snack game? Let’s dive into making these delicious homemade Twinkies!
Why are these Twinkies so special?
Nostalgic Charm: These Homemade Twinkies transport you back to childhood, evoking sweet memories with every bite.
Real Ingredients: Made with wholesome components, no artificial preservatives—perfect for those who care about what they eat.
Customizable Fun: Feel free to experiment with flavors! Add chocolate chips or citrus zest to make them your own.
Crowd-Pleasing Treat: Ideal for gatherings, bake sales, or simply enjoying at home—everyone loves this nostalgic delight!
Simple Process: Despite their impressive looks, this recipe is easy to follow and great for novice bakers. Get ready to bring smiles and warmth to your kitchen with this delightful treat!
Homemade Twinkies Ingredients
For the Sponge
• All-Purpose Flour – Provides structure; Use cake flour for a lighter sponge.
• Baking Powder – Helps the sponge rise; Avoid if using self-rising flour.
• Salt – Enhances flavor; Keep it small for balance.
• Eggs (4 large, room temperature) – Increases fluffiness and richness; Important for maximum volume when beaten.
• Granulated Sugar (2/3 cup) – Adds sweetness and contributes to the sponge’s structure; Can replace partially with brown sugar for a richer flavor.
• Vanilla Extract (1/2 teaspoon) – Provides flavor; Use pure vanilla for best results.
• Milk (2 tablespoons) – Adds moisture and tenderness; Can substitute with almond milk for a dairy-free version.
• Unsalted Butter (1 tablespoon, melted) – Enhances flavor and moisture, aiding in texture; Always use room temperature for better integration.
For the Filling
• Unsalted Butter (1/2 cup, softened) – Creates a rich and smooth filling.
• Marshmallow Crème (1/2 cup) – Core flavor of the filling; Can substitute with homemade marshmallow fluff.
• Powdered Sugar (1 cup) – Sweetens and thickens the filling; Sift before measuring for accuracy.
• Heavy Cream (1 tablespoon) – Adds richness to the filling; Can replace with milk but will alter texture slightly.
Step‑by‑Step Instructions for Homemade Twinkies
Step 1: Preheat Oven
Begin your baking journey by preheating your oven to 350°F (175°C). While the oven warms up, prepare your Twinkie or mini loaf pans by greasing them thoroughly with butter or non-stick spray. This step is crucial to ensure your delightful homemade Twinkies release easily after baking.
Step 2: Prepare Dry Ingredients
In a mixing bowl, sift together 1 ½ cups of all-purpose flour, 1 ½ teaspoons of baking powder, and a pinch of salt. This process aerates the flour, ensuring a lighter sponge. The combination of these ingredients lays the foundation for the tender sponge you’ll enjoy in your homemade Twinkies.
Step 3: Mix the Batter
In a large mixing bowl, beat 4 room temperature eggs with 2/3 cup of granulated sugar using an electric mixer on medium speed for about 6-8 minutes. The mixture should become thick and pale, resembling a light custard. Gently fold in ½ teaspoon of vanilla extract, cascading in the dry ingredient mixture a bit at a time to maintain its airy texture.
Step 4: Incorporate Wet Ingredients
Combine 2 tablespoons of warm milk and 1 tablespoon of melted unsalted butter in a small bowl. Make sure the butter isn’t hot, which can cook the eggs. Gently fold this mixture into the batter, ensuring everything is just combined. This step adds moisture and richness to your homemade Twinkies.
Step 5: Bake the Cakes
Carefully fill each mold in your greased pans about three-quarters full with the batter. Bake in your preheated oven for 12-15 minutes, or until the tops are golden brown and a toothpick inserted in the center comes out clean. Once baked, allow them to cool in the pans for a few minutes before transferring them to a wire rack to cool fully.
Step 6: Prepare the Filling
In the meantime, beat ½ cup of softened unsalted butter in a mixing bowl until fluffy. Gradually add in ½ cup of marshmallow crème, 1 cup of powdered sugar, and 1 tablespoon of heavy cream, mixing until you achieve a smooth, creamy filling. The consistency should be light and spreadable, perfect for your homemade Twinkies.
Step 7: Fill the Cakes
Once the cakes are completely cooled, use a piping bag fitted with a small round tip to poke holes in the bottom of each Twinkie. Gently fill each cavity with the luscious marshmallow cream filling, ensuring that each bite will be packed with delightful flavor.
Step 8: Serve and Enjoy
Your homemade Twinkies are now ready to bring joy to the table! You can serve them immediately for the freshest taste or refrigerate them in an airtight container to maintain their fluffy texture for up to 4-5 days. Indulge in these delightful treats with family and friends, making memories with each bite!
Homemade Twinkies Variations & Substitutions
Customize your scrumptious Homemade Twinkies and let your imagination run wild as you explore these delightful variations!
-
Dairy-Free: Substitute whole milk with almond or oat milk for an enjoyable, dairy-free option that doesn’t compromise flavor.
-
Chocolate Lovers: Opt for cocoa powder in the batter instead of half the flour for a rich chocolate sponge. Paired with vanilla cream, it’s a match made in heaven!
-
Zesty Filling: Infuse your marshmallow crème filling with lemon or orange zest for a refreshing twist that dances on your palate.
-
Gluten-Free: Replace all-purpose flour with a 1:1 gluten-free baking blend, making your treat inclusive for everyone to savor without gluten.
-
Nutty Addition: Stir in a handful of chopped nuts or toasted coconut into the batter to add texture and a delightful crunch.
-
Spiced Up: Mix in a pinch of cinnamon or nutmeg into the batter for a cozy, seasonal flavor, adding warmth and depth to every bite.
-
Marshmallow Twist: Try using homemade marshmallow fluff instead of store-bought for an even more indulgent and personal touch to your filling. It’ll be worth the extra effort!
-
Frozen Treat: Pop your filled Twinkies in the freezer for a cool summer treat. Just make sure to wrap them tightly before freezing!
With these variations, feel free to check out Homemade Marshmallow Fluff for that delightful filling twist. You might also enjoy Dairy-Free Alternatives to keep your recipes accessible and inclusive!
Make Ahead Options
These Homemade Twinkies are perfect for busy home cooks looking to save time on dessert preparations! You can prepare the sponge cake up to 24 hours in advance by baking and cooling it, then storing it in an airtight container in the refrigerator to maintain freshness. Additionally, feel free to make the marshmallow crème filling a day ahead as well; just store it in the fridge and give it a quick stir before use. When you’re ready to serve, simply poke holes in the cooled cakes and fill them with the creamy filling. With this make-ahead plan, you’ll enjoy freshly filled, fluffy Homemade Twinkies with minimal effort and maximum delight!
What to Serve with Homemade Twinkies
Pairing complimentary dishes and drinks with your homemade Twinkies creates the perfect memory-making moment filled with luscious sweetness and delightful flavors.
- Creamy Vanilla Ice Cream: The rich creaminess of vanilla ice cream balances the sweetness of Twinkies, creating a dreamy dessert experience.
- Fresh Berries: Juicy strawberries, blueberries, or raspberries add a refreshing tartness that cuts through the sweetness, making every bite more enjoyable.
- Chocolaty Dipping Sauce: A warm chocolate sauce drizzled over Twinkies adds indulgent depth, transforming your treat into a fancy dessert worthy of special occasions.
- Whipped Cream: Light and airy, whipped cream brings a whimsical touch, enhancing the fluffy texture of Twinkies while complementing the marshmallow filling perfectly.
- Decaf Coffee or Tea: The subtle bitterness of decaf coffee or tea pairs beautifully with the sweetness, providing a cozy companion to this nostalgic snack.
- Banana Pudding: Creamy banana pudding echoes the Twinkies’ soft texture, forming a pleasant combination reminiscent of childhood favorites.
- Mint Chocolate Chip Milkshake: Enjoy a fun twist by pairing your Twinkies with a mint chocolate chip milkshake; the cool mint elevates the experience!
- Chocolate-Covered Strawberries: For an elegant touch, serve chocolate-covered strawberries alongside Twinkies to bring both whimsy and indulgence to your gathering.
Tips for the Best Homemade Twinkies
Room Temperature Eggs: Ensure your eggs are at room temperature to whip them into a fluffy volume—this is crucial for a light sponge.
Gentle Mixing: Be careful not to over-mix your batter. Folding gently helps maintain airiness, preventing a dense texture in your homemade Twinkies.
Cool Completely: Allow cakes to cool completely before filling them. This preserves the filling’s texture and ensures it doesn’t melt into the sponge.
Proper Baking: Keep an eye on your baking time. Every oven is different, so check for that golden brown color and clean toothpick test for perfect results.
Storage Tip: To maintain freshness, store your homemade Twinkies in an airtight container for up to 4-5 days after baking.
How to Store and Freeze Homemade Twinkies
Room Temperature: Store your leftover Twinkies at room temperature for up to 1 day in an airtight container if you plan to enjoy them quickly.
Fridge: For longer freshness, refrigerate them in an airtight container for up to 4-5 days. This helps keep the filling creamy and sponge nice and moist.
Freezer: You can freeze homemade Twinkies for up to 2 months. Wrap each Twinkie tightly in plastic wrap, then place them in a freezer bag to prevent freezer burn.
Reheating: When ready to enjoy your frozen Twinkies, thaw them in the fridge overnight. For a soft texture, you can warm them slightly in the microwave for 10-15 seconds before serving.
Homemade Twinkies Recipe FAQs
What ingredients should I use for the best Twinkies?
Absolutely! For the best flavor and texture in your homemade Twinkies, I recommend using room temperature eggs, which whip up beautifully, creating a light and fluffy sponge. Always opt for high-quality vanilla extract for a richer taste and use real butter rather than margarine for a creamier filling.
How long can I store homemade Twinkies?
You can store your homemade Twinkies in an airtight container at room temperature for up to 1 day if you’re planning to enjoy them soon. For longer freshness, refrigerate them for up to 4-5 days. This helps keep the filling smooth and the sponge tender.
Can I freeze my homemade Twinkies?
Absolutely! To freeze your homemade Twinkies, wrap each one tightly in plastic wrap, ensuring there are no exposed areas to prevent freezer burn. Place them in a freezer-safe bag or container, and they’ll keep well for up to 2 months. To enjoy, simply thaw them in the fridge overnight and, if you’d like, warm them in the microwave for 10-15 seconds before serving.
Why did my Twinkies turn out dense?
Very! If your Twinkies turn out dense, it could be due to over-mixing the batter or not incorporating enough air during the whipping of the eggs. To avoid this, ensure your eggs are fully beaten and aim to fold the dry ingredients gently into the wet, being careful not to deflate the batter.
Are there any allergies to consider with this recipe?
Yes! Since this homemade Twinkies recipe contains eggs, dairy (milk and butter), and wheat (flour), it’s important to consider allergies related to these ingredients. If you’re baking for someone with gluten sensitivities, gluten-free flour can be a great alternative. Additionally, for dairy-free options, you can substitute almond milk for regular milk and use a dairy-free butter alternative in both the sponge and filling.
Can I add flavors to the filling?
The more the merrier! Absolutely, you can make your homemade Twinkies even more exciting by incorporating various flavors into the filling. Try adding citrus zest or a splash of flavored extracts like almond or orange for a unique twist that personalizes your treat beautifully.
Delicious Homemade Twinkies That Bring Back Childhood Joy
Ingredients
Equipment
Method
- Preheat your oven to 350°F (175°C) and prepare your Twinkie pans by greasing them thoroughly with butter or non-stick spray.
- Sift together 1 ½ cups of all-purpose flour, 1 ½ teaspoons of baking powder, and a pinch of salt in a mixing bowl.
- In a large mixing bowl, beat 4 room temperature eggs with 2/3 cup of granulated sugar on medium speed for about 6-8 minutes.
- Combine 2 tablespoons of warm milk and 1 tablespoon of melted unsalted butter in a small bowl, then gently fold into the batter.
- Fill each mold in your greased pans about three-quarters full with the batter and bake for 12-15 minutes.
- Beat ½ cup of softened unsalted butter until fluffy, then gradually add in the marshmallow crème, powdered sugar, and heavy cream.
- Once cooled, use a piping bag to poke holes in the bottom of each Twinkie and fill with the marshmallow cream.
- Serve fresh or refrigerate in an airtight container for up to 4-5 days.
Leave a Reply