
As I rolled out my kitchen mat this afternoon, the sun poured in, reminding me that spring and summer celebrations are just around the corner. One delightful treat that has graced many gatherings in my home are these No-Bake Lemon Cream Cheese Mints. Combining a tangy twist with velvety creaminess, these mints integrate a refreshing burst of lemon that dances on the palate. Not only are they a breeze to make with just a few pantry staples, but they also elevate any occasion, from weddings to casual brunches, ensuring smiles all around. And if you’re looking for a fun way to impress your guests without spending hours in the kitchen, this quick recipe is just the answer! So, are you ready to make your own batch of these delectable mints? Let’s dive in!
Why are these mints a must-try?
Irresistible Flavor: The zingy lemon paired with creamy textures creates a flavor sensation that is simply unforgettable!
Effortless Preparation: With no baking required, you’ll whip these up in no time, making them perfect for busy schedules.
Versatile Delight: Ideal for spring and summer gatherings, these mints make delightful party favors or an elegant addition to any dessert table.
Crowd-Pleasing Treat: Whether at a wedding or a casual get-together, these mints are sure to garner compliments and keep guests asking for more!
Storage-Friendly: They can be made ahead of time and stored in the fridge, so you can enjoy them whenever you need a refreshing treat!
Don’t miss out on this easy recipe; give it a try and experience that citrus bliss yourself!
Lemon Cream Cheese Mints Ingredients
For the Mints
• Softened Cream Cheese – Provides richness and creaminess; make sure it’s at room temperature for easy mixing.
• Unsalted Butter – Adds a creamy texture and richness; can substitute with an equal amount of vegan margarine for a dairy-free option.
• Lemon Extract – Infuses the mints with bright citrus flavor; adjust the quantity for a more intense lemon taste.
• Powdered Sugar – Sweetens and gives structure; essential for forming that luscious dough-like consistency.
• Freshly Grated Lemon Zest – Enhances the lemon flavor; use fresh for the best results, or combine with a bit of orange zest for a delightful twist.
• Optional Food Coloring – Enhances visual appeal; stick to pastel shades for a soft, elegant look.
Feel free to experiment as you make these Lemon Cream Cheese Mints, and watch the smiles grow with every delightful bite!
Step‑by‑Step Instructions for Lemon Cream Cheese “Mints”
Step 1: Combine the Base Ingredients
In a large mixing bowl, add 8 ounces of softened cream cheese and 4 tablespoons of unsalted butter. Using an electric mixer set to medium speed, beat these together for 2-3 minutes until the mixture is smooth and creamy, with no lumps. Then, mix in 1 teaspoon of lemon extract and 1 tablespoon of freshly grated lemon zest until fully incorporated, creating a rich lemony base for your Lemon Cream Cheese Mints.
Step 2: Create the Dough
Gradually add 4 cups of powdered sugar, incorporating about ½ cup at a time. Continue mixing on low speed until the sugar is blended in, then increase to medium and mix for an additional 2-3 minutes. The dough should form a soft, non-sticky ball. If needed, use a spatula to scrape down the sides of the bowl to ensure everything is well combined, resulting in a deliciously sweet and tangy dough.
Step 3: Shape the Mints
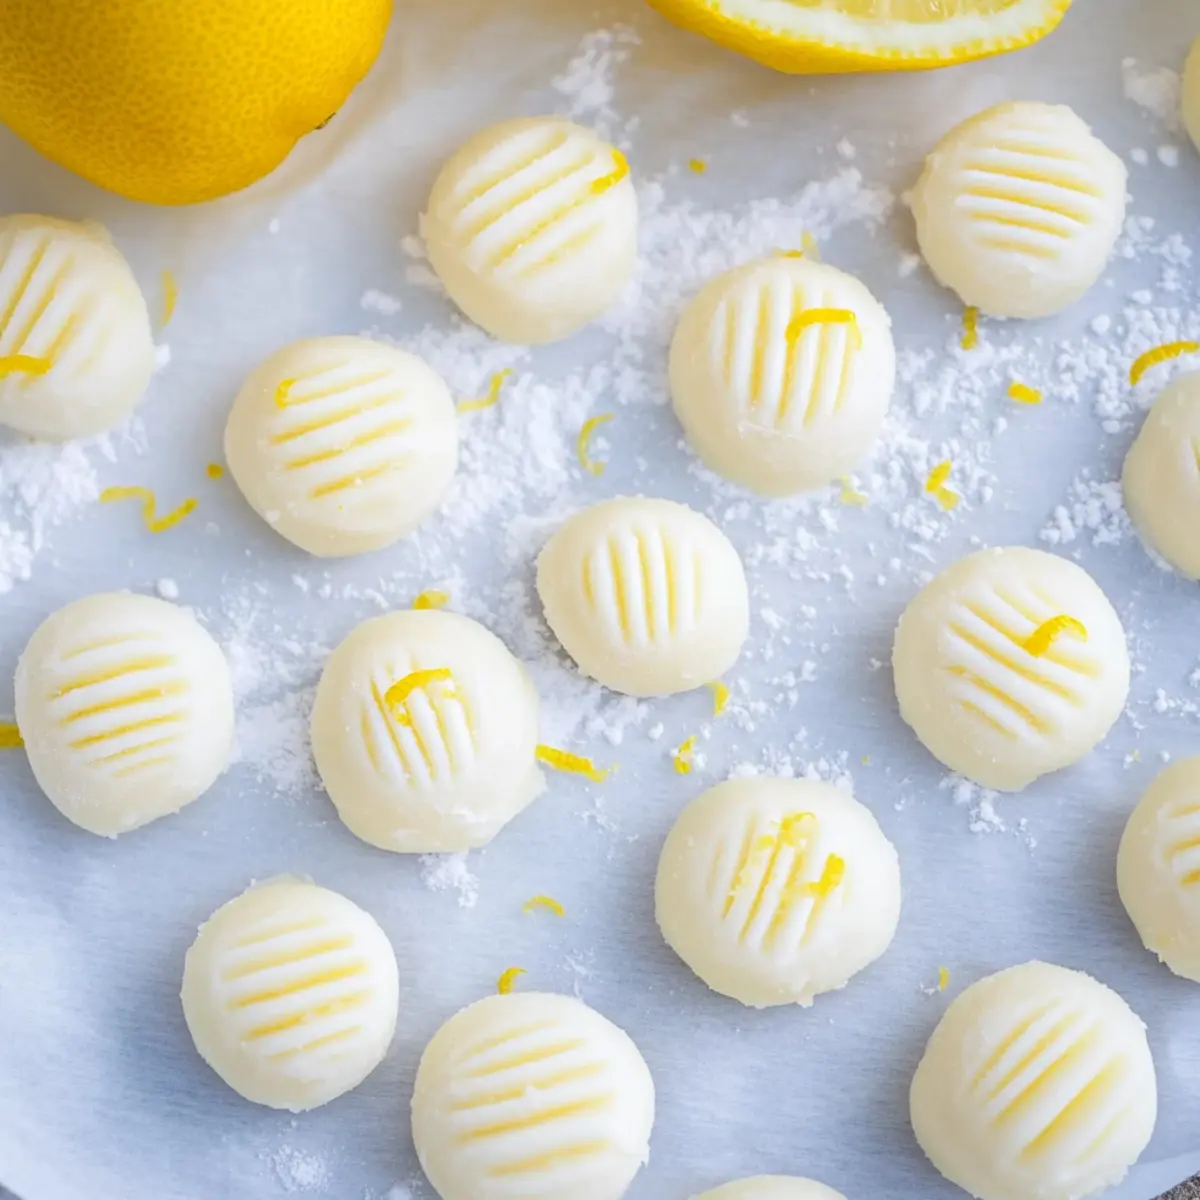
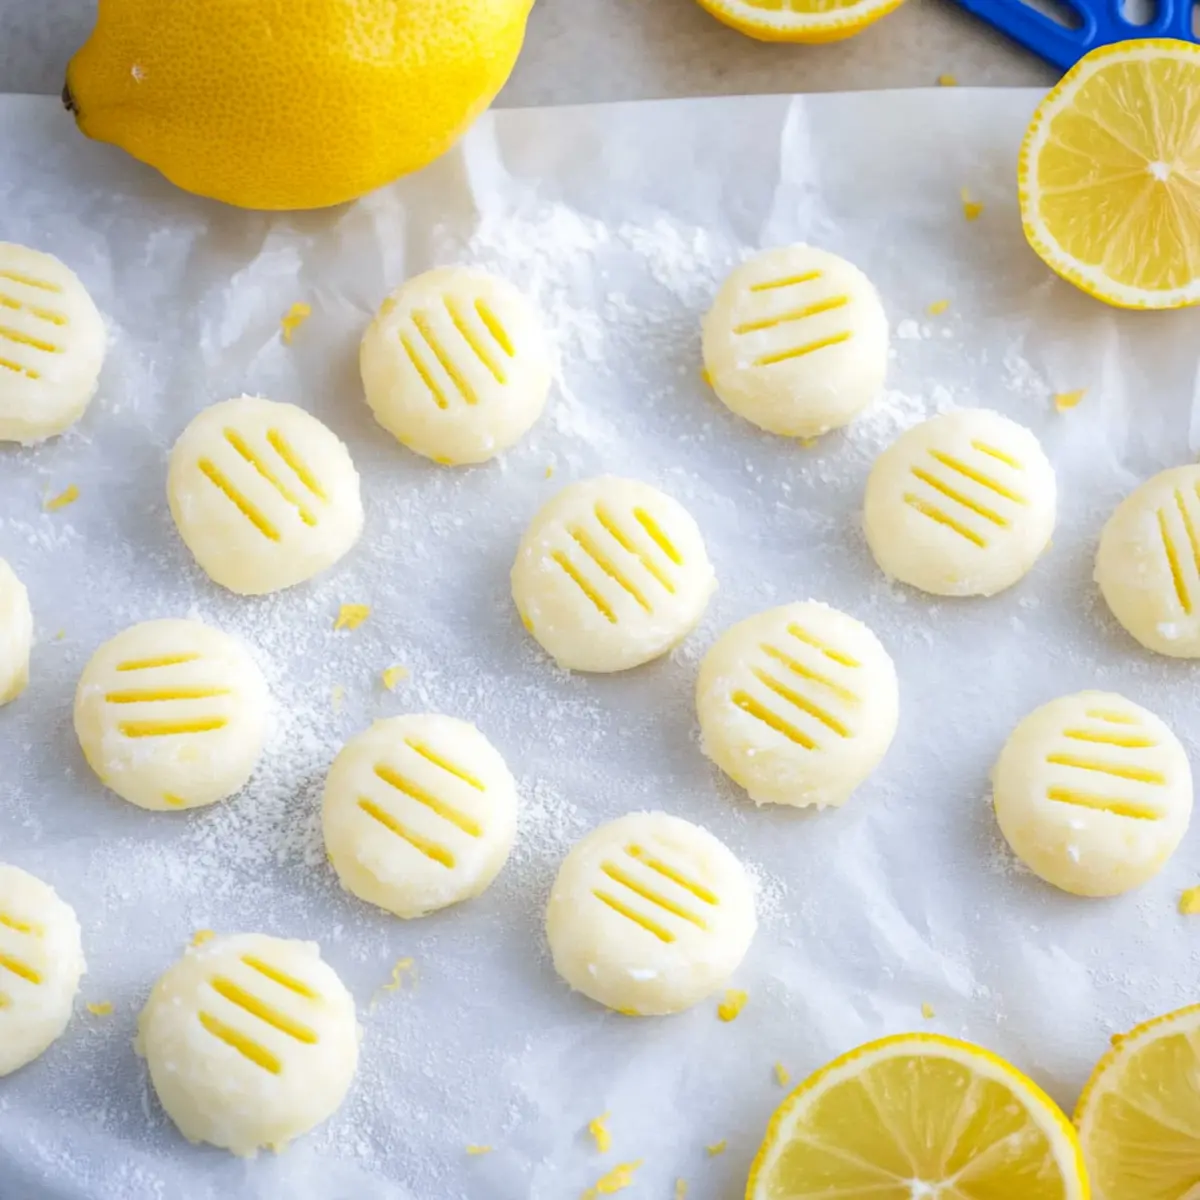
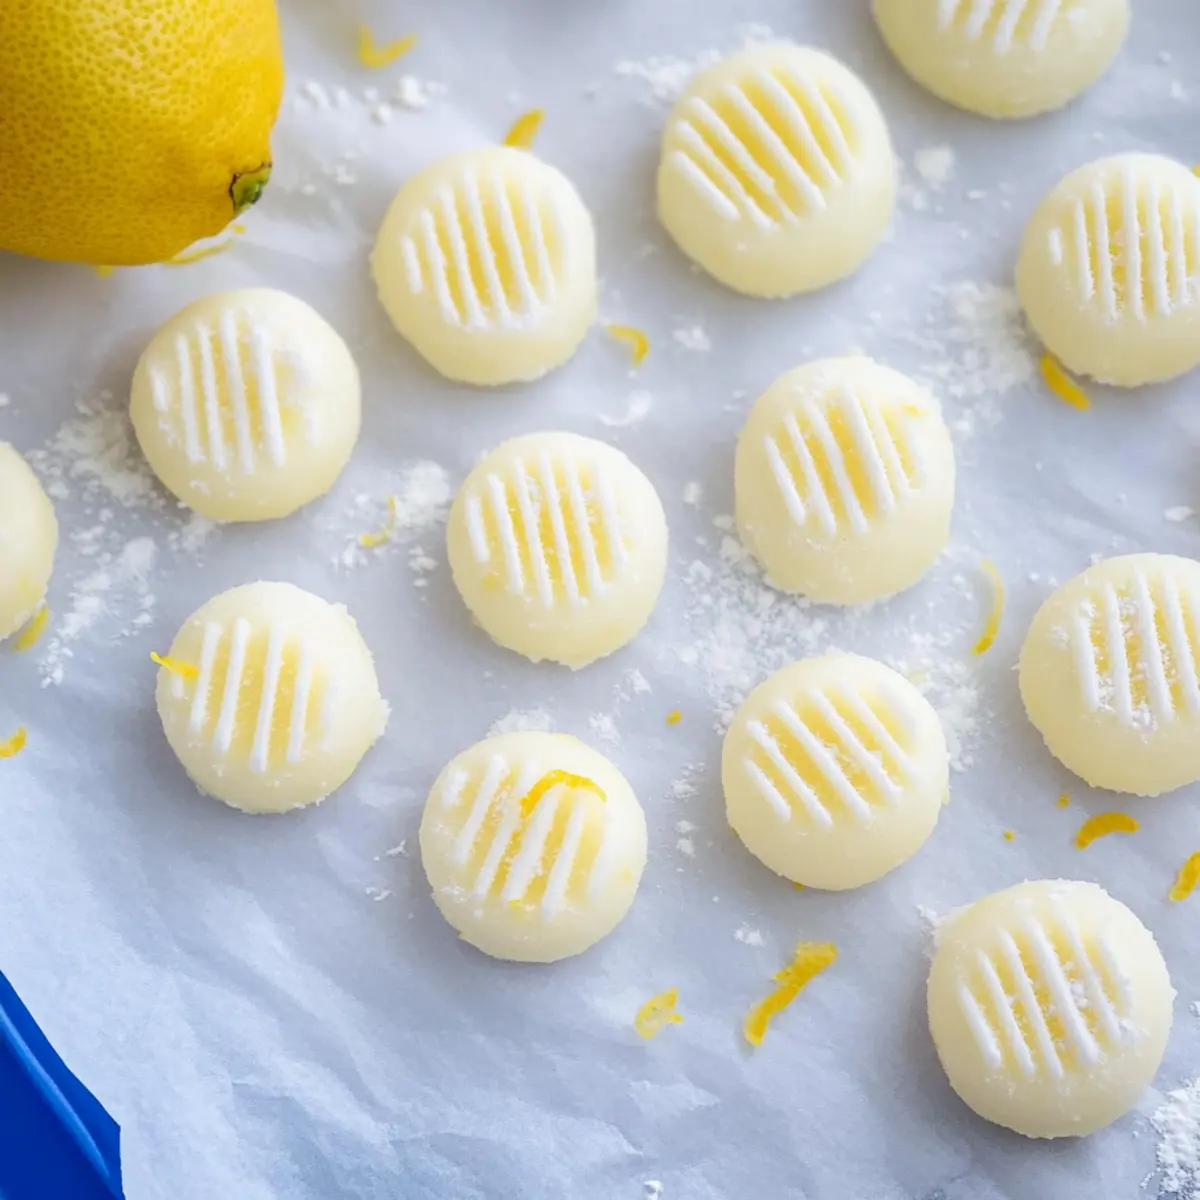
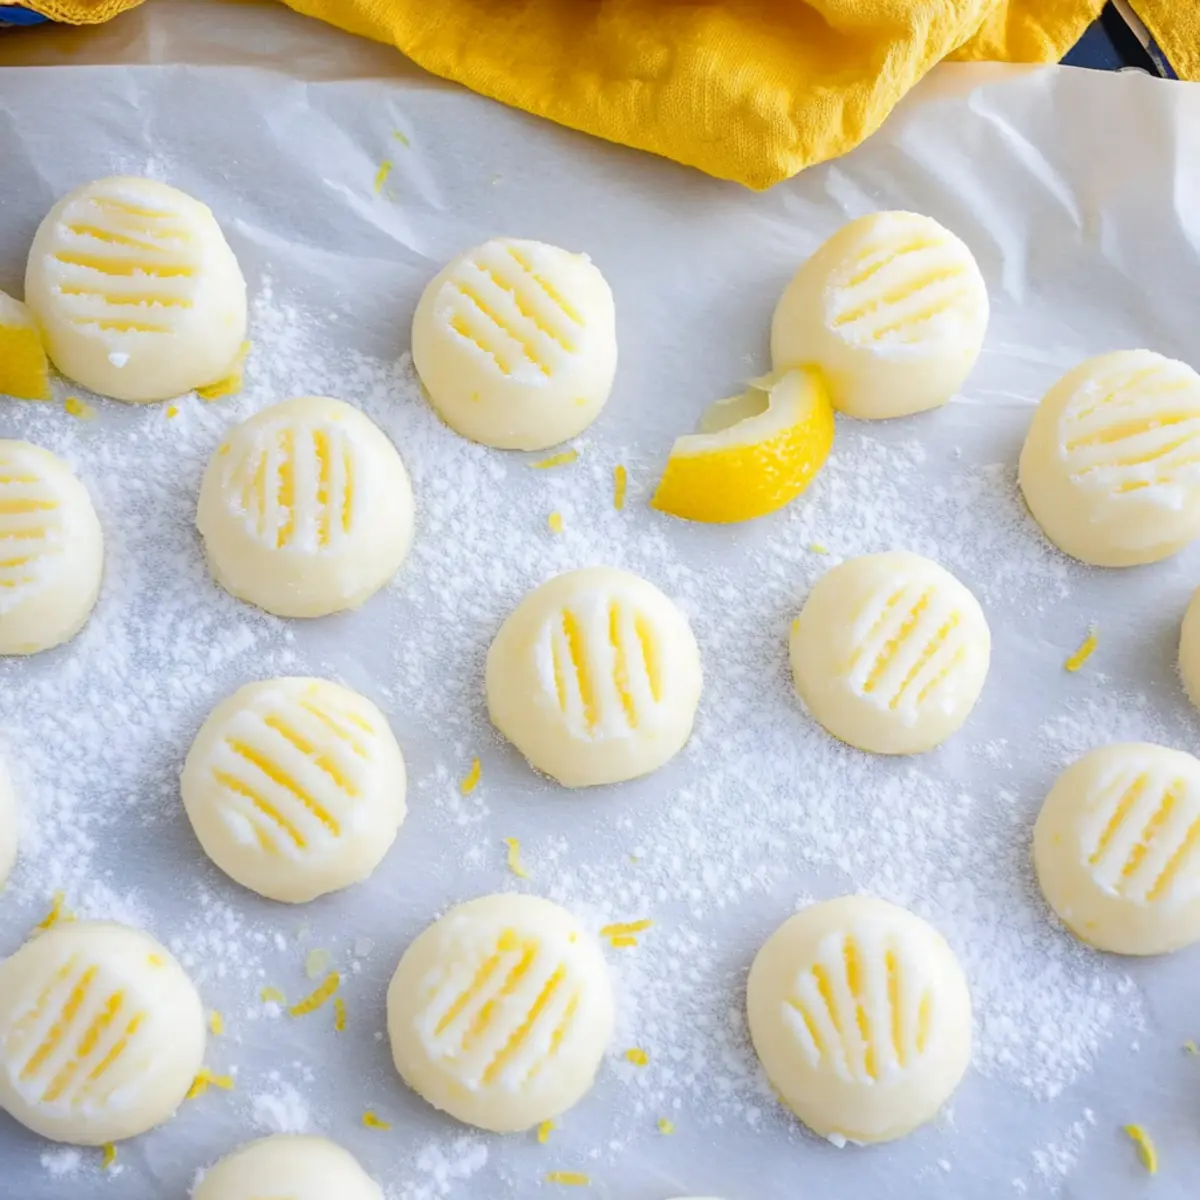
Using your hands, scoop out small portions of the dough and roll them into 1/2-inch balls. Place each ball on a parchment-lined baking sheet, leaving a bit of space between them for easy handling. The mints should look smooth and glossy at this stage, showcasing the delightful lemon flavor about to shine through as they set.
Step 4: Flatten Each Mint
Take a fork and gently press down on each ball, flattening them slightly to create classic mint shapes. Aim for a nice, even thickness—around 1/4 inch will do. The fork marks will add a charming texture, and you’ll start to see your Lemon Cream Cheese Mints taking form, ready to set up beautifully in the fridge.
Step 5: Chill and Set
Cover the baking sheet with plastic wrap and refrigerate the mints for at least 1 hour, allowing them to firm up and set. After the chilling time, they should be slightly firm to the touch. This step helps to enhance the flavors while ensuring the mints maintain their shape, making them the perfect refreshing treat for your next gathering.
Step 6: Serve and Enjoy
Once chilled, you can serve your delightful Lemon Cream Cheese Mints straight from the refrigerator. They’re perfect for parties, elegant gatherings, or just a zesty treat to brighten your day. If desired, you can add a few drops of food coloring before shaping for a lovely pastel finish, giving an extra flair to these vibrant mints!
How to Store and Freeze Lemon Cream Cheese Mints
Fridge: Store the mints in an airtight container in the refrigerator for up to 2 weeks, keeping them fresh and zesty for your next craving or gathering.
Freezer: For longer preservation, freeze the mints in a single layer, separated by parchment paper, for up to 1 year. Thaw in the fridge when ready to enjoy.
Serving: Allow mints to come to room temperature for a few minutes after freezing before serving; this enhances their creamy texture and flavor.
Tips: Make sure to tightly seal the container to prevent any moisture from affecting the delightful taste of your Lemon Cream Cheese Mints!
Make Ahead Options
These Lemon Cream Cheese Mints are perfect for meal prep enthusiasts! You can prepare the mint dough up to 24 hours in advance, making them a great option for busy weeknights or last-minute gatherings. Simply follow the steps to create the dough, and once shaped into balls, place them on a parchment-lined sheet, cover with plastic wrap, and refrigerate. When you’re ready to serve, simply flatten the mints and chill for at least one hour to set. For longer storage, these mints can be frozen for up to three months; just layer with parchment paper to prevent sticking. They’ll be just as delicious and refreshing when you’re ready to enjoy them!
Lemon Cream Cheese Mints Variations
Feel free to play with this classic recipe to find your perfect version that tantalizes your taste buds!
-
Citrus Swap: Replace lemon extract with orange or lime for a fresh twist. Each citrus brings its unique zing to the mints!
-
Herbal Infusion: Add finely chopped fresh mint leaves to the dough for a refreshing herbal touch that complements the citrus beautifully.
-
Sugar Alternative: Use powdered erythritol or other low-carb sweeteners for a sugar-free version that still delivers on taste.
-
Nutty Delight: Fold in crushed nuts, such as pistachios or almonds, for a delightful crunch and an added depth of flavor.
-
Chocolate Drizzle: After chilling, drizzle melted dark chocolate over the mints for a luxurious touch, creating a dreamy chocolate-lemon flavor combo.
-
Spicy Kick: Mix in a pinch of cayenne or chili powder to the dough for a surprising burst of heat that contrasts with the sweetness.
-
Vanilla Twist: Add a teaspoon of vanilla extract alongside the lemon for a creamy, warm flavor—a perfect complement to the tanginess of lemon.
-
Fancy Presentation: Shape the mints into fun forms, like hearts or stars, and use colored sugar sprinkles to decorate for those festive occasions!
Whichever variation you choose, you can ensure a delightful treat that will be the talk of your next gathering! If you want even more ideas, check out our section on serving suggestions to pair these delightful mints with refreshing beverages.
What to Serve with No-Bake Lemon Cream Cheese Mints
Delight in a full springtime spread that enhances these zesty mints while embracing sunshine and celebration.
-
Iced Tea: The refreshing taste of iced tea balances the sweetness of the mints, adding a classic touch to your gathering.
-
Lemonade: Pairing these mints with chilled lemonade amplifies their citrusy flavor, making for a perfectly uplifting duo.
-
Fruit Salad: A colorful fruit salad complements the mints with fresh juiciness, creating a harmonious blend of vibrant flavors.
-
Chocolate-Dipped Strawberries: The rich chocolaty flavor of strawberries offers a beautiful contrast to the mints’ brightness—it’s pure bliss!
-
Shortbread Cookies: The buttery, crumbly texture of shortbread cookies pairs well, bringing a comforting element to your dessert table.
-
Cheesecake Bites: Light and creamy cheesecake bites echo the mints’ textures while introducing a decadent touch to the experience.
-
Sparkling Water: A bubbly glass of sparkling water infused with mint or lemon enhances your refreshing treat without overpowering the flavors.
-
Lemon Bars: For a citrus lover’s delight, serve lemon bars alongside. Their tartness perfectly contrasts the mints’ sweetness and makes for a delightful pairing.
-
Vanilla Ice Cream: A scoop of creamy vanilla ice cream creates a luscious balance; the cold sensation melds beautifully with the mints’ chilled texture.
-
Fruit-Infused Sangria: A chilled, fruity sangria adds an element of sophistication while enhancing your gathering’s joyful mood.
Expert Tips for Lemon Cream Cheese Mints
Smooth Mixture: Use a hand mixer or stand mixer to ensure all ingredients are fully combined, avoiding lumps in your Lemon Cream Cheese Mints.
Sweetness Balance: Gradually add powdered sugar to prevent overwhelming sweetness; taste as you mix to find that perfect balance.
Chill Time Matters: Don’t skip the chilling step! This is crucial for firming up the mints, enhancing both texture and flavor for a delightful treat.
Dough Consistency: If the dough feels sticky, add more powdered sugar in small increments until you achieve a smooth, manageable consistency.
Creative Variations: Feel free to experiment by adding different extracts or a pinch of salt to elevate the flavor and personalize your Lemon Cream Cheese Mints.
Lemon Cream Cheese Mints Recipe FAQs
What is the best way to select fresh lemons for zesting?
Absolutely! Look for lemons that are firm and brightly colored, avoiding any fruits with dark spots or soft patches. The best ones will feel heavy for their size and should have a fragrant aroma, indicating freshness.
How long can I store Lemon Cream Cheese Mints in the fridge?
You can store the mints in an airtight container in the refrigerator for up to 2 weeks. Just make sure the container is sealed tightly to keep them fresh and zesty for whenever a craving strikes!
Can I freeze Lemon Cream Cheese Mints, and how do I do it?
Yes, you can! To freeze your mints, arrange them in a single layer on a baking sheet lined with parchment paper. Freeze them for about 1-2 hours until solid. Then, transfer the mints into an airtight container or freezer bag, ensuring to separate layers with parchment paper. They can stay in the freezer for up to 1 year. When ready to enjoy, just thaw them in the fridge for a few hours!
My mints turned out sticky; what went wrong?
Very! If your mints are sticky, it usually means they need more powdered sugar. Gradually add powdered sugar—start with ½ cup at a time—until you achieve a smooth, non-sticky dough. Make sure to mix thoroughly, scraping down the sides of the bowl, to ensure even incorporation.
Are these mints suitable for people with dietary restrictions?
Yes! You can make these Lemon Cream Cheese Mints dairy-free by substituting the unsalted butter with an equal amount of vegan margarine. Additionally, check any store-bought ingredients like powdered sugar to ensure they meet your dietary needs. Also, just a heads up: these mints do contain cream cheese, which may not be suitable for individuals who are lactose intolerant.
Can I use other flavors instead of lemon extract?
Of course! Feel free to get creative by swapping lemon extract for other citrus extracts like orange or lime. You could even experiment with flavor combinations by adding different extracts, such as vanilla, for a unique twist to your Lemon Cream Cheese Mints.
Delicious Lemon Cream Cheese Mints for a Refreshing Treat
Ingredients
Equipment
Method
- Combine the base ingredients by mixing together the cream cheese and butter until smooth. Add lemon extract and lemon zest.
- Gradually incorporate powdered sugar, mixing until a soft dough forms.
- Scoop dough into small portions and roll into balls. Place on a baking sheet.
- Flatten each ball with a fork for classic mint shapes.
- Cover and chill in the refrigerator for at least 1 hour until firm.
- Serve the chilled mints straight from the refrigerator.
Leave a Reply