
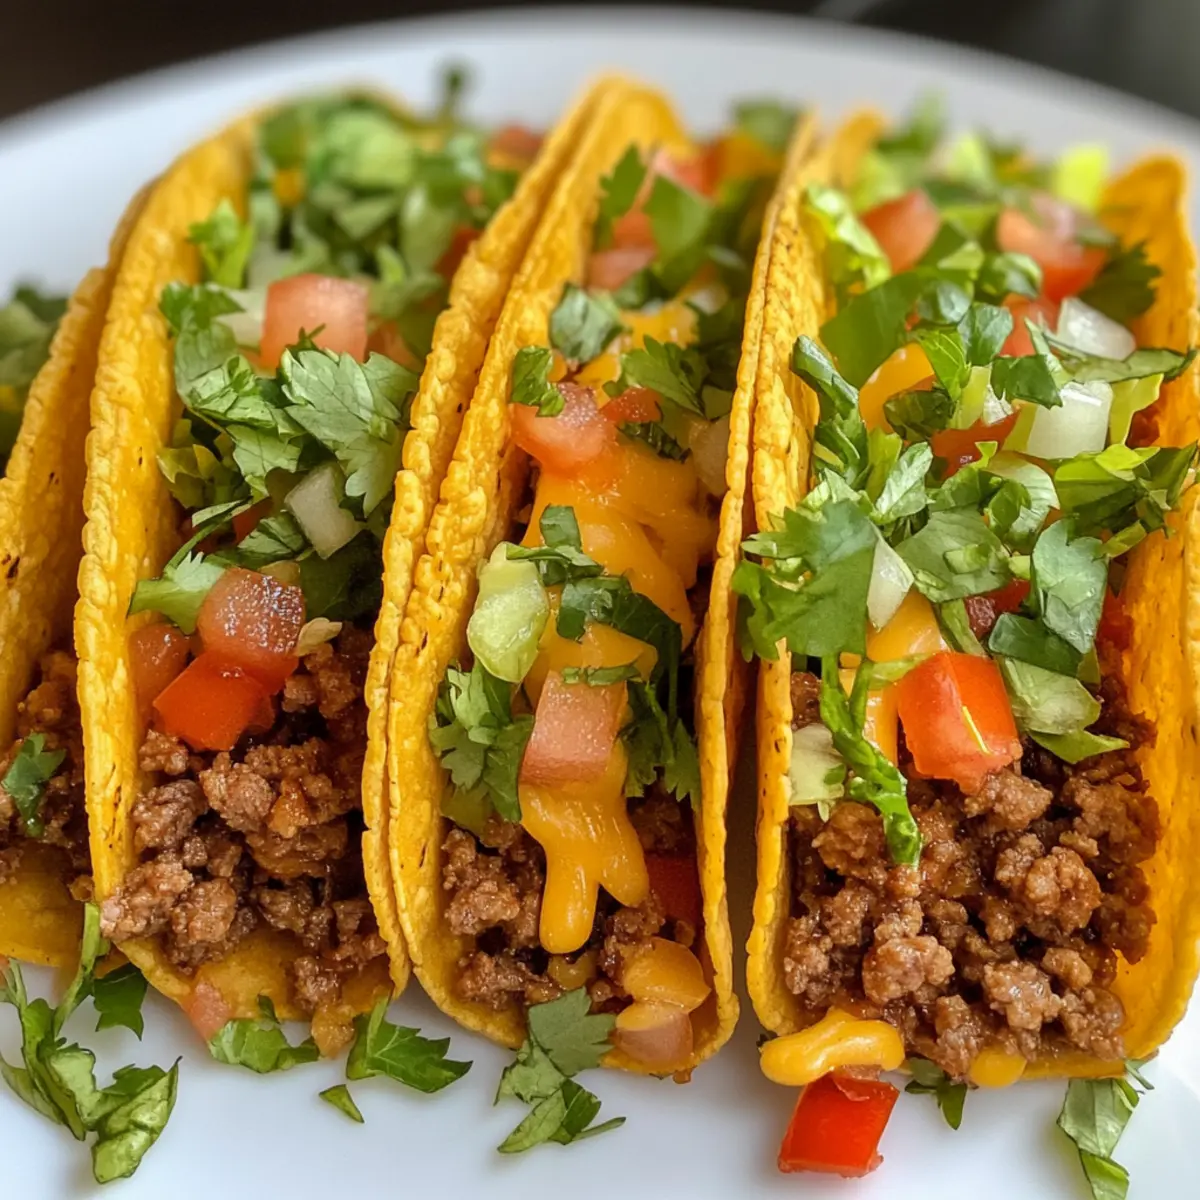
In the midst of a bustling week, when cooking feels like a chore rather than a joy, this recipe for Oven-Baked Cheesy Tacos transforms dinner into a delightful experience! The simplicity of these crispy delights, filled with seasoned beef and gooey cheese, shines through as a quick meal solution that never sacrifices comfort. Each bite is not only a satisfying crunch but also a canvas for your favorite fresh toppings. Plus, with its gluten-free option and the chance to customize your fillings, these tacos are ideal for everyone at the table. Are you ready to bring a bit of fun back to your weeknight dinners? Let’s dive into the cheesy goodness!
Why are these tacos so irresistible?
Crispy Perfection: The Oven-Baked Cheesy Tacos achieve the ultimate crunch, thanks to their hard shell that crisps beautifully in the oven.
Loaded with Flavor: Each taco is generously packed with seasoned beef and gooey cheese, creating a savory explosion in every bite.
Quick and Easy: Ideal for busy weeknights, this recipe requires minimal prep while keeping the deliciousness high.
Endless Customization: From classic expectations to adventurous toppings, you can make these tacos your own—think spicy jalapeños or fresh avocado!
Crowd-Pleasing Delight: Perfect for a dinner party or family night, everyone will love the satisfying crunch and rich flavors.
Whether you’re serving with guacamole or a side of Mexican rice, these tacos are sure to be a hit!
Oven-Baked Cheesy Tacos Ingredients
For the Filling
- Ground Beef – The main protein providing a delicious base; feel free to swap for turkey, chicken, or lentils for a tasty twist.
- Onion – Adds a hint of sweetness; use yellow, white, or red onions according to your preference.
- Garlic – Elevates the flavor profile of the beef; fresh garlic is best, while garlic powder can work in a pinch.
- Taco Seasoning – Essential for that classic taco taste; make your own blend with chili powder, cumin, and paprika if desired!
- Tomato Sauce or Salsa – Brings moisture and a tangy kick; you can substitute with diced tomatoes or a dash of hot sauce.
For the Shells
- Taco Shells – Ensure they are sturdy; these crispy carriers hold all the delicious fillings without breaking apart.
For the Cheese
- Shredded Cheese – Melts beautifully for that gooey goodness; using a blend of cheddar and Monterey Jack offers the best flavor combination.
For the Toppings
- Lettuce, Tomatoes, Red Onion, Cilantro – Fresh veggies add crunch and brightness; don’t hesitate to include other favorites like avocado or sour cream for extra delight!
These Oven-Baked Cheesy Tacos are sure to steal the show at dinner time! Enjoy the crispy crunch and rich flavors as you customize your perfect taco experience.
Step‑by‑Step Instructions for Oven-Baked Cheesy Tacos
Step 1: Preheat Oven
Start by preheating your oven to 400°F (200°C). This ensures that your Oven-Baked Cheesy Tacos will reach the perfect level of crunchiness and gooeyness. Meanwhile, gather all your ingredients and equipment, including a baking dish and a skillet, so everything is ready when you need it.
Step 2: Prepare Taco Shells
Carefully arrange the hard taco shells upright in a baking dish. This position allows for even filling and ensures that the shells maintain their structure during baking. Visualize the shells forming a delightful taco town, ready to be filled with delicious goodness!
Step 3: Cook Ground Beef
In a large skillet over medium heat, brown the ground beef. Add diced onion to the skillet and sauté until the onion turns translucent, about 5 minutes. Drain any excess fat, then mix in freshly minced garlic and taco seasoning, cooking for an additional minute until fragrant. This mixture will become the flavorful heart of your tacos.
Step 4: Combine Sauce
Next, stir in the tomato sauce or salsa with the beef mixture. Allow the filling to simmer for about 5 minutes, letting the flavors meld together beautifully. You’ll know it’s ready when the sauce is bubbling lightly and the beef is fully coated in that delicious, tangy goodness.
Step 5: Assemble Tacos
Now it’s time to fill your taco shells! Spoon the seasoned beef mixture generously into each shell, packing it tightly for a satisfying bite. Top each filled taco with a handful of shredded cheese, ensuring every taco is brimming with cheesy delight—this is the key to your Oven-Baked Cheesy Tacos!
Step 6: Bake Tacos
Carefully place the baking dish in your preheated oven. Bake for 10-15 minutes, checking for that golden-brown shell and bubbling cheese on top. The aroma wafting from your oven will make it hard to resist! Once they look deliciously crispy and bubbly, they’re ready to be removed.
Step 7: Add Fresh Toppings
Once out of the oven, let your delicious Oven-Baked Cheesy Tacos cool for a moment. Finish by adding your favorite fresh toppings, such as diced tomatoes, shredded lettuce, red onion, and cilantro. This step not only adds color but also brings a fresh crunch that perfectly contrasts the warm, cheesy filling.
Expert Tips for Oven-Baked Cheesy Tacos
Drain the Fat: Always drain excess grease from the ground beef to avoid soggy filling. This keeps your Oven-Baked Cheesy Tacos light and delicious.
Sturdy Shells: Ensure you choose sturdy taco shells that can hold the filling without breaking. Fragile shells can lead to messy tacos!
Fill Generously: Pack each taco shell with plenty of beef and cheese to avoid empty bites. A well-filled taco is the best taco!
Watch the Bake Time: Keep a close eye on your tacos towards the end of baking. Overbaking can make shells too hard—aim for a golden color and bubbly cheese.
Customize Wisely: Feel free to mix different toppings, but be cautious not to overload them, which can cause the shells to crack. Enjoy the variety while keeping your Oven-Baked Cheesy Tacos together!
What to Serve with Oven-Baked Cheesy Tacos
Elevate your taco night by pairing these crispy delights with sides and accompaniments that will round out the meal beautifully.
-
Mexican Rice: A fluffy, seasoned side dish that complements the rich flavors of the tacos, adding a hearty element to the meal.
-
Guacamole: Creamy and rich, it’s the perfect contrast to the crunchy tacos. Fresh avocados mixed with lime and spices provide a refreshing twist.
-
Black Bean Salad: Packed with protein and vibrant colors, this salad adds a fresh and zesty touch, enhancing the overall taco experience.
-
Corn on the Cob: Grilled or boiled, slather it with butter and sprinkle some chili powder for a sweet and spicy accompaniment that everyone loves.
-
Pico de Gallo: This fresh salsa garnished with tomatoes, onions, and cilantro brings brightness to every bite, making it an appealing topping for the tacos.
-
Tropical Fruit Punch: A refreshing drink to balance the savory tacos. The sweetness and tanginess are delightful partners to the savory filling.
-
Churros: Finish the meal with these warm, cinnamon-sugar treats. Their crispy exterior and soft center are a guilty pleasure after a delicious savory feast.
Your Oven-Baked Cheesy Tacos will shine even brighter with these delightful pairings!
How to Store and Freeze Oven-Baked Cheesy Tacos
Fridge: Store leftover Oven-Baked Cheesy Tacos in an airtight container for up to 3 days. Reheat in the oven for a crispy texture.
Freezer: For longer storage, freeze unbaked tacos in a single layer on a baking sheet before transferring them to a freezer-safe bag. They can be stored for up to 2 months.
Reheating: To reheat frozen tacos, bake them directly from the freezer at 375°F (190°C) for about 20–25 minutes or until heated through and crisp.
Make-Ahead Tips: Prepare the beef filling and fill the taco shells ahead of time, then refrigerate for up to 24 hours. Simply bake when ready to serve!
Make Ahead Options
These Oven-Baked Cheesy Tacos are perfect for meal prep, making weeknight dinners a breeze! You can prepare the beef filling up to 3 days in advance; simply cook the ground beef with onions, garlic, and taco seasoning, then let it cool before refrigerating in an airtight container. Assemble the tacos by filling the shells and adding cheese just before baking to maintain that crispy texture. When you’re ready to serve, pop them in the oven at 400°F (200°C) for 10-15 minutes until the cheese is bubbly. By prepping ahead, you’ll enjoy a stress-free cooking experience without sacrificing flavor—these tacos will be just as delicious!
Oven-Baked Cheesy Tacos Variations & Substitutions
Customize these Oven-Baked Cheesy Tacos to suit your taste and dietary needs!
- Gluten-Free: Use gluten-free taco shells or make your own with corn tortillas to enjoy this recipe without the gluten.
- Lighter Protein: Swap ground beef for ground turkey, chicken, or plant-based alternatives like lentils or black beans for a healthful twist.
- Cheese Variety: Experiment with different cheeses, such as pepper jack for a spicy kick or queso fresco for a mild finish.
- Extra Crunch: Add crushed tortilla chips or crispy bacon bits on top just before serving for an exciting texture contrast.
- Hearty Additions: Mix in black beans or corn into the beef filling for added flavor and a satisfying heartiness.
- Spicy Touch: Top your tacos with jalapeño slices or a drizzle of hot sauce to bring on the heat that delights!
- Creamy Twist: Opt for avocado or a dollop of sour cream as toppings to introduce a creamy element that complements the crunch beautifully.
- Herby Freshness: Enhance your tacos with fresh herbs like cilantro or parsley, making each bite burst with freshness.
No matter what variation you choose, your delicious Oven-Baked Cheesy Tacos will surely bring warmth and joy to your family gatherings. For additional sides, consider serving with some homemade guacamole or zesty Mexican rice for a complete meal experience!
Oven-Baked Cheesy Tacos Recipe FAQs
What’s the best way to choose ripe ingredients for my tacos?
Absolutely! When selecting your ingredients, look for firm taco shells that are not cracked. Choose ground beef that is bright red with a little fat for flavor—ideally 80/20 for a juicy taco. For onions, pick ones that feel heavy for their size and have smooth skins. Garlic should be firm, not sprouted, and choose fresh tomatoes with vibrant color and no dark spots for the freshest toppings.
How should I store leftover Oven-Baked Cheesy Tacos?
Very simply! Place any leftovers in an airtight container and store them in the fridge for up to 3 days. When it’s time to enjoy them again, preheat your oven and reheat at 350°F (175°C) for about 10-15 minutes to restore their crispy texture. Trust me, it’s way better than the microwave!
Can I freeze my Oven-Baked Cheesy Tacos?
Yes, you can! To freeze, assemble your unbaked tacos and place them in a single layer on a baking sheet. Freeze them until solid, then transfer to a freezer-safe bag, removing as much air as possible. They can be stored for up to 2 months. When ready to bake, preheat your oven to 375°F (190°C) and cook directly from frozen for about 20-25 minutes, until they are heated through and crispy on top.
What do I do if my taco shells crack or break during baking?
Not to worry! Choose sturdier brands of taco shells for a better experience, and ensure they’re positioned securely in the baking dish. If breakage occurs, it can be mitigated by not overfilling the tacos. A good rule is to fill them halfway and add cheese on top. This technique helps keep everything together and prevents cracks from forming!
Are Oven-Baked Cheesy Tacos suitable for dietary restrictions?
Absolutely! For a gluten-free version, simply use gluten-free taco shells. If you have any concerns about allergies, always check packaging for any allergens. Since the recipe allows for a variety of fillings, feel free to swap out the ground beef for turkey, chicken, or even a plant-based protein like lentils or black beans.
Can pets safely share Oven-Baked Cheesy Tacos?
It’s best to keep tacos away from pets. Ingredients like onion and garlic can be harmful to dogs and cats. While a tiny amount of beef or a bit of cooked cheese might be okay, avoid sharing the fully loaded tacos with them. Instead, save a little cooked meat without seasoning for your furry friend as a special treat!

Oven-Baked Cheesy Tacos: The Ultimate Crunchy Comfort Bite
Ingredients
Equipment
Method
- Preheat your oven to 400°F (200°C). Gather all ingredients and equipment.
- Arrange taco shells upright in a baking dish.
- In a large skillet over medium heat, brown the ground beef. Add onion and sauté until translucent. Drain excess fat, mix in garlic and taco seasoning, cook for an additional minute.
- Stir in the tomato sauce or salsa with the beef mixture and let simmer for about 5 minutes.
- Fill each taco shell with the beef mixture and top with shredded cheese.
- Bake in the preheated oven for 10-15 minutes, until shells are golden-brown and cheese is bubbling.
- Add your favorite toppings like lettuce, tomatoes, onions, and cilantro before serving.
Leave a Reply