
Can you smell that? The savory aroma of spices mingling with cheese is weaving through my kitchen, and I’m already thrilled about what’s to come. Oven-Baked Cheesy Tacos are my go-to solution when I want to whip up a quick dinner that pleases the entire family. These delightful tacos not only bring joy to our taste buds but also make weeknight cooking a breeze with their easy, mess-free preparation. Plus, they’re completely customizable—whether you’re a meat lover or prefer a vegetarian option, there’s something for everyone. Trust me, once you try these cheesy delights, taco night will never be the same. What will you load your tacos with tonight?
Why Are Oven-Baked Cheesy Tacos a Must-Try?
Easy Preparation: With simple steps and minimal cleanup, you’ll spend less time in the kitchen and more time enjoying dinner with family.
Crowd-Pleasing Flavor: The combination of savory meat or beans, gooey cheese, and fresh toppings creates a flavor explosion that even picky eaters will love.
Customizable Options: Everyone can create their perfect taco, whether it’s a meat lover’s dream or a vibrant veggie delight.
Quick Cooking Time: Ready to serve in just 15 minutes, making it perfect for busy weeknights or unexpected guests.
Healthier Choice: Opt for lean proteins or go vegetarian, ensuring you can indulge without the guilt. Plus, these tacos fit well with options like gluten-free tortilla or homemade taco seasoning for extra flavor.
Oven-Baked Cheesy Tacos Ingredients
For the Filling
• Ground Beef – Provides the main protein; substitute with ground turkey or chicken for a lighter option.
• Olive Oil – Used for sautéing, enhances flavor, and prevents sticking.
• Onion – Adds sweetness and depth; can substitute with shallots if desired.
• Garlic – Introduces aromatic flavor; fresh minced is preferred for the best taste.
• Taco Seasoning – Essential for flavor; feel free to use store-bought or whip up your own blend.
• Tomato Sauce or Salsa – Adds moisture and tang; select based on your flavor preference.
• Salt and Pepper – Season according to taste preferences.
For the Shells
• Taco Shells (10 small) – Forms the base of your tacos; both flour and corn options work well, just warm them slightly to avoid cracking.
• Shredded Cheese (2 cups – Cheddar or Mexican blend) – Melts beautifully for that gooey texture; consider pepper jack for a spicy kick.
For Toppings
• Shredded Lettuce (1 cup) – Adds crunch and freshness as a topping.
• Diced Tomatoes (0.5 cup) – Brightens up the dish with color and flavor.
• Diced Red Onion (0.5 cup) – Provides a sharp contrast to the other flavors.
• Chopped Fresh Cilantro (0.25 cup) – Enhances flavor and color with its fresh taste.
• Optional Toppings – Customize with sour cream, jalapeños, guacamole, or your favorite hot sauce for an extra zing.
Get ready to dive into delicious Oven-Baked Cheesy Tacos with this amazing ingredient lineup that will satisfy everyone’s cravings!
Step‑by‑Step Instructions for Oven-Baked Cheesy Tacos
Step 1: Preheat Oven
Begin by preheating your oven to 375°F (190°C). While the oven heats up, prepare a baking dish by greasing it lightly with cooking spray or lining it with foil for easy cleanup. This ensures that your Oven-Baked Cheesy Tacos cook evenly and don’t stick.
Step 2: Sauté Aromatics
In a skillet over medium heat, add a drizzle of olive oil and allow it to warm up. Next, toss in the diced onion and minced garlic, cooking for about 2-3 minutes, until the onions are soft and the garlic is fragrant. This step fills your kitchen with a warm aroma, setting the stage for delicious cheesy tacos.
Step 3: Cook Meat
Add the ground beef to the skillet, breaking it apart with a spatula as it cooks. Mix in taco seasoning, tomato sauce, salt, and pepper, allowing the mixture to simmer for around 5 minutes. You want it to thicken slightly, creating a flavorful filling for your Oven-Baked Cheesy Tacos.
Step 4: Fill Shells
Once the meat mixture is ready, take your warm taco shells and carefully spoon the savory filling into each one. Be sure to leave some space at the top for the cheese, as this will help the flavors meld beautifully during baking while also ensuring a crispy texture.
Step 5: Add Cheese & Arrange
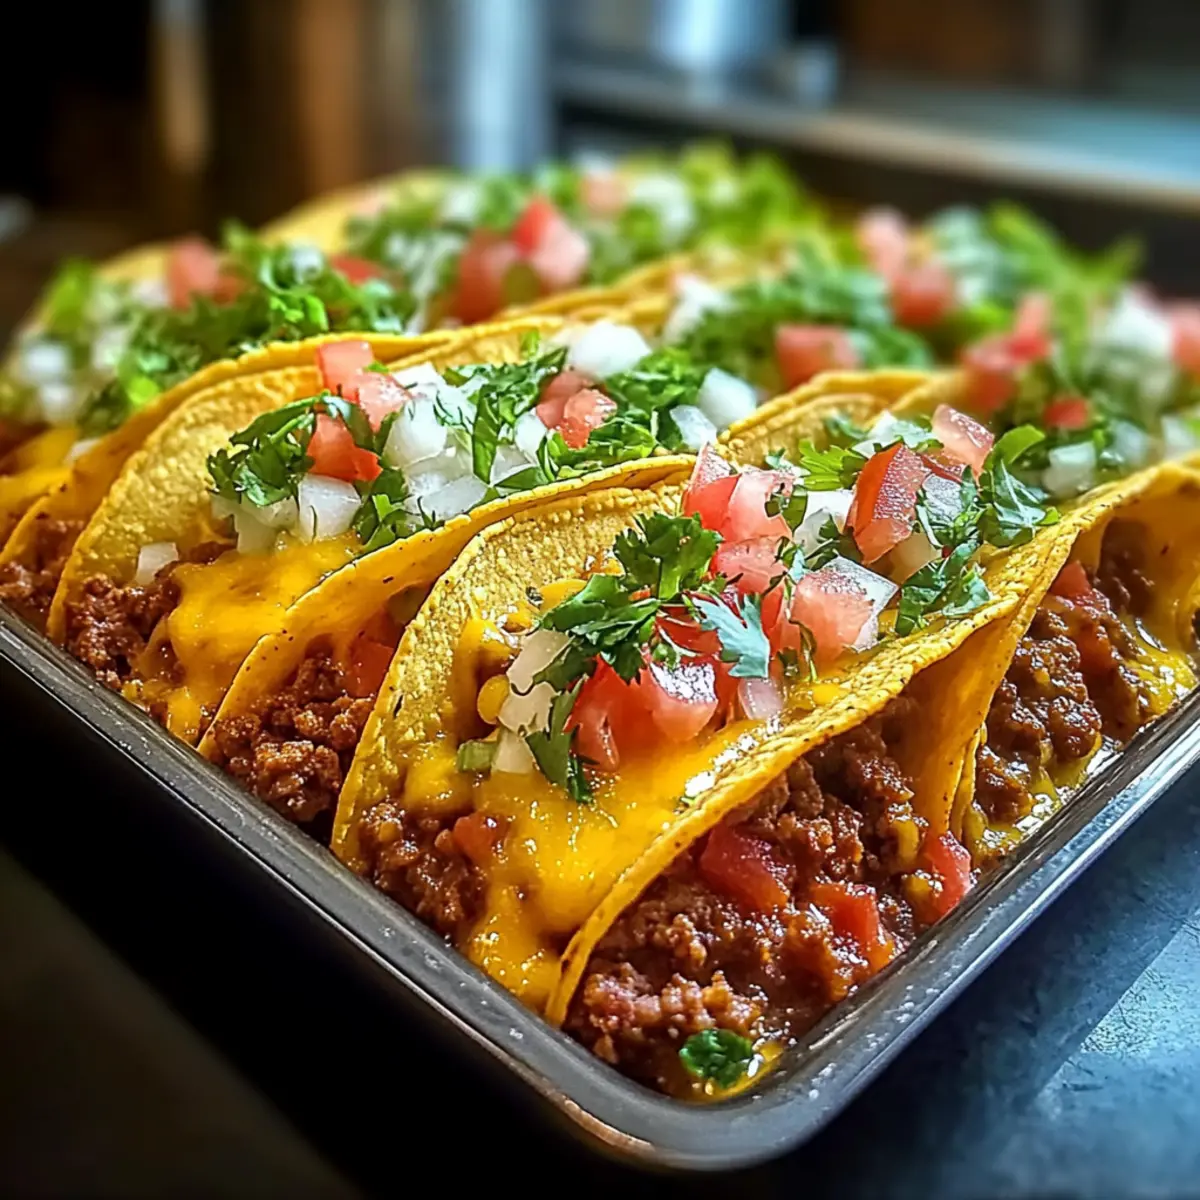
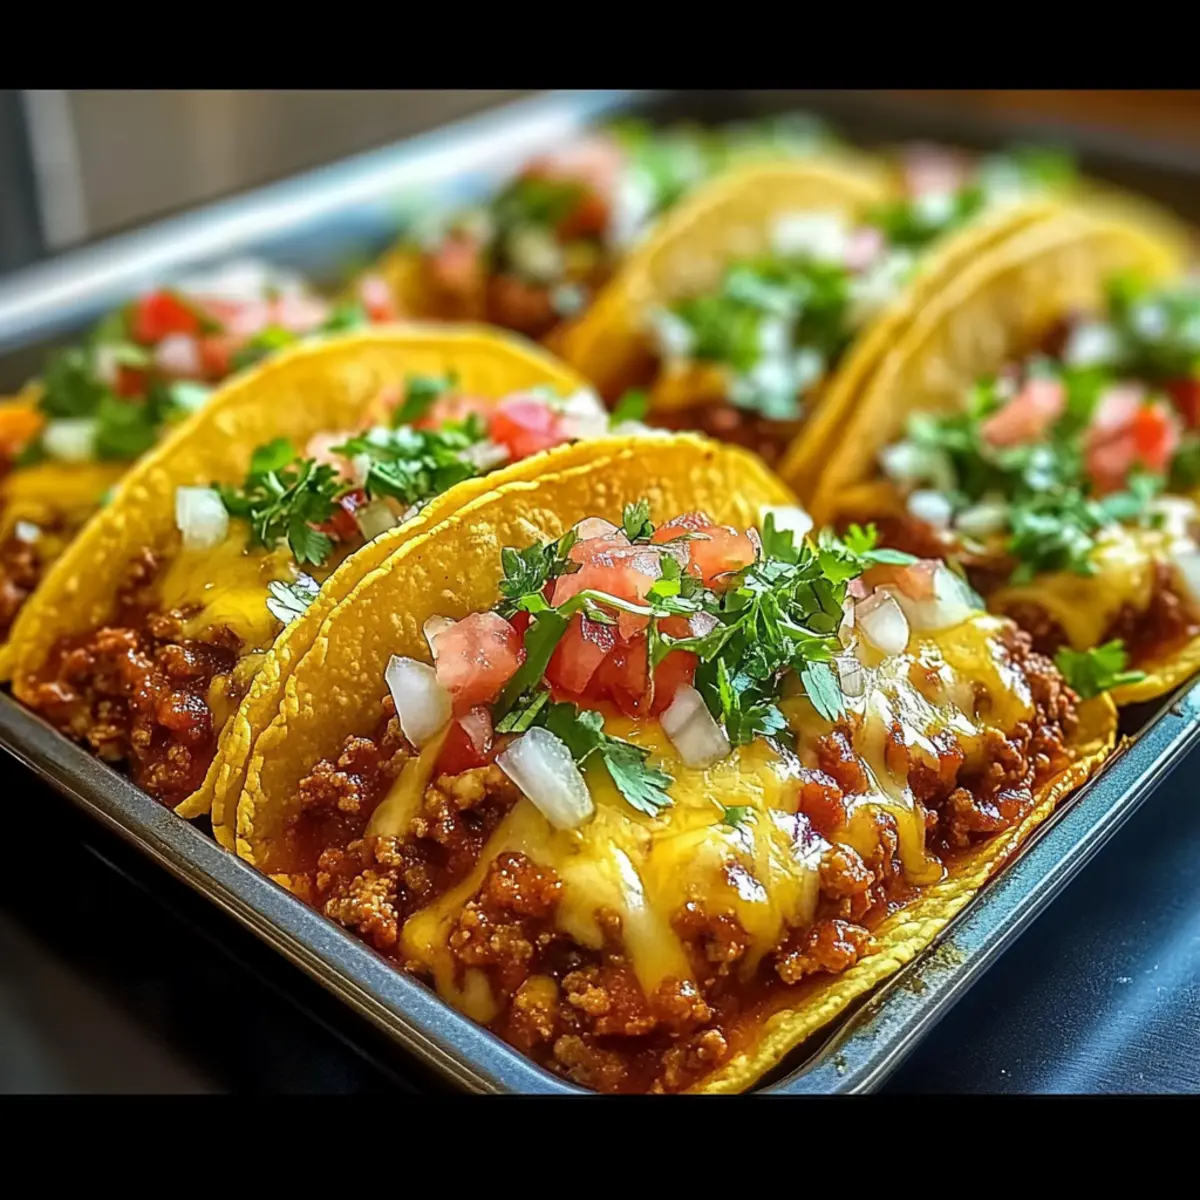
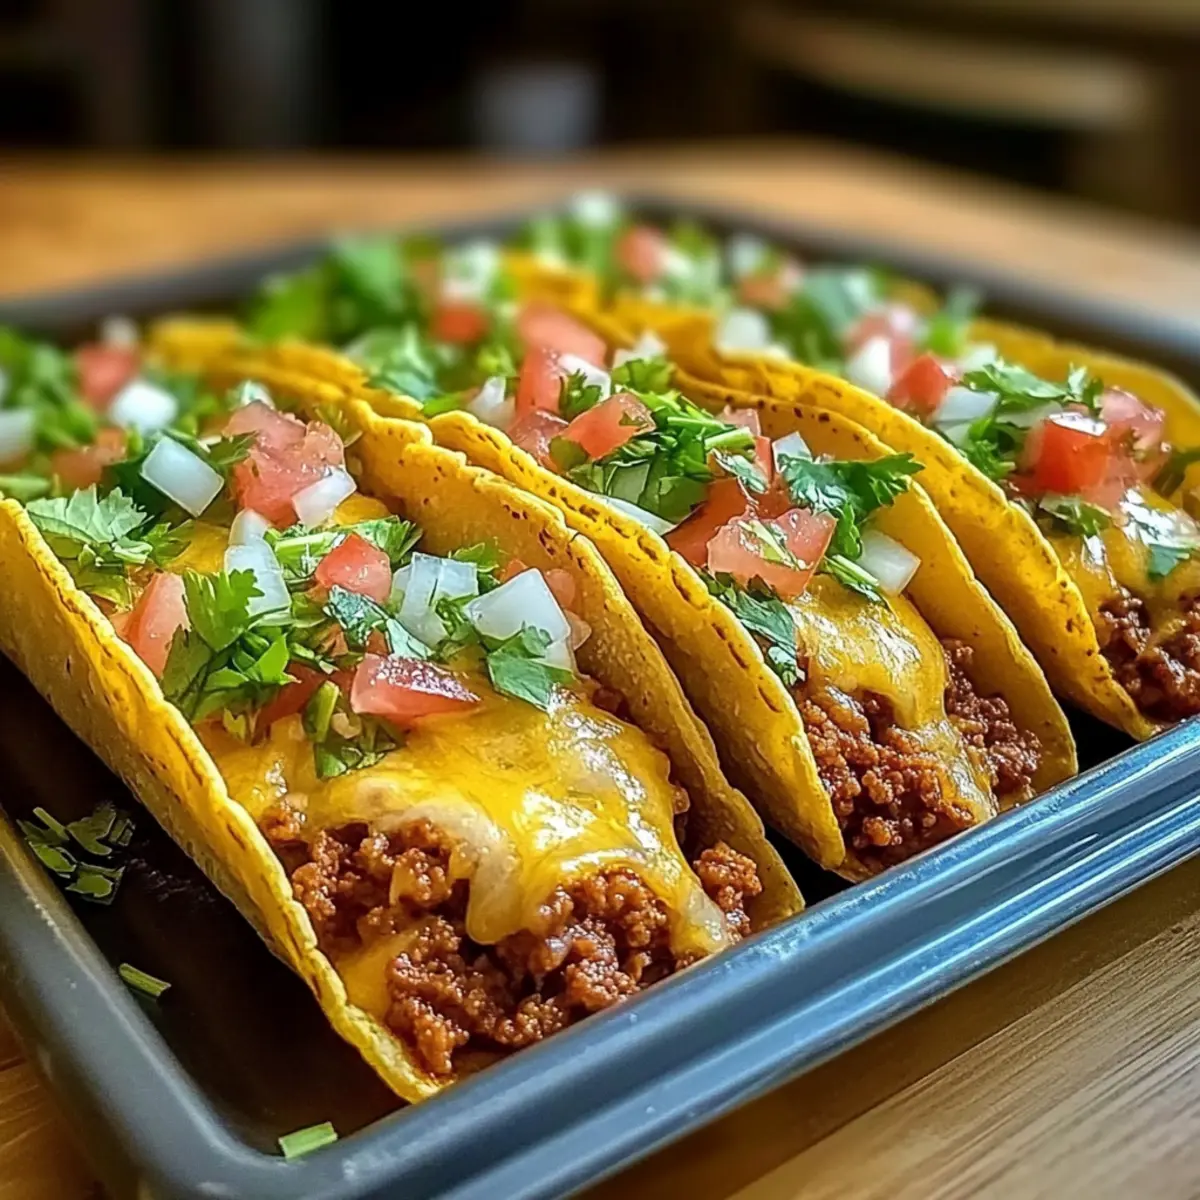
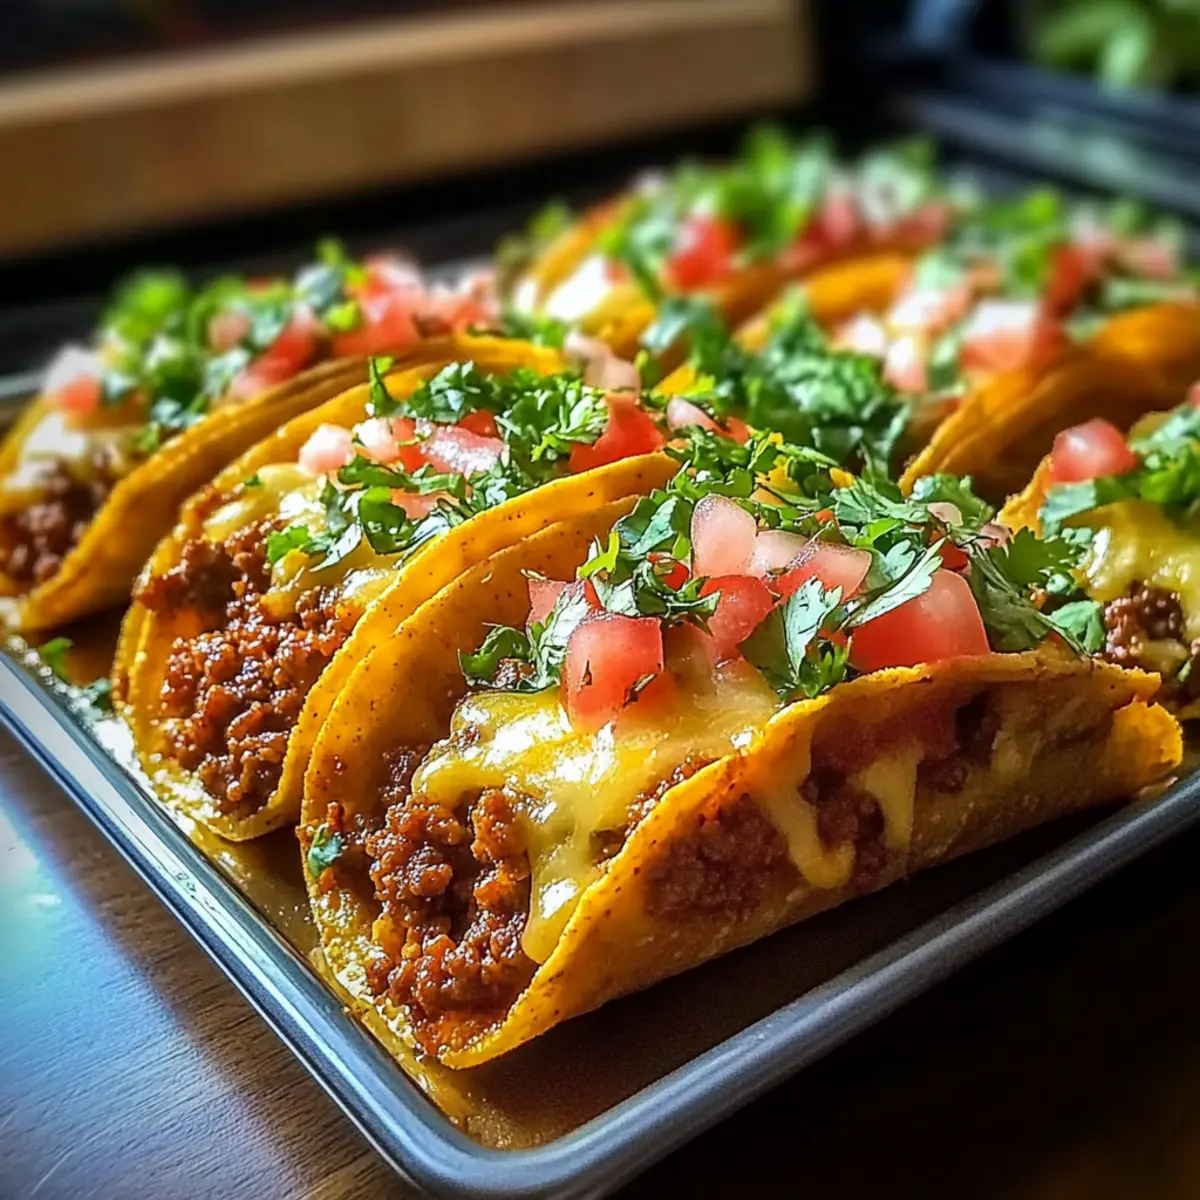
Generously sprinkle shredded cheese over the filled taco shells, ensuring each one is well covered for that delicious, gooey effect. Then, carefully place the filled tacos upright in the prepared baking dish, packing them snugly together to prevent tipping during baking.
Step 6: Bake
Slide the baking dish into your preheated oven and bake for 10-15 minutes. Keep a close eye on them; you’ll know they’re done when the cheese is melted, bubbly, and the taco shells are slightly crispy on the edges. This is when your Oven-Baked Cheesy Tacos turn into a mouthwatering delight.
Step 7: Top & Serve
Once baked to perfection, remove the dish from the oven and let it cool for a couple of minutes. Then, top your Oven-Baked Cheesy Tacos with fresh shredded lettuce, diced tomatoes, red onion, and cilantro. Feel free to add any other optional toppings you desire for a finishing touch.
Storage Tips for Oven-Baked Cheesy Tacos
Fridge: Store leftovers in an airtight container for up to 3-4 days. This keeps your Oven-Baked Cheesy Tacos fresh for quick snacking or easy reheating.
Freezer: For longer storage, freeze unbaked tacos in a sealed container or freezer bag for up to 2 months. Ideal for a hassle-free future meal!
Reheating: To maintain crispiness, reheat baked tacos in a 350°F (175°C) oven for about 10 minutes. Enjoy that melty cheese just like when they were fresh!
Assembling Later: If you prefer making them ahead, keep the filling and shells separate until ready to bake. This helps prevent sogginess and ensures the perfect crunch!
What to Serve with Oven-Baked Cheesy Tacos?
Enhance your meal with perfect sides and drinks that elevate taco night to an unforgettable experience.
- Crispy Mexican Street Corn: Drizzled with lime, cilantro, and cheese, this vibrant side complements the cheesy tacos and adds a sweet crunch.
- Refreshing Guacamole: Creamy avocado goodness balances the richness of cheesy tacos while providing a bright flavor contrast.
- Spicy Salsa Fresca: Chopped tomatoes, onions, and jalapeños bring a fresh, zesty bite, perfectly cutting through the taco’s delicious richness.
- Zesty Lime Rice: Flavored with lime and cilantro, this fluffy rice serves as a great base or side, soaking up every taco bite.
- Classic Refried Beans: Smooth and savory, they offer a creamy texture that pairs harmoniously with the crunchy taco shells.
- Crisp Garden Salad: Light and refreshing, a salad dressed with a zesty vinaigrette introduces a healthy crunch to the meal.
- Mexican Hot Chocolate: Warm and spiced, this drink wraps up the meal with a sweet finish, ideal for taco night comfort.
Serving these delightful sides ensures your Oven-Baked Cheesy Tacos shine as the centerpiece of a scrumptious feast!
Oven-Baked Cheesy Tacos Variations
Feel free to have fun with your Oven-Baked Cheesy Tacos by mixing and matching flavors and ingredients!
- Breakfast Tacos: Swap the filling for scrambled eggs and breakfast sausage for a delicious morning twist.
- Vegetarian Delight: Replace ground beef with seasoned black beans or lentils, adding colorful veggies like bell peppers for texture.
- Gluten-Free: Use gluten-free taco shells or large lettuce leaves as wraps for a gluten-free option that’s just as tasty.
- Spicy Kick: Add diced jalapeños to the meat mixture or sprinkle them on top for a fiery flavor boost.
- Creamy Avocado: Top your tacos with sliced or mashed avocado to introduce a creamy element that complements the cheese beautifully.
- Mushroom Magic: Substitute ground meat with sautéed mushrooms and fresh spinach for a hearty yet meat-free filling.
- Taco Chip Crunch: Add crushed tortilla chips inside the shells for an extra crunchy layer that contrasts with the cheese.
- Sweet & Savory: Mix in some diced pineapple or mango with the filling for a sweet touch that pairs well with savory spices.
No matter how you customize these tacos, they’re sure to please the whole family! For more flavor, try mixing in your own homemade taco seasoning, or get creative with various vegetable options. Enjoy!
Make Ahead Options
Oven-Baked Cheesy Tacos are a fantastic choice for meal prep, saving you precious time on busy weeknights. You can prepare the filling—cooked ground beef mixed with taco seasoning, tomato sauce, and sautéed onions—up to 24 hours in advance. Simply refrigerate in an airtight container. For added convenience, you can also fill the taco shells with the mixture and keep them assembled in the fridge for up to 3 days. To maintain their quality, wrap the dish tightly with plastic wrap. When you’re ready to enjoy, just sprinkle cheese on top and bake straight from the fridge, adding an extra minute or two to the baking time. Enjoy delicious, hassle-free tacos in no time!
Tips for the Best Oven-Baked Cheesy Tacos
-
Warm Shells First: Warm taco shells slightly in the microwave wrapped in a damp paper towel to prevent cracking during filling.
-
Avoid Soggy Shells: If your filling is too wet, drain excess liquid to keep the taco shells crispy and enjoyable.
-
Pack Tightly: For stability, arrange taco shells snugly in the baking dish to prevent tipping during baking and ensure even cooking.
-
Experiment with Fillings: Don’t hesitate to customize with different proteins or veggies; try black beans or lentils for a delicious vegetarian option in your Oven-Baked Cheesy Tacos.
-
Cheese Choice Matters: Using a blend of cheeses can enhance flavor; cheddar and pepper jack create a delightful gooey texture that elevates every bite.
Oven-Baked Cheesy Tacos Recipe FAQs
What kind of meat should I use for the filling?
Absolutely! Ground beef is a classic choice, but you can easily swap it for ground turkey or chicken for a lighter meal. For a vegetarian twist, seasoned black beans or lentils work wonders, especially when mixed with sautéed veggies like bell peppers and corn.
How do I store leftover Oven-Baked Cheesy Tacos?
Store leftovers in an airtight container in the refrigerator for up to 3-4 days. This ensures they stay fresh for quick meals or snacks. When reheating, pop them in a 350°F (175°C) oven for about 10 minutes to retain that delightful crispness.
Can I freeze Oven-Baked Cheesy Tacos?
Very! You can freeze unbaked tacos for up to 2 months. Simply assemble the filled taco shells, place them in a sealed freezer-friendly container or bag, and label them. When you’re ready to enjoy, bake them directly from the freezer – just add a few extra minutes to the baking time, and you’ll have a delicious meal ready to go!
What if my filling turns out too wet?
If your filling is too runny, don’t worry! Simply drain any excess liquid after cooking to prevent soggy taco shells. Aim for the consistency of a thick stew, which will hold its shape beautifully when stuffed into your taco shells.
Are there any dietary considerations with this recipe?
Absolutely! For those with gluten sensitivities, you can easily swap traditional taco shells for gluten-free options, or use large lettuce leaves as a fresh, crunchy wrap. Additionally, if you’re making this for young children or those with allergies, be sure to check for any specific ingredients that may trigger sensitivities, such as dairy in the cheese or spices in the seasoning.
How ripe should my avocado be if I want to add it as a topping?
Choose avocados that yield slightly to gentle pressure on the skin; that’s a sign they’re ripe and creamy on the inside. If they’re too firm, let them sit at room temperature for a day or two until they’re ready. Enjoying perfectly ripe avocado slices on your Oven-Baked Cheesy Tacos adds richness that’s simply divine!
Oven-Baked Cheesy Tacos: A Family Favorite Made Easy
Ingredients
Equipment
Method
- Preheat your oven to 375°F (190°C) and prepare a baking dish.
- In a skillet, add olive oil and warm it up, then sauté the diced onion and minced garlic for 2-3 minutes.
- Add ground beef, break it apart, and cook with taco seasoning, tomato sauce, salt, and pepper for 5 minutes.
- Spoon the meat mixture into warm taco shells, leaving space at the top for cheese.
- Sprinkle shredded cheese over filled shells and arrange them upright in the baking dish.
- Bake for 10-15 minutes until the cheese is melted and bubbly.
- Remove from the oven, cool for a couple of minutes, and top with fresh veggies and optional toppings.
Leave a Reply