
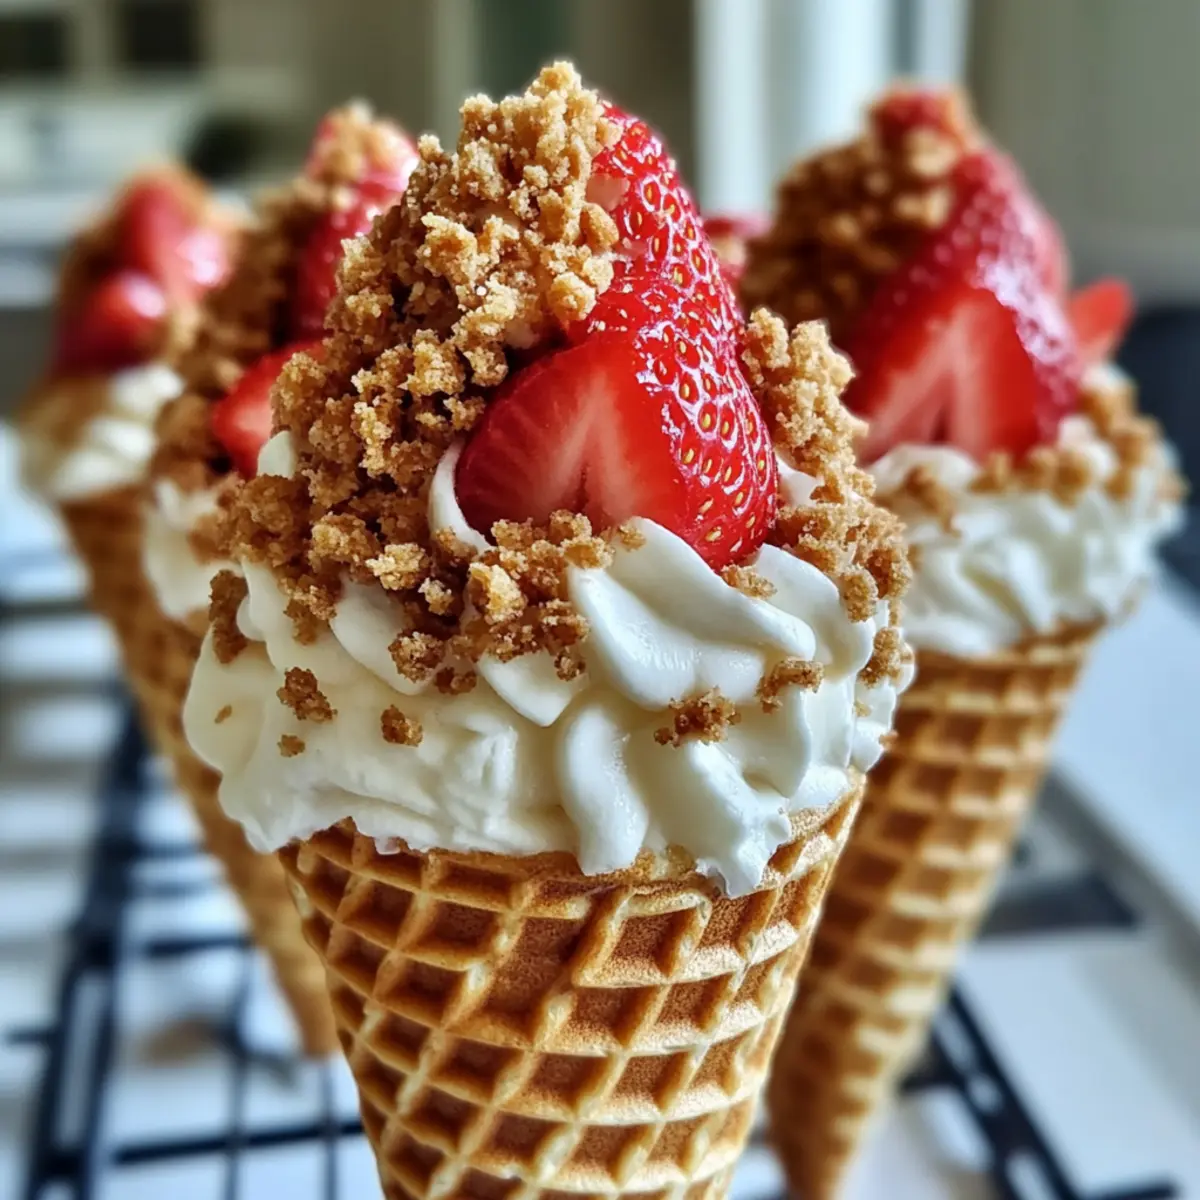
As I stood in my kitchen, the sweet scent of summer wafted in through the window, reminding me how much I love creating delightful treats during this vibrant season. Today, I’m thrilled to share a recipe that perfectly captures that essence: Strawberry Crunch Cheesecake Cones. This no-bake summer dessert is a blissful fusion of creamy cheesecake and fresh strawberries, all wrapped up in a crispy waffle cone. Not only are these cones easy to make, but they also serve as a fun crowd-pleaser for any gathering. They transform classic cheesecake into a portable indulgence that’s perfect for family celebrations or just a sweet treat for yourself on a sunny afternoon. Are you ready to dive into a delightful twist on cheesecake that everyone will love?

Why are Strawberry Crunch Cheesecake Cones a must-try?
Unique Twist: These Strawberry Crunch Cheesecake Cones transform a beloved dessert into a portable delight, perfect for summertime enjoyment.
No-Bake Convenience: With no baking required, you can whip these up quickly and enjoy more time soaking in the sun.
Crowd-Pleasing Treat: They’re not just delicious; their vibrant presentation makes them a show-stopper at any gathering.
Versatile Flavor: Feel free to swap strawberries for other berries or use graham cracker crumbs for a different flavor experience.
Chill and Serve: These cones can be assembled in advance and stored in the fridge, perfect for last-minute summer parties or spontaneous gatherings!
Strawberry Crunch Cheesecake Cones Ingredients
For the Cheesecake Filling
- Fresh Strawberries – Adds natural sweetness and vibrant flavor; use ripe strawberries for the best taste.
- Cream Cheese – Provides a rich and creamy base for the cheesecake filling; ensure it is softened for smooth blending.
- Whipped Cream – Lightens the cheesecake filling for a fluffy texture; don’t over-whip to prevent graininess.
- Strawberry Sauce – Enhances the strawberry flavor; cool completely before mixing into the cheesecake filling.
For the Topping
- Vanilla Wafer Cookies – Adds a crunchy topping; toast lightly for enhanced flavor.
For the Cones
- Waffle Cones – The vessel for the cheesecake and toppings, providing a satisfying crunch; opt for sugar cones for even more sweetness!
These Strawberry Crunch Cheesecake Cones are not only a delightful treat but also perfect for summer gatherings!
Step‑by‑Step Instructions for Strawberry Crunch Cheesecake Cones
Step 1: Prepare Strawberry Sauce
Start by blending 1 cup of fresh strawberries in a food processor until smooth. Pour the mixture into a small saucepan over medium heat and cook for about 8-10 minutes, stirring occasionally until thickened. Remove from heat and allow the sauce to cool completely, which will enhance the strawberry flavor for your Strawberry Crunch Cheesecake Cones.
Step 2: Make Cheesecake Filling
In a mixing bowl, combine 8 oz of softened cream cheese with ½ cup of granulated sugar. Beat with an electric mixer on medium speed for about 2-3 minutes until smooth and creamy. Next, gently fold in 1 cup of whipped cream until fully incorporated, being careful not to over-mix to maintain that fluffy texture. This cheesecake filling is the heart of your Strawberry Crunch Cheesecake Cones.
Step 3: Combine
Carefully add the cooled strawberry sauce into the cream cheese mixture, folding it gently without overmixing. Aim for a marbled effect where the strawberry sauce remains visible, providing a lovely color contrast. This harmonious blend creates a delightful cheesecake filling that will make your Strawberry Crunch Cheesecake Cones irresistible.
Step 4: Assemble Cones
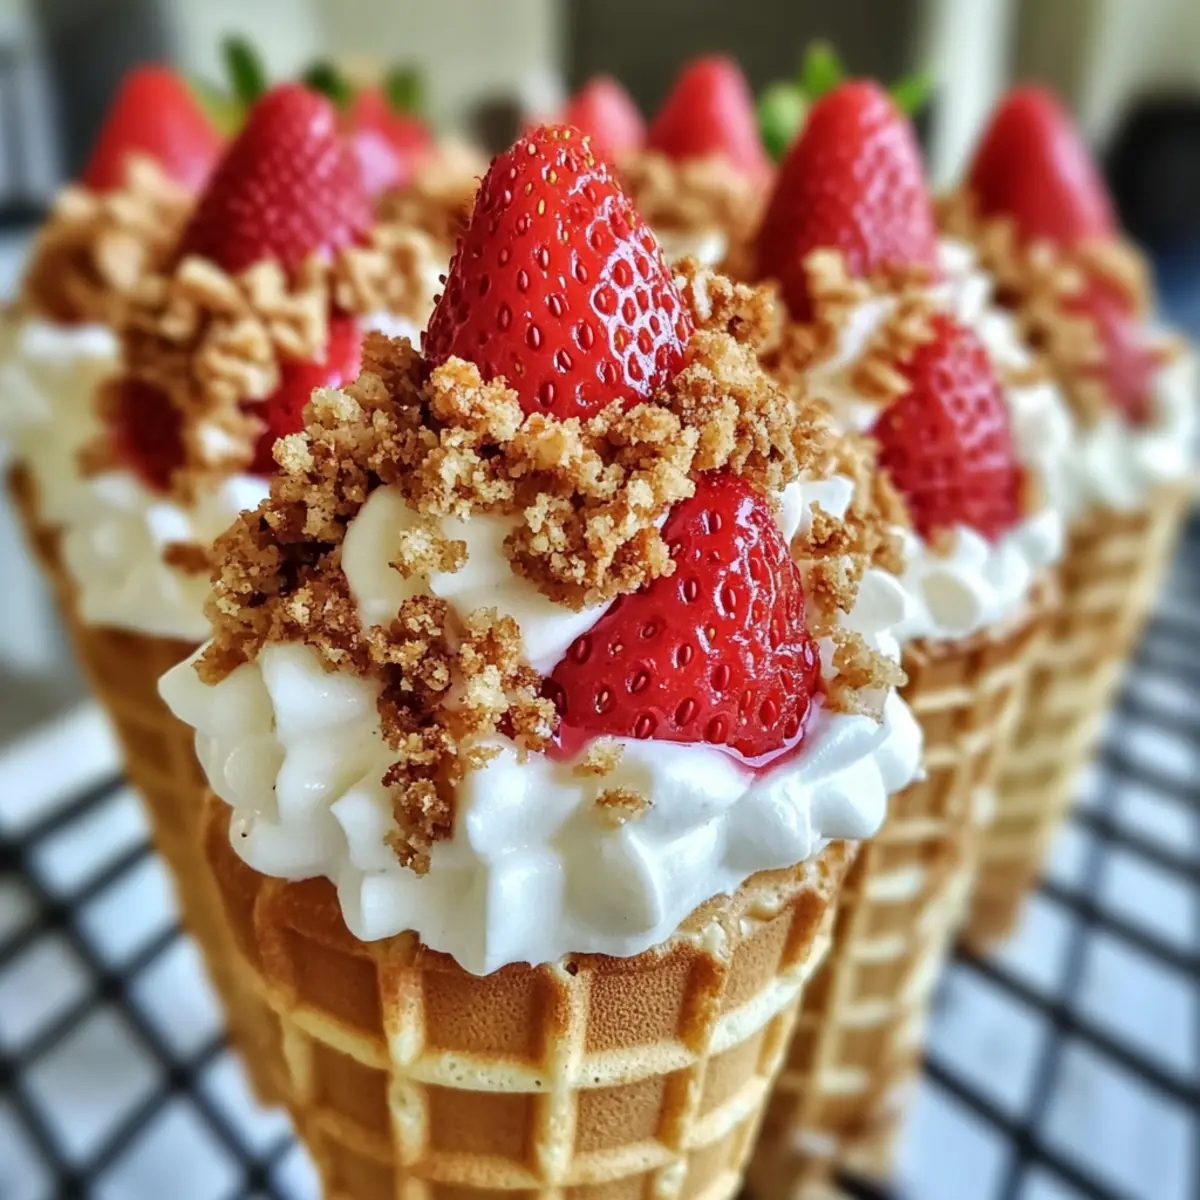
Grab 4 waffle cones and start filling each with the cheesecake mixture. Use a piping bag or a spoon to fill the cones generously, leaving a little room at the top for the final touch. Once filled, sprinkle toasted vanilla wafer crumbs on top, adding a crunchy finish to your gorgeous Strawberry Crunch Cheesecake Cones.
Step 5: Chill
Place the assembled cones in the refrigerator and let them chill for at least 1 hour. This step is essential for allowing the flavors to meld and the filling to set, ensuring a delightful experience. Once chilled and ready to serve, your Strawberry Crunch Cheesecake Cones will provide a vibrant and delicious treat for any sunny gathering.
What to Serve with Strawberry Crunch Cheesecake Cones
Elevate your summer gatherings by adding delightful accompaniments that beautifully complement these delightful cones.
-
Fresh Fruit Salad: A mix of seasonal fruits brightens your plate and adds a refreshing balance to the creamy dessert.
-
Minty Lemonade: This zesty drink offers a crisp contrast to the richness of the cheesecake while keeping your palate refreshed.
-
Chocolate Drizzle: A warm chocolate drizzle creates a luxurious touch, enhancing the flavors with its rich, sweet notes.
-
Berry Sorbet: A scoop of berry sorbet pairs well, providing a cold, fruity complement that echoes the cheesecake’s flavors.
-
Honey-Lavender Ice Cream: The floral notes of lavender infuse a unique twist that harmonizes flawlessly with the strawberries.
-
Grilled Peaches: Soft, caramelized peaches add warmth and a rustic charm, creating a delightful flavor contrast with the cones.
-
Caramel Sauce: Serve a small dish of warm caramel for dipping. The sweet richness enhances the cones’ delightful crunch.
-
Sparkling Rosé: A chilled glass of sparkling rosé or a fruity mocktail adds an effervescent joy and pairs wonderfully with a sweet dessert.
Make Ahead Options
These Strawberry Crunch Cheesecake Cones are perfect for meal prep! You can prepare the cheesecake filling and strawberry sauce up to 24 hours in advance—simply store them in airtight containers in the refrigerator. To maintain quality and prevent the cones from getting soggy, fill the waffle cones only a few hours before serving. When you’re ready to enjoy, just assemble the cones by piping in the cheesecake mixture and topping with toasted vanilla wafer crumbs. This advance prep allows you to effortlessly impress guests or treat your family to a delightful dessert with minimal last-minute effort!
Expert Tips for Strawberry Crunch Cheesecake Cones
-
Cream Cheese Prep: Ensure your cream cheese is fully softened. This prevents lumps in the filling, giving your Strawberry Crunch Cheesecake Cones a smooth texture.
-
Whipped Cream Secrets: Whip your cream to stiff peaks, but stop before it becomes grainy. This keeps your filling light and fluffy—just right for those summertime treats!
-
Cool the Sauce: Always let the strawberry sauce cool completely before adding it to your cheesecake mixture. This prevents any melting and keeps the filling perfectly creamy.
-
Toasting Wafers: Lightly toast your vanilla wafers before using them as a topping. This enhances their flavor and adds an irresistible crunch to your Strawberry Crunch Cheesecake Cones.
-
Honest Assembly: When filling your cones, be generous but leave a little space at the top. This allows for an appealing presentation and avoids any spills.
Storage Tips for Strawberry Crunch Cheesecake Cones
- Fridge: Keep the assembled cones in the refrigerator for up to 1 day. However, for the best crunch, serve them within a few hours of assembly.
- Freezer: If you’d like to store them for longer, freeze the cheesecake filling in an airtight container for up to 1 month. Assemble the cones just before serving.
- Reheating: These cones are best enjoyed chilled, so no reheating is necessary! Just grab them from the fridge and indulge in your delightful Strawberry Crunch Cheesecake Cones.
- Wrap: If you need to store any uneaten cones, wrap them individually in plastic wrap to prevent them from getting soggy.
Strawberry Crunch Cheesecake Cones Variations
Feel free to explore these delicious variations and substitutions to put your own spin on the recipe!
-
Berry Bliss: Swap out strawberries for blueberries or raspberries for a colorful medley of flavors. Each berry brings its unique sweetness and vibrance, adding a delightful twist to your cones.
-
Graham Cracker Crunch: For a change in texture, use graham cracker crumbs instead of vanilla wafers. This will lend a rich, classic cheesecake flavor that pairs beautifully with the creamy filling.
-
Gluten-Free Delight: Choose gluten-free waffle cones and cookies to accommodate gluten sensitivities without sacrificing taste. These cones will be just as delightful and inclusive for all your summer guests!
-
Chocolate Lovers: Drizzle melted chocolate over the assembled cones for an extra indulgent treat. The combination of chocolate and strawberry is always a hit, elevating the sweetness to a new level.
-
Citrus Zing: Add a splash of lemon or orange zest to the cheesecake filling for a refreshing, citrusy flavor. This twist brightens each bite, making them even more refreshing on a hot day.
-
Nutty Texture: Stir in some chopped nuts, like pecans or almonds, into the cheesecake filling for added crunch and richness. Nuts add a wonderful depth of flavor that complements the sweetness of the strawberries.
-
Spicy Kick: For some heat, mix in a dash of cayenne pepper or some finely minced jalapeños. This unexpected twist adds an exciting edge to your dessert, creating a sweet and spicy contrast.
-
Frozen Fun: Freeze the assembled cones for an ice cream-like treat during hot summer days. Simply allow them to set in the freezer for a few hours, and enjoy a refreshing dessert that doubles as a cool-down!
Don’t forget, using simply inspired elements to your cones can enhance these delightful treats even further. Things like pairing them with a refreshing summer fruit salad or serving alongside a light, zesty sorbet like a homemade raspberry sorbet makes for an unforgettable summer gathering. Enjoy your culinary adventure with these Strawberry Crunch Cheesecake Cones!

Strawberry Crunch Cheesecake Cones Recipe FAQs
What kind of strawberries should I use?
Absolutely! Ripe strawberries are crucial for these Strawberry Crunch Cheesecake Cones. Look for bright red strawberries that are slightly firm to the touch and devoid of dark spots. They should smell sweet and fragrant, which is a good indicator of their ripeness.
How should I store the assembled cones?
You can store assembled Strawberry Crunch Cheesecake Cones in the refrigerator for up to 1 day. However, for the best crunch, I recommend serving them within a few hours of assembly. If you’re planning to make them in advance, just keep them in an airtight container to avoid any sogginess.
Can I freeze the cheesecake filling?
Yes, you can! To freeze the cheesecake filling, place it in an airtight container and store it in the freezer for up to 1 month. When you’re ready to use it, let it thaw in the refrigerator overnight. Assemble the cones just before serving to ensure that delightful crunch!
What if my whipped cream is grainy?
If your whipped cream becomes grainy, don’t worry—it’s an easy fix! Over-whipping can cause this texture. If you catch it early, try gently folding in a little fresh whipped cream to smooth it out. For future batches, whip until you reach stiff peaks but stop just before it becomes grainy.
Are there any allergies to be aware of?
Yes, if you’re serving these Strawberry Crunch Cheesecake Cones to guests, it’s important to keep allergies in mind. The recipe contains dairy from the cream cheese and whipped cream, and the cones may contain gluten. Consider using gluten-free waffles and dairy alternatives like coconut cream to accommodate those with dietary restrictions.
How can I enhance the flavor of the vanilla wafers?
Very! To enhance the flavor of vanilla wafers, try lightly toasting them in the oven for 5-7 minutes at 350°F (175°C) until they’re golden and fragrant. This simple step adds a delightful crunch and deeper flavor to your cones’ topping.
Delightful Strawberry Crunch Cheesecake Cones for Summer Fun
Ingredients
Equipment
Method
- Prepare Strawberry Sauce: Blend 1 cup of fresh strawberries until smooth, cook for 8-10 minutes until thickened, and cool.
- Make Cheesecake Filling: Beat 8 oz softened cream cheese with ½ cup granulated sugar for 2-3 minutes, then fold in 1 cup whipped cream.
- Combine: Gently fold the cooled strawberry sauce into the cheesecake mixture to achieve a marbled effect.
- Assemble Cones: Fill 4 waffle cones with the cheesecake mixture, leaving room at the top, and sprinkle with toasted vanilla wafer crumbs.
- Chill: Refrigerate the assembled cones for at least 1 hour to set the flavors.
Leave a Reply