
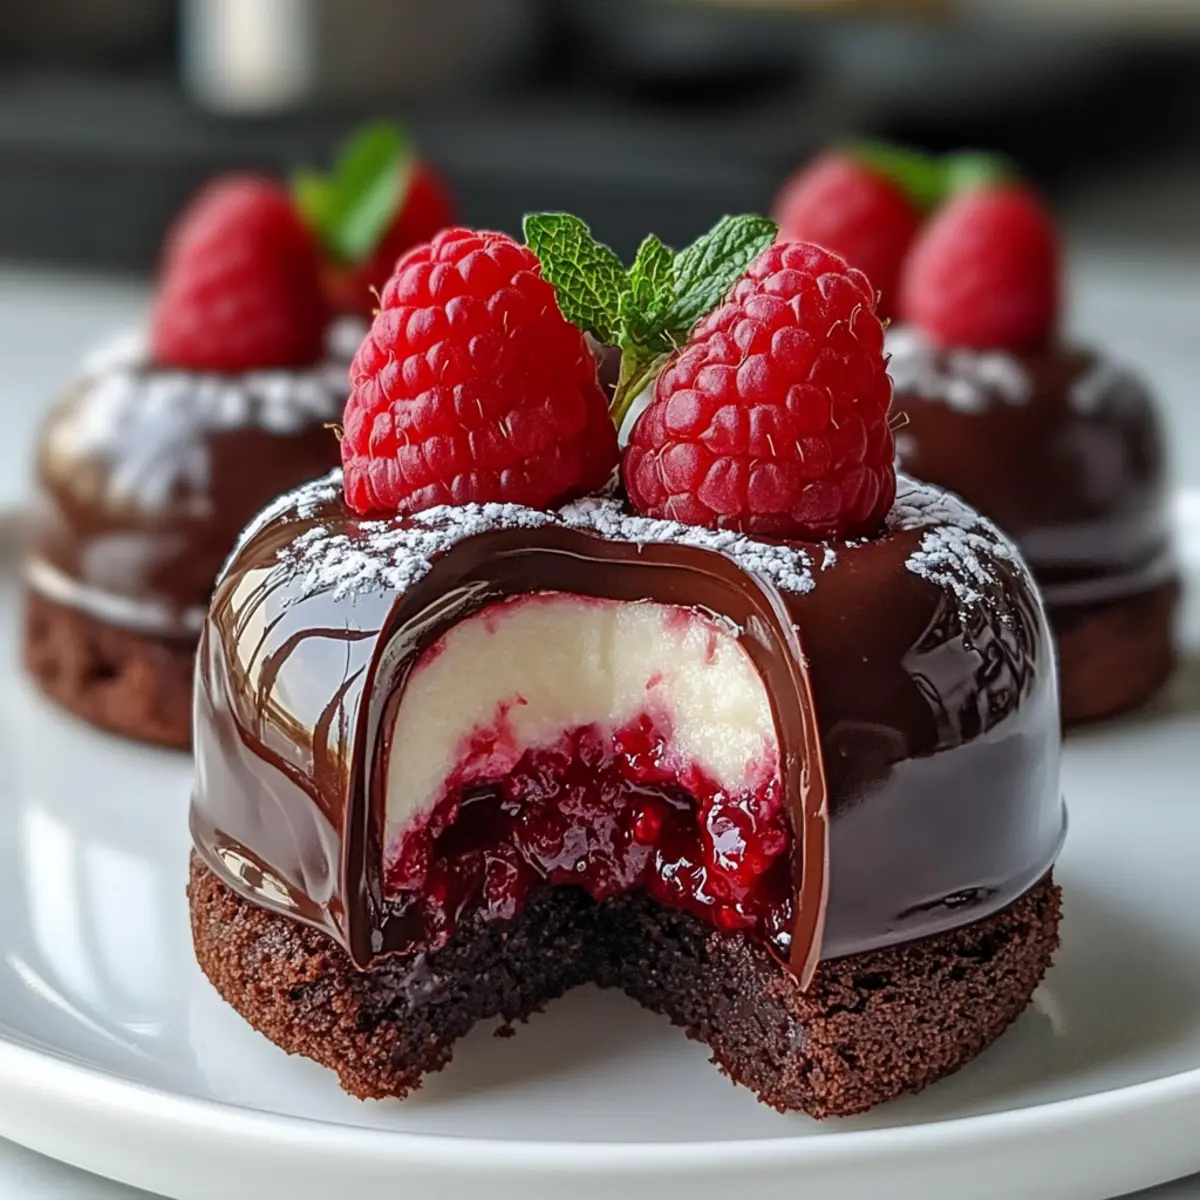
As I carefully coaxed the dark chocolate into a glossy sheen, memories of intimate dinner parties and excited guests rushed back to me. There’s something truly magical about dessert, especially when it comes wrapped in an elegant Chocolate Raspberry Cheesecake Dome. This no-bake delight not only impresses with its stunning presentation but also brings a lovely balance of flavors and textures. The combination of rich chocolate and tart raspberry makes it a perfect indulgence for any occasion, whether you’re celebrating a special moment or just treating yourself after a long week. Plus, it’s vegetarian-friendly, making it a versatile delight for a wider range of guests. Are you ready to dive into a dessert experience that’s as rewarding to make as it is to enjoy?
Why are Chocolate Raspberry Cheesecake Domes irresistible?
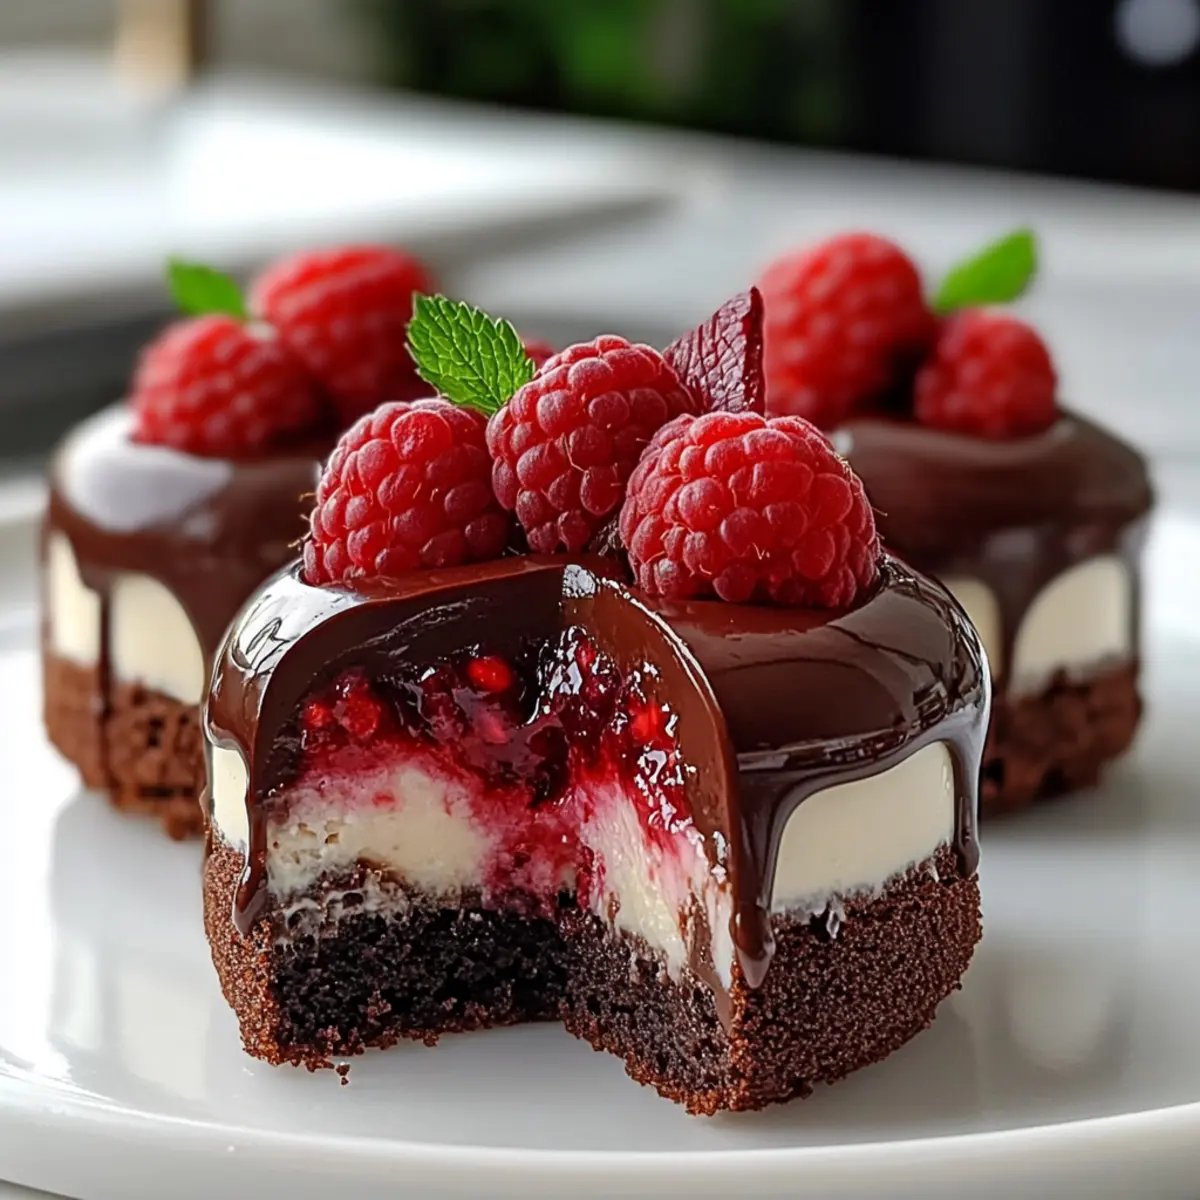
Elegant Presentation: Each dome is a mini masterpiece, perfect for impressing guests or making any occasion feel special.
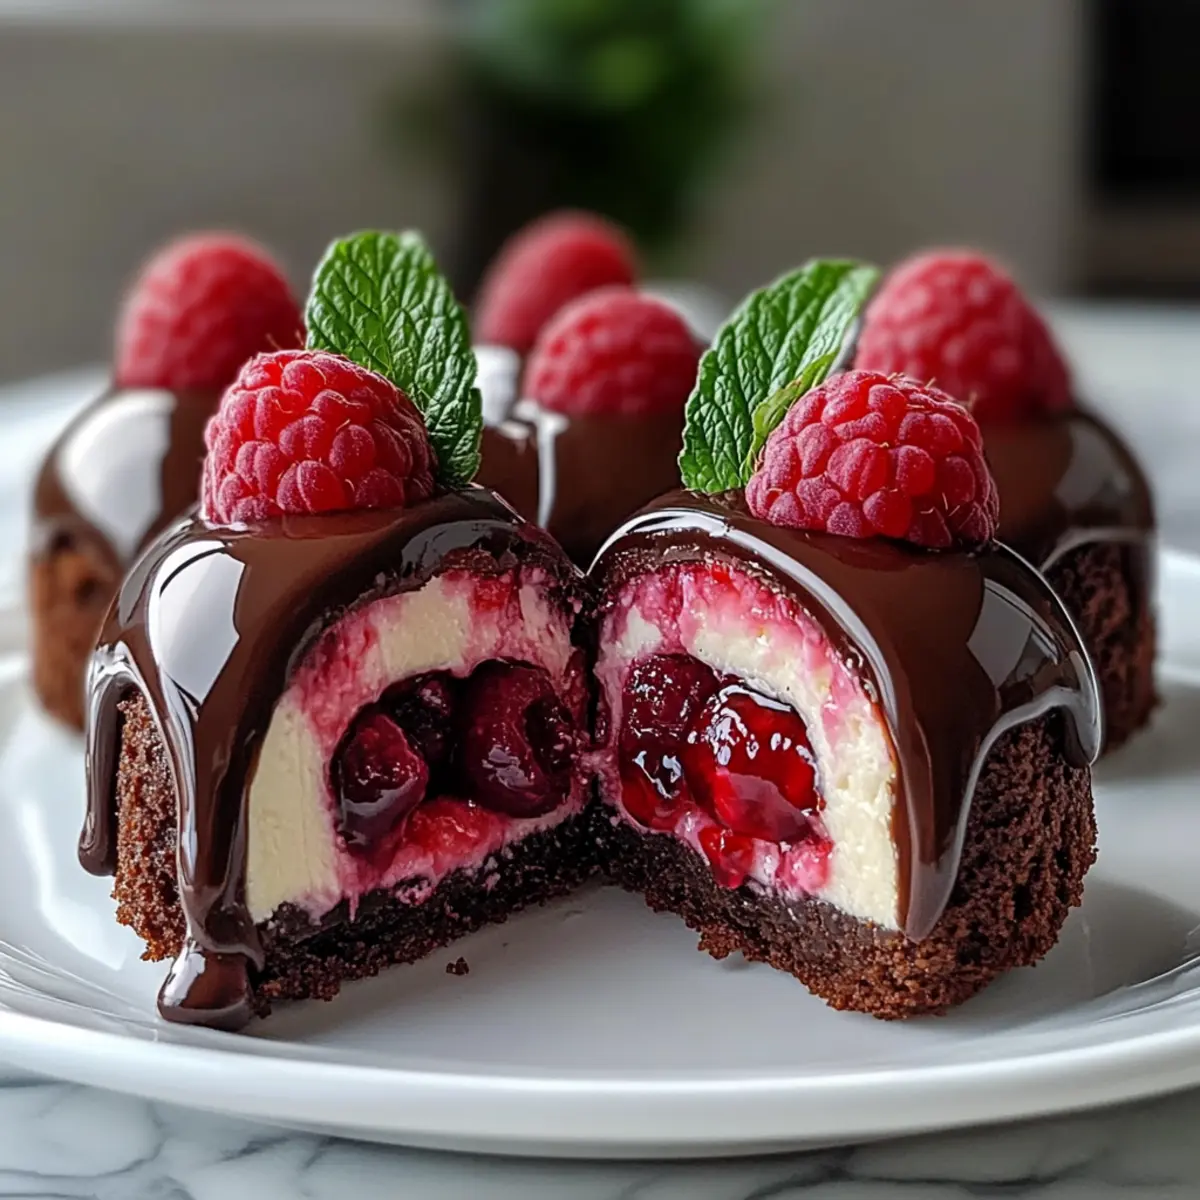
Bursting with Flavor: The blend of rich chocolate and tangy raspberry offers a delightful contrast that will tantalize your taste buds.
No-Bake Convenience: This recipe comes together effortlessly, just chill and serve—ideal for busy weeknights or last-minute gatherings.
Vegetarian-Friendly: Enjoy a decadent dessert that caters to various dietary preferences, making it a favorite for all.
Versatile Variations: Easily customize your domes with different fruit purees or types of chocolate for a unique twist every time.
Treat yourself and your loved ones with this exquisite dessert; you won’t regret it! Plus, if you’re looking for more delicious ideas, check out our easy no-bake desserts for more inspiration!
Chocolate Raspberry Cheesecake Dome Ingredients
Dive into the delicious details!
For the Chocolate Shell
• Dark Chocolate – Use high-quality chocolate (60-70% cocoa) for a glossy finish that enhances your Chocolate Raspberry Cheesecake Domes.
For the Cheesecake Filling
• Cream Cheese – This is essential for creaminess and tang in your filling.
• Heavy Cream – Contributes richness, helping achieve that dreamy mousse-like texture.
• Powdered Sugar – Sweetens the filling while ensuring it remains smooth and light.
• Vanilla Extract – A splash adds depth and warmth to the overall flavor.
• Raspberries – Fresh or frozen, pureed and strained, they infuse the filling with fruity brightness.
• Gelatin – Stabilizes the filling so that your Cheesecake Domes hold their enchanting shape.
For the Cake Base
• Chocolate Cake – Provides a tender bite to support each dome; can be swapped for any cake of your liking.
Explore these ingredients and prepare to create a dessert that’s not only gorgeous but incredibly delicious!
Step‑by‑Step Instructions for Chocolate Raspberry Cheesecake Domes
Step 1: Melt the Chocolate
Begin by melting your dark chocolate, using a double boiler for a gentle heat or a microwave in 30-second intervals until smooth. Stir the chocolate frequently to ensure it melts evenly and become glossy. This rich chocolate will form the stunning outer shell of your Chocolate Raspberry Cheesecake Domes.
Step 2: Coat the Molds
Once melted, carefully coat the inside of silicone half-sphere molds with a thin layer of chocolate using a brush or spoon. Ensure an even layer to prevent cracks. Chill the molds in the refrigerator for about 10 minutes until the chocolate is firm to the touch, creating the perfect base for your domes.
Step 3: Apply a Second Coat
After the initial layer is set, remove the molds from the refrigerator. Apply a second coat of melted chocolate to reinforce the shells, ensuring their sturdiness. Place the molds back into the refrigerator and chill until completely firm, which typically takes another 15 minutes. Your Chocolate Raspberry Cheesecake Domes are set to have a delightful and robust shell!
Step 4: Bloom the Gelatin
While the shells are chilling, bloom your gelatin by sprinkling it in cold water and letting it sit for about 5 minutes. This process helps the gelatin dissolve evenly later on. Once bloomed, gently melt the gelatin over low heat until it’s fully liquid and clear, ready to be incorporated into the filling for stability.
Step 5: Prepare the Cheesecake Filling
In a mixing bowl, beat your cream cheese until smooth and creamy, ensuring there are no lumps. Gradually mix in the powdered sugar, vanilla extract, and the raspberry puree until the mixture is well-combined and fluffy. This will form the delicious and tangy cheesecake filling that will anchor your domes.
Step 6: Incorporate the Gelatin
Once your gelatin is melted and cool, slowly stir it into the cheesecake filling mixture. This step is crucial as it stabilizes your filling. Ensure it’s mixed thoroughly and uniformly, providing a solid structure to your decadent Chocolate Raspberry Cheesecake Domes when set.
Step 7: Fold in the Whipped Cream
In a separate bowl, whip your heavy cream to soft peaks, creating a light and airy texture. Gently fold the whipped cream into your cheesecake mixture, being careful not to deflate the air you’ve just whipped in. This will add an irresistibly light and creamy texture to your cheesecake filling.
Step 8: Fill the Chocolate Shells
Using a piping bag, carefully fill each chilled chocolate shell with your raspberry cheesecake filling, leaving a little space at the top for the cake base. This filling should be smooth and level, ensuring an elegant finish to your Chocolate Raspberry Cheesecake Domes.
Step 9: Add the Cake Base
Once the filling is piped in, take rounds of your prepared chocolate cake and press them gently onto the top of each filled dome. Make sure the cake adheres well. Place the molded domes back into the refrigerator and allow them to set for at least 4 hours, ensuring everything binds beautifully.
Step 10: Unmold and Serve
After chilling, gently unmold each dome by pressing from the bottom of the mold. Allow the domes to sit at room temperature for about 10 minutes before serving. This step is key for achieving the best texture in your elegant Chocolate Raspberry Cheesecake Domes.
Step 11: Garnish (Optional)
For a touch of presentation, garnish your domes with fresh raspberries and a dusting of cocoa powder. This additional flair not only enhances the look but adds a burst of color and flavor, making your Chocolate Raspberry Cheesecake Domes as delightful to look at as they are to eat!

What to Serve with Chocolate Raspberry Cheesecake Domes
Imagine a beautifully laid dining table, where every element harmonizes to create a stunning dessert experience.
- Fresh Berries: A mix of strawberries, blueberries, and raspberries brightens the plate—offering a refreshing contrast to the rich domes.
- Whipped Cream: Light and airy, a dollop of freshly whipped cream enhances indulgence without overwhelming the flavors.
- Chocolate Drizzle: A delicate swirl of dark chocolate sauce adds visual appeal and intensifies the chocolate flavor, inviting you to savor every bite.
- Mint Leaves: Fresh mint provides a crisp note that balances the sweetness, offering a delightful garnish that’s as aromatic as it is beautiful.
- Coffee: A warm cup of freshly brewed coffee complements the dessert, cutting through its richness while enhancing the flavor profiles of chocolate and raspberry.
- Vanilla Ice Cream: Its creamy texture adds another layer of indulgence, creating a classic pairing with the tart and rich cheesecake.
- Dessert Wine: A sweet dessert wine, like Muscat, offers a lovely pairing that echoes the fruitiness of the raspberries while enhancing the chocolate.
- Chocolate Mousse: Layering a spoonful of silky chocolate mousse next to your domes creates a delightful contrast in texture and flavor.
- Spiced Hot Chocolate: Served alongside, this warm drink enhances the chocolate experience and invites cozy feelings, perfect for a special gathering.
Storage Tips for Chocolate Raspberry Cheesecake Domes
Fridge: Store your Chocolate Raspberry Cheesecake Domes in an airtight container in the refrigerator for up to 4 days. This keeps them fresh and ready to enjoy anytime!
Freezer: For longer storage, freeze the domes before garnishing. They can be kept for up to a month. When ready to enjoy, thaw overnight in the refrigerator and let them sit at room temperature for optimal texture.
Reheating: There’s no need to reheat these domes, as they are best served chilled. Simply unbox and allow them to soften slightly at room temperature.
Avoiding Moisture: To prevent condensation, ensure the container is airtight and avoid placing the domes in an area with high moisture when storing.
Chocolate Raspberry Cheesecake Domes Variations
Get ready to elevate your dessert game with these customizable twists that bring new flavors and textures to your delightful Chocolate Raspberry Cheesecake Domes!
-
Fruit Puree Swap: Use other purees like strawberry, mango, or passionfruit to create a unique taste each time you make these domes. The versatility of flavors allows everyone to find their favorite!
-
White Chocolate Option: Replace dark chocolate with white chocolate for a sweeter, creamier shell. Just bear in mind, you’ll need to add an extra chocolate layer for firmness.
-
Vegan-Friendly: Substitute gelatin with agar-agar to make this a vegan-friendly dessert. Just replace the gelatin in equal weight, but remember—setting takes a bit longer with this option.
-
Nutty Crunch: Add crushed nuts, like pistachios or almonds, to the chocolate shell for extra texture and flavor. This delightful crunch complements the creamy filling beautifully.
-
Liqueur Infusion: Mix a splash of raspberry liqueur or chocolate liqueur into the cheesecake filling for a grown-up twist. The alcohol enhances the flavors, perfect for special occasions!
-
Savory Bite: Introduce a pinch of sea salt or flaky salt on top of each dome after un-molding for an unexpected flavor burst. The sweet and salty combination is always a crowd-pleaser.
-
Layered Delight: Turn your domes into layered desserts by creating a thin raspberry gelée layer above the cheesecake filling. This extra layer adds visual appeal and an exciting taste burst.
-
Chocolate Cake Variation: Swap the chocolate cake base with a rich red velvet cake for an eye-catching color contrast. It retains the classic charm while bringing an unanticipated twist.
Feel inspired to try these variations and make this exquisite dessert yours! And if you’re looking for more inventive ideas, check out our easy no-bake desserts that will leave your guests raving!
Make Ahead Options
These elegant Chocolate Raspberry Cheesecake Domes are perfect for meal prep, allowing you to impress your guests while saving time on busy days! You can prepare the chocolate shells up to 24 hours in advance; just ensure they are stored in an airtight container to maintain their crunchiness. Additionally, the cheesecake filling can be made up to 3 days ahead. Simply whip up the filling, then refrigerate it in a sealed container. When you’re ready to serve, pipe the filling into the chocolate shells and top with the cake base, allowing the domes to set for a minimum of 4 hours. This way, you’ll have a gorgeous dessert ready to delight, all while keeping your stress levels low!
Expert Tips for Chocolate Raspberry Cheesecake Domes
• Quality Matters: Use high-quality dark chocolate for the shell; avoid chocolate chips for a glossy finish.
• Perfectly Bloomed Gelatin: Ensure gelatin is fully dissolved before adding it to the mixture to maintain stability in your cheesecake domes.
• Room Temperature Magic: Let the domes rest at room temperature for about 10 minutes before serving. This enhances the texture and flavor.
• Fruit Variations: Feel free to switch out the raspberry puree for other fruit flavors like mango or strawberry for a unique twist on your Chocolate Raspberry Cheesecake Domes.
• Garnishing Tips: Get creative with garnishes like fresh mint leaves or a drizzle of raspberry coulis for a stunning presentation.
Chocolate Raspberry Cheesecake Domes Recipe FAQs
How do I choose the right dark chocolate?
Absolutely! For the best results, select high-quality dark chocolate with a cocoa content between 60-70%. This range strikes a perfect balance between rich flavor and the ability to create a glossy finish. Avoid using chocolate chips, as they contain stabilizers that won’t melt smoothly, leading to a less appealing texture in your Chocolate Raspberry Cheesecake Domes.
What is the best way to store Chocolate Raspberry Cheesecake Domes?
Very! Store your Chocolate Raspberry Cheesecake Domes in an airtight container in the refrigerator for up to 4 days. This keeps them fresh and delicious. If you want to enjoy them later, freeze the domes before garnishing. They’ll last for up to 1 month in the freezer. Just remember to thaw them in the refrigerator overnight and let them sit at room temperature for a short while before serving to bring back their amazing texture.
Can I make these domes in advance and freeze them?
Absolutely! To freeze your Chocolate Raspberry Cheesecake Domes, follow these steps: Prepare them without garnishing, then place them on a baking sheet in a single layer. Freeze for about 1 to 2 hours until firm, then transfer them to a freezer-safe container or bag. This prevents them from sticking together. When you’re ready to serve, take them out and thaw overnight in the fridge; allow them to sit at room temperature for 10 minutes before enjoying.
What should I do if my cheesecake filling is too runny?
Very! If your cheesecake filling is too runny, it may be due to underbloomed gelatin or not mixing it properly into the filling. To troubleshoot this, try reheating the gelatin gently until fully dissolved. Then, give the cheesecake mixture another stir after adding the gelatin to ensure it’s fully incorporated. If it remains too loose, you can add more powdered sugar to thicken it slightly, ensuring it’s properly mixed in before filling your domes.
Can I use a vegetarian substitute for gelatin?
Absolutely! You can substitute gelatin with agar-agar as a vegetarian alternative. Use an equal weight of agar-agar, typically around 1 tablespoon for this recipe. First, dissolve the agar-agar in boiling water following the package instructions, letting it cool slightly before mixing it into your cheesecake filling. Keep in mind that agar-agar sets firmer than gelatin, so your final texture may be slightly different, but it’s still delicious!
How can I customize the flavor of my Chocolate Raspberry Cheesecake Domes?
Very! Get creative with your flavor combinations! You can easily swap out the raspberry puree for fruit purees like strawberry, mango, or passionfruit to give your domes a new twist. For the chocolate shell, if you want a sweeter option, white chocolate works beautifully, but be aware it’s softer. Just ensure you apply an additional coat for sturdiness. The more the merrier when it comes to flavor experimentation!
Decadent Chocolate Raspberry Cheesecake Domes You’ll Adore
Ingredients
Equipment
Method
- Melt the dark chocolate using a double boiler or microwave until smooth.
- Coat the inside of silicone molds with a thin layer of melted chocolate. Chill for about 10 minutes.
- Apply a second coat of chocolate to reinforce the shells, then chill until firm, about 15 minutes.
- Bloom the gelatin in cold water for about 5 minutes, then melt gently until clear.
- Beat cream cheese until smooth, then mix in sugar, vanilla, and raspberry puree until fluffy.
- Incorporate the melted gelatin into the cheesecake filling mixture thoroughly.
- Whip heavy cream to soft peaks and gently fold it into the cheesecake filling.
- Fill the chocolate shells with the cheesecake filling, leaving space for the cake base.
- Press rounds of cake onto the cheesecake filling and chill for at least 4 hours.
- Unmold the domes by pressing from the bottom, let sit at room temperature for 10 minutes before serving.
- Garnish with fresh raspberries and dusting of cocoa powder, if desired.
Leave a Reply