
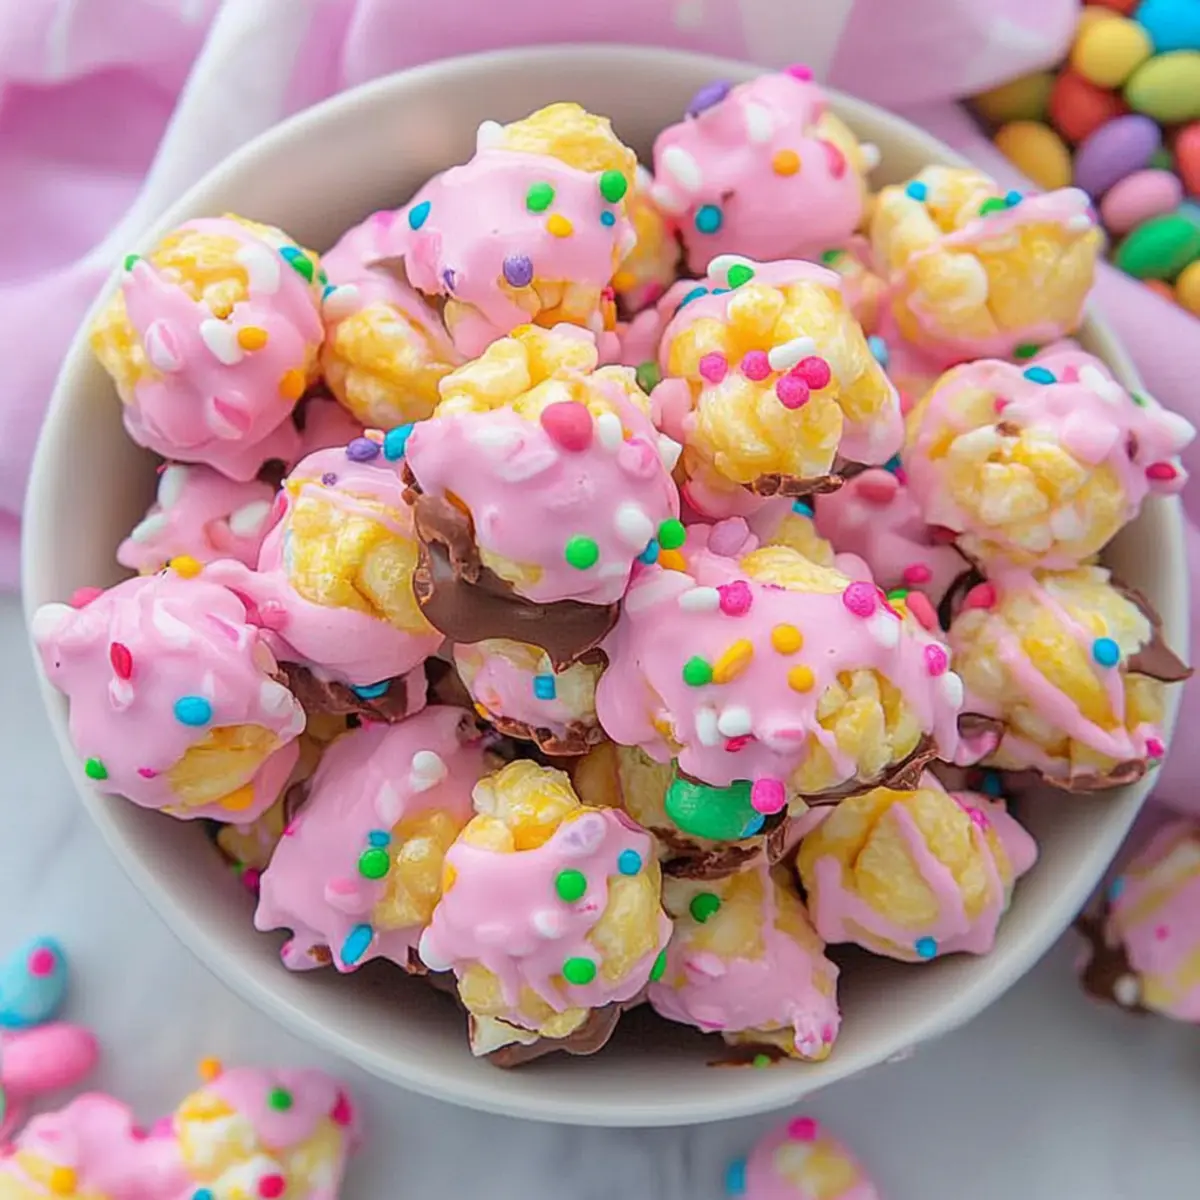
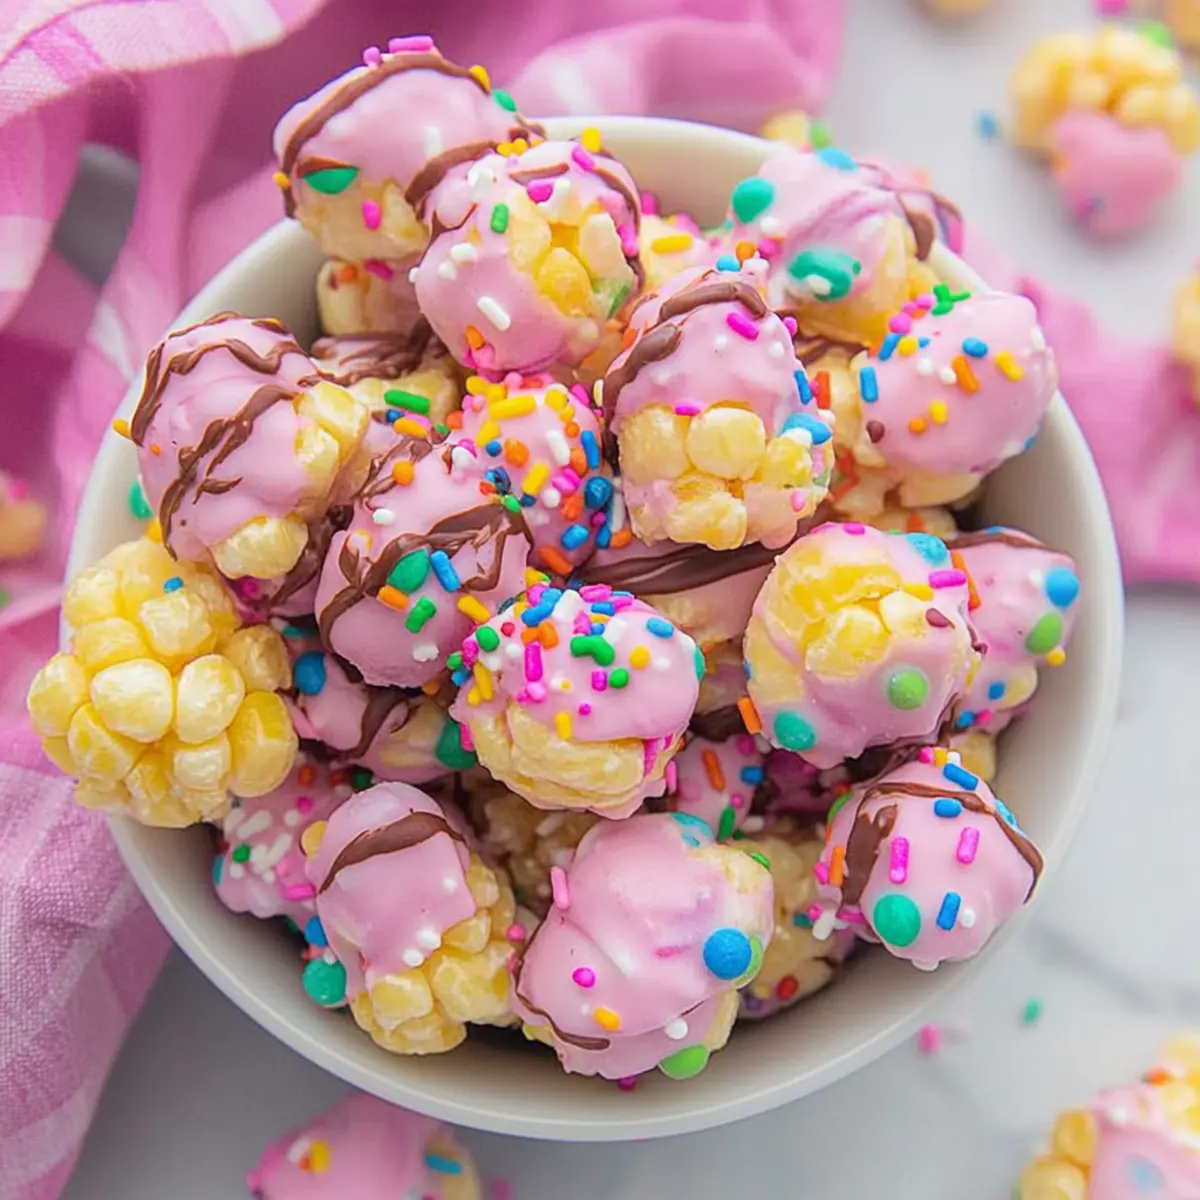
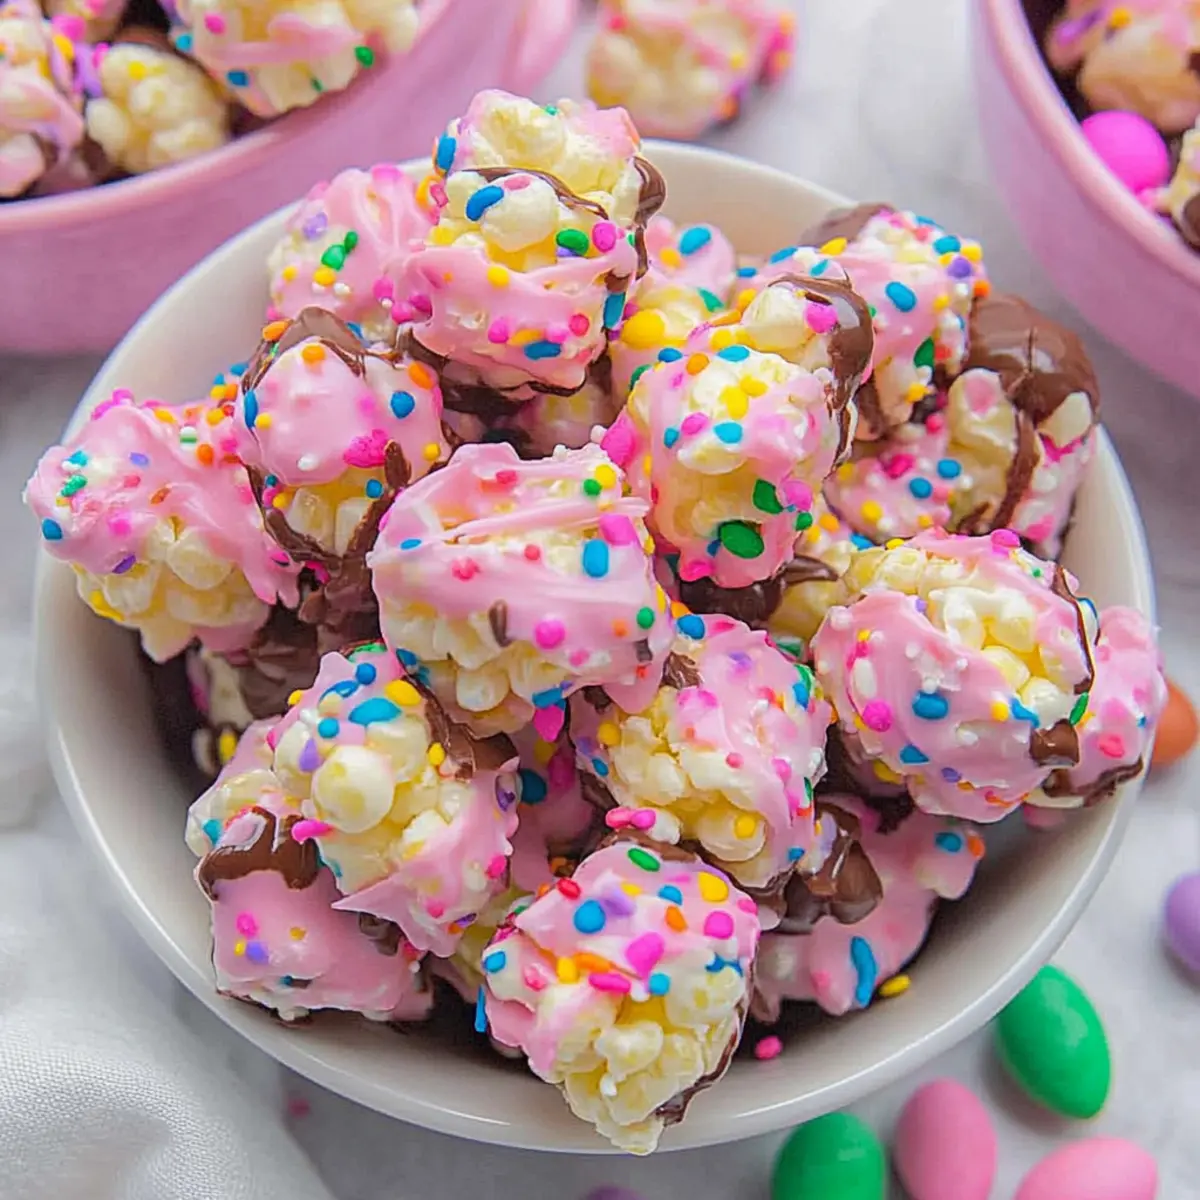
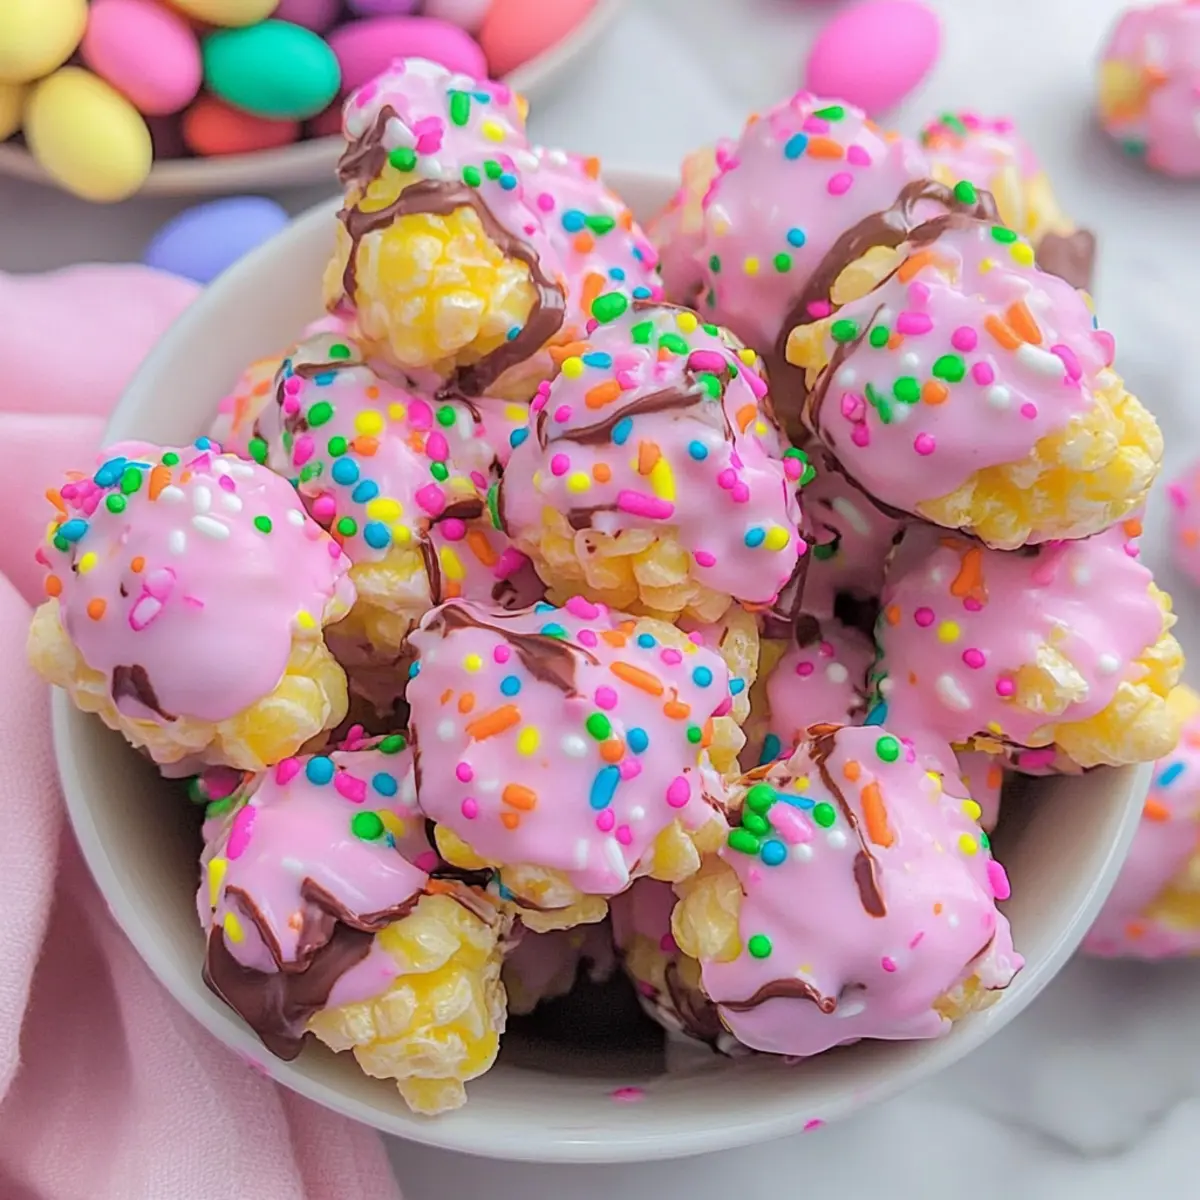
As I walked through the colorful aisles of the grocery store, I couldn’t help but feel the spirit of Easter creeping in. The vibrant packaging spilled over with goodies that promised sweet nostalgia, and it sparked an idea—what if I could capture that festive joy in a simple, crunchy treat? Enter my 4-Ingredient Easter Puff Corn, a no-bake delight that’s perfect for both cozy movie nights and lively Easter gatherings. With its easy and quick preparation, anyone can whip up this indulgent snack in no time. Coated in rich chocolate and topped with sparkling Easter sprinkles, this recipe is not only a crowd-pleaser but also a fuss-free way to add a touch of seasonal flair to your dessert table. Curious how to make this delightful treat? Let’s dive in!
Why is Easter Puff Corn a Must-Try?
Simplicity at its finest: This easy recipe requires just four ingredients and is perfect for those who love no-bake treats!
Festive and fun: Coated in rich chocolate and adorned with colorful sprinkles, it’s a vibrant addition to any Easter celebration.
Versatile options: Feel free to substitute with different candy melt flavors or customize the sprinkle theme for any occasion.
Perfect for sharing: Ideal for movie nights, Easter parties, or as delicious homemade gifts, this treat is sure to impress.
Quick preparation: You can whip it up in under 30 minutes, allowing you more time to enjoy fun festivities with family and friends.
Easter Puff Corn Ingredients
• Get ready to create this delightful treat!
For the Puff Corn
- Puff Corn – The base of the snack; ensure you choose unflavored for optimal chocolate coating.
For the Chocolate Coating
- Candy Melts – Provides a quick-setting chocolate coating; feel free to mix colors to create pastel hues for Easter Puff Corn.
- Butter Flavored Shortening – Enhances flavor and helps the chocolate harden; can be substituted with regular shortening if needed.
For the Decoration
- Easter Sprinkles – Add visual appeal and festive cheer; select various types to match your holiday spirit.
Step‑by‑Step Instructions for Easter Puff Corn
Step 1: Prepare Your Ingredients
Gather all your ingredients for the Easter Puff Corn. Ensure you have unflavored puff corn ready in a large mixing bowl. This large bowl will make it easy to mix your ingredients later. Pre-measure your candy melts and butter-flavored shortening so you’re ready to melt them effortlessly.
Step 2: Melt the Candy Coating
In a microwave-safe bowl, combine the candy melts and butter-flavored shortening. Heat the mixture in 30-second intervals in the microwave, stirring well after each interval until it’s completely melted and smooth. This should take about 1 to 2 minutes. Watch for a glossy texture, signaling it’s ready!
Step 3: Coat the Puff Corn
Once melted, pour the warm chocolate mixture over the bowl of puff corn. Using a large spatula or spoon, gently fold the puff corn into the chocolate until it’s evenly coated. This should take about 1–2 minutes. The Easter Puff Corn should glisten with chocolate throughout, making it look irresistible!
Step 4: Add Festive Sprinkles
Spread the chocolate-coated puff corn evenly onto a sheet of wax paper. While it’s still warm, generously sprinkle the festive Easter decorations over the top. Aim to cover as much of the puff corn as possible, adding color and texture. This is where your creativity shines—mixing sprinkles adds excitement!
Step 5: Let It Set
Allow the Easter Puff Corn to sit at room temperature for about 15–30 minutes, or until the chocolate coating has completely hardened. You can also speed up the process by placing it in the fridge for about 10 minutes. You’ll know it’s ready when the chocolate feels firm to the touch.
Step 6: Chop and Serve
Once set, break apart any large clumps of the Easter Puff Corn for easy serving. Transfer it to a decorative bowl or package it up as gifts. This fun no-bake treat is best enjoyed fresh, but can be stored in an airtight container for up to a week, ready for any occasion!
Make Ahead Options
These 4-Ingredient Easter Puff Corn treats are perfect for busy home cooks looking to save time! You can prepare the chocolate coating (candy melts and shortening) up to 24 hours in advance by melting it and storing it in an airtight container at room temperature. Also, you can measure and set aside your puff corn and sprinkles, ensuring everything is ready to mix when you need it. When you’re ready to serve, simply warm the chocolate mixture back up if needed, coat the puff corn, sprinkle the decorations on top, and allow it to set. This way, you can enjoy a delightful, no-bake treat with minimal effort on the day of your event!
What to Serve with 4-Ingredient Easter Puff Corn
Prepare to delight your senses as you create a joyful spread that elevates your festive gatherings beyond the ordinary.
-
Creamy Fruit Salad: A refreshing mix of seasonal fruits adds a burst of brightness, balancing the sweetness of the puff corn.
-
Mini Carrot Cakes: These adorable treats bring a hint of classic Easter flavors. Their soft texture and cream cheese frosting beautifully complement the crunch of the puff corn.
-
Savory Cheese Platter: Pairing with a variety of cheeses adds a lovely contrast, enhancing the flavor profile of both the cheese and the sweet puff corn.
-
Chocolate Milkshakes: Indulge in creamy milkshakes with a hint of chocolate flavor; the comfortable familiarity will make your dessert spread irresistible.
-
Flower-Shaped Sugar Cookies: Decorate these cookies with pastel icing for extra festive cheer. Their delicate sweetness will perfectly accompany the puff corn’s crunch.
-
Crisp Veggie Sticks and Dip: Opt for crisp, refreshing vegetables with a lively dip to contrast the sweetness. They provide a perfect light, crunchy balance to this festive snack.
-
Sparkling Lemonade: A glass of refreshing, bubbly lemonade adds a bright note to your gathering, making it even more celebratory.
-
Gelato Sundae Bar: Set up a DIY gelato station with toppings for a fun way to indulge. The creaminess of gelato adds a rich, dreamy touch to your dessert spread.
-
Hot Cross Buns: Soft and spiced, these traditional buns offer a perfect bakery-style option that fits well with the Easter theme and pairs nicely with the puff corn’s textures.
Easter Puff Corn Variations & Substitutions
Feel free to make this delightful recipe your own by experimenting with different flavors and textures!
-
Popcorn Swap: Replace puff corn with popcorn for a slightly different texture and flavor experience. Try lightly salting the popcorn for a sweet-salty combo!
-
Flavorful Candy Melts: Use flavored candy melts like vanilla, peanut butter, or even strawberry to personalize the chocolate coating. This adds a whole new dimension of taste!
-
Themed Sprinkles: Change up the sprinkles to match any holiday theme by using colors specific to birthdays or other celebrations. It’s a simple way to make this treat unique!
-
Nutty Crunch: Mix in crushed nuts like almonds or peanuts before coating the puff corn. This gives an exciting crunch and richness, elevating your treat to the next level.
-
Add Spice: Want a kick? Fold in a splash of cinnamon or chili powder to the melted chocolate for a zesty heat that will surprise your taste buds!
-
Caramel Drizzle: For an extra touch of decadence, drizzle your finished Easter Puff Corn with caramel sauce. This will provide a beautiful contrast to the chocolate.
-
Dairy-Free Option: Choose dairy-free chocolate melts or dark chocolate to ensure everyone can enjoy this delightful treat, keeping it inclusive for all!
-
Freeze It: Prepare ahead and freeze portions in bags for a quick snack later. Just let it thaw at room temperature before indulging.
Whether you’re mixing different candy melts or personalizing your sprinkles, these suggestions will add even more joy and flair to your Easter Puff Corn. Happy snacking!
Expert Tips for Easter Puff Corn
-
Ingredient Quality: Use high-quality candy melts for the best flavor and coating. Cheaper alternatives might not melt smoothly, affecting your Easter Puff Corn’s texture.
-
Avoid Overheating: When melting the candy melts, always use short 30-second intervals. Overheating can lead to a clumpy or grainy texture that won’t coat properly.
-
Cool Down Before Storage: Ensure the chocolate coating is fully cooled and set before sealing in an airtight container; this prevents the puff corn from becoming sticky.
-
Sprinkle Creativity: Feel free to mix different types of sprinkles for a playful and colorful Easter Puff Corn. Combining textures creates an inviting treat!
-
Personalize It: Try using flavored candy melts like vanilla or caramel to customize the chocolate coating, giving your Easter Puff Corn a unique twist.
How to Store and Freeze Easter Puff Corn
Airtight Container: Store your Easter Puff Corn in an airtight container at room temperature for up to 1 week to keep it fresh and crunchy.
Cool Before Sealing: Make sure the chocolate is fully cooled and set before sealing the container to avoid any stickiness or sogginess.
Freezing Tips: If you need to store it longer, freeze the puff corn in a freezer-safe bag or container for up to 2 months. Thaw at room temperature before serving.
Reheating Not Recommended: For best results, enjoy your Easter Puff Corn as is! Reheating is not recommended, as it can cause the chocolate to become melty and lose its delightful crunch.
Easter Puff Corn Recipe FAQs
What type of puff corn should I use?
Absolutely! For the best results with your Easter Puff Corn, opt for unflavored puff corn. This allows the rich chocolate coating to shine without any conflicting flavors. You can easily find puff corn in the snack aisle of most grocery stores—just check the bag for any added flavors.
How should I store leftover Easter Puff Corn?
Very simply! Store your Easter Puff Corn in an airtight container at room temperature for up to 1 week. This will keep it fresh and crunchy. Make sure the chocolate coating is completely dried before sealing the container; otherwise, you might end up with a sticky treat!
Can I freeze Easter Puff Corn?
Yes, you can! If you have leftovers or want to prepare it in advance, freeze your Easter Puff Corn in a freezer-safe bag or a container for up to 2 months. To enjoy it later, just let it thaw at room temperature before serving. This method retains its delightful crunch!
What are some common issues when making Easter Puff Corn?
A common issue could be the chocolate coating clumping. To prevent this, melt the candy melts in short 30-second intervals, stirring well after each. If your chocolate gets too hot, it can become grainy. If that happens, you might need to start over with a new batch of candy melts.
Are there any dietary considerations for my pets?
Yes, it’s essential to keep this treat away from pets, especially dogs and cats, as chocolate and many types of candy can be toxic to them. If you’re looking to make a pet-friendly snack, consider using carob chips instead of chocolate, as they have a similar taste without the harmful effects.
Easter Puff Corn: A Fun No-Bake Treat for Everyone
Ingredients
Equipment
Method
- Gather all your ingredients for the Easter Puff Corn.
- In a microwave-safe bowl, combine the candy melts and butter-flavored shortening. Heat in 30-second intervals until melted.
- Pour the melted chocolate mixture over the puff corn and gently fold until evenly coated.
- Spread the chocolate-coated puff corn on wax paper and sprinkle with festive decorations.
- Allow to sit at room temperature until set, about 15–30 minutes.
- Break apart large clumps and transfer to a bowl or package as gifts.
Leave a Reply